Here in Atlanta, Georgia, there are twelve of us who are playing in a Frostgrave campaign. Frostgrave is a skirmish wargame—low cost of entry (Core Rulebook is only $16 on Amazon), only 10 miniatures needed, a couple of D20 dice, and you’re ready to play. The game takes place in the lost (and frozen) city of Felstad… aka Frostgrave. Players create a warband consisting of a Wizard, an Apprentice, and eight Soldiers. You take your warband into the city to recover treasure, but it’s not as easy as it sounds. You’ll be going up against another opponent who also wants that treasure, plus there are random monsters, traps, and all sorts of surprises. There are 10 scenarios in the Core Rulebook… and our group is playing one scenario per month. Most of us are busy, so the only real rule is to get a game in once a month. Below is an account of the second scenario (of ten) in the campaign.
For more information on Frostgrave, I’ll include some additional links at the end of this battle report. I won’t go deep into the rules of Frostgrave, but you can get a basic explanation in the 1st Battle Report (link below).
Read Scenario 1 Battle Report
Read Scenario 2 Battle Report
Read Scenario 3 Battle Report
No Battle Report for Scenario 4
The Living Museum

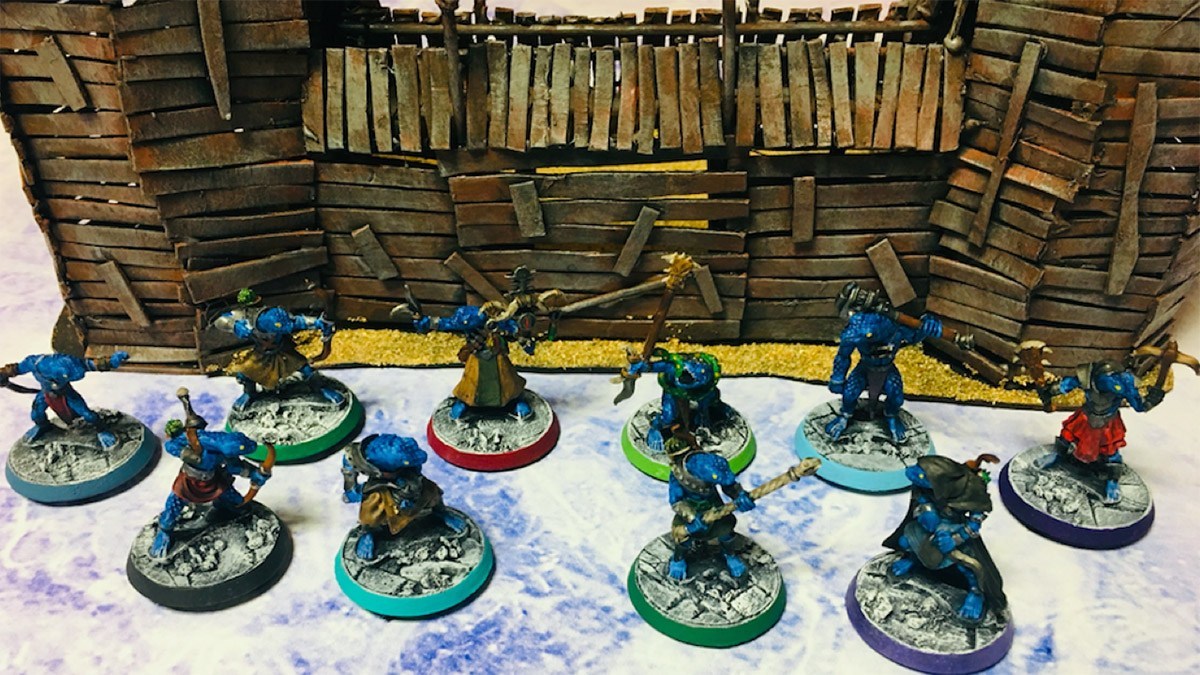
The fifth scenario is played on a 3′ x 3′ area of terrain. There are no specifics about what scatter terrain should be added other than a requirement for a 12″ x 12″ area in the center with six “statues” and a single treasure in front of each statue. A random statue will activate when a treasure is picked up, and the statues are treated as a Medium Construct creature. My opponent was Sebastian.

Before the scenario started, I had a couple of pre-game rolls to be made. Both my wizard and apprentice may roll to try and create a Grimoire/spellbook. I can sell these for 250 gold, so it’s been a nice spell for the previous scenarios, but this time… I failed both rolls. That’s 500 gold that won’t be going into my coffers. I also failed the two Write Scroll spell rolls that would have generated 100 gold each. Argh.
This was a tricky scenario—picking up a treasure will activate a random statue. The stats for the statue are those for a Medium Construct. Good armor (12) and Good Health (12). One on one, they’re tough to fight… keep that in mind as you keep reading.

My Sigilist is very light on offensive spells, but he DOES have the Telekinesis spell which allows me to move a treasure up to 6″ in any direction. This doesn’t count as picking up a treasure, so I wasn’t triggering the statues. (The rules on this weren’t 100% clear, so we rolled to determine whether Telekinesis would count as pick up or not… I won the roll, thankfully. This let me immediately start moving treasures in my warband’s direction. Sebastian and I have played before, so he knew about this spell and immediately tossed up a Wall (I can climb over or go around) that blocked access to one of these treasures. I got off some lucky archer shots, hitting his wizard (not taking him out of the game, though), his bear, and another soldier for a lot of damage. As his warband continued moving in my direction, they were able to pin me down occasionally but I pressed the attack by moving soldiers forward and keeping the pressure on Sebastian who was casting Leap and jumping in his soldiers closer to the treasures. Sebastian had cast a Reveal Secret spell which allowed him to place one extra treasure token closer to his side of the field… he managed to get it off the board successfully.

Other than archers, I don’t have the ability to do a lot of damage at range, so I outfitted most of my soldiers with a Explosive Cocktail potion. This counts as an autocast of the Grenade spell—I pick a point and then any creatures (friendly and enemy) within 1.5″ will find themselves under a +3 attack that are rolled individually. Sebastian had a bear, a warhound, and a soldier all ganging up on my warhound (that I’ve always treated as a sacrificial target), so my soldiers began tossing Explosive Cocktails left and right. All in all, I got off five of these potions and did a lot of damage. My archers and two Barbarians did the rest (although I did have one of my Barbarians taken out of the game).
NOTE: Remember, dying IN THE GAME isn’t the same as a permanent death—at the end of the game, you roll for the individual fates of any of your warband who got taken out in game.

While Sebastian was dealing with all the cocktails and a couple of Fog spells I threw out to block his line of sight, three of my soldiers got off with three treasures. The activated statues ganged up (3-to-1) on my Barbarian who used his single-use-per-game Teleport ring to jump into the museum and try for another treasure. He went down hard.
At this point, I had 3 treasures to Sebastian’s one, but he took out one of my Treasure Hunters (the one who threw a successful Explosive Cocktail and weakened that group attacking my warhound) who dropped a treasure. My other Barbarian moved in to try and lure the statues away (successfully), allowing Sebastian and I to fight it out over the remaining three treasures. He took out my Apprentice, though, leaving me only the Wizard to cast Telekinesis to move two more treasures closer to my side. At this point, I began a wave of bad rolls that allowed Sebastian to take out more of my soldiers. All in all, I had six of my warband (Two Archers, Barbarian, Treasure Hunter, Warhound, and Apprentice)… as did Sebastian. I managed to get two additional treasures off the board and Sebastian got one, leaving me with 5 treasures to his 2. Game ended.


End of Game Result Rolls
At the end of the game, any warband members who were “taken out” in the game must be rolled to see what their ultimate fate was. I had some BAD rolls. My Treasure Hunter and Warhound were KILLED (permanent), so I’ll need to spend gold to fill those slots. One Archer was safe, but one Archer and the Barbarian were Badly Wounded, meaning they cannot be used in the next game… this means either letting them go and spending gold to replace them OR being two soldiers short. I’ll have to think about this one.
As for my Apprentice, he was also Badly Wounded but I have the option to spend 100 gold to heal him. I don’t think I have a choice there… more gold. Sebastian had a couple of his soldiers badly wounded as well and one killed, but his Wizard and Apprentice left the game hurt but alive.
Now it was time for my five treasure rolls—these are done with a special table and the results are as follows:
- 100 gold and a Grimoire (rolled on a Random spell table for Glow spell)
- 30 gold and 3 Scrolls (rolled on Random spell table for Embed Enchantment, Animate Construct, and Control Animal)
- 100 gold and a Grimoire (rolled for Animal Companion spell)
- 25 gold
- 30 gold and 3 Scrolls (rolled Awareness, Mud, and Elemental Hammer spells)
You can ONLY sell Grimoires for 250 gold if you already know the spell… these two spells are new, so no luck there for extra gold. Each scroll can be sold for 100 gold so I may have to do that to generate some gold to replace my injured and killed soldiers.
XP: The max XP you can earn in a game is 300XP. You get 10XP per successful cast and 5XP for a failed cast. Between my wizard and apprentice, we cast a total of 8 successful spells and 2 failed ones for 90XP. I also get 50XP per treasure recovered, and that puts me at 340XP… beyond the cap of 300, so rounded down. My wizard did successfully cast an end-game spell called Absorb Knowledge that grants me a bonus 50XP that will carry over to the next game. For each 100XP I can choose to decrease the cost to cast a spell by 1, raise a stat by 1, or learn a new spell.
My wizard is currently level 15—I’ll need to decide how to spend those 300XP and decide how many scrolls to sell because I need to purchase some magic items and other items. The scenarios are only getting more difficult, and the opponents are growing in power, too. All in all, games are getting quite deadly… this one was the worst loss of soldiers I’ve had yet. I went in with the goal of getting five treasures, but it cost me dearly…
Next month’s scenario: The Worm Hunts
Six treasures are placed randomly around the game field. During each Creature Phase, a d20 is rolled and for each treasure picked up, +1 is added to the roll. On a roll of 18-20, a Giant Worm explodes randomly from beneath one of the remaining treasures. If the worm never appears, when the final treasure is picked up the worm reveals itself from beneath the center of the board. The Giant Worm is fast moving, has a Fight of +4, Armor of 10, and Health of 20. I do not want to be anywhere near a treasure when this thing appears!
Frostgrave Links:
Introducing My Kids to Frostgrave: https://geekdad.com/2017/01/frostgrave-february/
Basic Rules video: https://www.youtube.com/watch?v=mrW3P_T41DM
Core Rulebook: https://amzn.to/2CiFhAE


