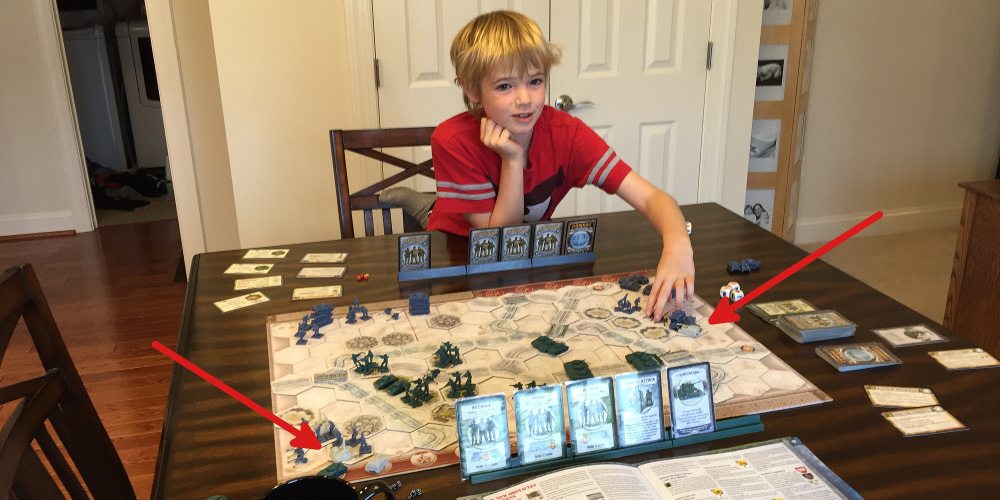
My son is back into Memoir ‘44 after a lengthy break, and we’re finally digging into some of the scenarios outside of the base game. There are plenty to choose from among Memoir’s many expansions, but we started with Winter Wars as I was excited to try out the combat deck (cards that sit alongside your command card deck). Winter Wars’ first scenario, “Longvilly Trap”, includes the Elefant Panzerjäger (Tank Destroyer) and the late war M2 Mortar. As with most Memoir expansions, there are no figures included for those units; instead, cardboard chits are provided to place alongside your regular tanks or infantry to remind you of their upgraded status.
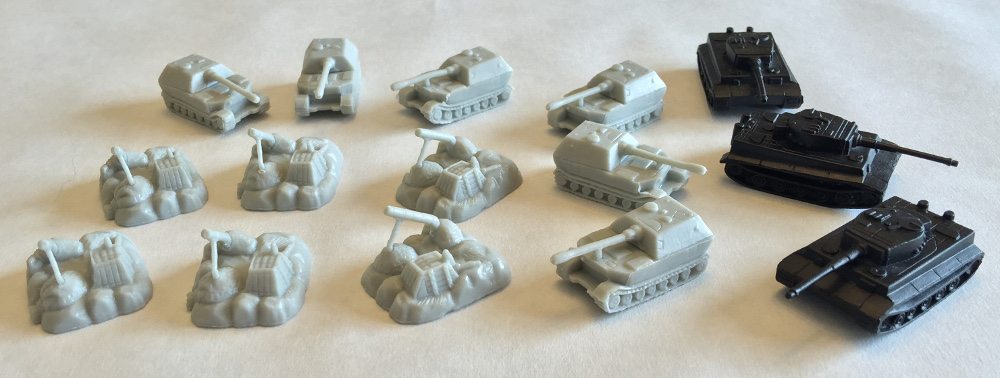
For a game where so much of the fun factor comes from pushing around dudes on a map, this is less than ideal. Days of Wonder addressed this by publishing the Memoir ’44 Equipment Pack, which includes plastic figures for many of the units that have been detailed in the expansion packs. Unfortunately, the figures are all provided in a generic off-white color. While I don’t have any problem with the base game’s color scheme, where each country’s units are painted a single color (German grey, U.S. green, etc…), this boring off-white is less than appealing. We woke up to rain Sunday morning, making it a perfect day to upgrade the Equipment Pack.
I decided to paint the two units from “Longvilly Trap,” along with the Tiger tanks from the Equipment Pack and the Anti-Tank Weapons that came in the Mediterranean Theater expansion. Seeing what I was up to, my son joined in to paint the Kübelwagen (Command Cars). Unfortunately, my in-progress photos of the Anti-Tank Weapons and Command Cars were hit-and-miss due to paint timings.
I’m not an expert painter by any stretch of the imagination. When I get good results, it’s a because of patience and using the relatively simple techniques of applying a wash and dry brush to get the most out of my efforts. My theory here is that even minimally painted minis are better than unpainted minis. I figured I could get a bunch of the Equipment Pack painted in minimal time by using a single base color with those techniques. However, I soon got sidetracked by some of the available details and did more painting than I meant to!
In the following photos I note which colors I used, but most of my colors are a bit older and have been discontinued. If you’re looking to recreate any of these paint schemes, you can check out this excellent paint compatibility chart, which might point you in the right direction for the Games Workshop (GW) paints. But really, just pick something close and you’ll be fine.
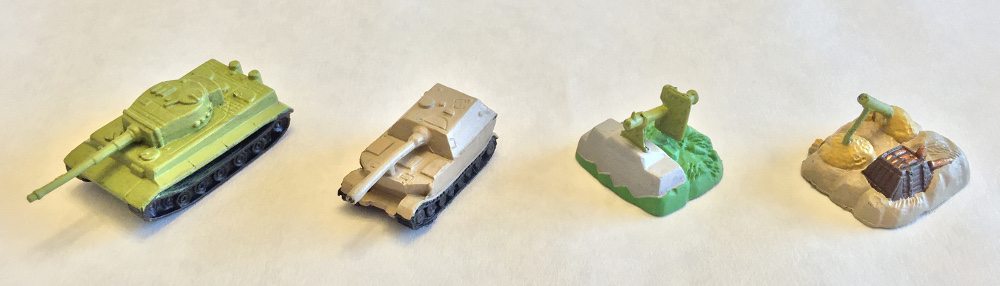
The Tiger required two layers of GW Camo Green, while the Tank Destroyer was easily covered by a single coat of Privateer Press (P3) Hammerfall Khaki. For the Anti-Tank Weapon I used GW Fortress Grey for the rock wall, GW Goblin Green for the grass, and GW Camo Green for the gun itself. This later turned out to be too much green-on-green and I repainted the gun. Finally, the M2 Mortar has GW Camo Green for the mortar, GW Bubonic Brown sandbags, P3 Battlefield Brown for the ammo box and rope on the sandbags, GW Dwarf Bronze for the shells, and the ground is covered in P3 Hammerfall Khaki. While the painting doesn’t look great at this point, it’s already a huge step up from unpainted!
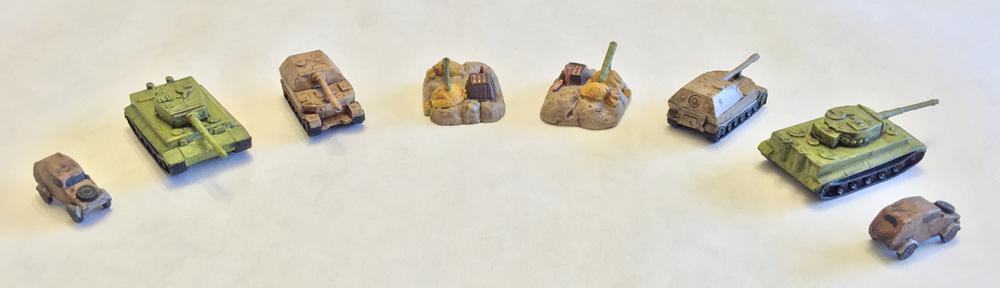
Already, things are looking much better with just the single wash applied. The Tiger was washed with GW Badab Black, while the Tank Destroyer got a coating of GW Devlan Mud. The M2 Mortar was more complicated, receiving GW Badab Black on the weapon, GW Gryphonne Sepia on the sandbags, and GW Devlan Mud on the terrain.
For the Kübelwagen, my son had kept it very simple, using Army Painter Leather Brown on the body and GW Fortress Grey for the fenders. I was dubious of his washing it with GW Badab Black, but I think it came out perfect for a beaten up army vehicle.
While not pictured, I washed the Anti-Tank Weapon in GW Badab Black on all parts. I did this to darken the grass up. I’ve tried using brown washes on grass before and it generally just makes everything look muddy rather than bringing out shadows, and I was happy with the effect this time.
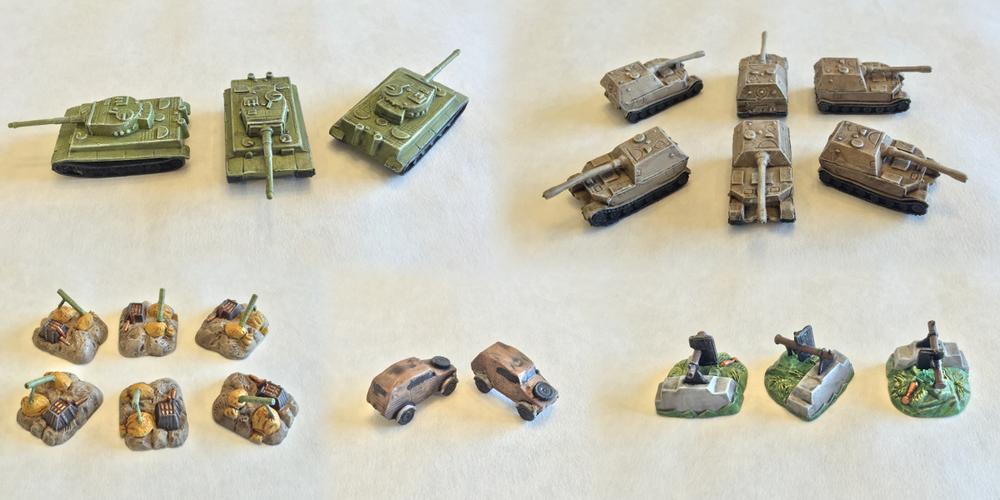
Now we’re talking! The Tiger tanks and Tank Destroyers simply received a lightened version of their base coats dry brushed to catch all the details in the model. It’s perhaps a touch more exaggerated than I would like on the Tigers, but they really ‘pop’ in a way that I like. My son didn’t want to dry brush the Kübelwagens, but I think they look just fine as they are.
The M2 Mortar received lighter versions of the terrain coat, ammo box, and weapons colors for dry brushing, which brought out the raised portions nicely.
The Anti-Tank Weapon got some special treatment. First off, I noticed that the GW Camo Green looked terrible on top of the grass color and repainted it using a mix of P3 Battlefield Brown for the barrel and black for the accompanying parts. I then used fellow GeekDad writer Anthony Karcz’s approach and used a metal color (GW Chainmail) for the weapon’s dry brushing, which showed up very nicely. For the grass, I used a technique I learned in a Battlelore paint guide (which has sadly disappeared from the internet) to use yellow when dry brushing grass for a more realistic effect than simply employing a lighter shade of green. For this, I mixed GW Sunburst Yellow with some white and then drybrushed just the portions of the model that looked specifically like grass-blade tips. While doing that work, I noticed the shell hidden in the grass and colored it with GW Dwarf Bronze. Finally, the stone wall was brushed with a lighter version of its base color.
Clearly I spent more time on the Anti-Tank Weapon and M2 Mortar than I meant to, but it’s all worth it in the end. Here’s two shots from “Longvilly Trap” with the upgraded pieces:
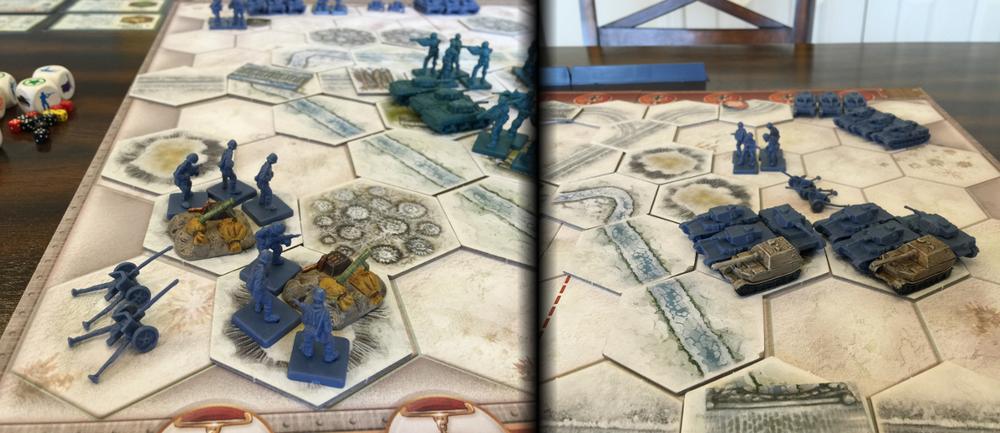
While the M2 Mortar units definitely stand out, it’s amazing how good a piece can look from a single color, wash, and dry brush, as is the case with the Tank Destroyers. I could have taken that approach with the M2 Mortar and Anti-Tank Weapons and shaved half the day off my painting time, were I not so easily drawn into bringing out the details. They takeaway here is: even if you think your painting skills aren’t “good enough” to paint a model, you’d be surprised at how pleasing you can make a figure look with those simple techniques. Get painting!
And while I missed photographing these vehicles for GeekDad Paints, since we’re taking a look at Memoir ’44 anyway, here’s the first pieces we upgraded from the Equipment Pack some time ago: the Supply Truck and Long Range Patrol Car.

That’s enough for one rainy Sunday. See you when I’m next pressured into further Equipment Pack upgrades. Happy painting!


Wow! Look great. Was thinking of doing the same
Very cool!