
Tune your camera settings to capture the beauty of the natural world.
What Is Behind the Lens: Photographing Earth?
Behind the Lens: Photographing Earth is a game for 1 to 4 players, ages 14 and up, and takes about 45–90 minutes to play. It’s currently seeking funding on Kickstarter, with a pledge level of $56CAD (about $42USD) for a copy of the game. (The campaign is for two standalone Earth-inspired titles; check out my review of Earth Express for the other title.) Behind the Lens is tied to Earth primarily just in theming—it is about taking photos of nature—but is otherwise an entirely different game from Earth.
Behind the Lens was designed by Charlie Bink and Danielle Reynolds and published by Inside Up Games, with graphic design by Riley Lem and Katie Hoang.
New to Kickstarter? Check out our crowdfunding primer.
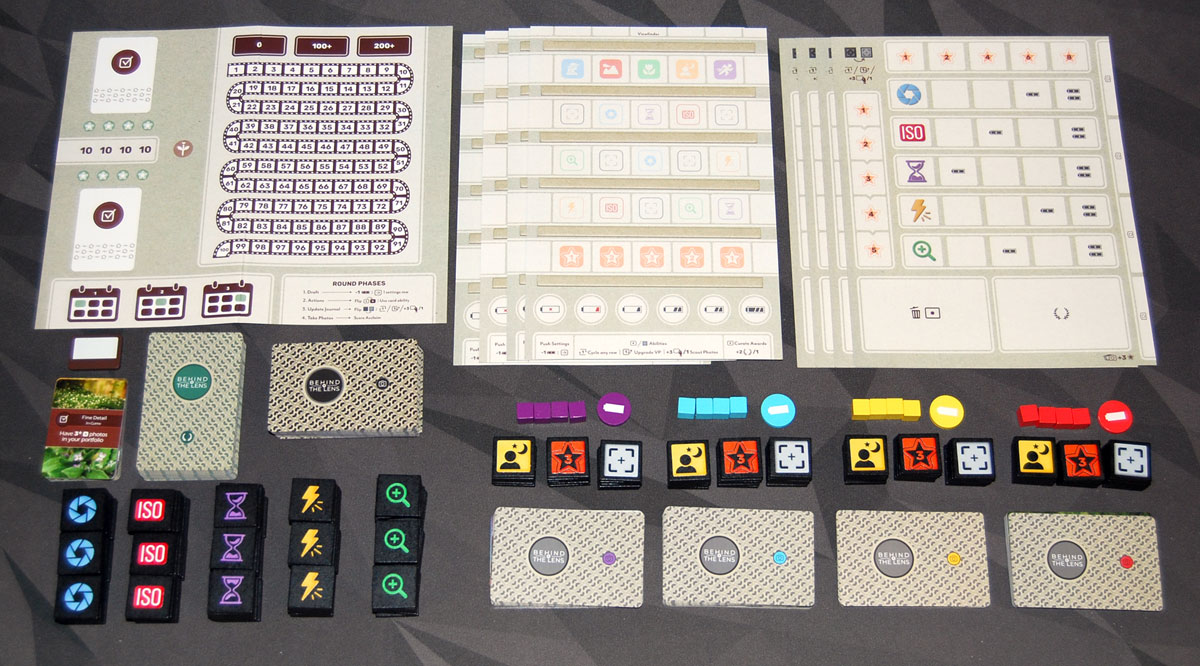
Behind the Lens Components
Note: My review is based on a prototype copy, so it is subject to change and may not reflect final component quality.
Here’s what comes in the box:
- Exhibition board
- Month tracker
- 40 Assignment cards
- 57 Award cards
- 60 Action cards
- 110 Setting tiles (in 5 types)
- 4 Sets of Player components, each including:
- Camera mat
- Journal mat
- 4 Acclaim markers
- Battery token
- 5 Subject tiles
- 5 Acclaim tiles
- 5 Auto-focus tiles
- 25 Photo cards
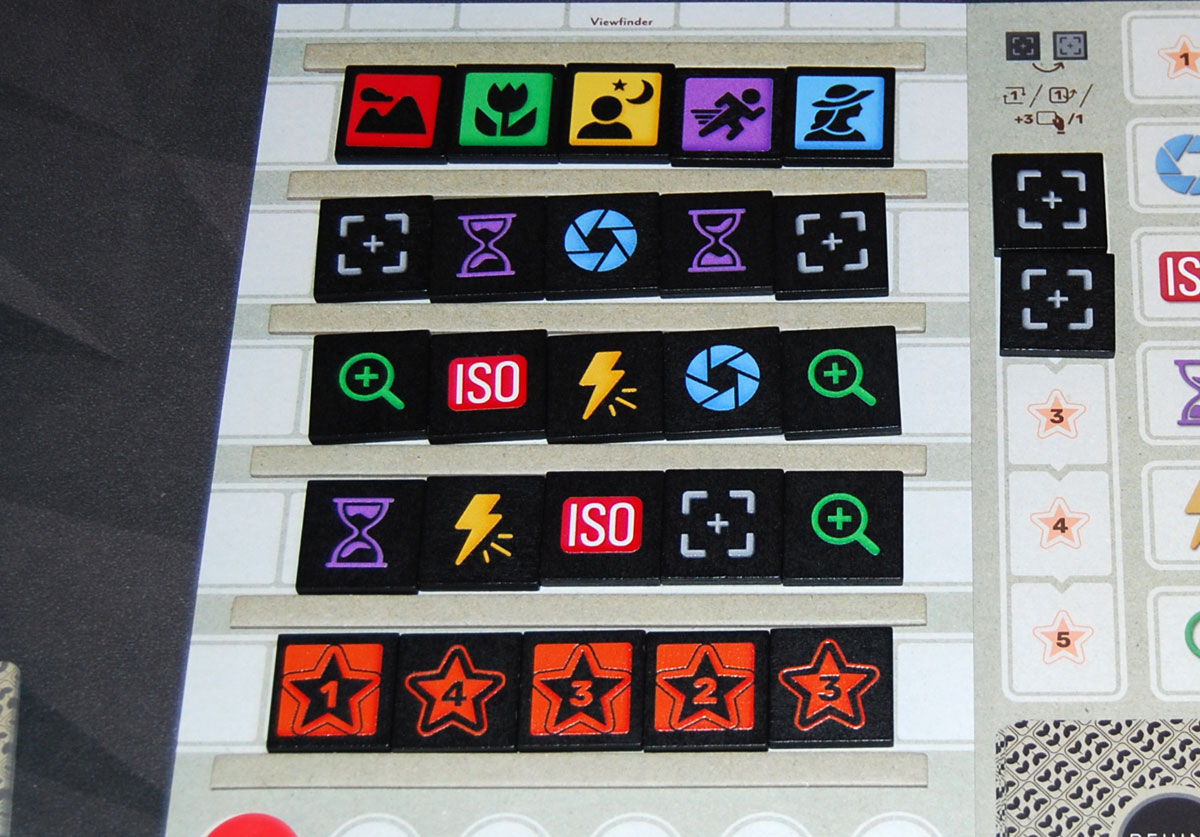
The standout components in Behind the Lens are the camera mats and the tiles—which are wooden in the standard edition but with optional acrylic versions as an add-on (or included in the deluxe bundle with both Earth games). The camera mat shows a 5×5 grid, with little rails that allow you to slide the tiles in from the left or the right. The primary mechanic of the game is manipulating this grid, usually by sliding a tile into a row and bumping out the tile on the end, kind of like the classic game Labyrinth. The prototype was a cardstock mat with little cardboard rails that I had to peel and stick on them manually. I don’t think this is the final form, but these had a tendency to peel off if you flexed the mat.

The photo cards all have unique nature photography on them, and are depicted as if looking at a viewfinder with the various camera settings: f-stop, aperture, ISO, etc. I recognize a lot of these icons from my digital camera even though I primarily use a couple of preset defaults, but I did notice that some folks in my gaming group—who have mostly used cell phone cameras—didn’t know what the icons represented. Either way, it’s okay: you don’t actually have to know what the icons mean to play the game. Likewise, the action cards look like the back of a digital camera, though in that case it’s just a frame for the actual pertinent information.
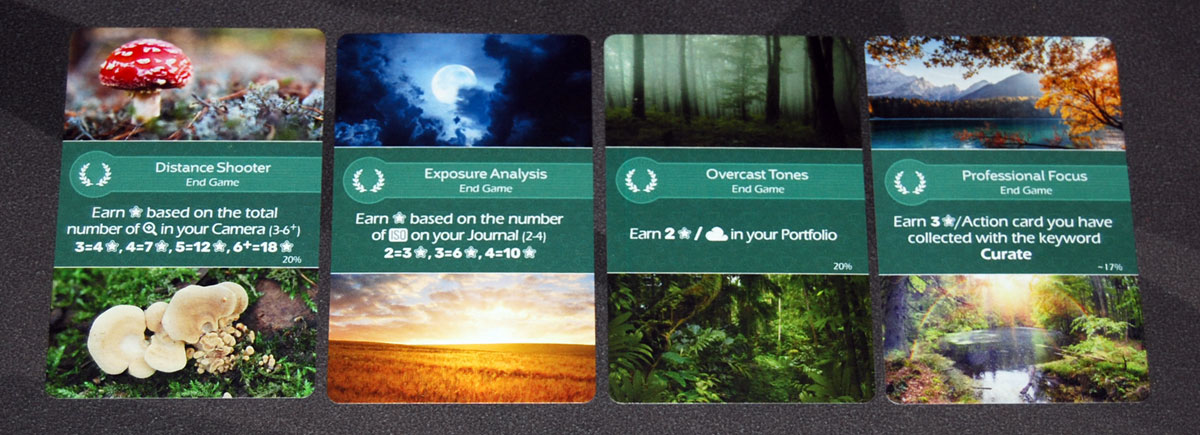
I mentioned that Behind the Lens is a different game than Earth, but the one place where they feel similar is in the scoring objectives. In Earth you have red fauna cards and green ecosystem cards, both double-sided; you race to complete fauna objectives, while ecosystems are only scored at the end of the game. Behind the Lens has double-sided assignment cards (red) and award cards (green), and they look and function a lot like their counterparts from Earth.
How to Play Behind the Lens
You can download a draft of the rulebook here. Behind the Lens is also available to try for free on Tabletop Simulator.
The Goal
The goal of the game is to score the most acclaim (points) over the course of 3 months (rounds) by setting up your camera to capture photographs.
Setup
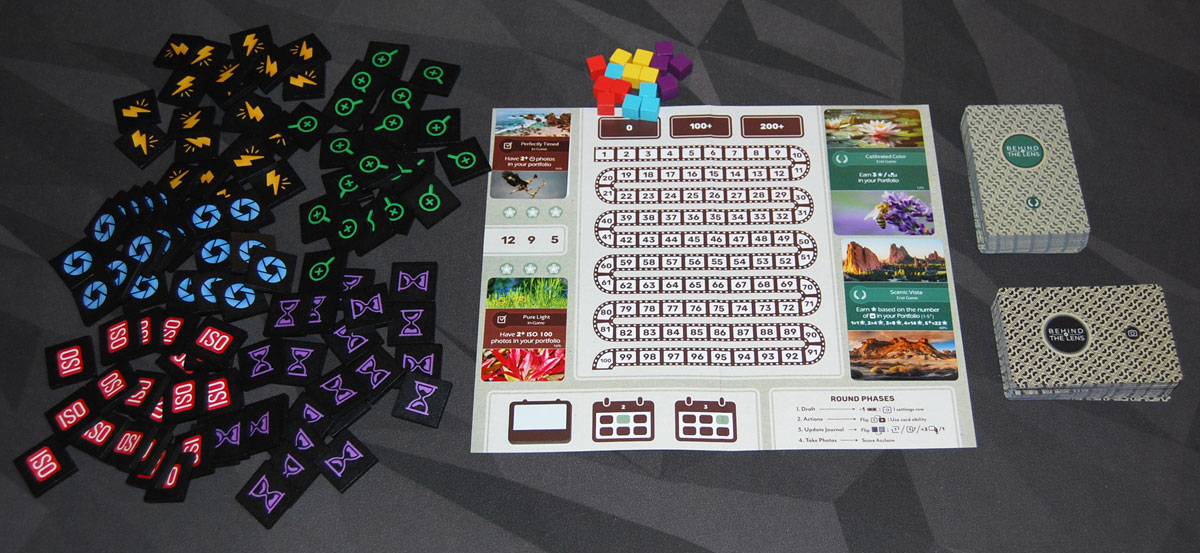
In the center area, place the exhibition board, with the month tracker on the first calendar space. Shuffle the assignment cards and place two of them on the left side of the exhibition board, random side up (the rest are returned to the box). Set up the action card deck by removing cards for the player count if necessary, and then shuffling it. Make a supply of settings tokens. Place the player acclaim markers (cubes) on the “0” space of the score track.
Advanced mode: Shuffle the award cards and place two on the exhibition board, and then deal two awards to each player. Each player chooses one to keep (face-down on the awards area of their journal mat), and then discards the other.
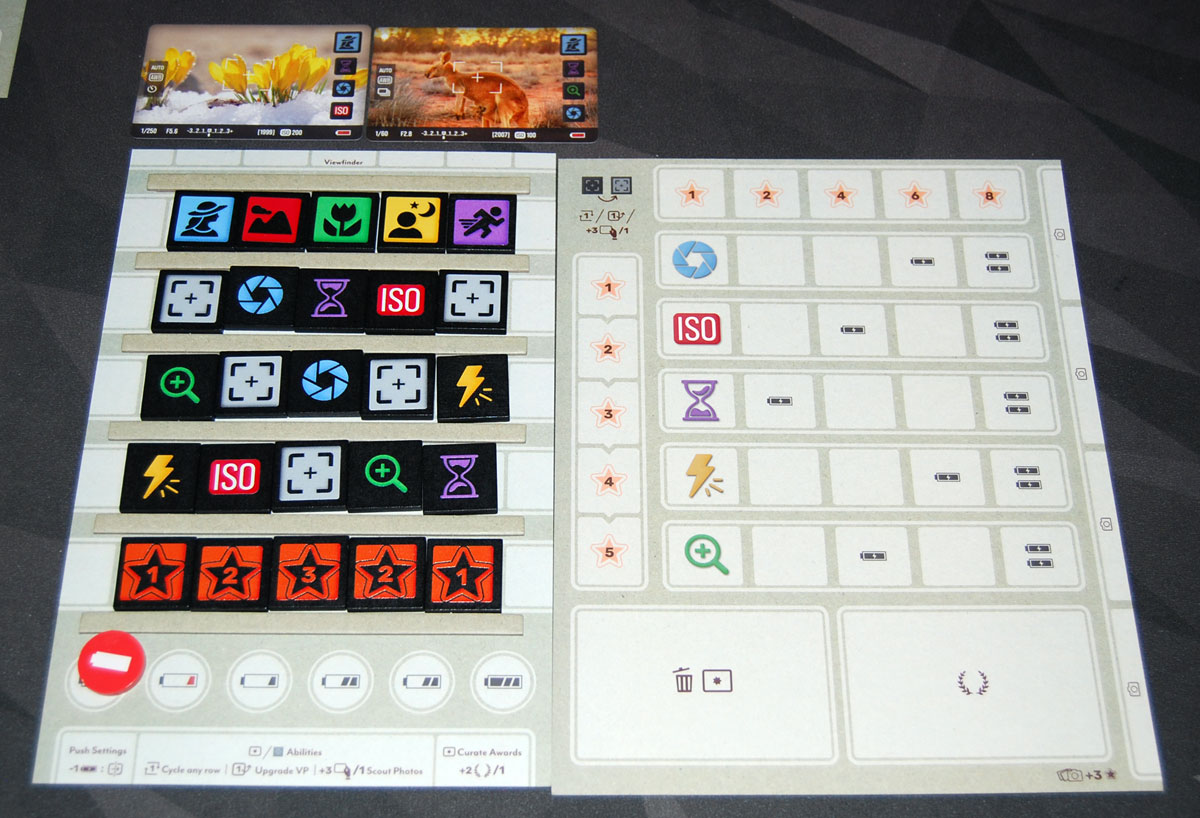
Give each player a set of the player components: a camera mat, journal mat, deck of photo cards, battery token, and a set of the 25 tiles as depicted on the camera mat. Place all of the tiles onto the camera mat as shown, and set your battery token to empty. Note that the acclaim tiles have different values on the front and back—use the sides with lower values. 5 of the photo cards have a star in the top corner—each player chooses 2 of these to place above their camera in the “viewfinder” area, and then shuffles the rest into their photo deck.
Gameplay
Each month has 4 weeks (rounds), and the game lasts 3 months. At the beginning of each month, deal each player 5 action cards from the deck.
Each week, players will draft cards, adjust their cameras, journal skills, and capture photos. Play is simultaneous so everyone does each step at the same time.
Draft cards: Choose a card from your hand to play face-up in a play area near your camera board, and then pass the rest of your hand to the player to your left. Each card shows a setting icon at the top left—take a matching tile from the supply. The card may also show a number of battery icons—charge your battery that amount. (If you are already at max charge, nothing happens.)
Adjust camera: This is the main action portion of the game. You are trying to line up a vertical column of tiles so that it matches the requirements of one (or more!) of the photo cards in your viewfinder. The top tile is always the subject, with three settings below it, and then the bottom tile is an acclaim value.
You may make three types of adjustments: push, action card ability, and auto-focus tile.
To push, you spend a battery, and then slide the setting tile in your hand into one of the three settings rows on your camera, pushing it one space and ejecting a tile out the other side, which goes into your hand. You may push any number of times as long as you have the battery to pay for it.

You may use any action card ability shown on the cards in your play area, but each action card may only be used once per game, and then it is placed in the trash area on your journal. Unused cards will just stay in play. Action cards may let you manipulate the tiles in various ways, but they may also give you access to some of these other actions:
- Cycle – remove the tile on the end of one row, and push it into the other end, so the whole row has been shifted (but does not change the tile you have in your hand).
- Upgrade – flip one of your acclaim tiles over to its higher value.
- Scout – draw 3 photo cards from your deck, choose one to place in your viewfinder, and return the others to the bottom of the deck or shuffle them in. There’s no limit to the number of photos in your viewfinder.
- Curate – you can either increase your focus or apply for awards. To increase your focus, you name a particular card feature that you need for an assignment or award, and search through your photo deck, taking the first one that you find that matches. Exchange it with a card in your viewfinder, and then reshuffle your deck. To apply for awards, draw 2 award cards, pick one to place in your awards area and return the other to the bottom of the deck.
You start the game with five auto-focus tiles in your camera, and they may end up on your journal mat. If you have a face-up auto-focus tile on your journal, you may flip it face-down to Cycle, Upgrade, or Scout.
Journal skills: When you’re done adjusting your camera, put the tile in your hand onto your journal mat in the corresponding space. There’s one row for each setting type, and a column on the left for the auto-focus tiles. (For the settings, the first space in each row is already filled.) If you place the tile on a battery icon, immediately charge your battery.
(In the basic game, spent auto-focus tiles are refreshed when they are placed into your journal; in the advanced game they are not.)
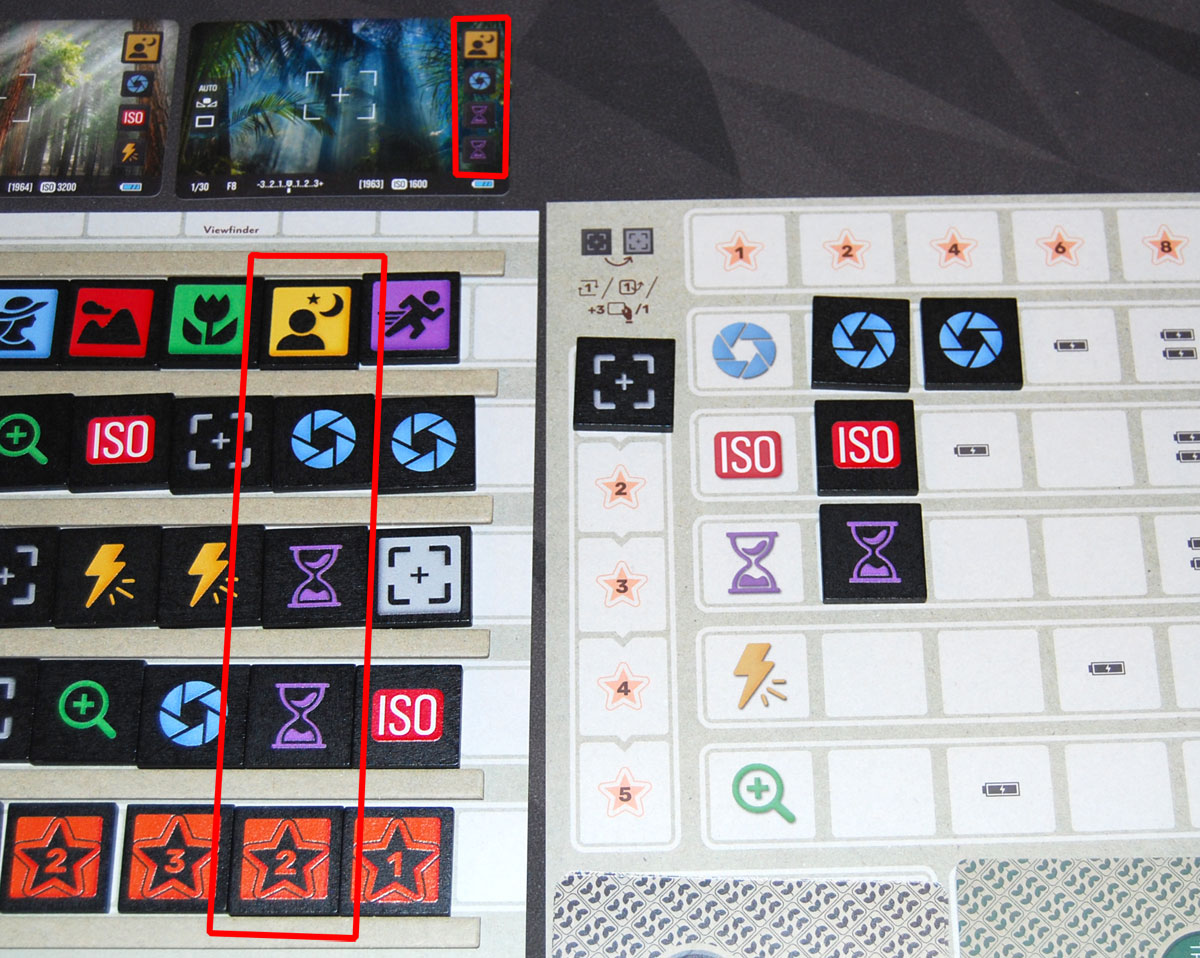
Capture photo: If any of your camera columns matches the settings shown on a photo card in your viewfinder, you capture that photo! Auto-focus tiles in your camera are wild and count for any setting, but if you use them then they are turned face-down and cannot be used again. Photos you have taken are moved to your portfolio next to your journal, where you can arrange them in any way you like. (There are no limitations on how to arrange them.)
You score points equal to the acclaim tile at the bottom of that column. You also score points for each setting shown on the card, based on the value you’ve reached for that setting on your journal. If you manage to capture multiple photos at a time by matching multiple columns to multiple photos, you get a 3 point multi-shot bonus for each additional photo. (In the photo above, I score 2 points for the acclaim tile at the bottom of the column. The aperture icon scores 4 points, and then each hourglass icon scores 2 points, for a total of 10 points.)
After each week, pick up the cards that were passed to you. If you have fewer than 2 photos in your viewfinder, draw back up until you have 2. Then start the next week. In the fourth week of each month, you discard the extra card instead of passing it to your neighbor.
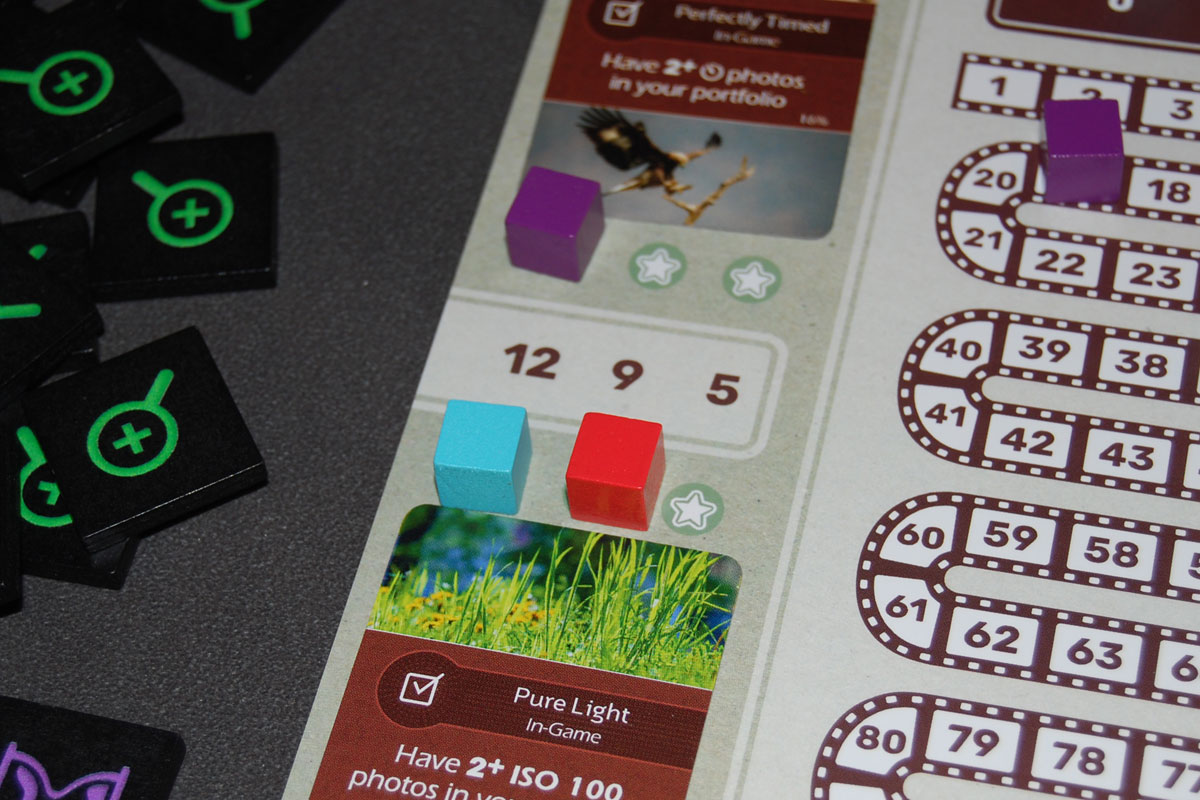
The assignments on the exhibition board are requirements for certain photos. If you complete an assignment, mark it with one of your score markers. (In the basic game, each assignment is worth 10 points. In the advanced game, assignments are worth more points if you complete them sooner than other players.)
When the month is complete, move the month marker, deal everyone 5 new action cards, and repeat.
Game End
The game ends after the third month. You score additional points for the following:
- Each auto-focus space you have covered earns the points shown.
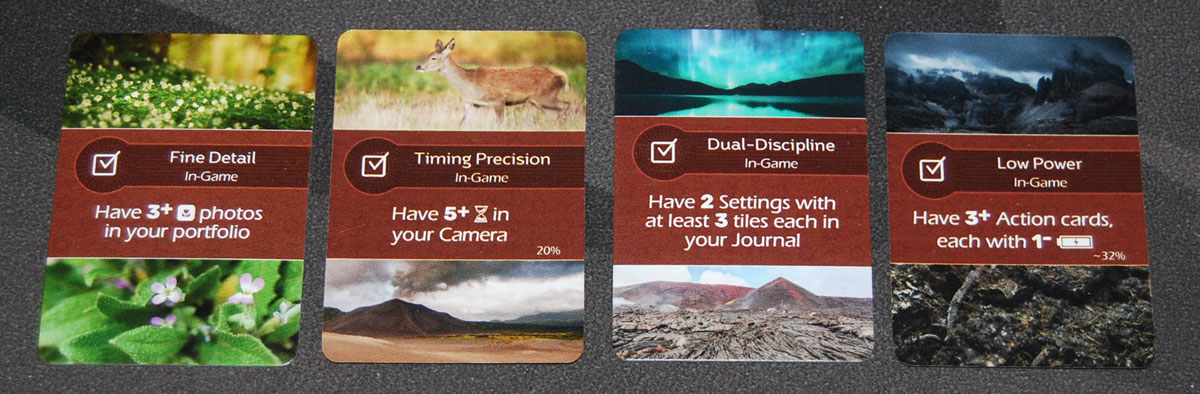
- Reveal the awards you have in your awards space and earn points if you have completed them.
- In the advanced game, everyone who has completed the public awards on the exhibition board earns points.
The player with the highest score wins! Tiebreakers are: fewer photos in portfolio, most remaining battery charge, most total acclaim from assignments.
Why You Should Play Behind the Lens
Despite some similarities in the overall graphic design and in the scoring objectives, Behind the Lens is quite distinct from Earth. Earth (as well as its little sibling Earth Express) is a tableau-building game where you’re building a grid of cards, activating abilities on those cards, and swapping various resources. The arrangement of the cards in the grid matters both because of the abilities and some scoring objectives.
Behind the Lens still has some of the set-collection scoring that feels like Earth, but there is no tableau, just a portfolio that’s a collection of your cards. Your portfolio could just be in a stack—it makes no difference in the scoring. There aren’t really resources to gain and spend. Instead, it is a spatial puzzle game about sliding and swapping tiles in a grid to make patterns. While it’s not a match-three game, it does give you a little bit of the same vibes as you study your grid and search for the optimal way to get all the right tiles to the right spots.

I really love these sorts of puzzles, whether it’s in a match-three game or the classic sliding tile squares, or even the old kid’s game Labyrinth. Behind the Lens isn’t quite as complex as Labyrinth since you can only slide left and right instead of in two dimensions, but that also means it takes more actions to get a tile from one row to a different row. The auto-focus tiles are handy at the beginning of the game because they’re wilds, but then once you’ve used them they flip face-down and are now blank spaces in your grid—and you’re incentivized to bump them out so they’re worth points in your journal.
On top of the puzzle, there are a lot of other factors to keep track of, too. For example, every round you’re going to have one tile leftover that goes into your journal. With only 12 rounds in the game, you aren’t going to be able to fill everything. Auto-focus tiles will give you some end-game points, and you can also use them for bonus actions, but the settings tiles may charge your battery so you can do more push actions. Also, settings tiles in your journal increase the value of photos taken with those settings… but of course if you’re putting a tile in your journal it means it is no longer in your camera, which makes it harder to take photos requiring that setting!
The action card you choose is also important: it determines which tile you’ll get, how much battery you charge, and some other special ability. Action cards are the only way to get the “curate” effect, and even that can be a tough decision: do you search for a photo that matches a requirement you already have, or do you draw award cards to give you more end-game objectives?
Behind the Lens hasn’t landed for everyone in my gaming group, though, particularly for those who have a hard time navigating the tile puzzle. If you struggle with picturing how to move tiles around to line up a photo, then it can be pretty frustrating. There’s also not an easy way to “undo” a turn if you’ve moved a bunch of things around and then realize you still can’t take the photo.
Overall, though, I’ve really enjoyed Behind the Lens myself because I like the mix of the spatial puzzle on top of the challenging choices I’m forced to make each turn. I’d recommend it for players who have good spatial awareness skills and who love nature photography!
For more information or to make a pledge, visit the Behind the Lens Kickstarter page!
Click here to see all our tabletop game reviews.
 To subscribe to GeekDad’s tabletop gaming coverage, please copy this link and add it to your RSS reader.
Disclosure: GeekDad received a prototype of this game for review purposes.