Not too long ago, a couple of boxes arrived at my door directly from China: the brand new Mars 3 MSLA printer and Mercury X Bundle Washing and Curing Machine from ELEGOO. The Mars 3 is the latest iteration of the Mars series printers; I previously reviewed the Mars Pro in October 2020. As all three machines work together, I figured I might as well do one big review, showing how well all three of them work together to produce resin 3D prints.
SLA vs FDM: The Two Types of 3D Printing
Briefly, for our readers who aren’t that familiar with 3D printers but are thinking about dipping their toes in the water:
There are essentially two types of printers available, stereolithographic (SLA) and fused deposition modeling (FDM). FDM models use a heated filament (most frequently PLA plastic) to build up a model, adding layer after layer until the model is complete. SLA printers use light to solidify a layer of resin at a time, creating the model. In the case of the Mars 3, which is a masked stereolithographic (MSLA) printer, it uses light specifically from an LED array combined with an LCD photomask.
Both types of printers use their own type of “slicer” software to prepare a 3D model for printing, allowing you to adjust for the type of material you’re printing, how much detail you want to put into the final product (the finer detail, the longer it takes to print), and if you need to add any “supports” into the model to help ensure that the model doesn’t break or deform during the printing the process.
If you’re new to 3D printing, this can all seem a bit overwhelming. Don’t worry, I’ll be explaining more as I describe my experiences with the Mars 3. In the meantime, think about it this way: SLA printers like the Mars 3 and Saturn are best if you want to print smoother, more detailed figures such as tabletop miniatures for Dungeons & Dragons, while FDM printers excel at printing larger, less detailed parts and objects, such as cosplay armor pieces and weapons.
What Is the ELEGOO Mars 3?
The ELEGOO Mars 3 is an MSLA printer using an Ultra 4K mono LCD screen, with roughly a 30% improvement in print accuracy over the 2K screen in the Mars 2. It also boasts a faster cure time and slightly larger build plate than the Mars 2, as well as a host of other changes.
Here are the specifications:
- Product model: MARS 3
- System: EL3D-3.0.1
- Slicer Software: ChituBox
- Technology: MSLA 3D Stereo lithography
- Layer Thickness: 0.01-0.2mm
- Printing Time: 1.5-3s
- Z Axis Accuracy: 0.00125mm
- XY Resolution: 0.035mm(4098*2560)
- Build Volume: 5.64in(L)*3.52in(W)*6.89in(H) 143mm(L)*89.6mm(W)*175mm(H)
- Light Source: UV Integrated Light (wavelength 405nm)
- Languages: Chinese English Japanese Dutch Korean French German Russian Italian Spanish Turkish Portuguese
- Connectivity: USB
- Weight: 11.5lbs(5.2kg)
- Operation: 3.5 Inch Touch Screen
- Power Requirements: 100-240V 50/60Hz
- Printer Dimensions: 8.93in (L)*8.93in (W)*17.28in (H) / 22.7cm (L)*22.7cm (W)*43.85cm (H)

Much like any of the other printers I’ve gotten from ELEGOO, the Mars 3 comes nestled in firm foam packaging, ensuring that it stays immobile and protected during its journey from the ELEGOO factory. As with the ELEGOO Saturn, the Mars 3 has foam packed inside of the lid as well, to hold and protect the build plate, resin tray, and LCD display.

Removing everything from the box, you’ve got the printer, build plate, resin tray (which ships already attached), UV-filtering lid, and a tool kit.
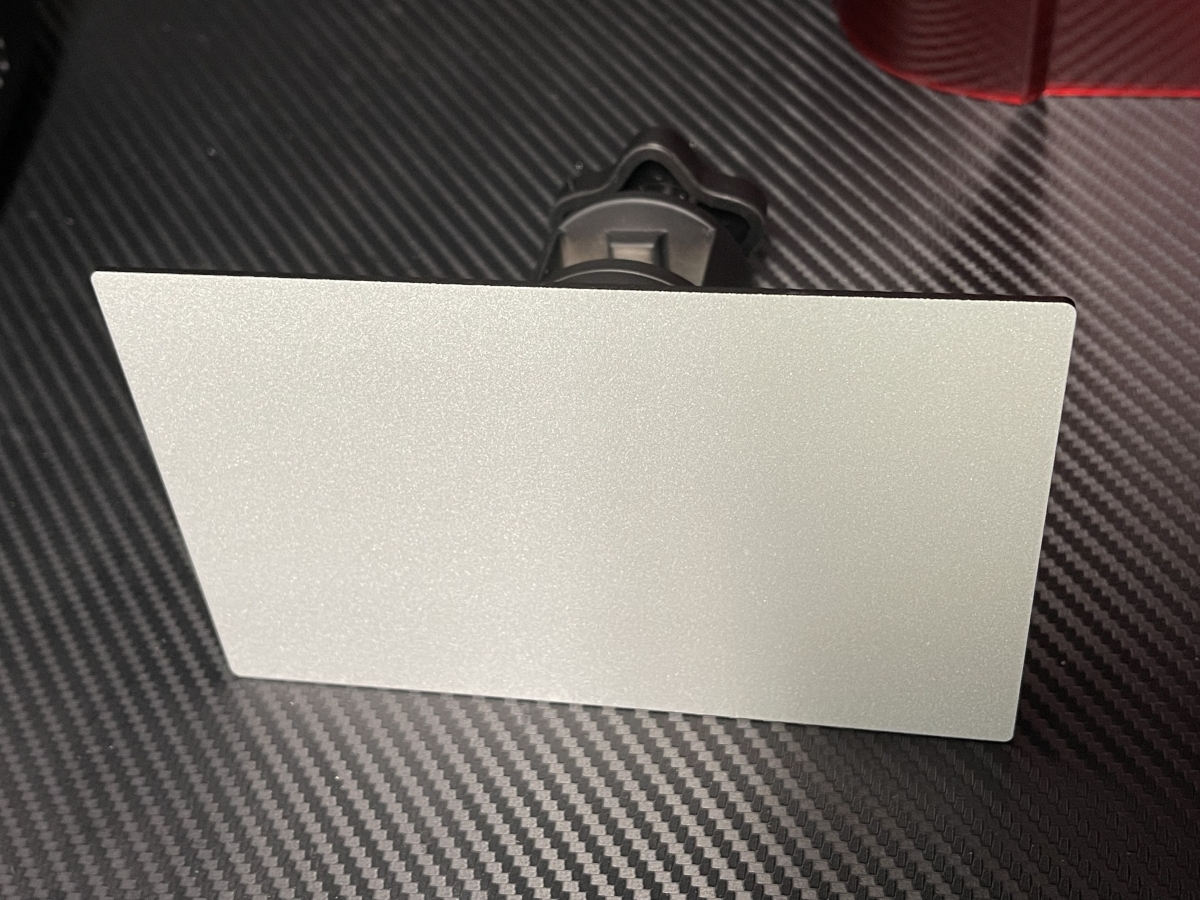
One of the small but significant upgrades to the Mars 3 is a sandblasted build plate. This is to provide better adhesion for the models to the plate.
After assembling the printer, I thought I’d see how it looked side by side with the other ELEGOO MSLA printers I’ve worked with, the Mars Pro and the Saturn. Here are all three:
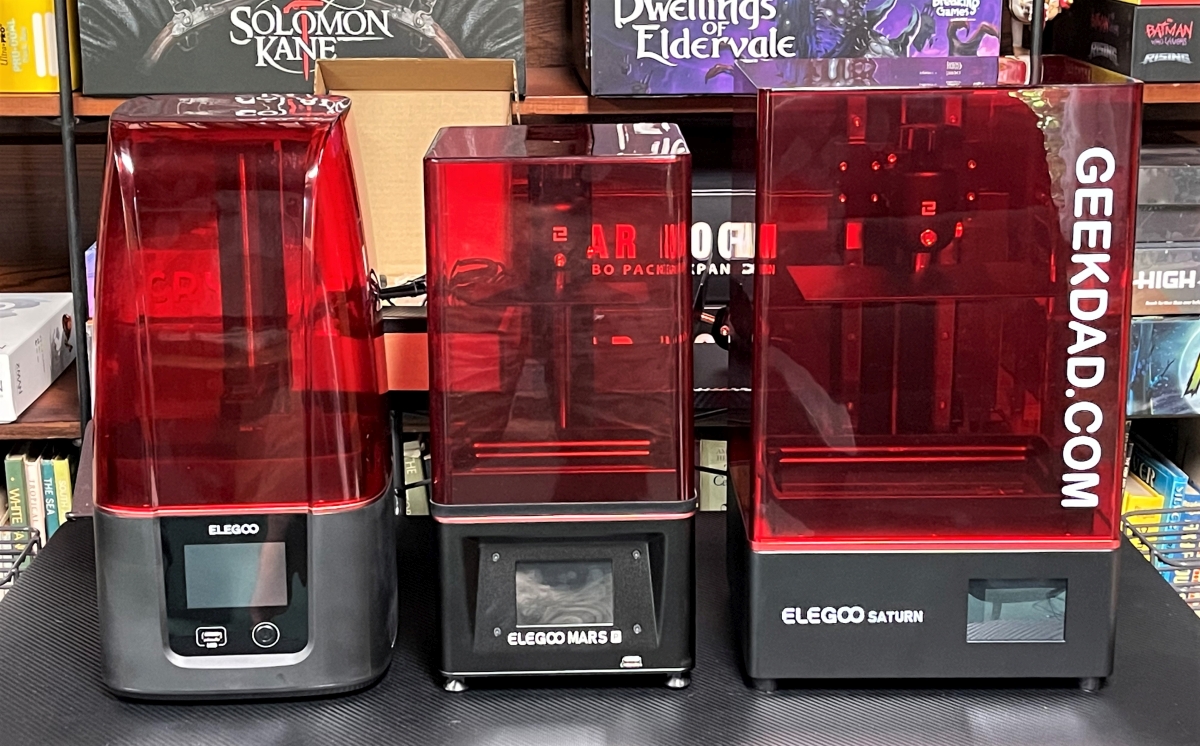
As you can see, the Mars 3 has a similar footprint to the Mars Pro but adds a bit of height for larger prints. The Mars 3 is also significantly lighter than the Mars Pro: 11.5 pounds versus the Pro’s 16.5 pounds.
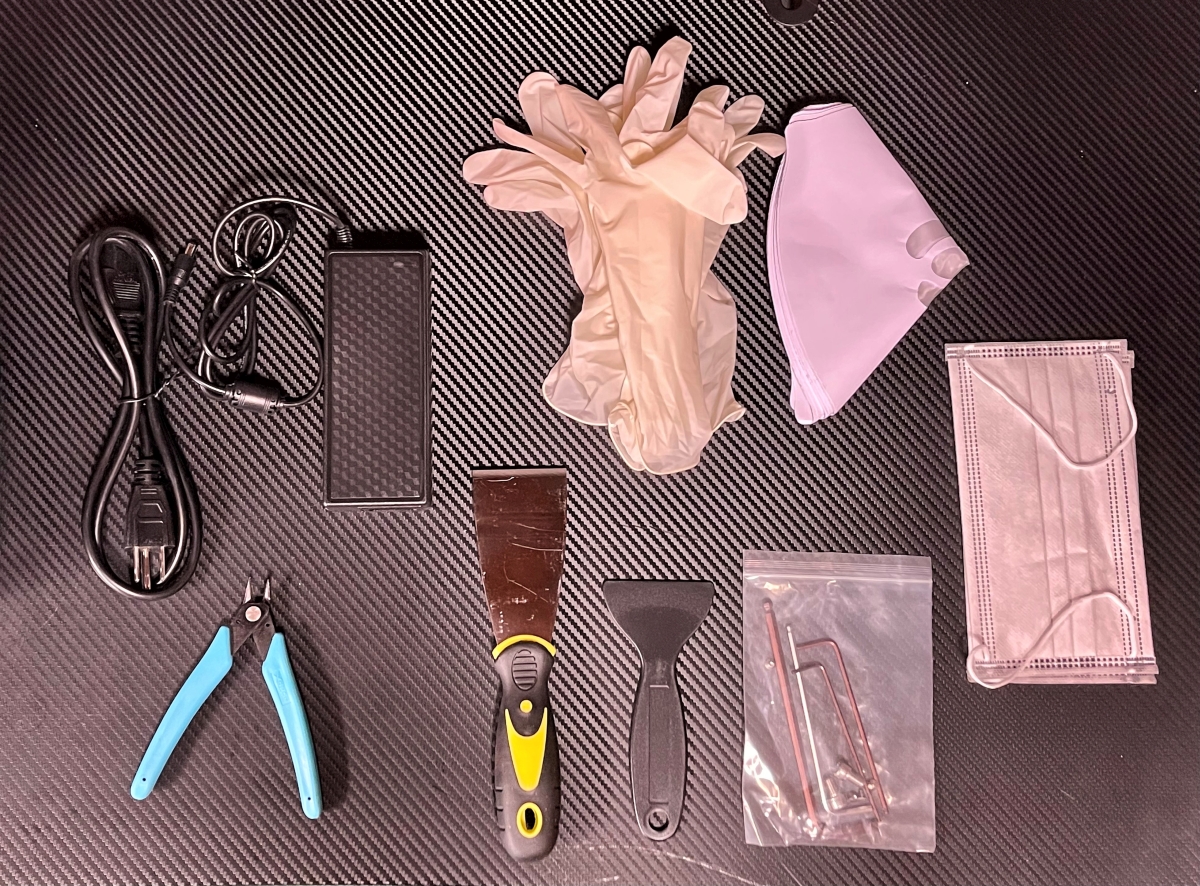
ELEGOO continues their excellent practice of including a robust tool kit with their printers. Besides the power supply for the printer, you’ll find Allen wrenches, a metal scraper to remove prints from the build surface, a plastic scraper to remove resin from the FEP film, disposable filters for pouring resin back into the bottles, nippers, and even a few nitrile gloves and face masks. The gloves certainly won’t last you for more than a few prints, but it’s enough to get you started. Sadly, my tool kit was missing the USB drive that would normally accompany an ELEGOO printer. However, as I have plenty of USB drives from previous printers, this wasn’t a big deal. I did inform my contact at ELEGOO, and had I been a customer, they would have gotten a replacement drive to me right away.
Also of particular note is that the ELEGOO Mars 3 comes with a 1-year license of Chitubox Pro slicing software, a $169 value. In addition to all the features found in the free, basic Chitubox software, the Pro version allows you to cut 3D models into separate pieces for printing, repair damaged model files, and also gives the user finer control over the placement of supports for printing. While I did appreciate the extra features, there are currently some known bugs with the Pro version of the software. I myself had frequently been getting the dreaded, “program unresponsive” message, so I went back to printing my models using the free, basic Chitubox slicer, which has worked flawlessly. As this free trial for Pro is only for a year’s duration, if you purchase a Mars 3 you may want to hold off on redeeming the year of Pro until Chitubox has fixed their software.

Adventures in 3D Printing With the ELEGOO Mars 3
Setting up and leveling the Mars 3 was a breeze, much like any of the other MSLA printers I’ve worked with from ELEGOO. There was no dedicated leveling paper like you’ll find with the ELEGOO Saturn. However, you simply place a normal sheet of paper between the screen and the build plate for setting the level. Following the simple instructions, I had the Mars 3 leveled and ready to print in just a couple of minutes.
As I didn’t have the USB drive, I decided to forego downloading and printing the standard ELEGOO rook chess piece demo model. Instead, I jumped right into printing some models that I’d acquired previously.
For all of my prints, I decided to use the ELEGOO water-washable ceramic grey resin, which I’d also used testing out the Mars Pro. I added both supports and a print platform for all the models when slicing in Chitubox.
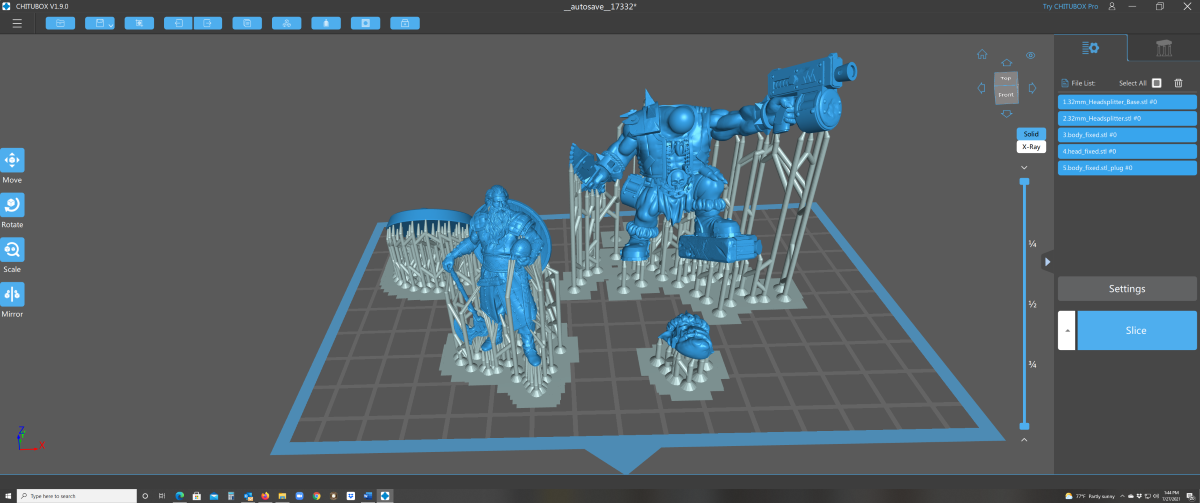
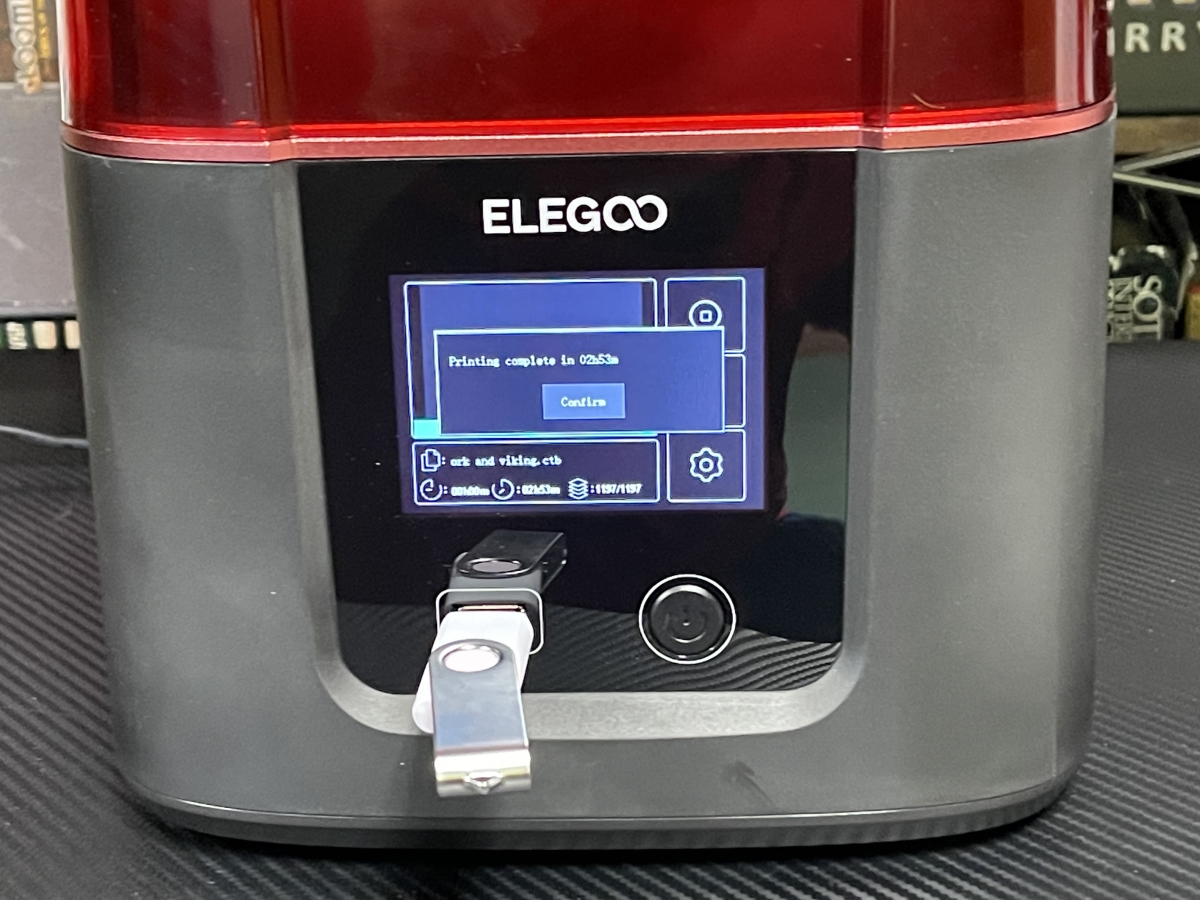
When I was ready to begin, I inserted my USB drive containing the files I’d sliced, powered up the Mars 3, and selected the file I was going to print first.

In less than 3 hours, the print was done!

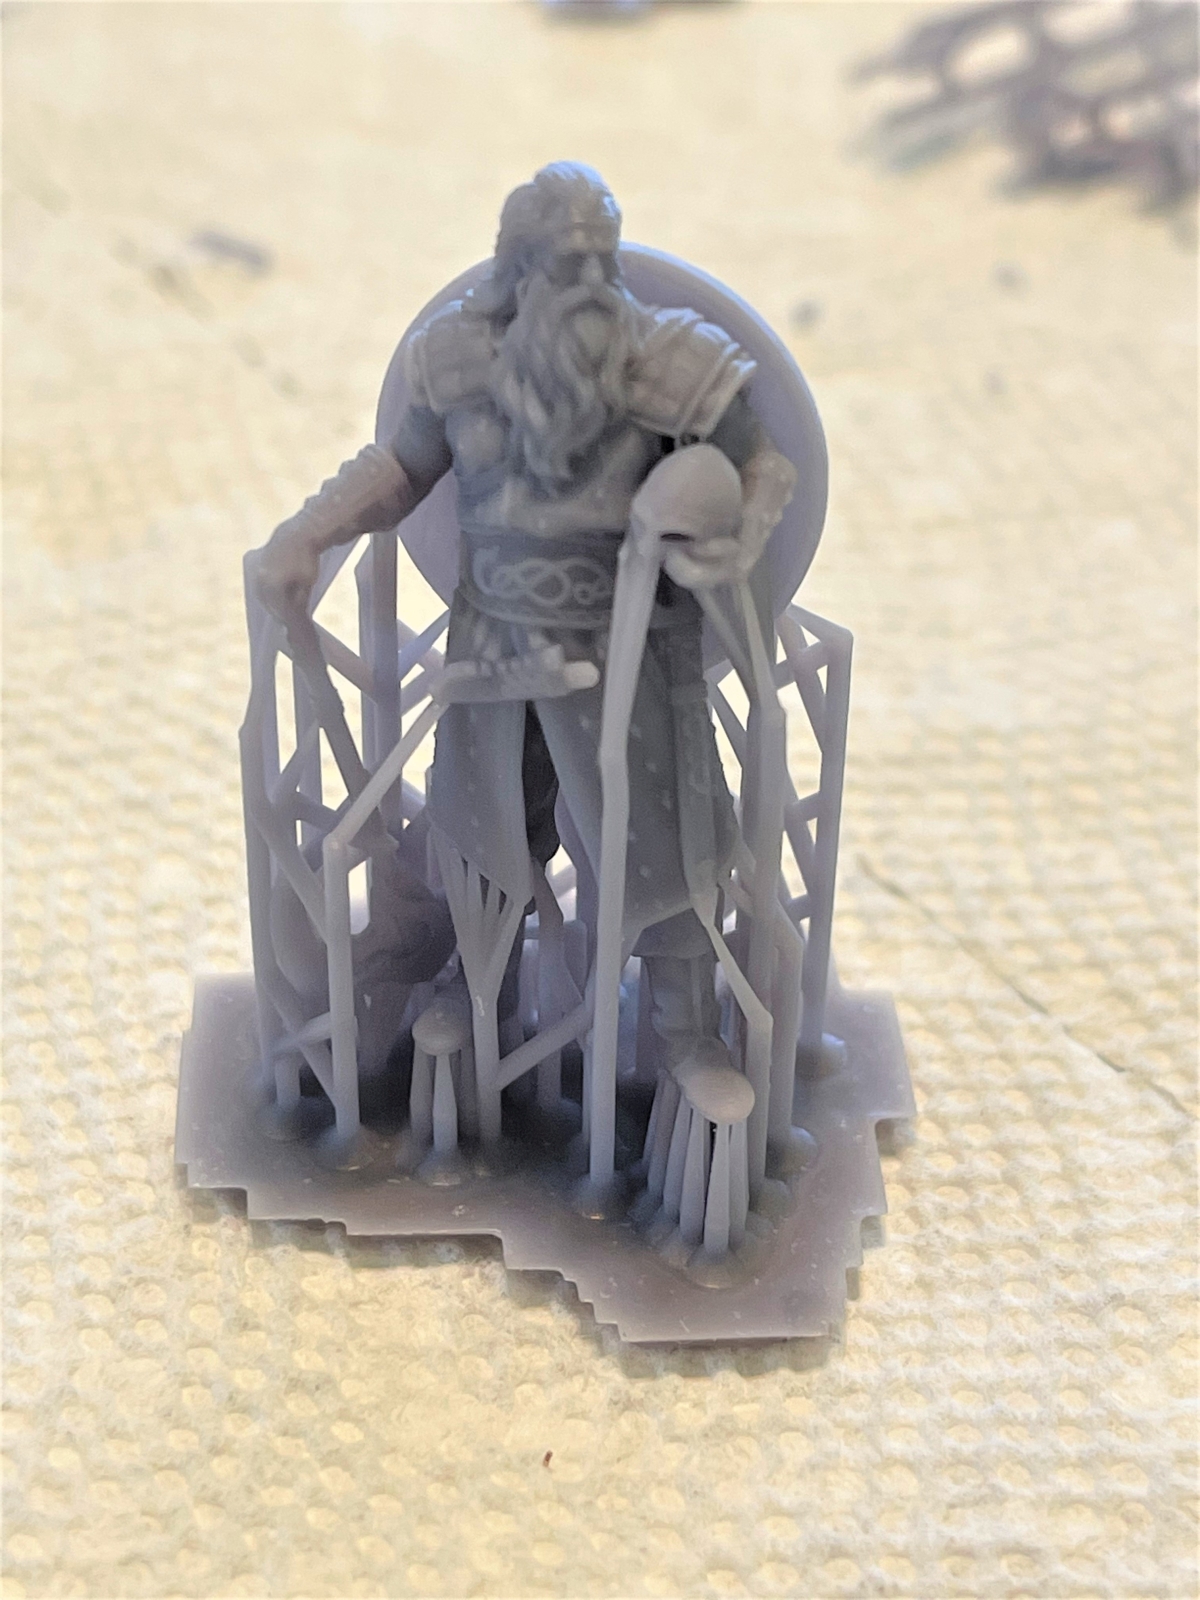
Here’s what one of the miniatures looked like, before removing the supports:
Before we get too deep in the weeds with the quality of the prints from the Mars 3, let’s take a look at the Mercury X Bundle. After all, washing and curing are integral steps in finishing your resin prints.
What Is the Mercury X Bundle Washing and Curing Machine?
First off, the name is a bit of a misnomer as the Mercury X Bundle is actually 2 separate machines. This is unlike the previous Mercury Plus, which used one machine for both washing and curing duties.
Here are the details:
- ELEGOO Mercury X WASH Machine
- Control Method: Knob + Button
- Rated Power: 12W
- Input Voltage: 110V/240V 50/60Hz
- Time Setting: 0-30mins
- Machine Size: 255mm*155mm*385.5mm
- Maximum Wash Volume:
- 180mm*121mm*153mm (with platform)
- 201mm*124mm*255mm (without platform)
- Machine Net Weight: 2.27kg
- ELEGOO Mercury X CURE Machine
- Control Method: Knob + Button
- Rated Power: 36W
- Input Voltage: 110V/240V 50/60Hz
- Time Setting: 0-30mins
- Machine Size: 246mm*230mm*363.5mm
- Maximum Curing Size: φ200mm*260mm
- Machine Net Weight: 2.4kg

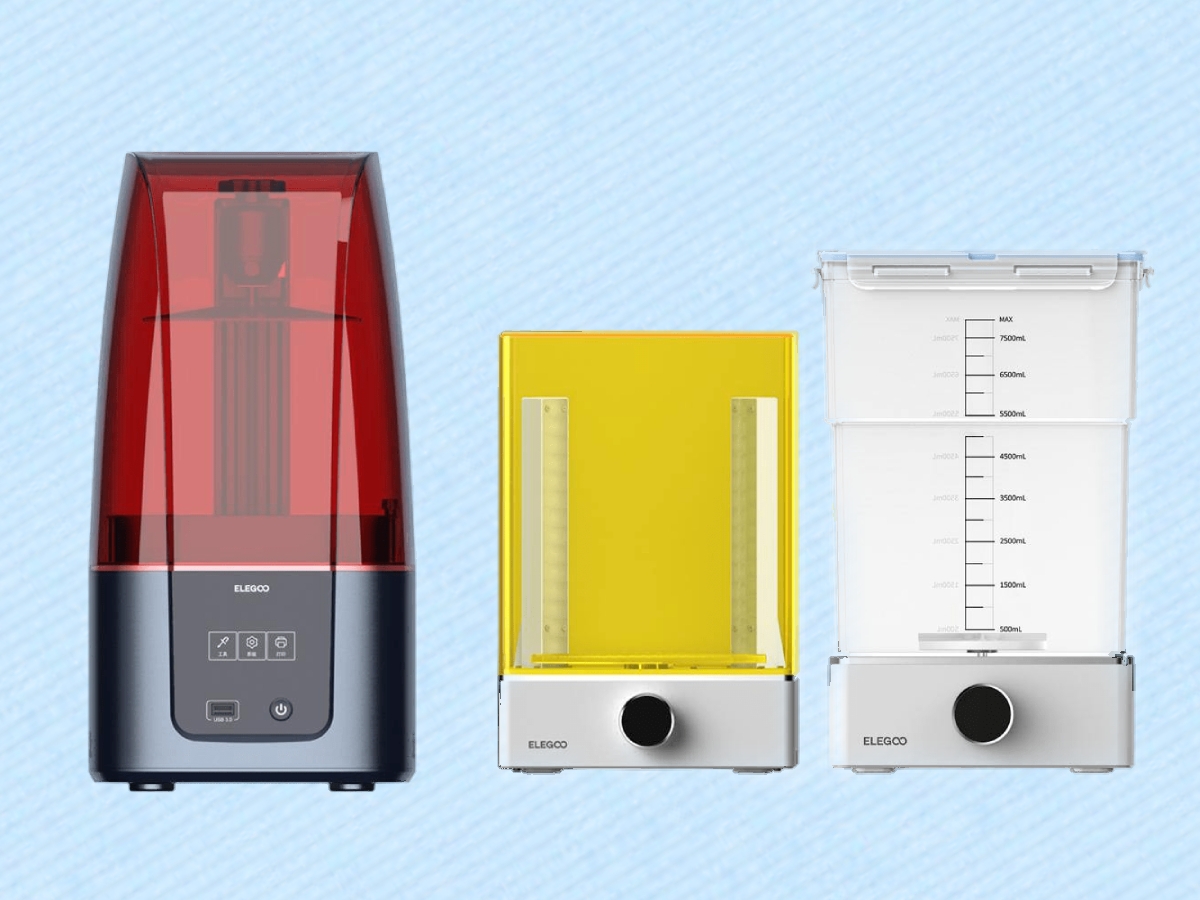
Unboxing the ELEGOO Mercury X Bundle Washing and Curing Machine
Much like the Mars 3, the Mercury X Bundle arrives nestled safely in foam. Once you take everything out, here’s what you’ll find:

While the wash machine is pretty much ready to use out of the box, there is a small bit of assembly that you’ll need to do with the cure machine before you’re ready to use it.
The UV light columns need to be connected to the base. The instructions are slightly confusing as it just says to connect them with the wires. You’ll soon notice that there are two different sockets on one of the columns and only one on the other. Correspondingly, there are two plugs on the left side of the base and only one on the right.

Once the columns are connected properly, they each attach to the base with 5 tiny screws.
The power supply has two cords that connect to the backs of both the washing and the curing machines, allowing you to operate both at the same time. Here’s what the machines look like put together:
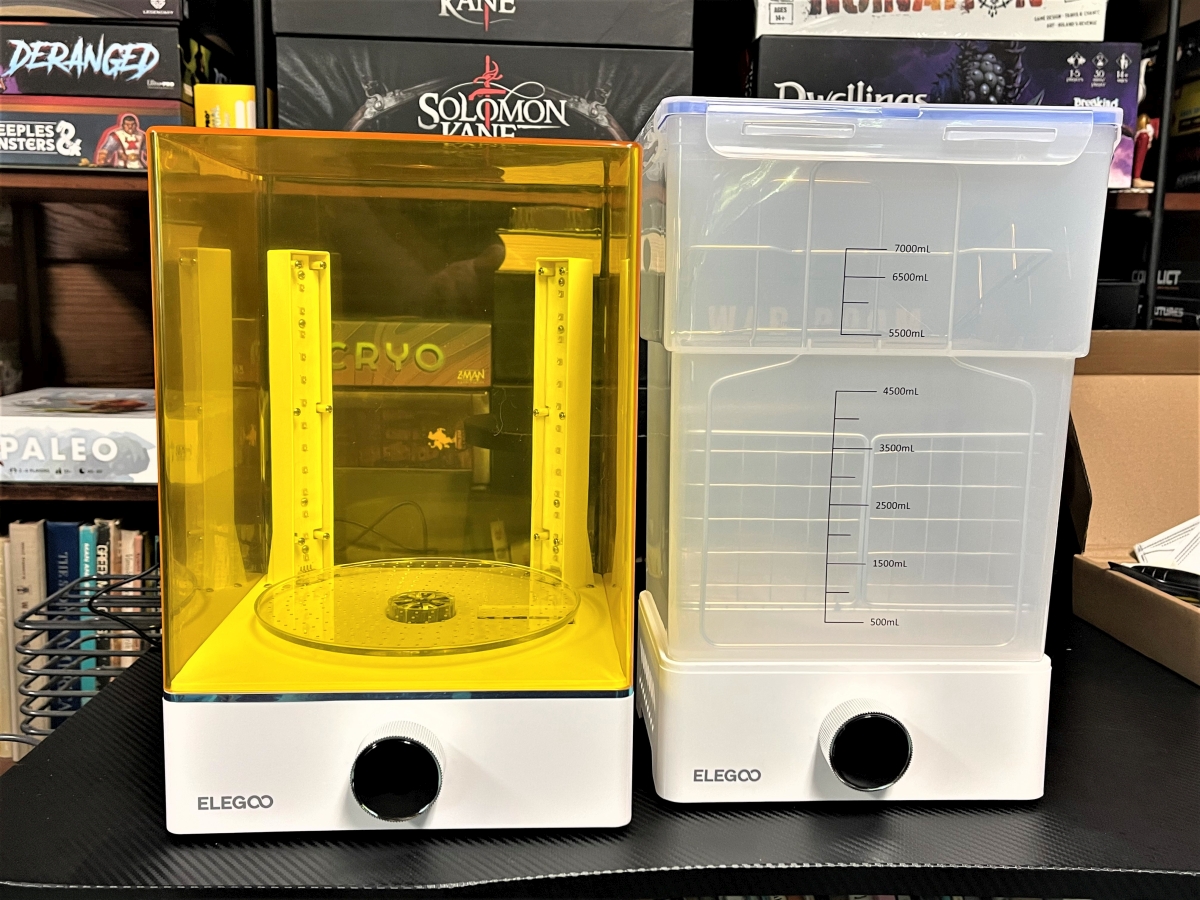
Using the Mercury X Bundle
Let’s go back to that first print I produced on the Mars 3. After allowing a bit of time to let the resin drip off the models into the tray, it’s time to wash the prints. With the Mercury X, you have two options: you can either remove the print from the build plate and use the metal basket, or you can submerge the entire build plate, using the included metal bracket. The bracket is sized in such a way that you can fit up to two ELEGOO Mars 3-sized build plates at a time or one ELEGOO Saturn build plate.
As I prefer not to have models bouncing around loose in the basket, I opted to use the bracket. Here’s how it looks placed in the cleaning bucket:

As I was using the water-washable resin, I filled the bucket with water high enough to completely cover the model when submerged. To operate either of the Mercury X machines, you hold the face of the dial for 3 seconds until it powers on, then turn the dial until the amount of time you want the machine to run is shown. Pressing the face again starts the cycle. I set my wash cycle to 4 minutes.

Here’s a short video, to show what the washing machine looks like during use:
When the cycle is done, the machine gives a short beep. To power it off, you again hold the face of the dial for 3 seconds.
After letting the models dry and removing the supports, it was time to cure them. As these were smaller models, I set the cure machine for the recommended 2 minutes and started it up.

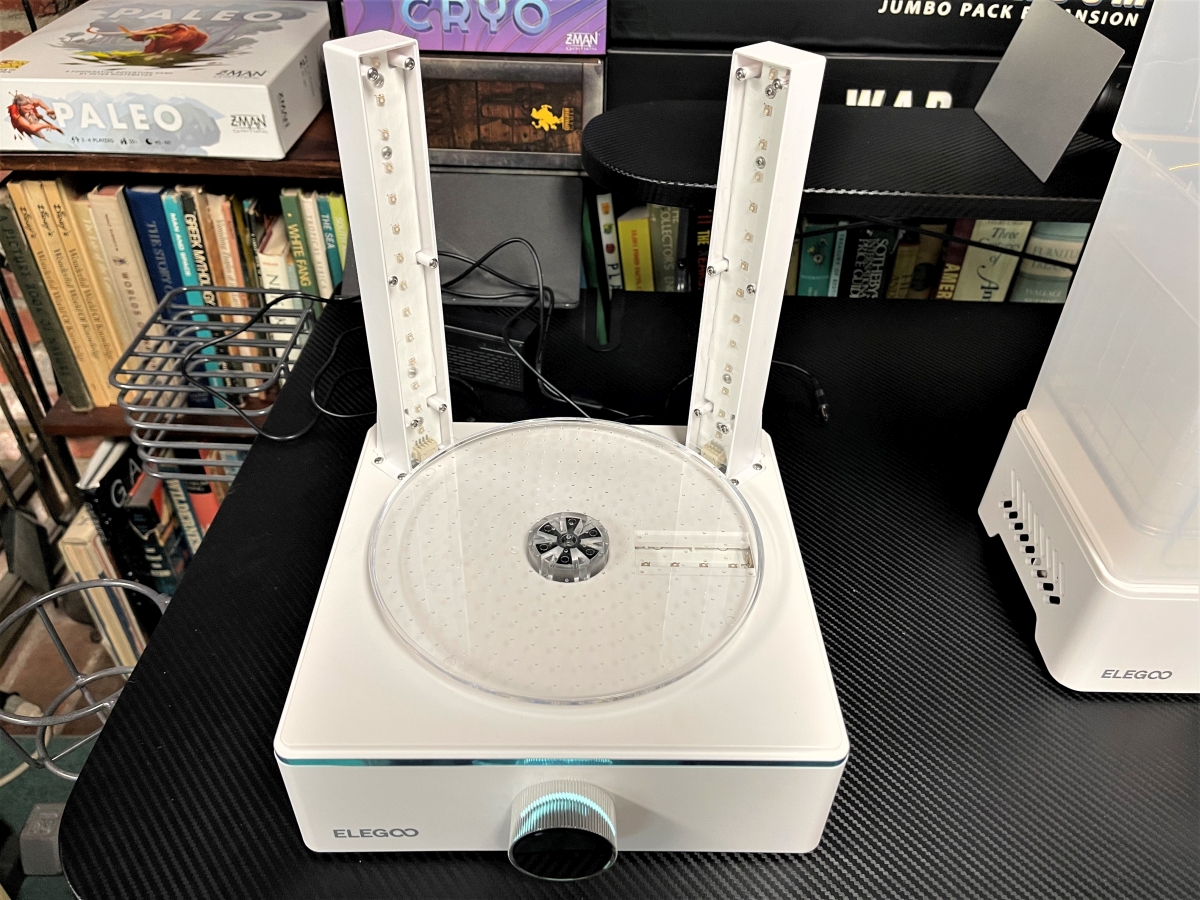
The clear platform rotates during curing, with UV light coming not just from the two columns, but also from a row of lights set into the base of the Mercury X curing machine. This ensures a nice, even curing throughout the models. And with that, let’s see the finished results!
Washed and Cured Models
Here are the first models I printed, fresh off the build plates. Note that for these and other models that I printed, I didn’t spend a lot of time cleaning up the contact points from the supports on the models. In a few cases, I missed some of the smaller supports altogether and will have to clean those up later with an X-ACTO knife.
The Viking model has a ton of detail in it, which pops, even at a 28mm scale. But as I also had the file for a 75mm version of that model, I decided to print it out to compare:


You can really see the incredible detail work that went into designing these miniatures. They printed out great at both scales.
Next, I wanted to try printing up something really small. As a friend of mine is into the Adeptus Sororitas faction from Warhammer 40,000, I went looking on Thingiverse for a model to print for him. What I found was a 6mm-scale “Rhino” transport, which I copied in the slicer so that I printed out 8 of them at one time. These also came out looking great, especially when you consider how small they are:
Staying with the Warhammer 40,000 theme, I then moved on to considerably larger models: some self-propelled Mek Gunz.

As you can see, these models filled the build plate. I had also hollowed them out for printing, as otherwise, they would have used far too much resin. Here’s what the finished models look like:
Finally, I wanted to print some more of the ornaments from the Fates End Kickstarter, which are beautifully detailed and would work great in resin. Here are the 4 different ornaments I’ve printed so far… I currently have two others printing, but I had to stop somewhere to write this review!
ELEGOO Mars 3 and Mercury X Bundle Washing and Curing Machine: The Verdict
Aside from the issues with the Chitubox Pro software (which, to be fair, is a Chitubox issue and not an ELEGOO one), I’ve found my time working with all three of these machines to be a delight.
Let’s start with the Mars 3. Like all of the ELEGOO printers I’ve worked with, operating the Mars 3 is easy and intuitive. But with this printer, not only have I gotten probably the best resin prints I’ve made to date, but they’ve also printed the quickest. That very first set of models I printed took less than 3 hours.
The Mercury X Bundle was also very easy to work with. I appreciated that I could move the build plate directly from the Mars 3 to the Mercury X Washing Machine to clean my prints. And once I got a printing workflow going, I found that there were times that I was using both the washing and the curing machines at the same time, so having them both operating off the same power supply was very convenient. Not to mention that both machines were sized large enough to wash and cure models from any Elegoo printer up through the current size king, the Saturn. ELEGOO has an even larger printer, the Jupiter, coming to Kickstarter next month, but at this juncture, it’s hard to say if the Mercury X Bundle will accommodate prints from the Jupiter’s 12.8″ build plate.
As of this writing, both the Mars 3 and Mercury X Bundle Washing and Curing Machine are sold out from their initial preorder on the ELEGOO website. I fully expect ELEGOO is working hard to get more of these new machines built, as there’s sure to be high demand. The Mars 3, with an MSRP of $300, is a phenomenal printer, as you can see from the models I’ve produced. And at $150 for the Mercury X Bundle, the washing and curing machines will make your resin printing workflow much more efficient and convenient. You can also keep an eye on the ELEGOO store on Amazon for these machines to hopefully become available soon.

I highly recommend both the ELEGOO Mars 3 and the Mercury X Bundle Washing and Curing Machine. Using all three machines, you’ll quickly be producing some amazing, highly detailed 3D prints.