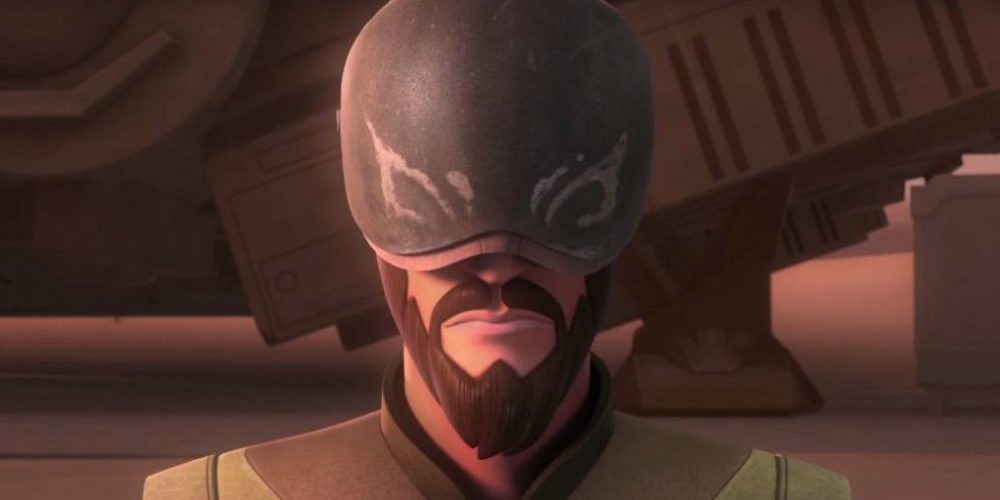
 When I saw the first episode of Season Three of Star Wars: Rebels, I knew that my next cosplay would be Kanan Jarrus.
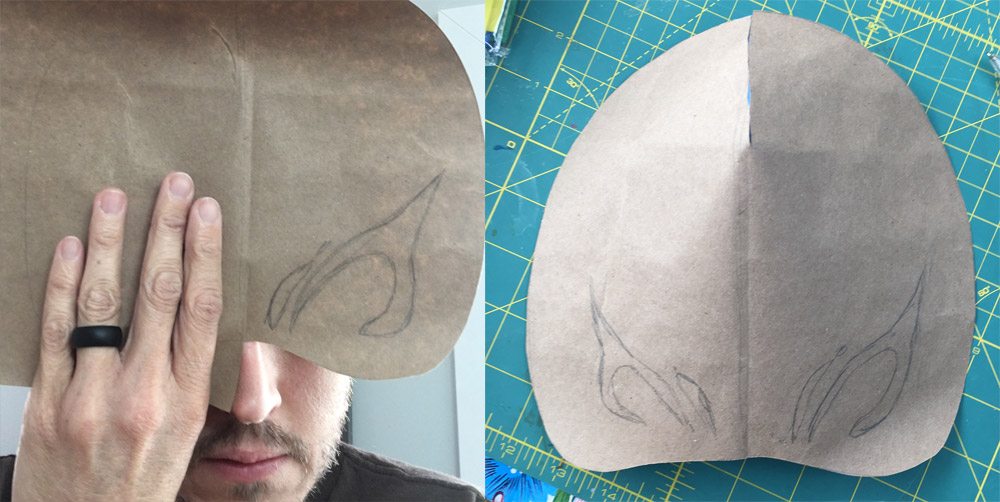
I’d long been wanting to do a Kanan cosplay because he has a great costume with cool armor, but I’d been postponing it. Seeing his new look with the mask really clicked with me. Before the first episode was even over, I was sketching out a template for the mask on butcher paper.

Once I was happy enough with my paper template, I transferred it onto a scrap piece of EVA foam (an old floor mat from my scrap bin. Floor mat EVA is seriously the cheapest foam you can get to do prototyping and templating with) and did a quick prototype. The shape and size wasn’t quite right, but overall, I was pretty happy with the design.

Once episode two aired, I took a bunch of screen shots and zoomed in to refine the shape and capture more of the details. I decided floor mat EVA would be too thick and did my next prototype out of 6mm craft foam instead. I was much happier with the thickness and overall shape and moved forward with it.

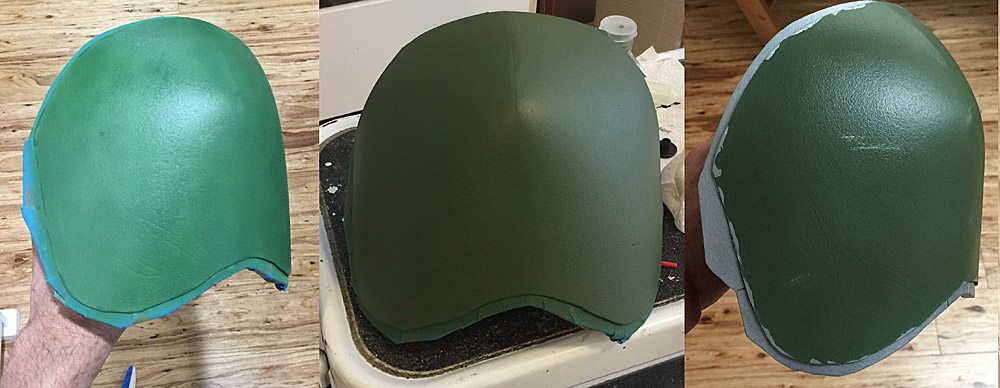
Kanan’s mask has two different thicknesses, so I actually made my mask one thickness and cut it to the size and shape of the bigger of the two layers. I then heat formed the foam to get the right curvature in it and glued it using Barge (the best foam contact cement out there). You can see in the photo that I had the lines drawn for the inner thicker layer from the beginning.

Once I had the mask where I wanted it, the next step was to make it look two-layered. Using a technique I learned from Bill Doran (from Punished Props), I cut the outer rim of the mask and then offset it about a quarter-inch, then hot glued it around the inner rim. This instantly made it look like I had a two-layered mask and both layers fit together perfectly. The next couple of steps are my standard steps for any EVA foam build–heat seal and coat. I just use a standard heat gun to heat seal the foam. This helps make the foam less porous and absorbent, which means easier coating and painting later on. I then did a handful of light coats of Plasti Dip.

Once the Plasti Dip was all dried, I did a couple of coats of Rustoleum Metallic silver as my base metal coat. I didn’t care too much about using a nice metallic paint since I knew I’d be covering most of it. I then tried something completely new for me. I knew I wanted to do some chipped and scratched effects in the green paint, so I got my hands on some Micro Mask, which is a liquid masking product. I painted it on where I wanted metal to show through the green (that’s what all the blue is). I added not only chips around the edge, but a few chips and scratches across the face as well. The idea is that once you put your paint over it, the mask can just be peeled and picked off.
I masked off the outer rim with masking tape and mixed up my own custom color for the mask. The first coat, the green was a little too bright for my taste, so I tweaked the mixture a bit and then put a few more coats of paint on with my airbrush. What I didn’t expect was that the liquid mask was so thin, that after painting the green, I couldn’t figure out where I’d put the mask on! So I carefully went to work with my X-acto knife. I lightly scratched all along the outer rim until I found a bit of mask and then peeled it off. I didn’t even try this on the face of the mask. I just used my blade to make my own scratches and scuffs.

Sorry for the lack of in-between pics here, but next I hand-painted the Jaig eyes on the mask and did some weathering using some weathering powders (soot, sand, and rust) as well as a mix of acrylic paints washed over everything. I then sealed it all in with a clear coat.
It was, of course, at this point that I realized I’d forgotten to do the side “rivets.” These seem to be the part of the mask that magically attaches to Kanan’s face. I took a sharpened piece of brass tubing and cut out two holes in the foam. Using the same technique as I used for the entire edge of the mask, I poked the little cut circles out about a quarter-inch and then hot glued them in place.
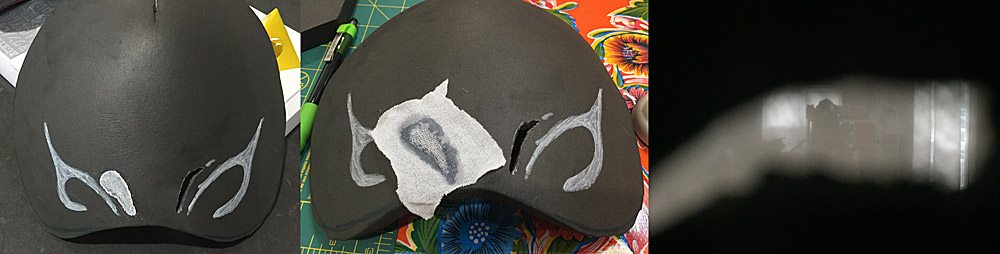
With the mask looking excellent, I decided I had two choices to make–would I modify the mask to give myself more visibility, or would I keep the mask solid and use either a helper to walk around or just take the mask off when I wasn’t standing for photos. I am planning to give myself the scar and wear white “blind” contact lenses, so even with the mask off, I’ll still look in character. But it would be nice to be able to walk around with the mask on as well. I did a couple of tests using white nylon in the Jaig eyes on my prototype mask. While I could get pretty good visibility out of it, I couldn’t figure out a way to get it to look good, so, for now and my first con, I’m going with the solid mask approach.
Once I have the rest of the costume done, I may circle back around and make a mold of the mask. That will let me cast it in clear resin and then I can use a reflective coating of some sort to allow more visibility while still making the mask look clean. That will be my 2.0 mask!
I have also started looking into the Rebel Legion. I’ve always been fascinated by the 501st Legion and doing my first Star Wars costume has been a great excuse for me to finally take steps in joining up and giving back to the community! While I can’t become a full member until I have at least one approved costume, I’ve already hopped onto the forums and met a few great people that have helped me with some of my Kanan costume (you’ll hear more about that in future parts of this write-up).
I hope you’re enjoying the detailed build write-up. Stay tuned for the continued saga as I work to complete my Kanan cosplay. You can also follow along in more real-time over on my site or by becoming a patron of Billythebrick Cosplay.


How do you attach it to your face?