

I’ve been seeing polymer clay on social more and more. One of the social accounts that has stood out to me the most has been The Clay Impress, an LGBTQ-owned business based in Hawaii. Their beginner-friendly tutorials and unique tools had me wanting to jump in and see if this could be my new hyperfocus (and if I could learn how to make trinkets for my growing dragon hoard, I wouldn’t complain).
They sent me a selection of cutters and tools to try out and see if this could be my next hobby or addition to my small business.
What I Received:
I was surprised at the wide variety of items The Clay Impress sent me to play with. A few were intimidating, but I had faith that their tutorials would see me through.
Cutters
- Dragon Bookmark Charm Polymer Clay Cutter
- Book Stud Cutters
- Soaring Dragon Mirrored Polymer Clay Cutter Set
Texture and Screens
- Dragon Scales Texture Roller
- Botanical Bookshelf Silk Screen
- Mushroom Meadow Transfer Sheets
- Vintage Book Text Texture Sheet
Tools
- Earring Post Embedder Kit – Embedder for 4 mm Posts
- Thickness guides, 1.5 mm
Let’s see how these tools hold up in a beginner’s hands.
My Setup
Since I only recently joined this new world of crafting, I have a simple but efficient setup. Here is my humble list of tools:
- Sculpey Premo clay – colors: white, black, blue, yellow, and fuchsia
- Bathroom tiles in various sizes – These provide an easy-to-clean work surface and can go straight into the oven.
- Clay Pasta Machine – Not required, but a huge help when mixing your colors.
- Basic Clay Tool Set – Get something with thickness guides, roller, and at least one cutting tool.
- Toaster Oven – There is no harm in using your regular kitchen oven for baking clay, but this prevents me from wasting electricity on small projects.
Four Tips Before We Begin
- Clay picks up everything. Make sure your surface is clean so it doesn’t wind up in your project.
- Put some cornstarch on a plate or in a bowl to dip your tools in to prevent them from sticking to your project. You can use a soft brush to brush away the cornstarch after you cut out the design. I also learned you can dust the clay itself before using your cutter.
- Thickness guides are essential to making sure your projects are even. Play with the ones that you get to see which ones you like. Some might be too thin for one project, but perfect for another. These are easy to make yourself.
- Get an oven thermometer so you can monitor the temp. Each clay has a specified baking temperature; an oven thermometer helps you check the actual temperature.
Project Time
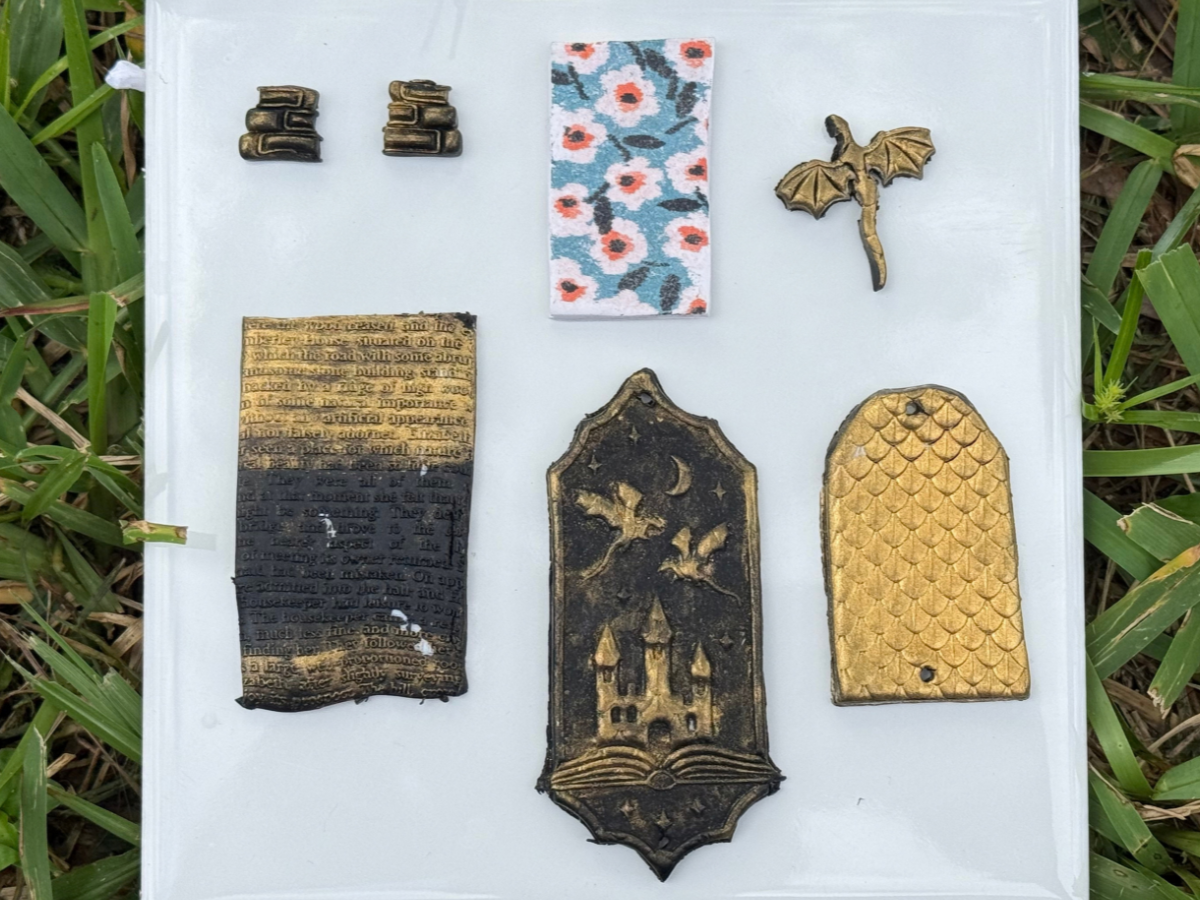
I had a lot of fun going through each of the products and seeing what they could do. As I was doing my testing, I could see the possibilities for both personal projects and for my business. Let’s get into it.
Color Recipe PDF
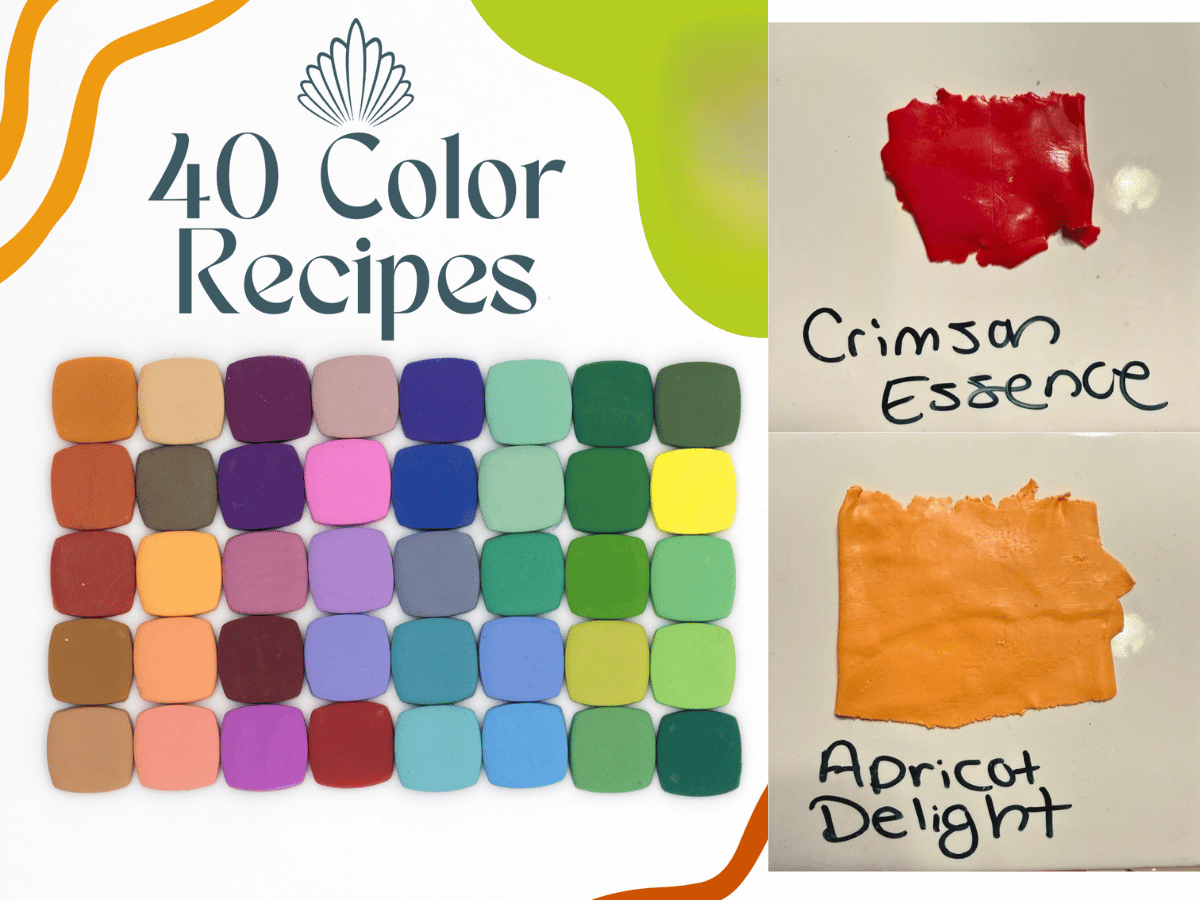
Price: $24.95
The color recipe PDF includes 40 easy-to-follow recipes, and I like how The Clay Impress includes a couple of different versions of the file (the address labels file is great for organizing your colors after mixing). Considering the time and money these recipes could save me, this PDF is well worth the cost. Just keep the main colors on hand (white, blue, yellow, and fuchsia), and you are set.
For my first color mix, I went with Crimson Essence. It calls for three parts fuchsia and one part yellow. The size of the parts doesn’t matter, as long as you use the same thickness and size for each color. To get even thickness, I placed thickness guides on both sides of the clay and then put my roller over it. The guides prevent the roller from flattening the clay more than you want.
The color came out just as the PDF showed, and I didn’t notice any color change after it was baked.
Side Note: I was super happy with the tiles because they worked great as my work surface and then went straight into the oven. I also used a dry-erase marker to write on the tiles so I would remember what color I was making.
Dragon Bookmark Charm Cutter
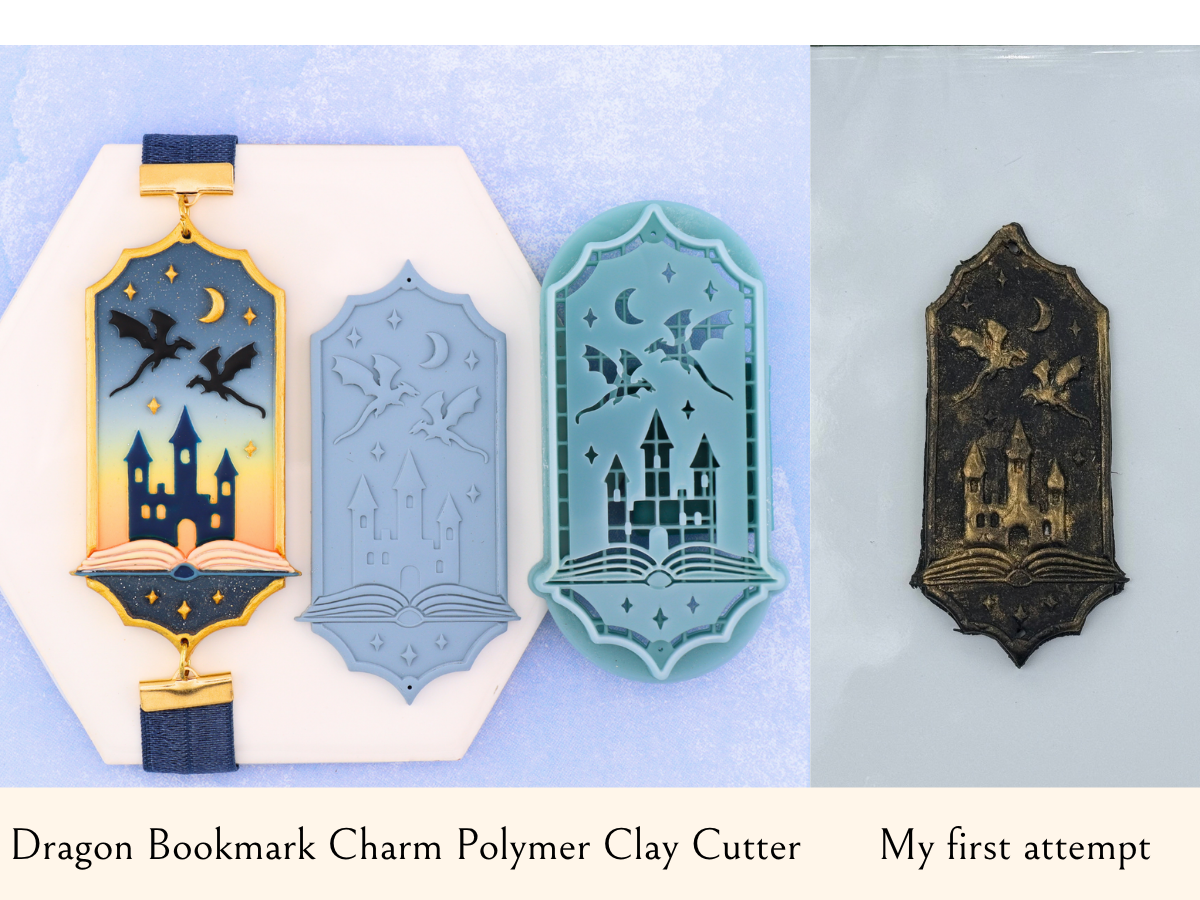
Price: $12.20
This is the largest cutter I tried, and I love the detail on it. I used a small piece of wire and the built-in guides to open the small holes before baking. The details stood out when I dry-brushed some gold mica powder over the design before baking. After baking, the details were still sharp and looked great. This was the first project I did with a cutter, so I have some learning to do. I’m confident I’ll get there because The Clay Impress has some amazing tutorials on their socials and their website.
Book Stud and Soaring Dragon Cutters
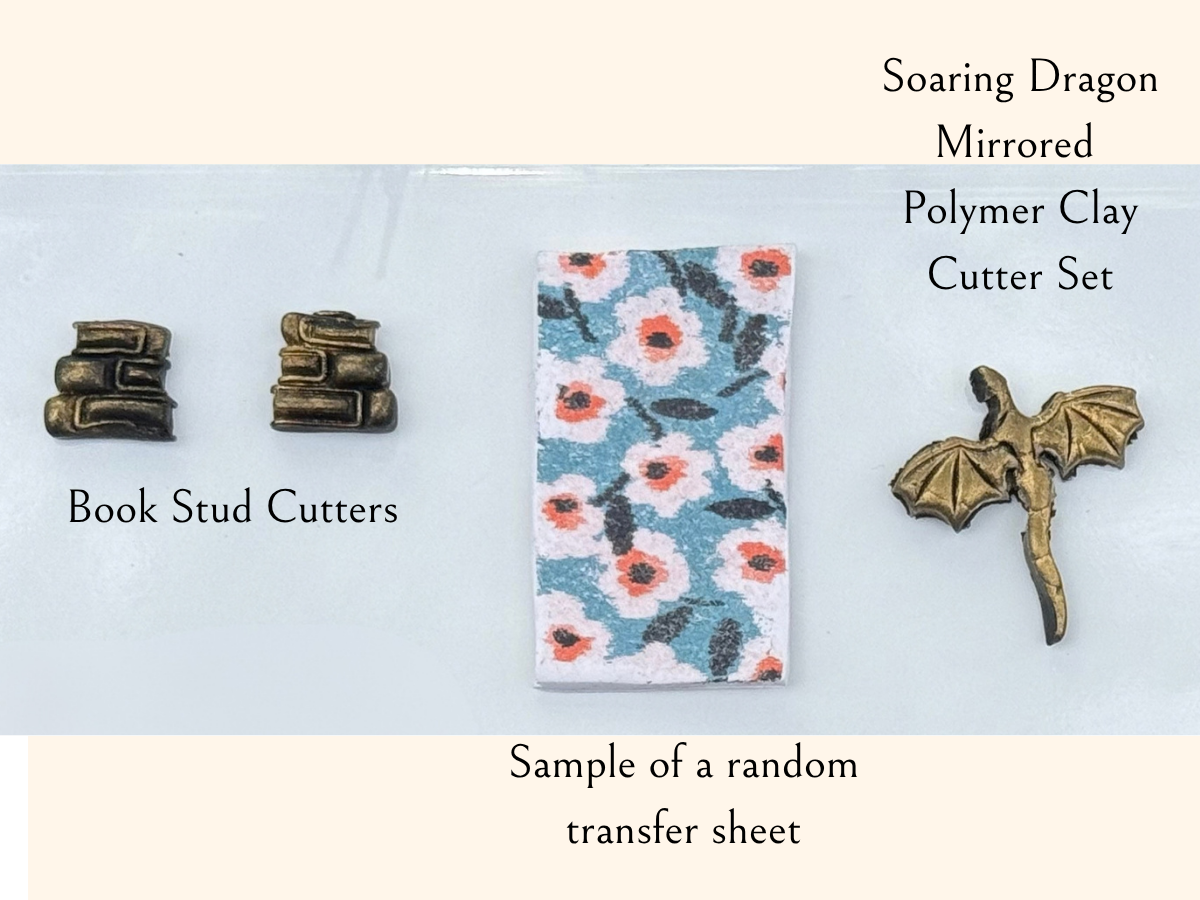
Price: Book Studs – $7.20, Soaring Dragon Cutters – $9.30 (3 cm), $11.00 (4 cm), or $12.65 (5 cm)
The Book Stud and Soaring Dragon cutters are just the right size for earrings or accent pieces for other projects. I’d like to explore using liquid clay to fill in the details and really make them stand out. Both of these were the perfect size to use with the 4 mm Earring Post Embedder tool.
4 mm Earring Post Embedder
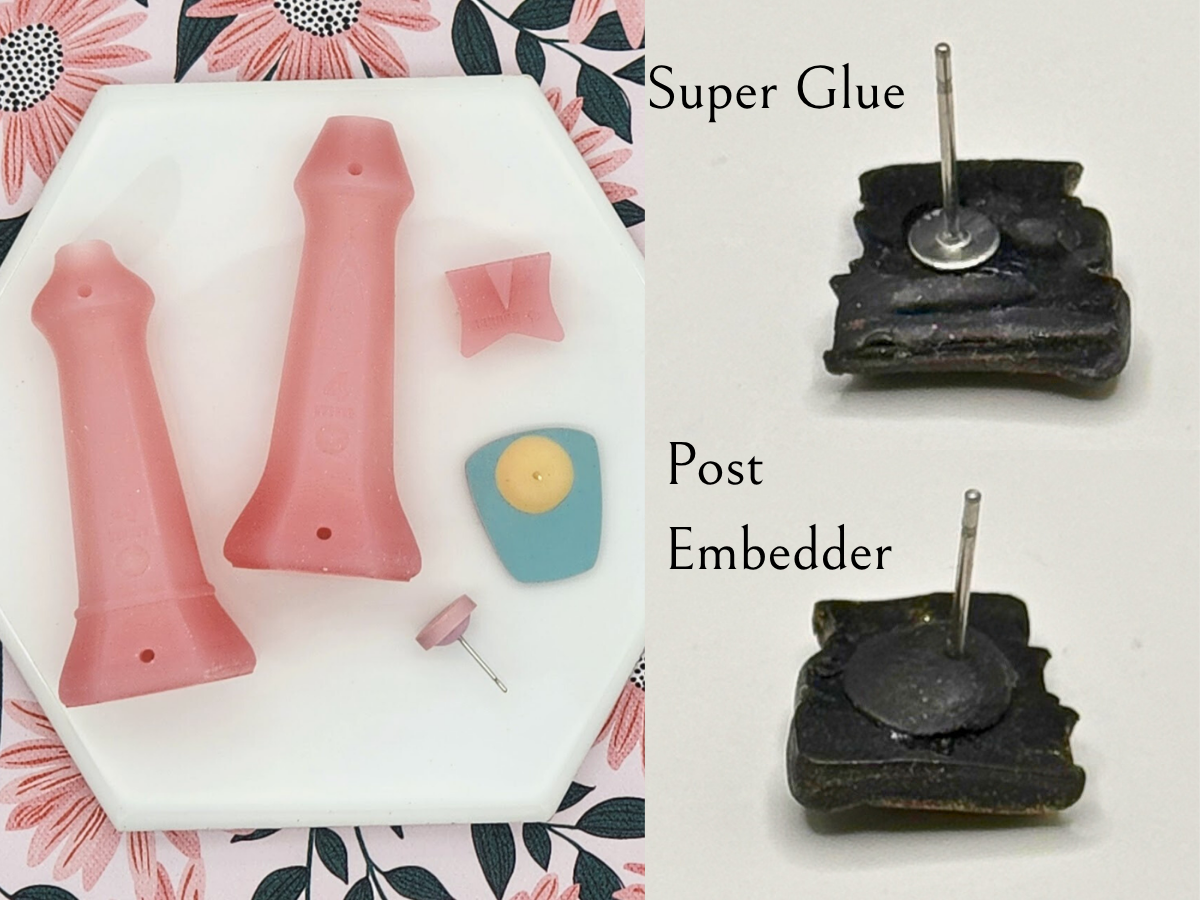
Price: $24.90 with 1.5 mm guides; $19.95 without
The Earring Post Embedder is a signature item with Clay Impress and one of the things they are known for. This embedder tool allows you to secure your earring post to the clay stud with clean perfection. I recommend getting it with the thickness guides, even if you have some, so you can keep it all together. The steps are as easy as 1…2…3 and give a professional look to the project. I especially like how the embedder has the post size on the tool so you can measure your stud against it to make sure you grab the right one.
Dragon Scales Roller
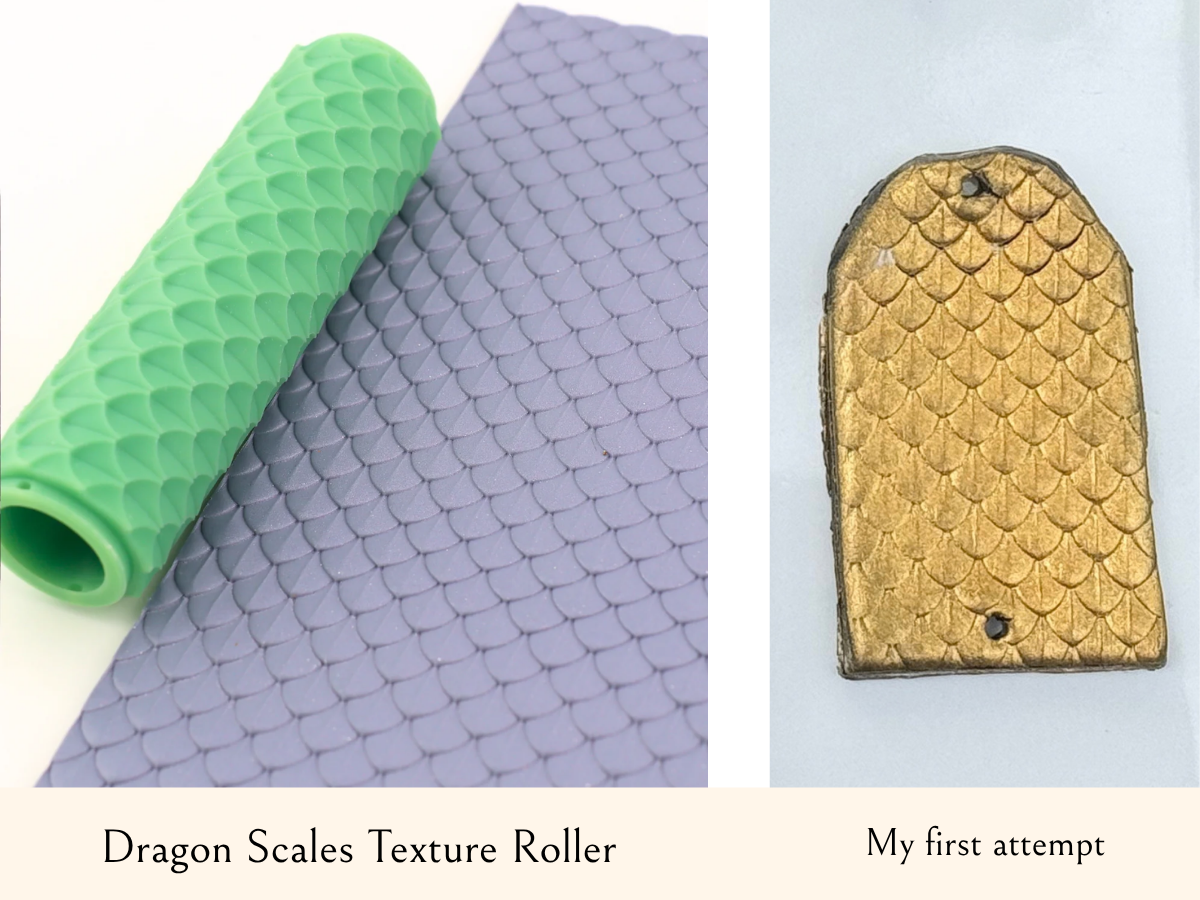
Price: $15.95
The Dragon Scales roller gives you the ability to put a texture over the clay before cutting. This one comes in a couple of different sizes so you can get a different size scale depending on your project. I learned quickly to roll over my clay in one direction and only once, or it could give a glitched effect. I really liked doing this one over the black clay and dusting it with the gold mica powder because it brought out the design. If you want it more subtle, you can leave it without the mica powder.
Vintage Book Text Texture Sheet
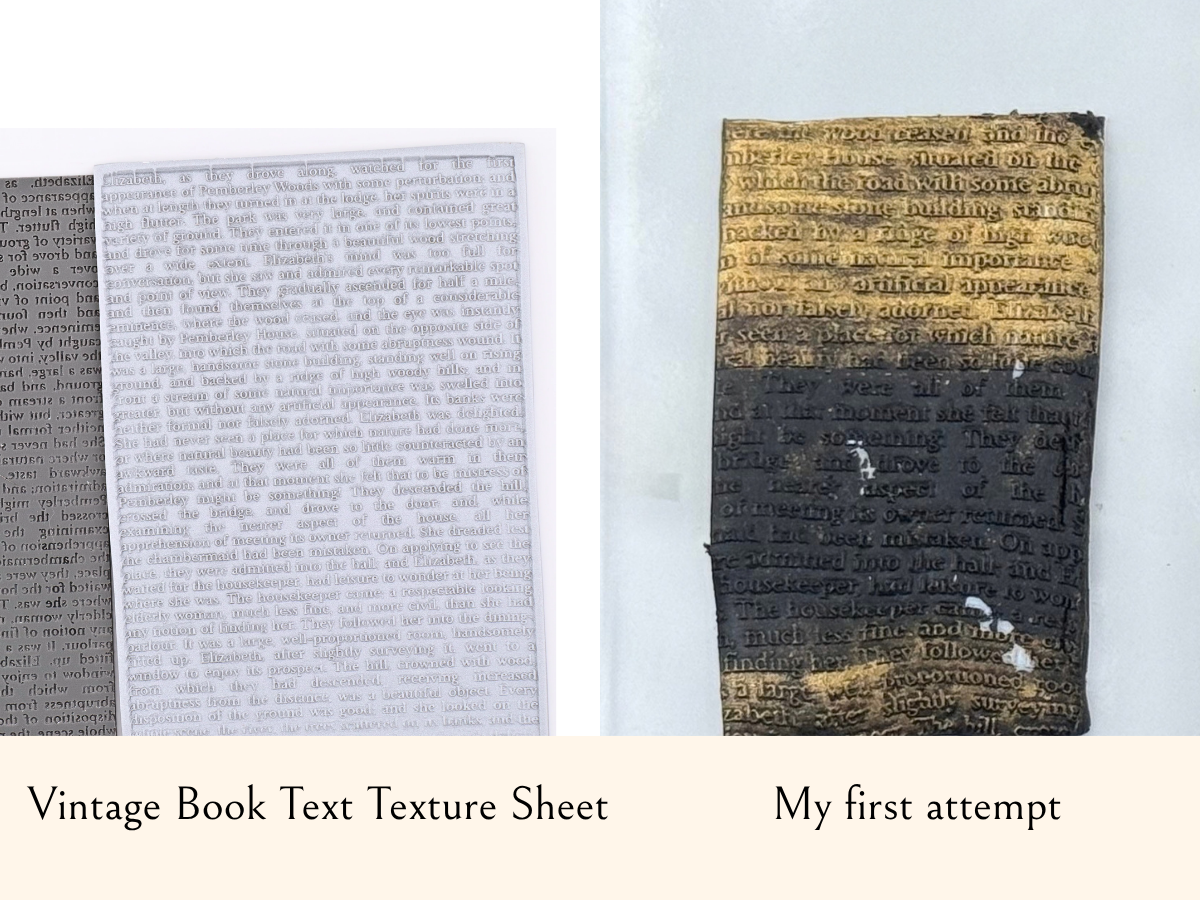
Price: $12.95
The Vintage Book Text texture sheet is similar to using the scale roller, but it gives you the entire design in one shot. The text is taken from Pride and Prejudice, but the words are so small that if you’re not an Austen fan, it won’t matter in the final project. After rolling out your clay in the desired thickness, you place this on top, roll over it, and peel away the texture sheet. The impressed words were easy to read. Leave it blank for the texture or dust over it with a mica powder to bring more attention to the words themselves. This works great as a background for the Soaring Dragon cutter.
Remember when I said that clay will pick up everything and to make sure your work surface is clean? That’s why I have those white marks on my project…whoops.
Botanical Bookshelf Silk Screen

Price: $11.95
My experience with silk screens is limited. After you roll out your clay to the desired thickness, place your silk screen, shiny side down, on the clay. Put a small amount of your acrylic paint at the top corner and, using a squeegee, gently press the paint into the silk screen and drag it across. Once the paint has covered the silk screen, gently pull it away and immediately rinse the silk screen with cool water. My design showed up beautifully on the white with green paint, and after about 15 minutes under a fan, it was dry enough to bake.
Mushroom Meadow Transfer Sheet
Price: $9.95
Unlike the reusable texture sheet and silk screen, each piece of transfer paper is used once. You can use the entire sheet at one time, or cut out the size you need for that project. The process is similar to putting a temporary tattoo on your skin.
Place the design face down on the clay and gently press it into the clay to make sure it sticks. Get a small cup of cool water and, with the clay at a tilt, rinse the paper backing off. The paper will look kind of like foam and dissolve, revealing only the design. I found this to be oddly satisfying and fun. Once it’s dry, you can cut the clay with any of your cutters to have a printed-on look to your project.
Final Verdict: Does The Clay Impress Impress?
Yes. The Clay Impress lives up to their name and definitely impresses me with the quality of their products, ease of use, and especially in their instructions and tutorials for use. A few things I could figure out for myself, but when I got stuck on others, their website had easy-to-understand (and easy-to-find) tutorials that led me through the process. It’s no wonder I see them so widely used by makers on Instagram and at the events and markets I attend.
From a small business owner’s standpoint, they are a company I’m happy to use with my own products to sell to my customer base. And I’m not the only one to feel that way. I met Wise Guy’s Art and Designs at an event, and they gushed over The Clay Impress for the quality and variety of its cutters and tools (if you are looking for a cool dice dragon, check them out).
Stay tuned to GeekDad for my next post, Crafting Through the Holidays, which will go live in November. I’ll be covering more of The Clay Impress products that you can use to make gifts for your friends and loved ones.
You can explore the rest of The Clay Impress’s cutters and tools on their website.
Disclaimer: GeekDad was given a review sample.

