The Makera Carvera Air is a great way to bring the power of CNC and Laser to your desktop in a small form factor that is easy to setup and easy to use at a great cost. Makera offered to send me their Carvera Air to put through its paces, which I was more than happy to accept as I’ve been needing a small form factor CNC to add to my workshop that isn’t a pain and doesn’t make a huge mess.
Unboxing
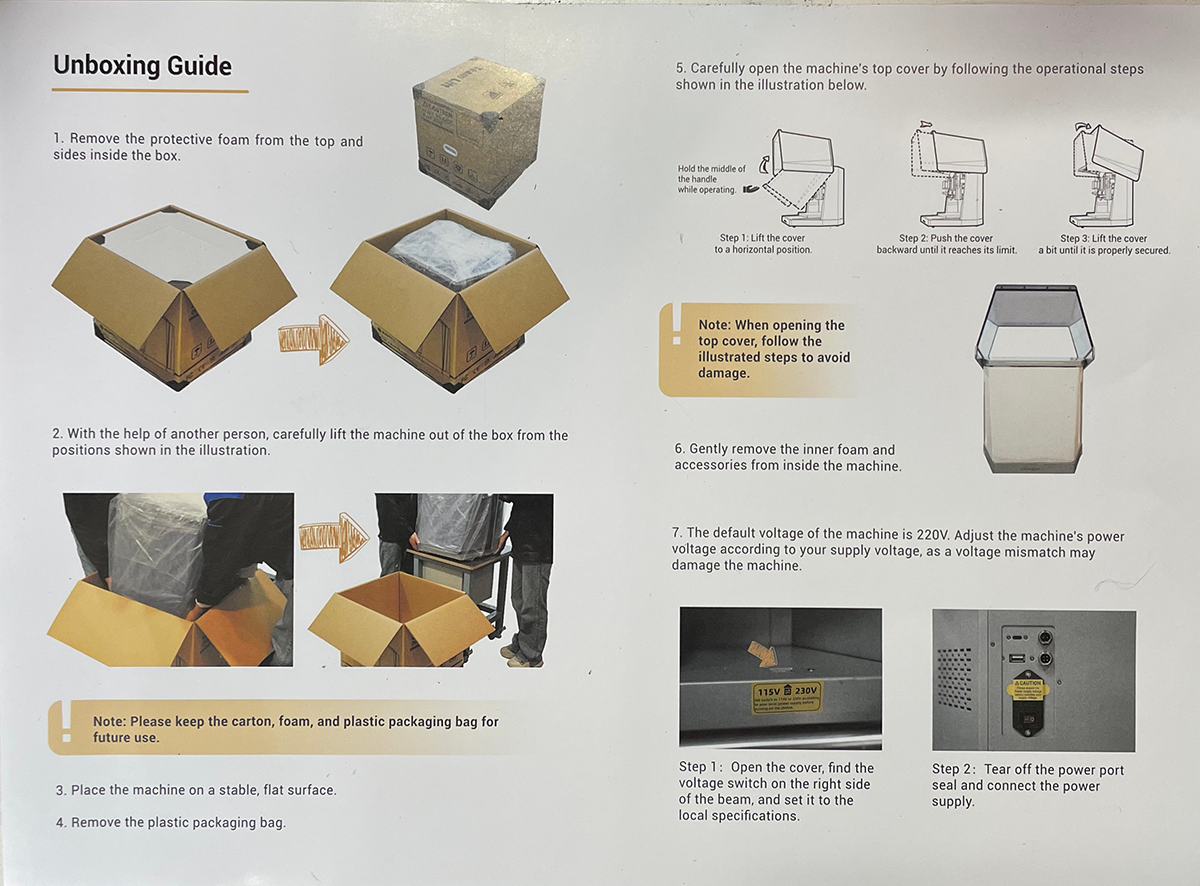
The first step was unboxing this beauty and beast. While it isn’t huge or extremely heavy (about 65 pounds and roughly 20 in x 18 in x 18 in), it’s definitely a two person job to at least get it out of the box and onto your table. Upon opening the box, the first thing you’ll see is a quick unboxing guide. This was a good indicator on how easy the machine is to setup and use and how Makera guides you the whole way.

Beneath the Unboxing Guide were some decals and stickers, extra gaskets for the bottom rails, the waste boards, and two books – the Instruction Manual and the Examples Guide.

With the top goodies out of the way and the top piece of styrofoam removed, the hard part, with most big machines in boxes, was getting the fully wrapped Carvera Air out of the box. Thankfully, with my wife’s help, we managed to get it out of the box fairly easily.

And voila! The Carvera Air placed on my table and the outer plastic removed.
Kits

Inside the machine itself were five individually wrapped boxes – Accessories, Tool Kits, Materials, the Laser Module, and the 4th Axis Module. As someone who adores organization, I really love the way these kits are packaged. Each box not only has an illustration of the essentials inside, but the side panel lists out all of the included parts. Because I have these stacked on a shelf above my Carvera Air, it’s extremely helpful as I can see what is in which box without having to take them all down and rummage through them every time I need something.
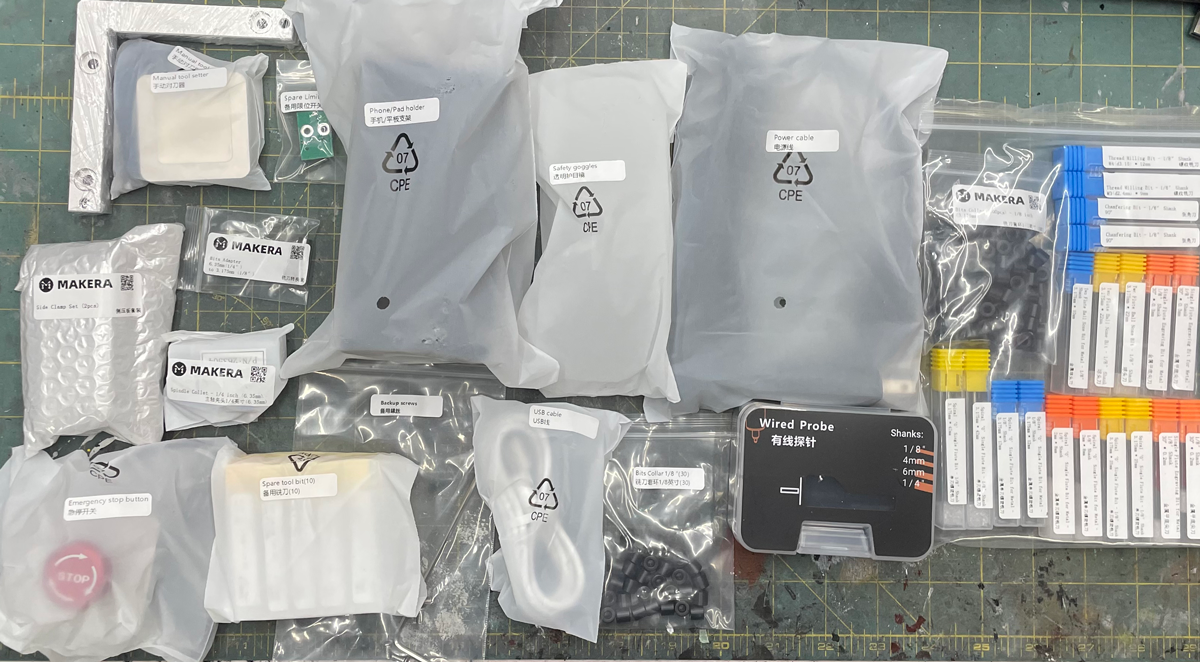
The first box you need to get into to setup the Carvera Air is the Accessories box. I laid everything ou on the table, but in reality, you only need a handful of items from this box to get started – the power cable and the wired probe, with the E-stop and phone holder being optional.
Tools
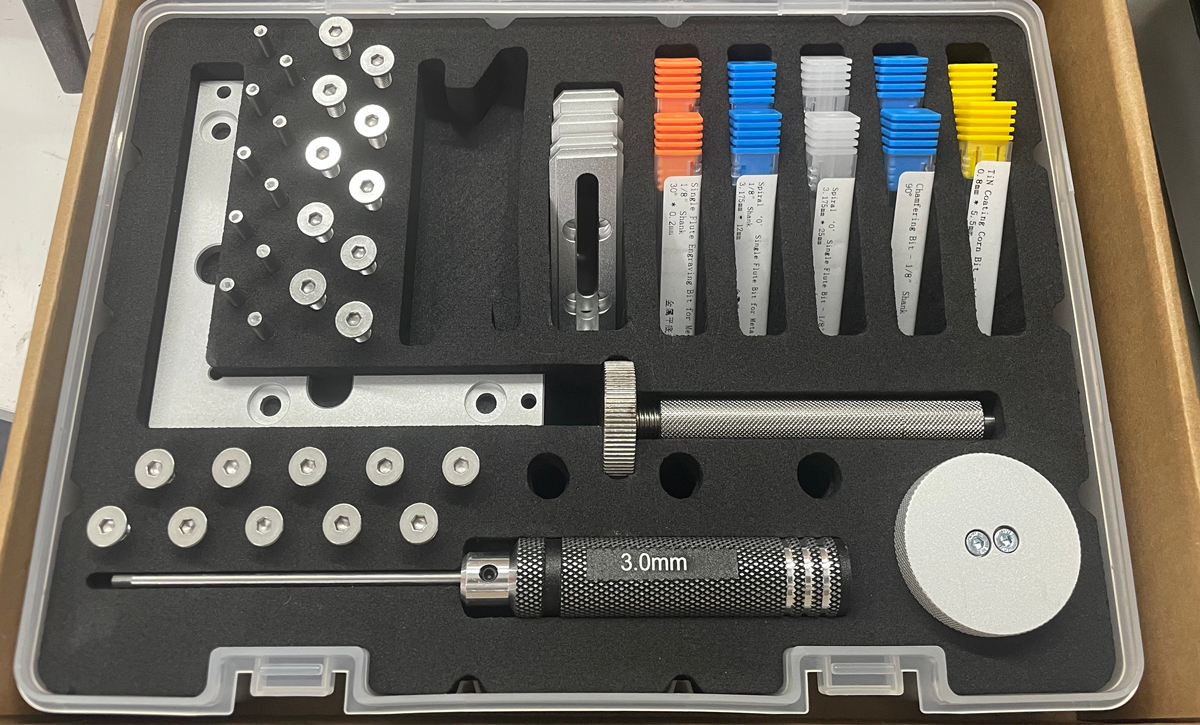
Did I mention I love storage and organization? Inside the Tools cardboard box is a plastic, latching tool box with a beautiful insert with cutouts for the hex driver, the collet tool, a variety of metal pegs and screws, the material holders, and most common bits.
Setup
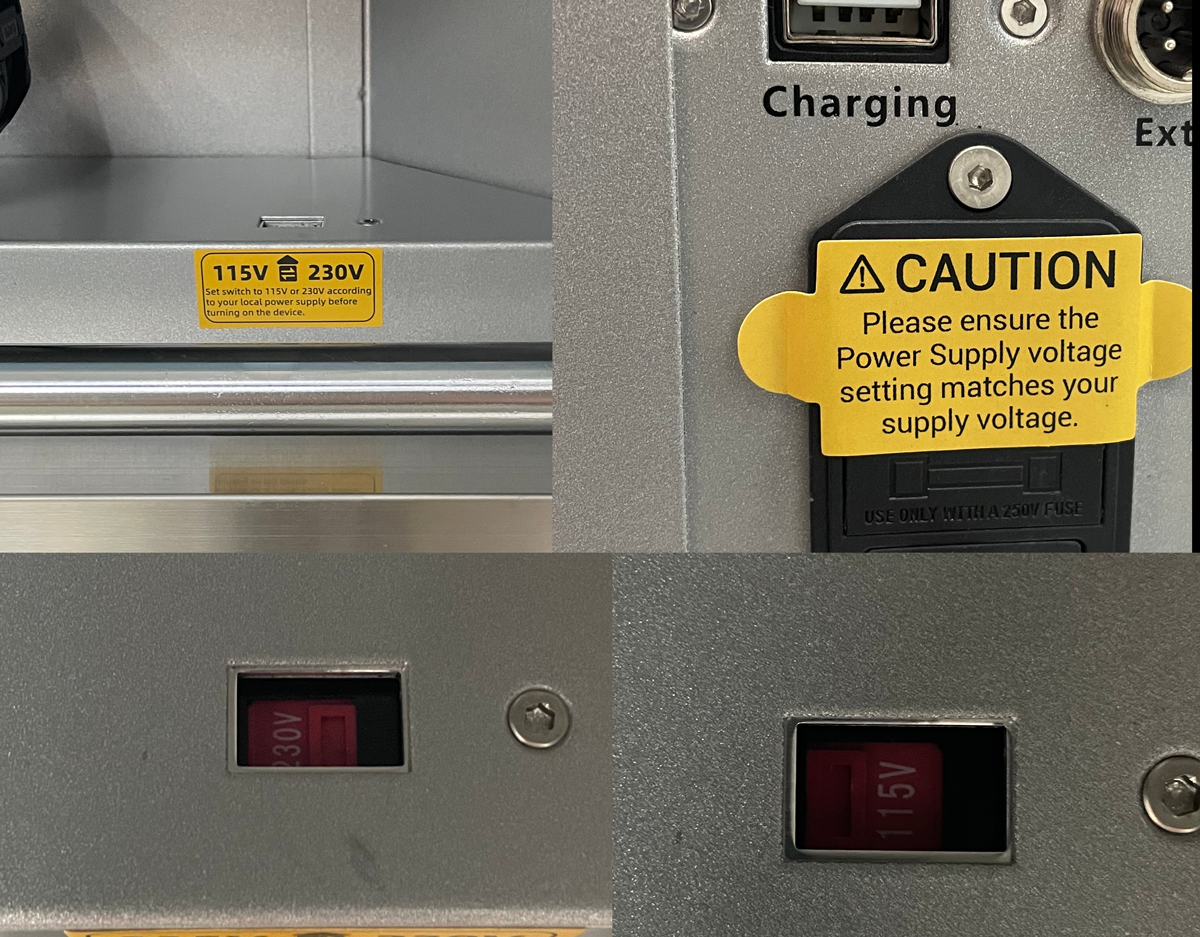
The first and most important step in setting up the Carvera Air is setting the voltage. There is a bright yellow warning on the Unboxing sheet, another inside the machine near the voltage switch, and, in the event you missed both of those, one covering the power supply plug so you can’t even try to plug in the machine without doing this crucial step (or completely ignoring it at your own peril). My machine was set to 230V by default which would not have been good, so after switching it to 115V, I was off to the rest of setup.
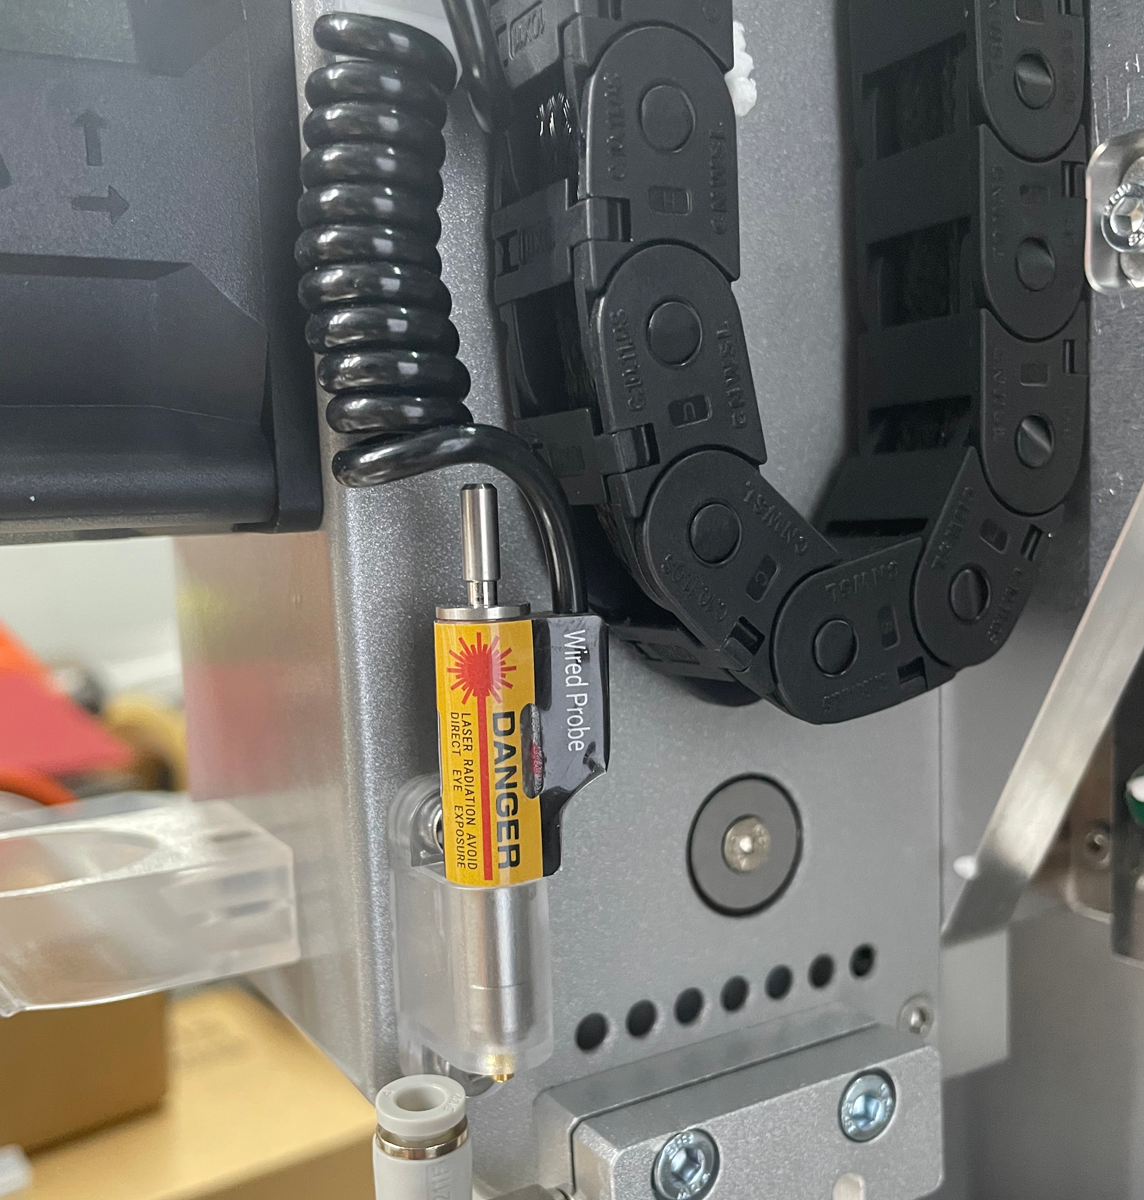
The Wired Probe is a hard requirement as it is helps determine the operation of the machine in almost all scenarios. While the instructions say it needs to be installed, mine came already installed. The Wired Probe detects the height of your material and also helps with ensuring level operations if you have a material that is not exactly level. It also, optionally, shows you the outer bounds of your job before you start it so you can ensure you didn’t accidentally set your work in the wrong spot.
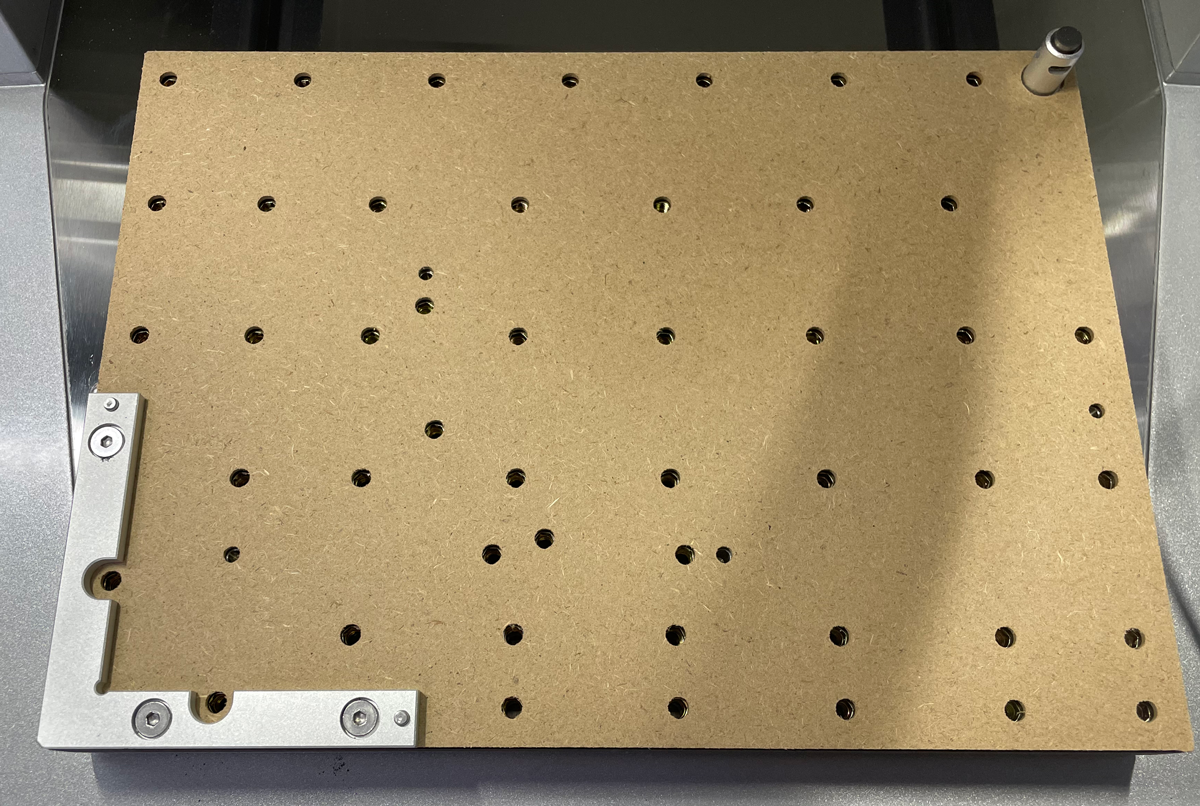
The other absolutely required setup accessory is the waste board and L-bracket. The waste board is what you’ll put your materials on, and, as its name implies, is a consumable. It is designed to take a beating and get carved into and lasered. that being said, I try to cut into it as little as possible, but it helps protect the actual bed from damage when you need to (or accidentally) cut all the way through your material by a little bit. The L-bracket is what will help hold your material in place and ensure a constant starting point that is pre-programmed into the Carvera Air software.
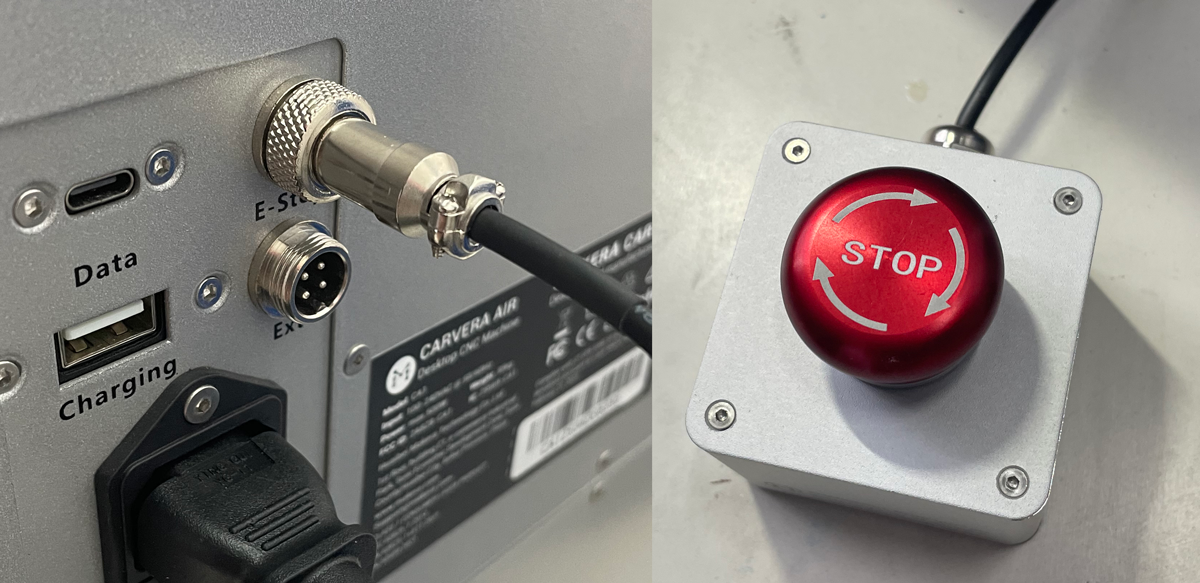
Installing the emergency stop is optional. The machine will function just fine without it; however, I highly recommend installing it. It’s an added safety feature that may save your life, a finger, and eye, or at least your machine some day. I haven’t needed to use it yet, but if I ever do, I’ll be glad it’s there. One note, the button come locked down. To unlock it, turn it and it will pop up. I didn’t realize this and when I first powered on the machine, it immediately alarmed (as it does when you hit the button), and I was worried my button was either faulty, or I’d installed it improperly.

The phone/tablet holder is definitely the most optional setup accessory. If you don’t plan on using a mobile device to control the machine, you probably don’t need the holder. However, I almost never use my phone to control the machine, but it’s such a great phone holder that I use it just to hold my phone every single day when I’m in he shop. It even has a pass through slot so your device can charge while being held in the cradle. The cradle and arm can pivot and rotate in a lot of angles and directions which is also really helpful. It’s very easy to move it from horizontal to vertical as well.
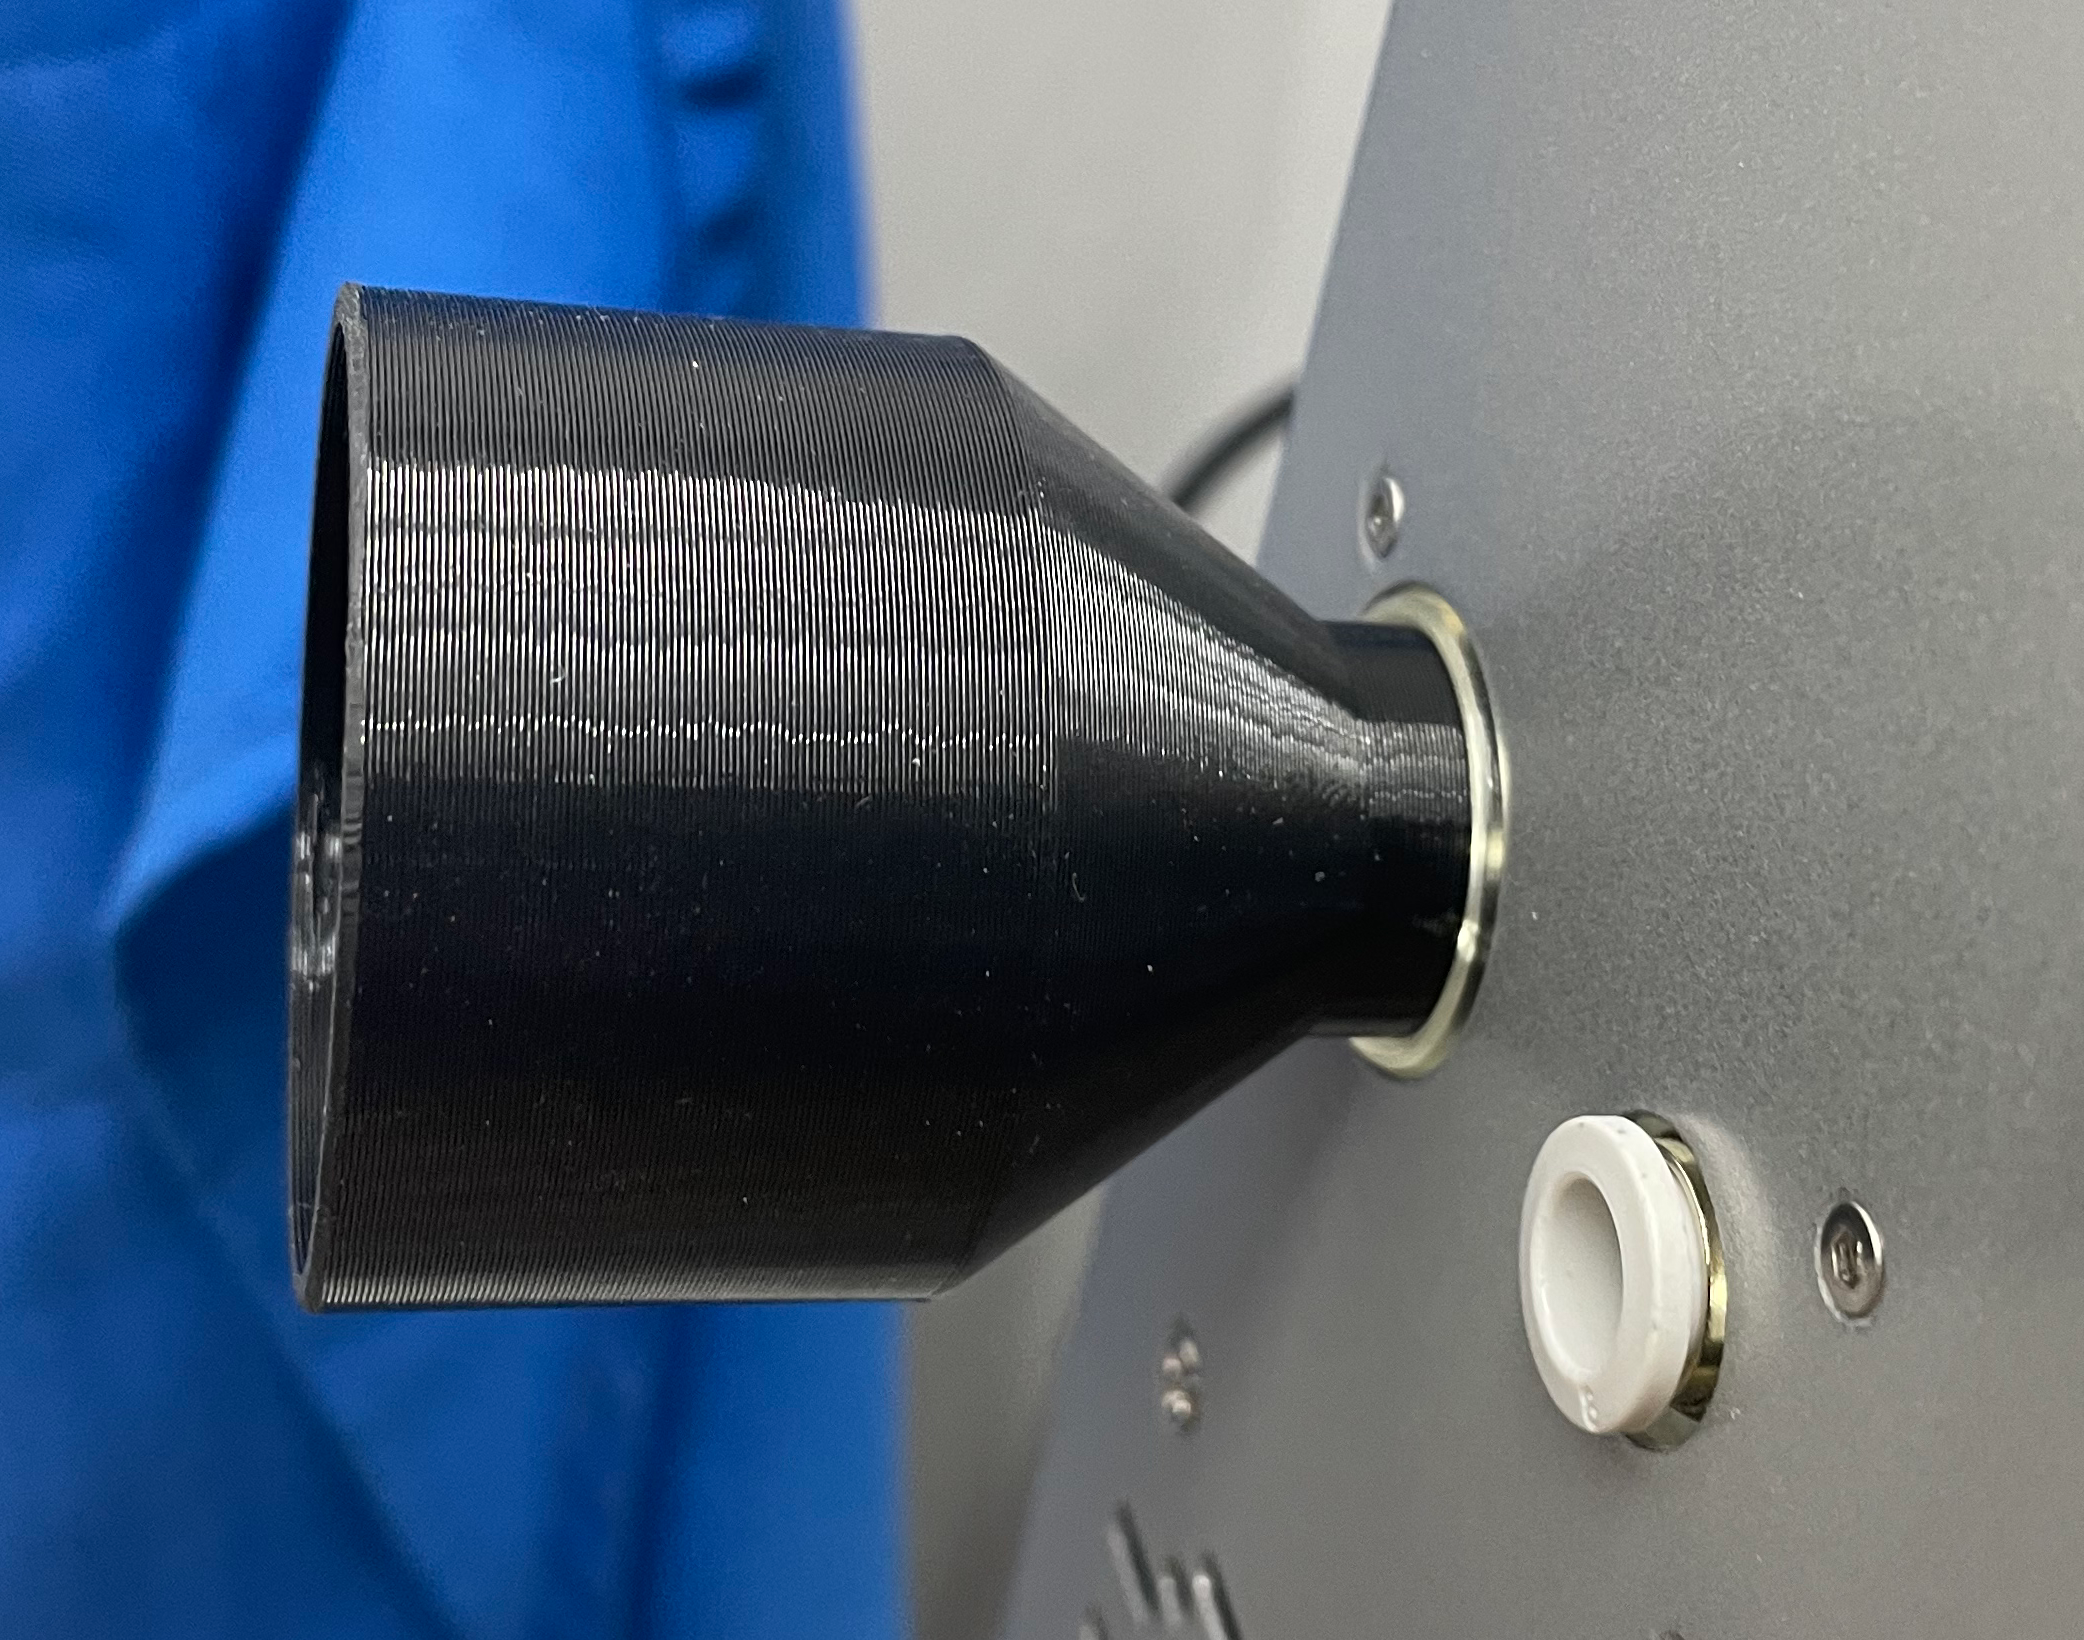
This isn’t an accessory that came with the machine, but since I wanted to use my shop vacuum with the machine, I quickly 3D modeled and printed an adapter for my vacuum hose that fit into the vacuum port on the side of the Carvera Air.
Software
Once the machine itself is all setup, the next thing you’ll need is software to control it. The easiest thing to do is to go to the Makera Software page and download both the Makera CAM software and the Carvera Controller software (and, optionally, the Carvera Controller app for your phone or tablet). The Makera CAM software is where you setup your tools, materials, and what you’re doing before exporting it to a file you then send to your machine via the Controller software. The Controller software, you guessed it, conrols the machine.
Guides
There are a wealth of resources and guides for using the Carvera Air. The included books do a great job of walking you through getting everything setup and, if you prefer having a hard copy of instructions, walking you through the example projects. All of the materials and bits you need for the example projects are included with the Air.
However, if you are a more visual person or like instructional videos, you can find all of the How-to’s for setting everything up as well as all of the examples (plus a lot more) oin their website. In fact, they have an entire Wiki on their website to help you with almost any question that arises. And if you still can’t find an answer to a question or get stuck, Makera also has a Discord with a lot of helpful folks around at almost any time of day.
One additional particular page on their Wiki that I’d like to call out though is the Speeds and Feeds page. While all of the tutorials tell you what speed and feed rate to operate at, once you move on to doing other projects with other materials, this page will be invaluable.
Sample CNC

The first CNC sample (found in the Examples Guide or on the website) uses an epoxy tooling board and two bits – a spiral bit for the rough pass and a single flute engraving bit for the final pass. Step 1 is to measure the dimensions of your material and set it in the Makera CAM software. Then you will want to secure your piece to the bed using the clamps and screws. I probably went a little overboard on my first attempt, but I didn’t want my first try to be a failure!
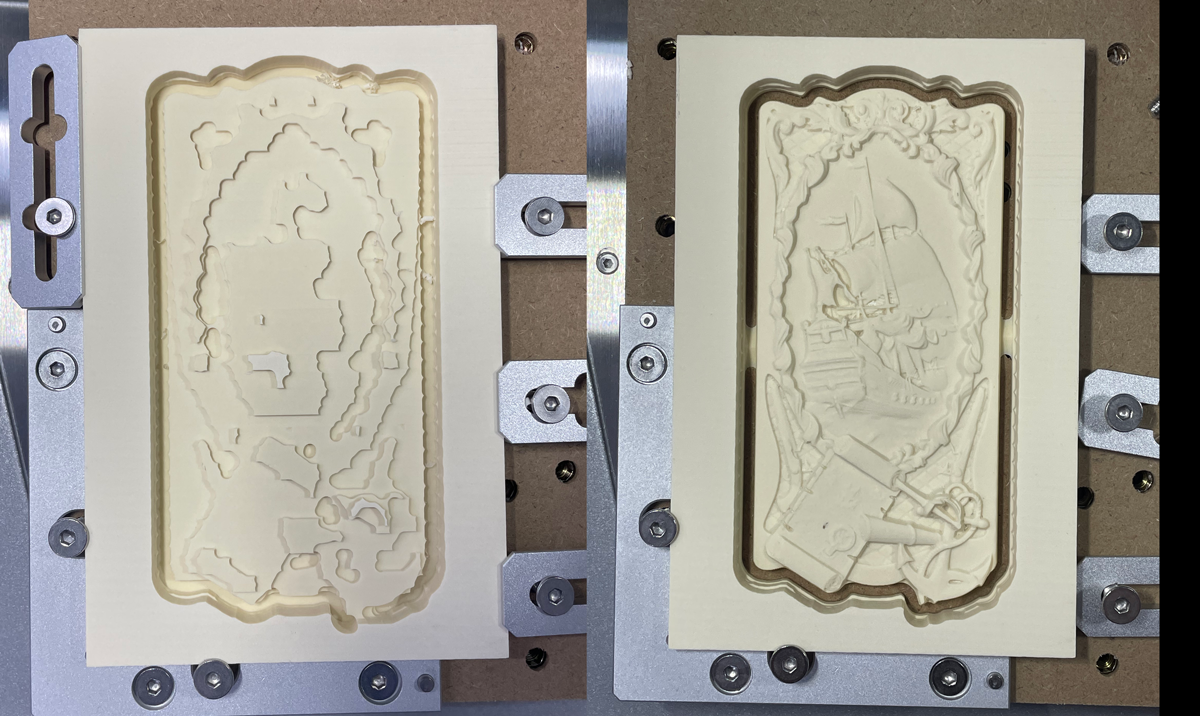
The left image shows what the cut out looked like after the rough pass – if I didn’t already know what the outcome was supposed to be, I’d have been unable to guess what the heck this was. And, on the right, the material after the final pass. I was blown away at the level of detail possible (my very limited, previous experience with CNC machines was for doing large cuts on large material quickly – nothing this delicate and intricate). One of the other great innovations of the Makera Air is the ease of switching out bits. There is a lever that releases the bit and allows a quick easy swap – definitely not something I was used to on previous CNC machines I’ve used.
Laser
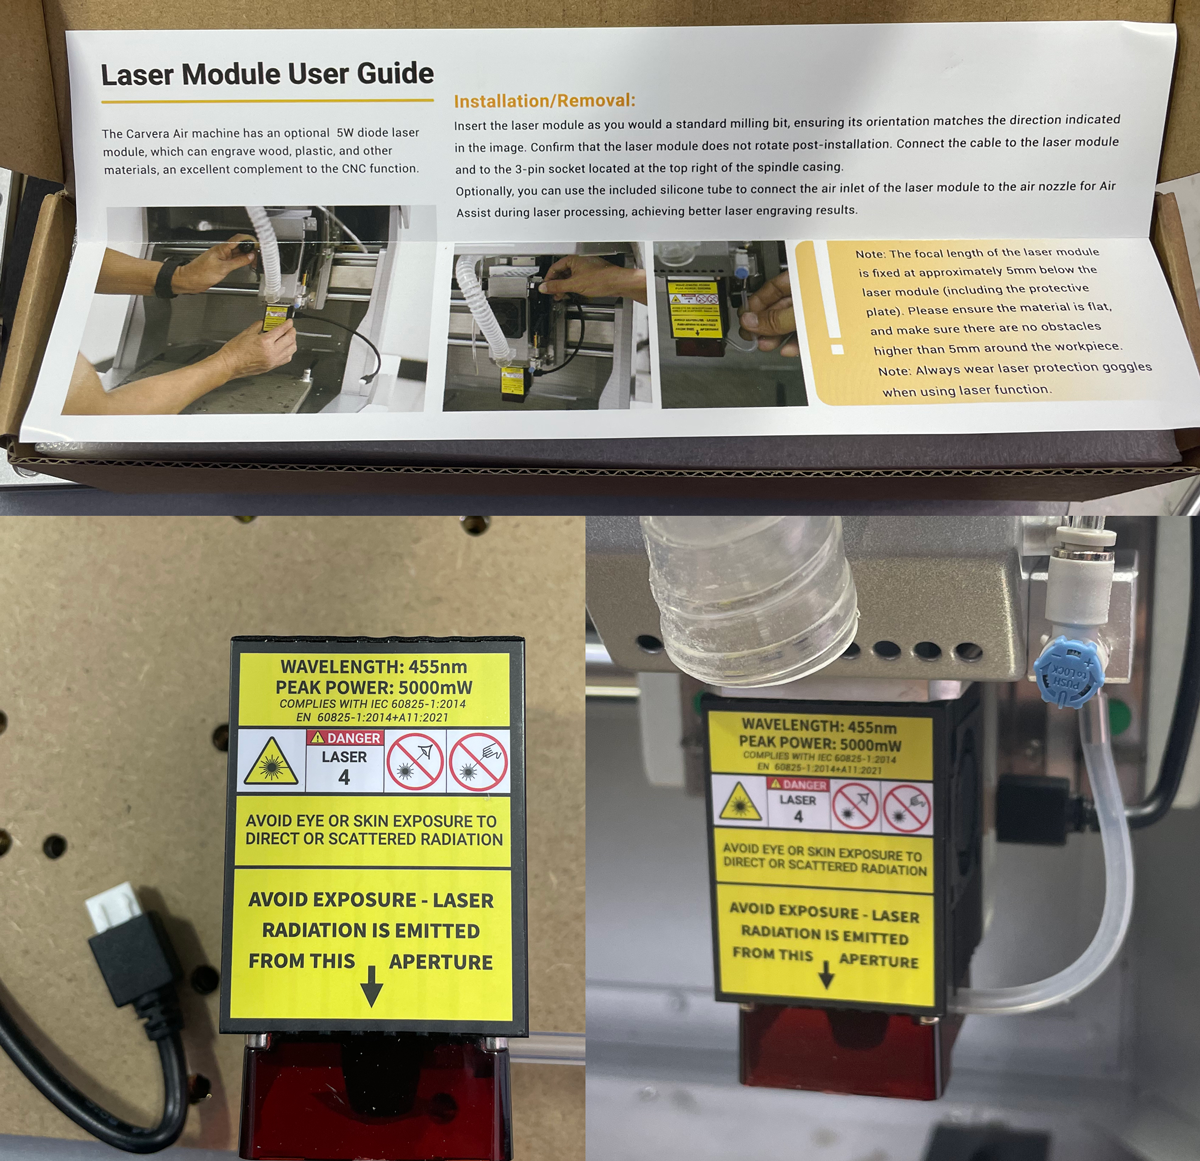
Next up, I wanted to give the laser module a test because LASERS! The laser module is as easy to install as swapping any other bit. Pull down the lever, insert the laser module, raise the lever and it’s locked in place. There is one extra step of plugging in the controller cable, but its an easy quick connect cable – easier than a USB cable for sure. There is an optional air assist for the laser to help keep certain materials from burning too fast. To use it, you’ll need an air compressor and hose that connects to the air port next to the vacuum port.
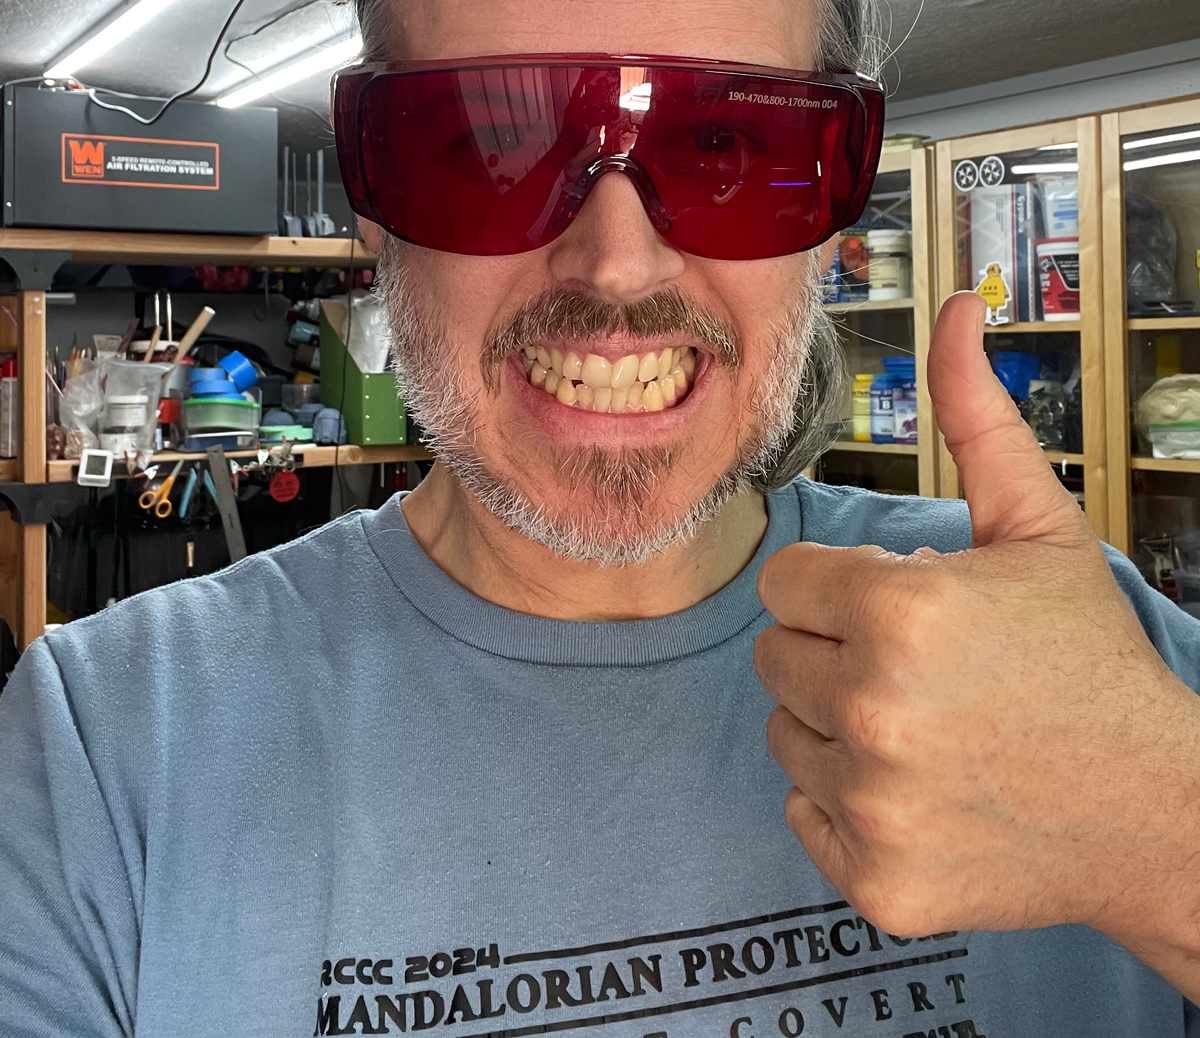
The laser module also includes stylish eye protection so you too can feel like an X-man!
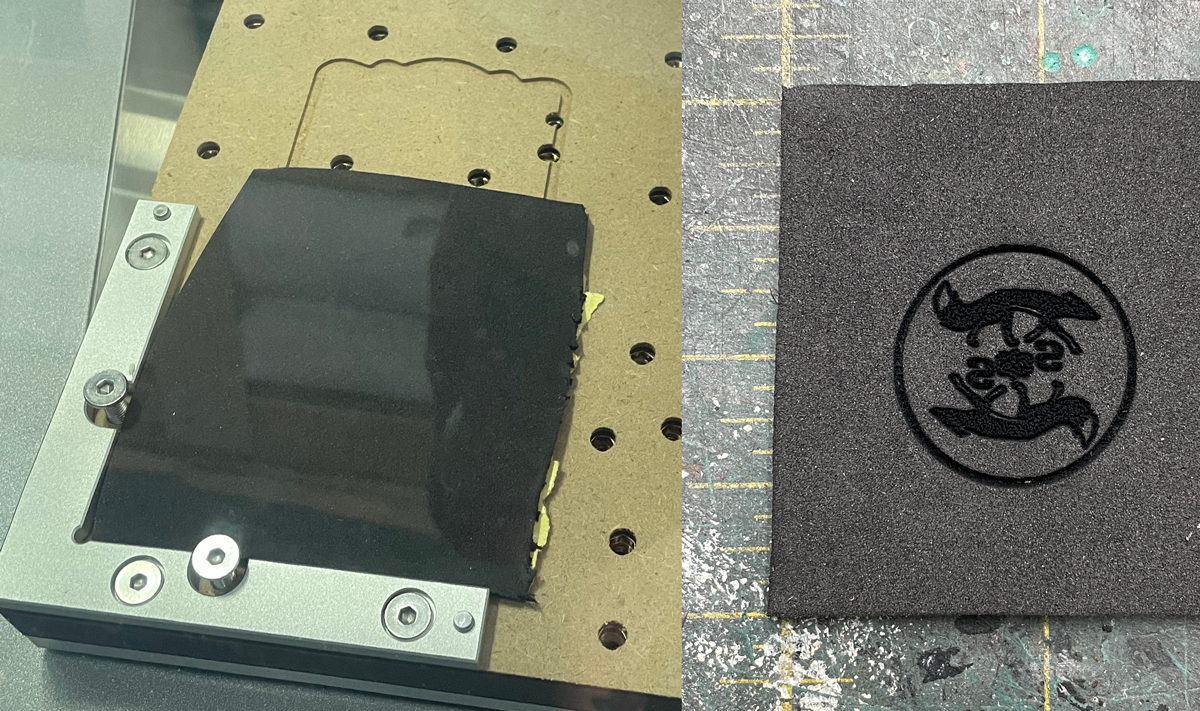
I decided to skip the sample laser project and venture out on my own. One of the things I plan to use the laser for is cutting EVA foam, so for my first test, I put a piece of 2mm EVA foam down, looked up the speeds and feeds for the laser and EVA foam and fired away. To my joy, it came out exactly as I was hoping! The logo in he center is only a fraction of a millimeter deep, while the outer circle cut almost all of the way through the foam, making removal a breeze. You may be wondering why its backwards. If you’ll be patient and read on, I promise you’ll find out.
4th Axis

The last test I wanted to run was using the 4th axis module. The point of the 4th axis module is to allow for your material to rotate thereby allowing your 3 axis CNC to make a fully 3D item. Installing the 4th axis module is a bit more work than swapping bits, but is not difficult. First, your waste board must be removed. Then, 2 of the metal pins are put into place to align the module. Six screws are used to mount the module to the bed. And, lastly, the controller cable for the module is clamped down to keep it out of the way and plugged into the port inside the machine.
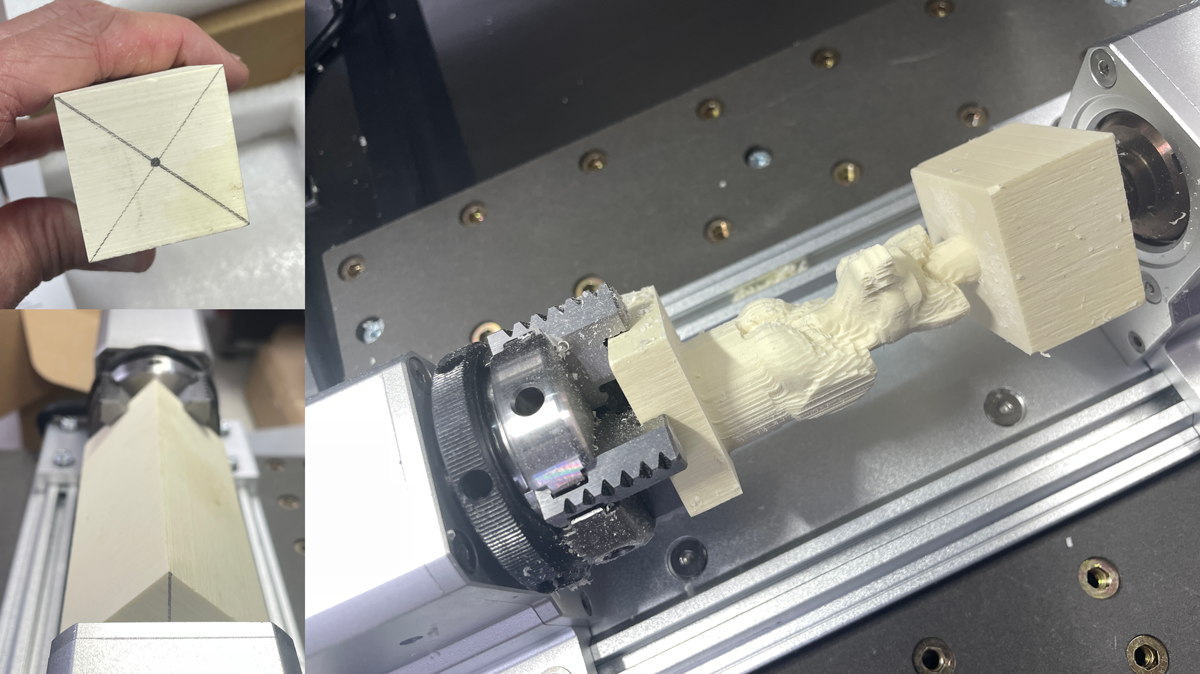
Sicne I was using the sample material and files as a guide, I didn’t need to measure anything, but you do need to mark the center point of the top of your material. This is where you will stick the spike that holes the top of your material. clamping the material into the module and getting it placed properly worried me, but it turned out to be easier than expected and looked and felt good, so I proceeded with fingers crossed. Confident from my laser test, I decided I would also do my own thing for this test as well. I grabbed my own model and swapped it out in the sample files, so I had a fairly high expectation that it would turn out ok. The right image shows my material after the rough pass had been completed.
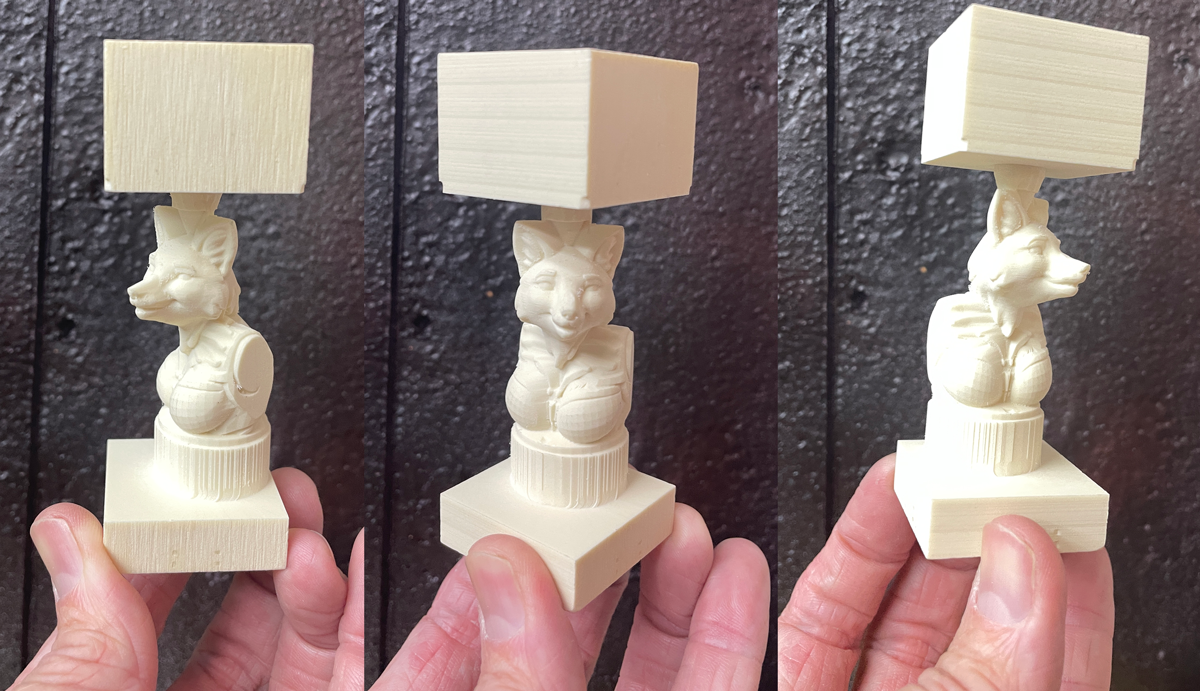
And, like with the flat CNC piece, I was blown away by the quality captured after the final pass was complete. This fox character started life as a D&D mini I made on Hero Forge, then scaled it up and cut it to make it into a sall bust.
Laser + 4-th Axis = Custom Stamp

Afer trimming off the excess from the fox bust, I painted it to look like aged copper and then stuck the lasered EVA foam to the bottom. Voila – instant custom stamp (and why the logo was backwards). I am very happy with how this little project came out.
Custom Trophy

Taking my knowledge from the first tests, I then made a custom cut acrylic screen and a plaque for this trophy I made for the PAX West 2025 Cosplay Contest.
Favorite Features
I am absolutely thrilled with the Makera Carvera Air, and have already incorporated it into a lot of projects I’ve done and plan to do, but wanted to highlight two of my favorite features, especially based on my previous CNC experience.
The super easy swap between tools and from CNC and Laser are just a huge lift. I am really good at losing or misplacing tools, so not having to have a tool to loosen and tighten bits everytime there is a change is big relief for me. Plus anything that is easier AND faster AND works well, is never a bad thing.
The other feature I really love is the way the top button and lighs work. While everything can be done via the Controller software (when a tool needs to be changed there is a popup, and once you switch the tool, you can click continue), you can also do those things directly from the machine without ever looking at the software. When setting up your job, you can specify which tool is which number (I highly recommend just numbering them in order of their use starting with 1), and the machine will flash a number of lights (up to 4) that tell you which tool needs to be inserted next. Once you change the tool (or, be aware, even if you don’t), you hit the button and the machine will continue. I am frequently doing something in my shop that does not allow me to go inside to look at my computer or even won’t allow me to tap open my phone, but the lights and button allow me to move my Carvera Air project forward without either of those (assuming I remember which tool is which number).
Misses
So is this machine the best thing ever? Of course not. I would never expect any piece of equipment to be perfect in everyway. However, I could only find three things that really bug me although none of these are even close to deal breakers.
Firstly, there is no easy way to swap between the controller software on my PC to the conroller app on my phone. My workflow tends to be – setup the job on my PC, send the job to the Carvera from my PC, then go into the shop and work on things while also monitoring the CNC. The lights and start and stop button mostly counter balance this issue, but sometimes I’d like to see the progress and status of the job on my phone which is impossible without first disconnecting my PC and then connecting my phone. I try to remember to disconnect my PC after starting a job and going into the shop, but I don’t always and then I’m stuck either going back inside or solely relying on the button and lights.
Secondly, while there is so much great documentation for a wealth of different projects on the Makera Wiki site, if you are doing something outside those, there isn’t a good resource for what bits you should use for what materials. Obviously some of that comes with experience, but being fairly uneducated about CNC machines (all of my previous experience was just running or monitoring jobs setup by someone else), choosing the right bit for the job is not always intuitive. For example, both of the CNC test projects I mentioned above use a metal engraving bit for the final pass. I’d never have even thought to use a metal engraving bit on a hunk of plastic without the tutorial telling me to especially when there are engraving bits that are for non metal materials. My go to on something new is to pick whatever the closest sample project seems to be and try those tools. The Discord is a great backup resource for this though if that doesn’t work either. Again, not a deal breaker, and not something unique to the Carvera Air over any other CNC.
And the last negative for me is that the laser just isn’t that powerful. The laser is a 5W laser which is essentially a laser engraver, not a laser cutter. My hope for a laser in my shop is for cutting acrylic and MDF, but this laser just isn’t powerful enough to cut through material like that. And it isn’t designed to, so it really isn’t a failure of the machine, I just wish a more powerful laser attachment was available. The laser does what it is designed to wonderfully, and at around $150 as an add-on the base machine, can’t be beat for its price.
Note: I received the Carvera Air as a review sample but all words and thoughts in this review are my own.