Stroll through this Japanese garden and visit various shrines along the way.
What Is The One Hundred Torii: Diverging Paths?
The One Hundred Torii: Diverging Paths is an expansion to The One Hundred Torii, a tile-laying game for 1 to 4 players, ages 14 and up, and takes about 45 minutes to play. It’s currently seeking funding on Kickstarter, with a pledge level of $40 for a copy of the game; there are additional pledge tiers in case you don’t have the base game or if you’d also like the Hanafuda deluxe set that’s also part of this campaign. (I won’t be reviewing the Hanafuda set here.) The base game had an age recommendation of 8 and up, but this one says 14 and up—the expansion adds some complexity (especially if you throw in all the rules at once), though if your kid is an expert at the base game, they may be able to pick up on this one just fine.
The One Hundred Torii: Diverging Paths was designed by Scott Caputo and published by Pencil First Games, with illustrations by Vincent Dutrait. Nancy Hamilton served as the Japan history and culture consultant.
New to Kickstarter? Check out our crowdfunding primer.

The One Hundred Torii: Diverging Paths Components
Note: My review is based on a prototype copy, so it is subject to change and may not reflect final component quality.
The Diverging Paths expansion adds a few modules that can be incorporated into the base game individually or together, along with components for the solo mode.
- 4 Yellow Starting Path tiles
- 4 Blue Starting Path tiles
- Fushimi Inari Shrine:
- Fushimi Inari Shrine tile
- 20 Small Fushimi Inari landmark tokens
- 4 Large Fushimi Inari landmark tokens
- Solo Shrine board
- Kitano Shrine:
- Kitano Shrine tile
- 5 Large Kitano Shrine landmark tokens
- 20 Netsuke discs (4 per player, plus 4 for solo mode)
- Solo Shrine board
- Nonomiya Shrine:
- Nonomiya Shrine tile
- 24 Nonomiya Goal cards
- Solo Shrine board
- To-Ji Pagoda:
- To-Ji Pagoda tile
- 24 To-Ji Pagoda cards
- Solo Shrine board
- Gambler:
- 4 Gambler character tokens
- Large Gambler character token
- Gambler die
- Pilgrim:
- 4 Pilgrim character tokens
- Large Pilgrim character token
- 6 Lonely Path tiles
- Gambler/Pilgrim Info board
(Kickstarter backers will also get two mini-expansion card sets included for free, though these were not in the prototype and are not part of this review.)

Each of the shrines has its own little tuckbox, which makes it easy to grab just the components needed for that module. The Gambler and Pilgrim characters have their components stored in the main box, along with the starting path tiles.
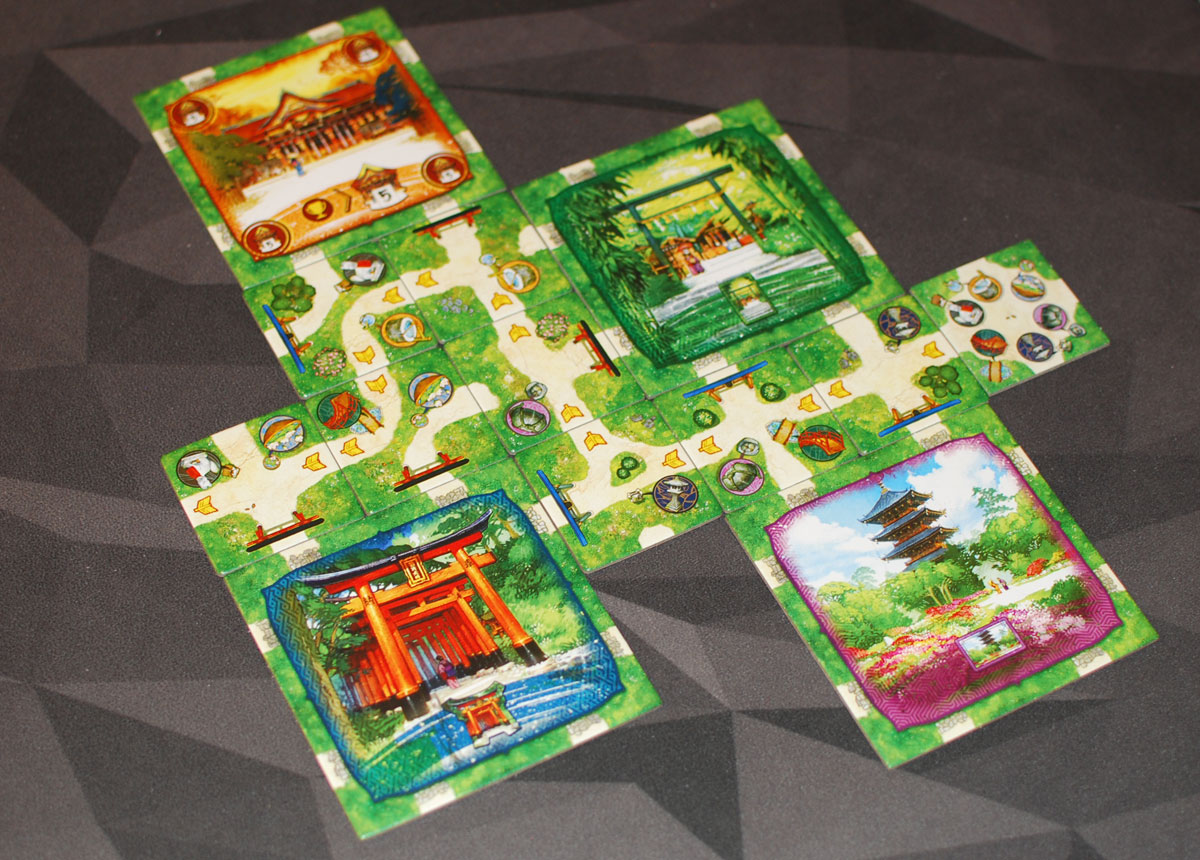
As with the base game, the illustrations are by Vincent Dutrait and are really beautiful. Each of the shrines have a large tile (the size of four small tiles) that really showcases its artwork, which is also printed on the tuckboxes.
The back of the rulebook has a section that goes into more detail about the setting, including explanations of the two new characters as well as the four shrines.
How to Play The One Hundred Torii: Diverging Paths
You can download a draft of the rulebook here. Note that you do need to know how to play The One Hundred Torii already, so if you’re new to the title, check out my review of the base game here.
The Goal
The goal of the game is to score the most point via landmark tokens, character tokens, and other achievements.

Setup
You still set up the game as normal, but now you use one set of the starting path tiles to create a short path leading away from the base game’s starting tile, according to the arrows on the tiles. Then, place a large shrine tile at the end of the path, and set out that shrine’s additional components.
If you’re playing with more than one shrine, there are additional instructions for doing so—you can even use all four at once! The game recommends playing with one shrine at a time, in the order listed below, before you mix and match them.
The Gambler and Pilgrim characters may be optionally added into the mix—just add their character components to the rest.
Gameplay
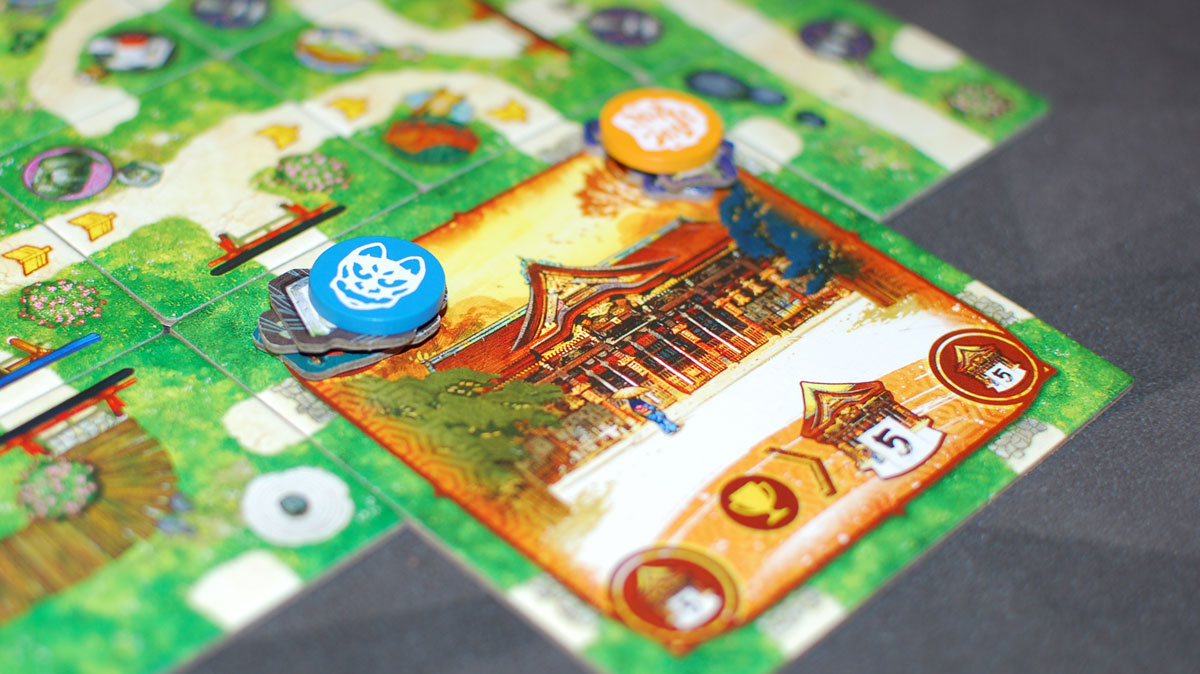
Each of the shrines has a special ability that triggers if you score a path that goes through tiles adjacent to the large shrine tile—for each tile you pass through, you’ll trigger the effect once. Although the shrine tiles have paths drawn on them going into the large illustration, these paths are considered blocked (you can’t walk through) but do not form enclosures.

Fushimi Inari Shrine
This adds a new landmark token, which you gain by passing by the shrine. The Fushimi Inari tokens are wild, so you can combine them with other small landmark tokens to gain the 5 and 10 point score tokens. If you accumulate 5 Fushimi Inari tokens, you are required to cash them in for the 5 point token, just as with the regular tokens.
Kitano Shrine
Each time you pass by the Kitano shrine, you may make an offering at any of the corners you pass. You place at least one small token, along with your Netsuke disc, on the corner of the shrine tile. If there is already an offering there, you must offer more than the current stack, returning the current offering and disc to its owner.
At the end of the game, each corner is worth 5 points; if you control the most corners (no tie), you get a bonus 5 points.
Nonomiya Shrine
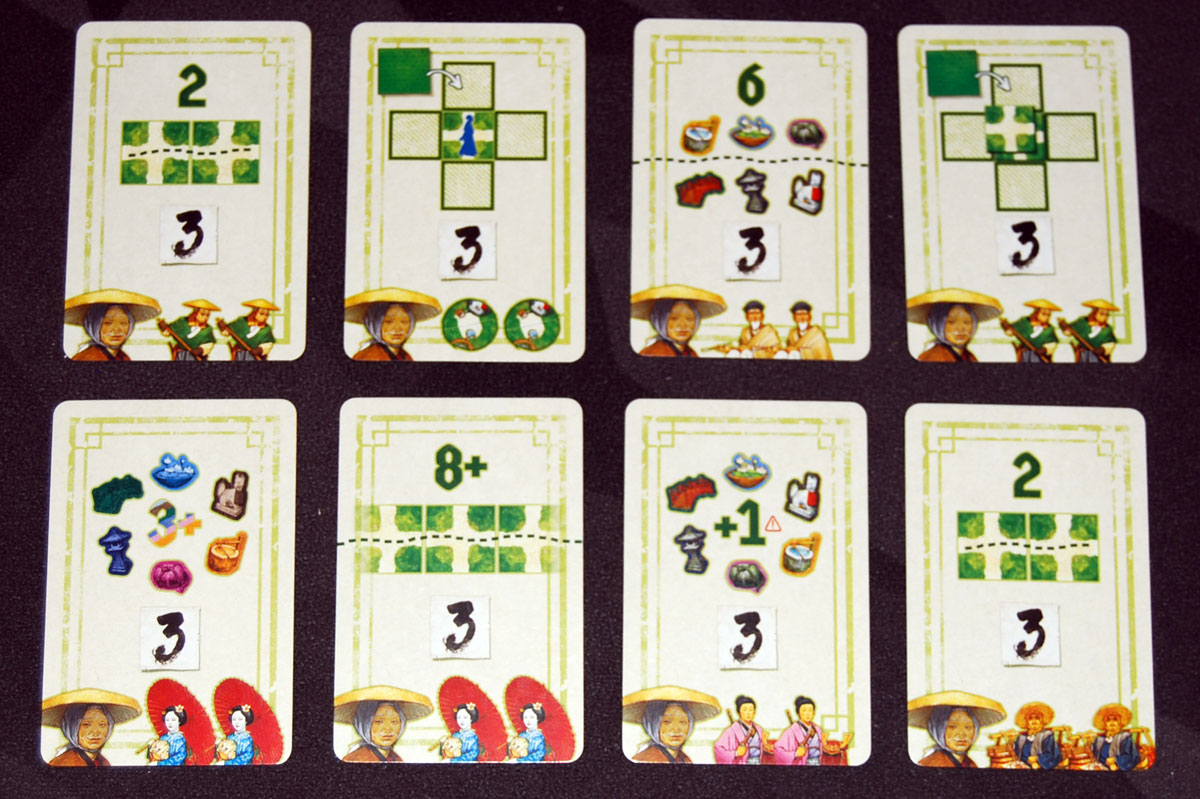
Each time you pass the Nonomiya Shrine, you draw a goal card. Goal cards are kept secret until you achieve the requirement, and then you reveal the card. You may not score a card on the same turn you drew it. You may score multiple cards in a single turn, as long as they are different cards. (You can have duplicate cards, but they must be achieved individually.)
Goals include things like scoring a path of exactly length 2, scoring a path of 8 or more tiles, gaining 3 different types of tokens on a single turn, and so on. Every scored card is worth 3 points at the end of the game.

Shrines at To-Ji Temple
During setup, place the To-Ji cards nearby, sorted into their card types from 1 to 6.
Each time you pass by the To-Ji Pagoda, you take the next card(s) that you don’t have already.
At the beginning of your turn, if you have cards, you may use them during the Get Help phase—but if you do, you must use all of the cards you’ve collected (in any order) and then start back over at 1. Here’s what the cards do:
- Get help from any single character for a cost of 1 token.
- Get help from 2 different characters.
- Gain any 3 small tokens.
- Gain a large landmark token for the cost of 4 instead of 5.
- Worth 5 points if you still have it at the end of the game.
- Worth 6 points if you still have it at the end of the game.

Gambler
The Gambler costs 1 token to hire. You roll the gambler die (which shows one of each landmark), and then place it on a path. It effectively adds that landmark to the path for scoring purposes. You may re-roll the die at a cost of 1 token per roll as many times as you wish, but you still only score the Gambler token once per turn.

Pilgrim
The Pilgrim costs 3 tokens to hire. You may take any of the Lonely Path tiles (either from the supply or from the board) and place it on the board as usual before placing your own tile. The Lonely Path tiles are each 2 squares wide and have a long bridge with torii on either end, and no landmark tiles.

Solo Mode
Each of the shrines has its own solo board that is added during the solo play, placed above the base game solo board. There’s a little chart showing which shrines to use for different difficulty ratings against Onatsu, your automated opponent. I did not explore the solo game for the expansion myself, but you can find the details in the rulebook.
Why You Should Play The One Hundred Torii: Diverging Paths
The One Hundred Torii is a lovely tile-laying game that generally challenges you to create long, meandering paths. You only get to trace a path to the nearest matching landmark, and you get bonuses for passing through the red and blue gates, so as more tiles are added it can be a challenge to take a long journey that doesn’t run into a match too soon. Getting help from characters not only gives you some abilities, but also scores points simply for asking for help (at the cost of a few tokens, of course). Diverging Paths changes up the flavor of the game, depending on which of the shrines and characters you include.
The Fushimi Inari Shrine, the simplest one, adds wild tokens to the mix. Every time you pass by it, you pick up a wild token, making it easier to score the large landmark tokens along with the associated achievements. In my two-player game using just this shrine, both of us were scoring so many tokens that the score actually came down to the character points. It’s an easy intro to the concept of the shrines, but I felt it wasn’t as interesting to play on its own.

The Kitano Shrine goes in the opposite direction: because you have to pay tokens to claim a corner, this one will have you feeling poorer than usual. If you’re first, you could claim a corner for a single token—but then you’re easily outbid. On the other hand, does it make sense to spend more than 5 points to get 5 points? The bonus for having the majority gives that decision a little more weight. It’s also interesting that when you get outbid, you get your tokens back. It’s like an auction game, but you can only bid if you take a certain path through the garden.
The goal cards from the Nonomiya Shrine include both highs and lows. Some will give you points for traveling really long paths or collecting a lot of tokens—so it was a valuable turn already, but you score 3 bonus points if you can push it to the limits. Others give you points for doing the bare minimum: scoring a path of exactly 2 tiles, gaining exactly 1 token on your turn—these feel like a consolation prize for having a bad turn. And there are still others that require a particular position: place a tile next to the Samurai, or next to a Gardener’s stacked tile, or next to an enclosure. Depending on how much you pursue these, you can score a lot of points through the Nonomiya Shrine. In a 2-player game, we’ve hit as many as 30 points through these cards. One key, though, is to pick them up early so you know what to go after.
Finally, the To-Ji Pagoda introduces an ebb and flow. Each time you pass, you can collect more powerful cards—but if you spend the cards for their effects, you reset back to 0. The first three cards let you get help more easily, which is worth points in itself but also helps you with your tile placement. The fourth gives you a discount on a large landmark—useful if you had exactly 4 of a kind, but not so much otherwise. The last two cards, though, are worth 11 points if you have both of them at the end of the game—but that means passing by the pagoda through at least 6 tiles, and then not spending the other cards for their effects. I haven’t figured out yet the ideal mix of using some cards early and then collecting them for the end-game points, but I think that could be a powerful combo as well. With the To-Ji Pagoda in play, expect a lot more character points than usual.
The two new characters are pretty easy to use. The Pilgrim is expensive, but often worth it if you can afford it. Since there aren’t any landmarks (or branching paths), you can almost guarantee that you add two gates to whatever it was you were planning on. With the shrines, it can also help build paths around those large tiles, which can otherwise feel a bit like big obstacles.
The Gambler is cheap—at least, if you’re lucky. It adds a landmark to an existing path, sort of the opposite of the Poet. It’s good on the rare occasions where you want to score a path but it doesn’t already have your matching landmark on the other end, but it can also be handy to score an enclosure at an empty dead end. The trick, of course, is that it costs you one token per roll, so it could end up costing you even more than 3 tokens if you’re absolutely set on a particular landmark.
I tried some mix and match with the shrines, including a game that used all four at once. I like the way that each of the shrines changes up the direction of the game a bit, though all four at once did make it more difficult to create the longer paths simply because of the way the initial setup turned out. I was pondering the title Diverging Paths, because when we played with a single shrine it felt like we actually had a lot of converging paths instead, as everyone tried to tread and re-tread the same paths next to the shrine. Once you throw in multiple shrines, though, you do get some interesting divergence as some players go after the offerings at the Kitano Shrine, some players pursue goal cards from Nonomiya, and so on. It can be hard to chase after each option, so you’ll have to decide which path will bring you the most success.
If you enjoyed The One Hundred Torii and are looking for a way to add a bit more variety and complexity, Diverging Paths is an excellent addition!
For more information or to make a pledge, visit the The One Hundred Torii: Diverging Paths Kickstarter page!
Click here to see all our tabletop game reviews.
![]() To subscribe to GeekDad’s tabletop gaming coverage, please copy this link and add it to your RSS reader.
To subscribe to GeekDad’s tabletop gaming coverage, please copy this link and add it to your RSS reader.
Disclosure: GeekDad received a prototype of this game for review purposes.