
MTV (originally Music Television) first burst onto cable televisions on August 1, 1981, and it is still affecting pop culture trends 40 years later.
Although the channel has evolved and mutated well beyond its original music video format, it is still best associated with the “I Want My MTV” golden era of its first decade, for which it will always be known.
This was the era when the music video was king. Every artist who was any artist needed a video, regardless of whether or not they even had their first album completed. These ranged from straightforward performances in front of live crowds or on an elaborate set to little mini-movies with their own stories. The “video toaster” era effects and overacting on the parts of the performers can be pretty cheesy by today’s production and effects standards, but there were a few who came up with some groundbreaking visuals.
Take this famous video from Norway’s a-ha for example:
Not only was the song “Take On Me” a massive and catchy hit, but the video (actually the second video made for this song) caught on due to its imaginative mix of pencil sketch animation and a live-action performance.
This method, called “rotoscoping,” was first created by animator Max Fleischer in the 1920s, and involves sketching over a movie, frame by frame, to come up with an animated design. The creators of “Take On Me” made this method all their own, creating a comic book-style story of romance and adventure. More than 3,000 frames were rotoscoped to create this tale, and the video took 16 weeks to complete. It was well worth it, as “Take On Me” is now one of the most famous music videos ever made with currently more than 1.3 billion views on YouTube alone.
In celebration of 40 years of MTV and the creative minds it helped foster through the music video genre, try an easy way all artist levels can give their own favorite photo the “Take on Me” treatment.

Needed are favorite pictures, white plain drawing paper, and some good, sharp pencils.

First, find a photo with a background that isn’t too busy. Tape it on a window or drawing light table.
Drawing light tables are how the “pros” do these images, and there are also several small inexpensive tabletop drawing LED lightboxes available. Most people, however, have a window and some plain tape.
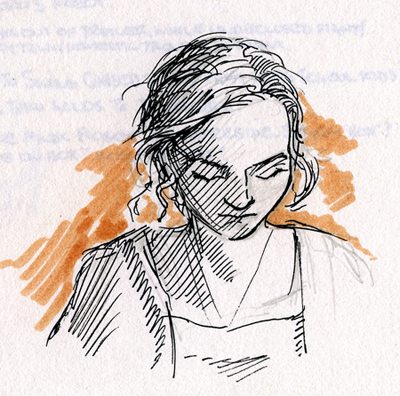
Tape the sheet of paper over the picture and began tracing just the basic edges and details of the people in the image.

Take the images off the light table or window and start “sketching” or filling some of the details in like shadows. That creates a plain old sketch tracing, which is essentially what most of these images are.
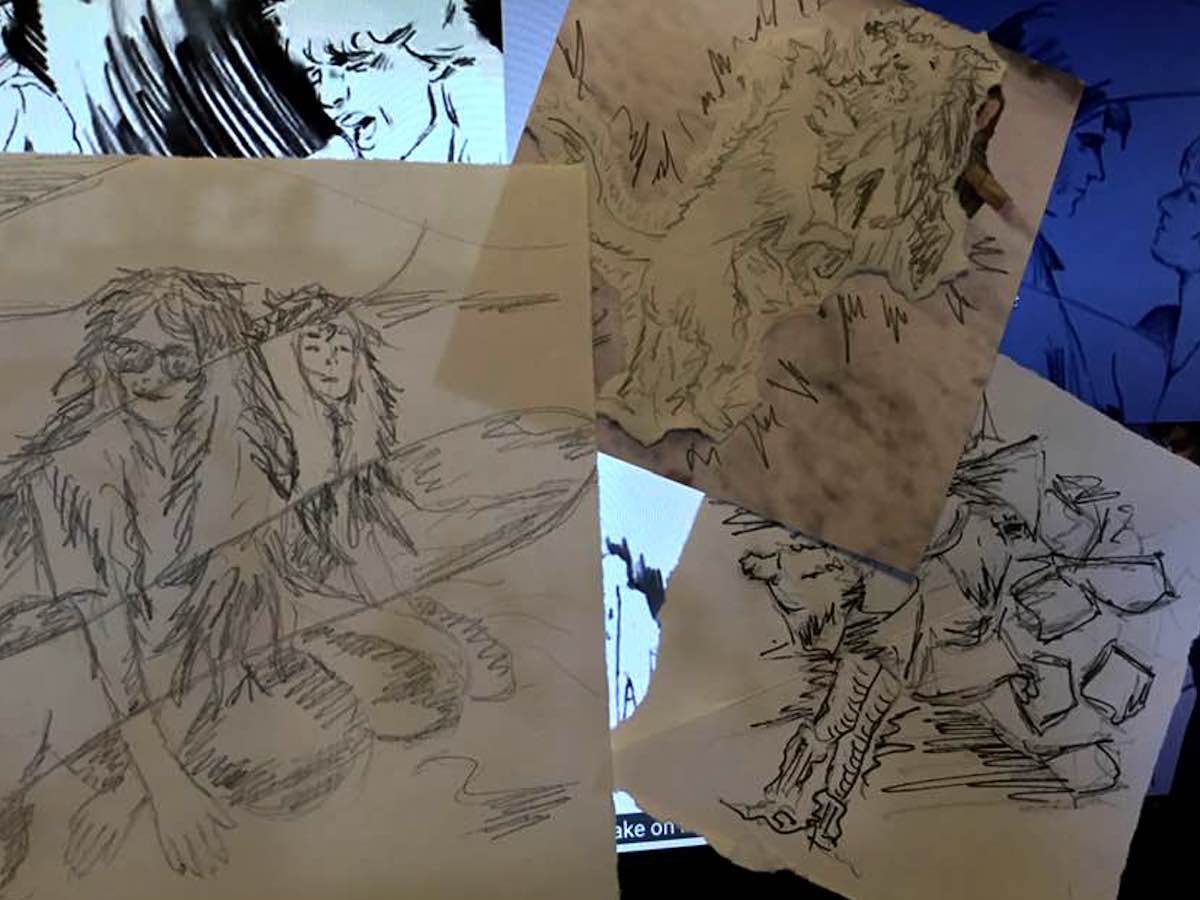
We could stop there, as some of the video’s images are very simple, but there are two clever things that stand out to make these sketches really distinct.

One is the mix of live-action and sketchbook-looking animation. To make this happen, draw over only some parts of the picture, and cut them out (or gently tear them out) once finished.
Place these over the picture where they were traced to create a cool photo/drawing collage. I suggest printing out a larger version of the photo first, so it doesn’t mess up the original image.

The second is the use of lines to give an image different levels of details. This isn’t very hard to do at all. Take the simple sketch made by tracing, but before filling in the details, draw a couple of wavy lines across it. (See the thumbnail for the YouTube Weezer video at the end of this post.) Once the lines are drawn, shade a little more detail in every other section, particularly the ones you want to stand out the most.
This is still a simple effect but has just a little more artistic edge.

Since pencils will smudge, you can go over these with a plain black ballpoint pen or fine line felt tip.
Once done, this method might just be instantly recognized by anyone who sees it and is a fun way to bring new life to a silly candid photo.

The early days of MTV may be long gone, but that doesn’t mean we still can’t get inspired by some of these early videos.
For example, let’s get some inspiration from Weezer’s 2019 cover of “Take On Me” featuring a totally ’80s rotoscoped group of teens led by Finn Wolfhard of Stranger Things and the upcoming Ghostbusters: Afterlife:
Click through to read all of “Give Your Family Photos the ‘Take On Me’ Animation Treatment” at GeekMom.If you value content from GeekMom, please support us via Patreon or use this link to shop at Amazon. Thanks!