I recently reviewed Games Workshop’s rapid-fire two-hander, Lost Patrol. This is a game set in the Warhammer 40,000 universe featuring two of their classic antagonists, Genestealers and Space Marines. Despite having played Warhammer Fantasy Battle for many years, I’d never owned or painted more than a handful of figures from the company’s science fiction universe. Now, I had the chance to try.
As I mentioned in my first GeekDad Paints! post, I have been following Sorastro’s Imperial Assault videos, as well as GeekDad’s own Anthony Karcz’s, IA experiences. I was hoping to put some of what I’d learned into practice on my new GW figures and that my new-found layering skills would be up to the task.
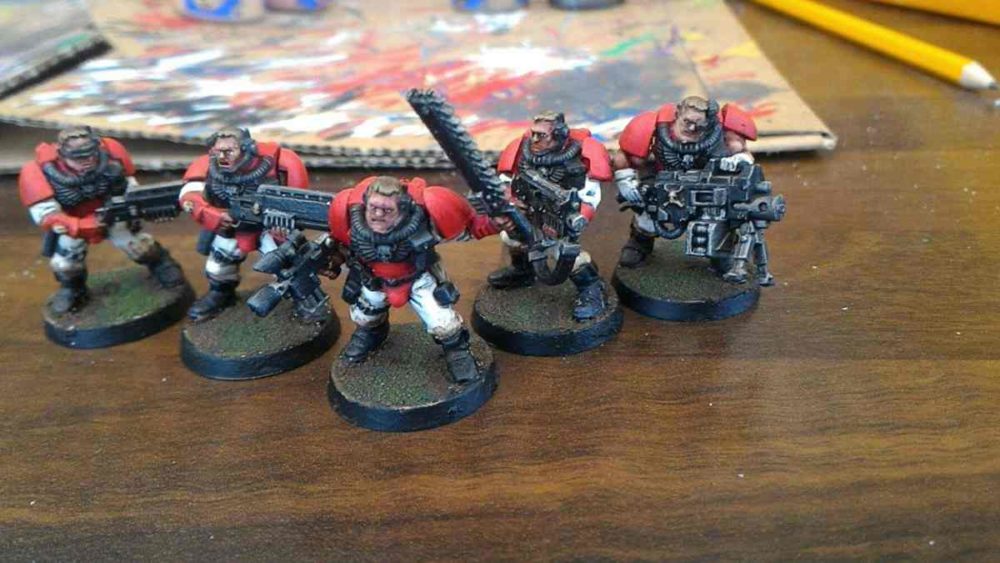
The Space Marines:
I started with the Space Marines. I’d had a little experience with these, helping my children paint their models, and I’d always collected human armies, with plenty of flesh tones and colored armor.
In the past, I would paint one area to completion. I’d choose an area, say, horse barding, paint the base color, add the shade, then highlight. Sorastro’s method of painting is to paint all of the flat base tones, then shade each area, before finally highlighting each tone in turn.
I can definitely see merit in approaching things this way. It’s easy to correct errors as you go, and if you do stray into an already painted area with a wayward paintbrush, at least it isn’t a wrong, beautifully shaded, area. With a bit of luck, you will be able to remove the offending overspill with a touch of shade or a dab of highlight.
I painted the Space Marine scouts using this method, and it did pay dividends, but there is a definite flip side to the coin. I spent a long time painting the various colors on the scouts, and by the time I had five fully covered, flat looking minis, I absolutely hated them.

The base colors I used were all from Games Workshop (here’s a handy color chart) and were applied using techniques picked up from my Imperial Assault painting, as recommended by Sorastro. If you haven’t realized it yet, since retaking up the painting baton, I’ve developed something of a man-crush on the British painting Jedi.
The base colors used were:
- Mephiston Red – Applied slightly thinned and in two layers to get an even coverage.
- Chaos Black – For the leather areas. Boots, pouches, and straps. Also the weapons and eagle crests.
- Ironbreaker – I picked out certain parts of the guns to look metal against the black.
- Standard Mechanicus Grey – The corrugated pipes and various eye pieces.
- Ceramite White – The trousers.
- Bugman’s Glow – Flesh tones.
- A mixture of Mournfang Brown and Kantor Blue in a 2:1 ratio – For the hair. I would never have thought of combining these two tones to make final dusty blonde. This idea is borrowed from Sorastro’s Luke Skywalker video. There’s also two layers of highlight added at this stage, some Steel Legion Drab, and then a thinner layer of Tallarn Sand. This gives great results.
I was torn on the hair, wondering whether to give each marine different shades. Since Space Marines might share a “geneseed” (or something), I decided these guys all had the same genetic code for their hair. A convenient excuse to save me a bit of time and effort!
I then gave the metal parts of the figure a gentle drybrush with some Runefang Steel.
The shading was fairly straightforward:
- Reikland Fleshtone for the skin.
- Carroburg Crimson for the red armor.
- I used a 2:1 mix of Nuln Oil and Serpahim Sepia for the White trousers. This gives a dirty white appearance, which I then highlighted back up in the next phase.
- I used some Nuln Oil on all the metal areas to dull the silver highlights back down and smooth out the chalkiness of the drybrush.
- The hair I used some Agrax Earthshade in a 1:1 ratio with Nuln oil.
As soon as the shading was done, which is always fairly quick, I found myself feeling much happier about my scouts.

For the highlighting stage, I started with the red armor.
I used Evil Sunz Scarlet in two or three thin layers to build up the intensity. I then added some very thin edge highlights with Wild Ryder Red to bring out the prominent surfaces but I was careful not to add too much as A) I wanted the armor to be fairly flat tone and B) was worried it might come up too orange.
For the black leather, I used a layer of Russ Grey mixed with black, in roughly a 1:1 mix, and then another highlight in 2:1 grey to black ratio for the brightest highlight.
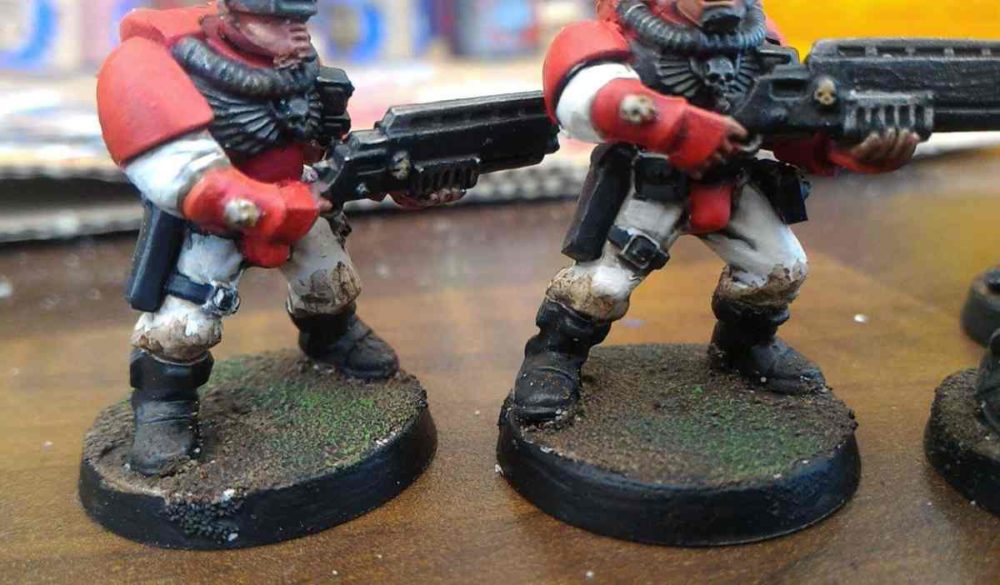
I’m not completely satisfied with how the flesh tones worked out. I think they are unnaturally pink. I was trying to simulate the hot humid, florid skintones of being in the jungle, but I’m not convinced it worked. I used reapplication of Bugman’s Glow, followed by a 1:1 mix of Bugman’s with Cadian Fleshshade. I then used another highlight of pure Cadian Fleshtone. I then made a 1:1 mix of Kislev Flesh and Cadian Fleshshade, before final highlights of pure Kislev flesh.
This felt like more than enough layers, but I definitely should have carried on, adding some white in the Reikland Flesh. A learning point for next time.
The hardest part was the trousers. Highlighting white is never easy. I used a mix of Scar White and Screaming Skull to highlight the ridges, leaving the dusty brown color in all the clefts. I then added more white for additional highlights. This felt like a lot of work to get back to what looked almost exactly like what I started with!
Finally, I painted the bone motifs with some Screaming Skull and added a sepia wash, before highlighting again with the original skull tone. In a sudden bout of improvisation, I decided to try to make the boots and trousers dirty. After all, these guys are meant to be crashing through the jungle. To do this, I used some Typhus Corrosion that I bought for another job. I added it sparingly, with an old brush, and whist scared I might ruin my hard work, I’m pleased with results.
To finish, I based the miniatures using some PVA glue and some sand, which is my standard basing method. Rather than grey or green, I chose brown with a few green highlights. This is Mournfang Brown with some more Typhus corrosion, a highlight with some Tallarn sand and a final drybrush with a couple of random green shades.
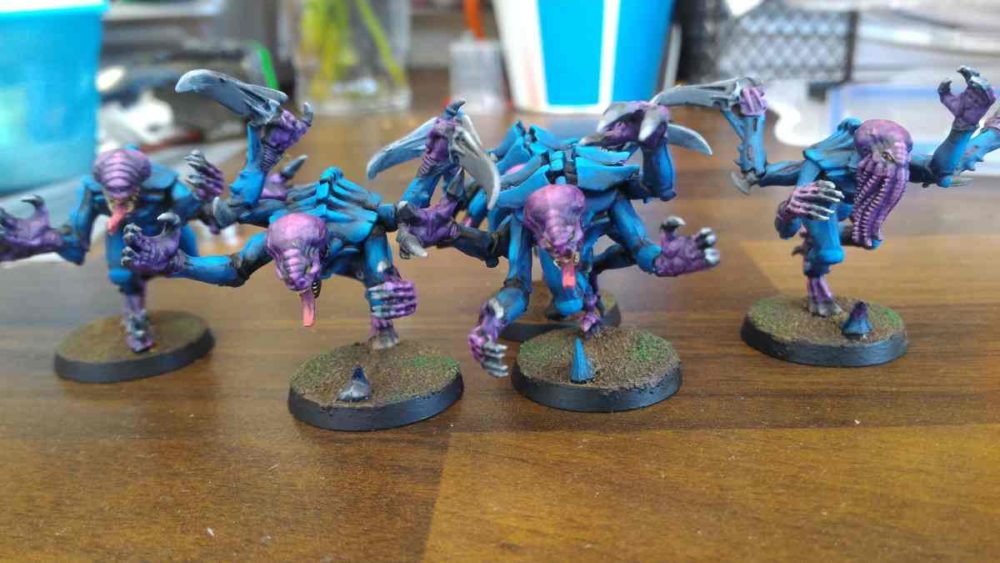
The Genestealers:
The Geigeresque stylings of the Genestealers, has always appealed to me, but I’ve before never any of the models. I have always liked the traditional pink and purple color scheme that has been used when they were introduced in the original Space Hulk game. Oddly, the Genestealers on the Lost Patrol box are an unusual pink and white combination, one that I don’t find appealing. For my Genestealers, I was going old school.

First up, a paint guide. This being the internet, an excellent one wasn’t very far away by Garfy on Tale of Painters. This tutorial has pretty much everything you need to paint a traditional Genestealer using the new Citadel paint palette.
The main way in which I deviated from Gargy’s paint scheme was with the initial blues. I found the transition between Kantor Blue and Teclis Blue too great for a smooth transition, so I added the paint in thin layers, building up the intensity of Teclis Blue as I went. This gave the smooth color gradient I was after. I had similar issues with the switch between Teclis and Temple Guard Blue, but as this was for the final highlights, I used just one intermediate step of 1:1 of the two blues in question.
Since the Genestealers were in the jungle, I based them in exactly the same way as I had the Space Marine scouts.
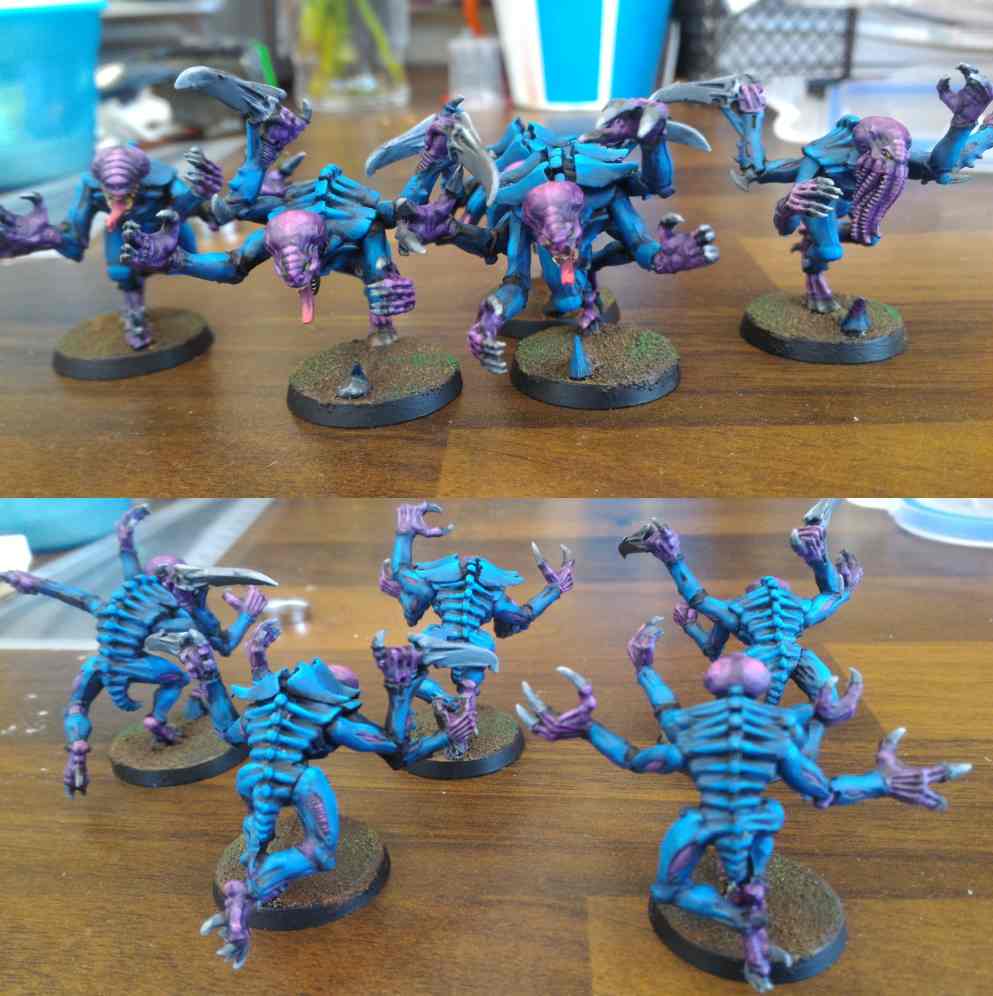
So what next? Well, my next batch of models are three from Knight Models’ Batman Miniatures Game, so I’ll report back how I got on. As for the Genestealers, I only have five painted up. I might finish them off all in the same style, but I’d like to try something else too. The rapid breeding of the Genestealers is part of what makes them so potent. I’d like to add the embodiment of natural selection into my horde of Genestealers, blending purple and pink with greens and browns right up to some perfectly camouflaged, highly intelligent, precision killers. The Jurassic Park velociraptors of the Warhammer 40K universe.
Disclaimer: I received a free copy of Lost Patrol for review purposes.


Thank you! I appreciate your review of Lost Patrol and your painting experience. Also your web links which are good reference.