Well, here we are: Deck 2 of Pathfinder Adventure Card Game: Wrath of the Righteous. Just a warning: lots of spoilers ahead if you haven’t played through this adventure path already!
One of the big rewards for finishing “The Worldwound Incursion” was getting to pick our Mythic Paths. Each player chooses one (and multiple players can choose the same thing), generally looking for those that will boost their most valuable skills. We ended up with the following:
- Adowyn: Mythic Trickster
- Balazar: Mythic Marshal
- Ekkie: Mythic Champion
- Enora: Mythic Archmage
- Shardra: Mythic Marshal
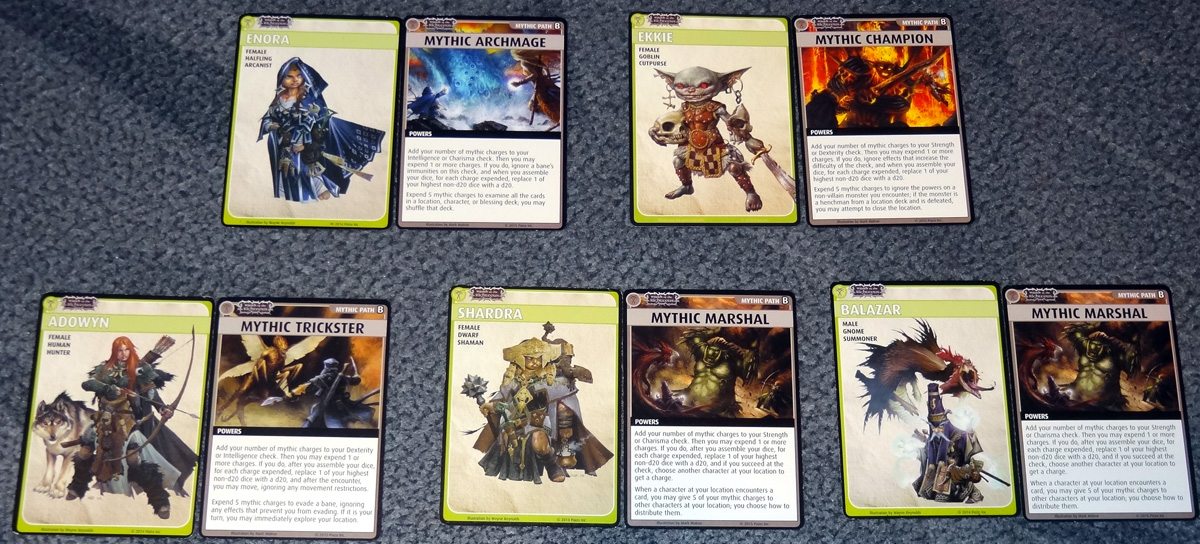
Each of the Mythic Paths will boost two skills by the number of charges you currently hold. For instance, Mythic Marshal boosts Strength and Charisma; Mythic Champion boosts Strength and Dexterity. Also, when you perform a check of that type, you may also spend any number of charges to upgrade your dice: you replace the highest dice with d20s, one per charge expended. Plus, each path also has some sort of additional ability when you expend charges. The Trickster can move and ignore movement restrictions; the Archmage ignores immunities. Finally, each path has a special bonus if you expend 5 charges at once–but we’re getting ahead of ourselves, because we’re not likely to have 5 at this point.
You start each scenario with a number of charges equal to the adventure deck number, so for now we just get 2. If you defeat a bane that has the Mythic trait, you get a charge, and there are some other ways of acquiring more, but at the end of your turn you have to discard back down to the adventure deck number.
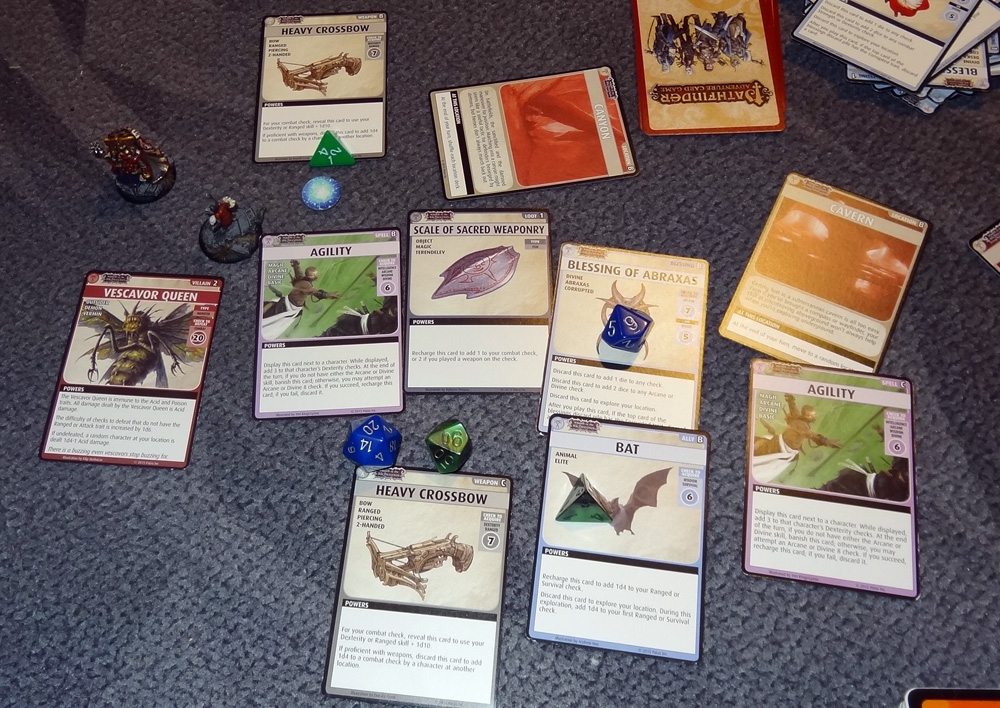
So, remember when I mentioned that the last scenario in the previous adventure replaced a bunch of our non-Corrupted blessings? Well, here’s the rub: in Deck 2, we now have our Mythic Paths, and we get to start with some mythic charges, which are used to boost particular skills for each player, and can be spent to upgrade a die to a d20. The Blessing of Ascension is the basic one that everyone started with at the very beginning of the game, and it can be used to gain a mythic charge. That’s much more useful now that we have our Mythic Paths, but we start the second adventure short on them. Fortunately, they’re also automatically acquired if you have any mythic charges, so we were able to build back up during the first scenario.

We start off the adventure with scenario 1: “The Gibbering Swarm.” Yeah, we’re all Big Mythic Heroes now, but our first job is pest control. In this scenario, the villain and henchmen are all Vescavors–vermin from the abyss. The swarms aren’t too bad–just a Combat 11–but there are some nasty side effects. For instance, if you use a weapon during the encounter, it gets banished. That, and you have to defeat them by at least 4 plus the adventure deck number in order to attempt to close the location. So, in this case, a Combat 17. Fortunately, they’re susceptible to the “Attack” trait, meaning that spellcasters have an advantage against them.
The Queen, on the other hand, is a Combat 20, and gets even harder if you don’t use Ranged or Attack trait against it–so Melee weapons aren’t so great. And if you don’t defeat her, she sprays some acid on somebody before flying away.
But the big difference separating this scenario from the usual “find the villain and trap it” routine is that when you build the location decks, all the monsters (including the villain and henchmen) are on the tops of the location decks. So unless something causes a deck to get reshuffled, you know you’re going to hit bad guys first, and all the boons are underneath. That means, for any given location, if you beat the Vescavor Swarm on your first attempt, you have to make the tough decision between closing the location (and thus losing any boons in it) or leaving it open (and spending a lot more time plowing through the deck). We made the choice to close things out when we were able to–we didn’t get as much stuff, but we were able to track down the Vescavor Queen and defeat her before we ran out of turns.
Reward: We get to check off one medal on the Knights of Kenabres cards, and each player got a power feat.

Scenario 2 was “The Fifth Crusade.” The flavor text talked about the four previous (failed) crusades, and we’re part of the fifth. There was some discussion about the connotations of that–“Uh, #NotAllCrusades, anyone?”

This one was really rough, right from the start, and we almost thought we’d have to resort to the Wardstone Fragment to revive a couple of us, but fortunately we pulled through. We encountered the Demonic Horde barrier on the first turn of the game, which wasn’t fun, even with Adowyn’s help to evade some of them. After dealing with that, Shardra took another exploration, and encountered the henchman Undead Company, which is a Barrier type with an Army trait, a new type of card in this scenario.
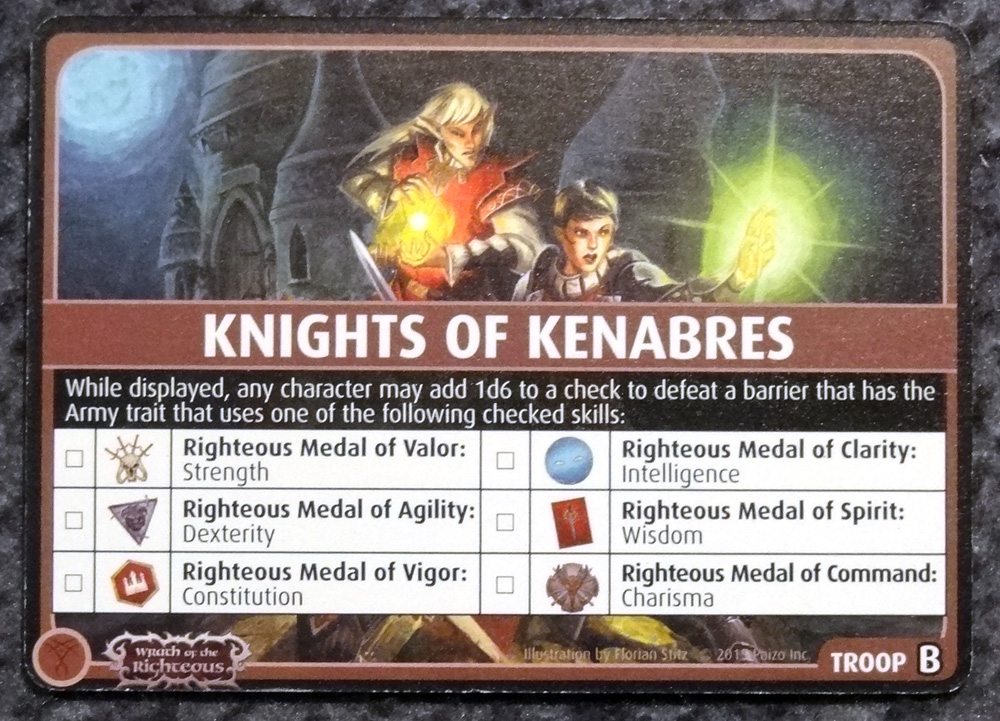
So the Knights of Kenabres card came into play–anyone making a strength-based check automatically added a d6 to their check, since that’s the reward we picked last time. However, the way the Undead Company works is that there are 6 checks, and each player has to succeed at one–furthermore, each check may only be chosen by one of the players. The choices were Combat 16, Combat 16, Divine 16, Stealth 12, Fortitude 12, Melee 12. (Yes, two people could just fight it with Combat.) Deciding who would take which check took us a long time. Ekkie is a good fighter and at first thought she would take a Combat or Melee–but she’s also one of the stealthier characters in our party. Shardra is good with Fortitude (and nobody else is). We ended up having Adowyn and Balazar take Combat, and Enora took Melee just because we were able to throw some blessings at her. (Remember, she had no cards left.)

We survived the fight, and Shardra closed out the Abyssal River location, so it was a productive first turn–but it also wiped out a lot of our resources. But from that point on we were pretty terrified of all the other Undead Companies we’d have to face. Our second one didn’t go as well, so we had to bury boons and all of the boons in the location were banished. We did find the other henchman, so that was nice being able to fight it instead of another Undead Company, and then we found the villain.

In this scenario, once you defeat the villain Nulkineth, you put the villain Maugla into a random location (and re-open it if necessary). Fortunately, that happens even if you don’t actually corner Nulkineth. So we fought Nulkineth, and Maugla went into a previously-closed location, so at least we didn’t have to track him down. We spent our last round getting everyone into position to temporarily close the last two locations while having two of us–Balazar and Enora–set up to fight Maugla. We finished the scenario with 1 card left in the Blessings deck.
Our reward: another skill on the Knights of Kenabres, and the Barding of Pleated Light, an armor for your animal! Adowyn claimed this, since she has some animals (including her cohort, Leryn).

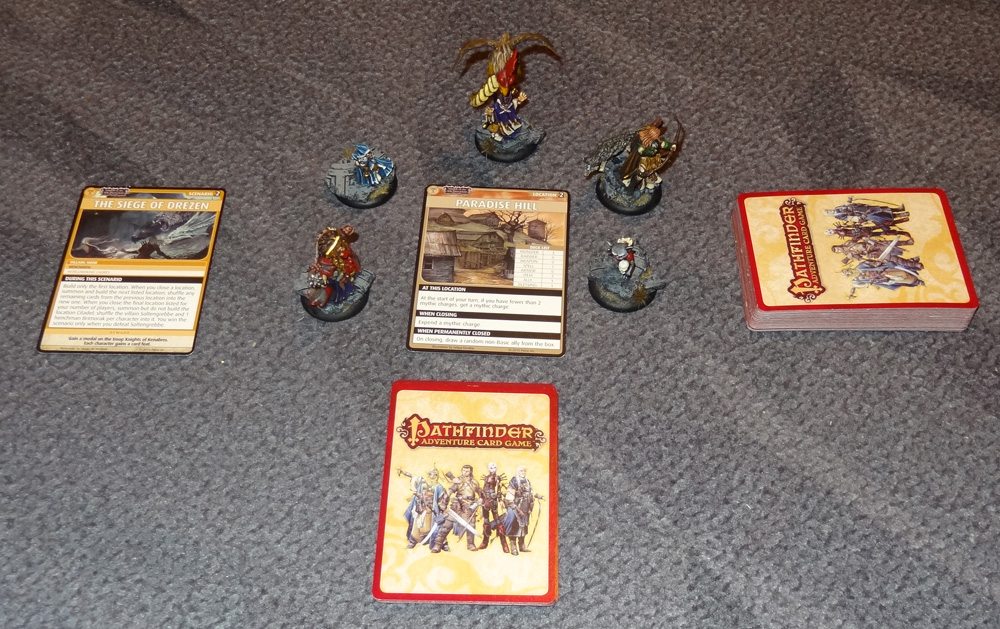
Scenario 3, “The Siege of Drezen,” was an odd one. Instead of the usual set of of various locations, you just build the first one on the list. When you close the location, instead of banishing all the cards that are left, you build the next location on the list and add all the remaining cards to it. After you close the last location on the list, then you get the Citadel location, which has a bunch of Brimorak henchmen (one per player) plus the final villain, Soltengrebbe the chimera. So, to win, you have to close all of the locations, but in a particular order, and then find the villain in a location filled with henchmen. Yikes!
Since we all started at the same location, it mean things like crossbows and the Scale of Cloudwalking were less useful at the start. Although as we got some locations closed and characters traveled to the new ones, we were at times spread out until we got caught back up, making those cards more useful again.
The henchman in this scenario was the Worldwound Cadre, another army-based barrier. This time it required Combat 18, Combat 18, Diplomacy 12, Knowledge 12, Ranged 12, and Survival 12. Uh-oh. Of those skills, none of us had Diplomacy at all. Adowyn had both Ranged and Survival, and Enora and Shardra both had Knowledge, but Ekkie and Balazar were often left with the choice of Combat or Diplomacy–either a more difficult target number, or a skill neither of us had. And the Knights of Kenabre didn’t help with Diplomacy, either. Fortunately, Ekkie picked up the Scribe ally after the first location, which adds 2d6 to Diplomacy and Knowledge checks, so we used that (and lots of Blessings) as much as we could. Once again, the army barriers wiped out everyone’s hand whenever they came up, often requiring us to spend a turn resetting our hands before exploring again.
We did manage to encounter the Worldwound Cadres fairly quickly each time–good because it meant we weren’t wasting a lot of turns digging through the location decks, but bad because it meant we weren’t collecting a lot of boons to help us with future fights. We did fail a Worldwound Cadre at least once–which made our location a lot smaller, but meant that it was made up entirely of all the monsters that followed us from previous locations. This scenario almost had us beat–we had several people come close to death and were worried we’d have to rely on the Wardstone Fragment to revive us.

Fortunately, though, we squeaked by. Soltengrebbe is a triple fight (one for each head), and does Cold damage to everyone at the location. Enora used her power to discard spells to give several of us immunity to the Cold damage, and then we were able to throw everything we had left at Soltengrebbe, defeating it on the last turn of the Blessings deck.
Our reward: another box checked on the Knights of Kenabres, and everyone got a card feat, increasing the number of cards in our decks.
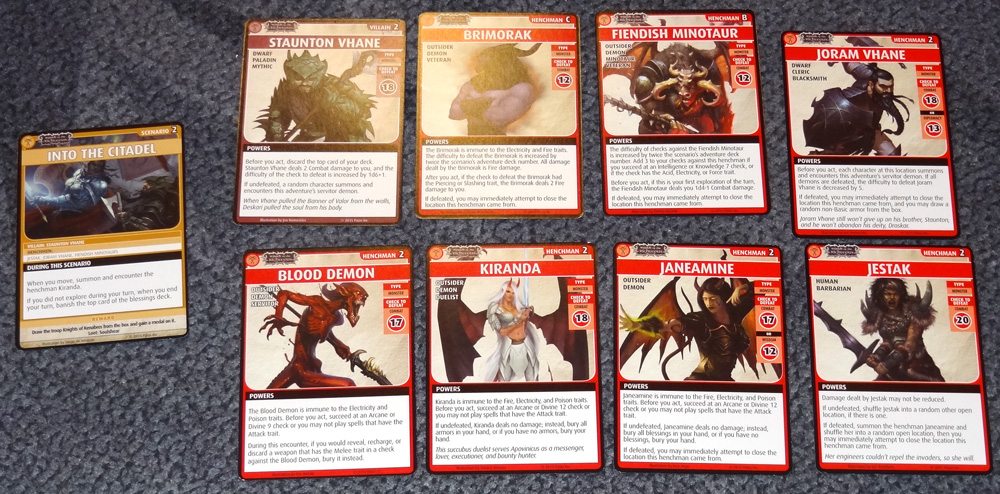
Scenario 4, “Into the Citadel,” gave us a break from the dreaded army barriers. But it did have two tricky special rules. First, whenever you move, you have to summon and encounter the Kiranda henchman–if you lose to her, you either bury all of the armors in your hand or your entire hand. Not great. Also, if you do not explore on your turn, you banish the top card of the Blessings deck. So, no sitting around and preparing in this scenario!
You notice all those henchmen in that photo? Here’s where they come from: you’ve already met Kiranda, who hovers above and attacks anyone who moves. The Blood Demon shows up at the start of every turn at the Great Hall. The Brimorak has to be defeated to close the Abbatoir. Finally, Joram and Jestak and the Fiendish Minotaurs are the henchmen that accompany villain Staunton Vhane. But when you defeat Jestak, Janeamine shows up in a random other open location.
This scenario wasn’t too bad, in the end. We tried to keep an armor on hand whenever we needed to move, and Adowyn helped us evade Kiranda in the cases when we found ourselves without it. The Fiendish Minotaurs weren’t too bad because many of us were able to pass the Intelligence/Knowledge checks, or use attacks that made them easier. We tracked down Staunton Vhane and put an end to him.
Our reward: another skill for the Knights of Kenabres, and a weapon: Soulshear, a corrupted poleaxe with a huge +4 attack. You can re-roll if you fail, but if you use that ability, you have to roll a d12: on a 1, you either summon the servitor demon, or shuffle Soulshear into your location deck, where you have to go find it again.

Scenario 5 is aptly named “Gauntlet of Ruin.” It did us in the first time we tried it, although we got closer than I thought… so close that it was even more painful when we failed.
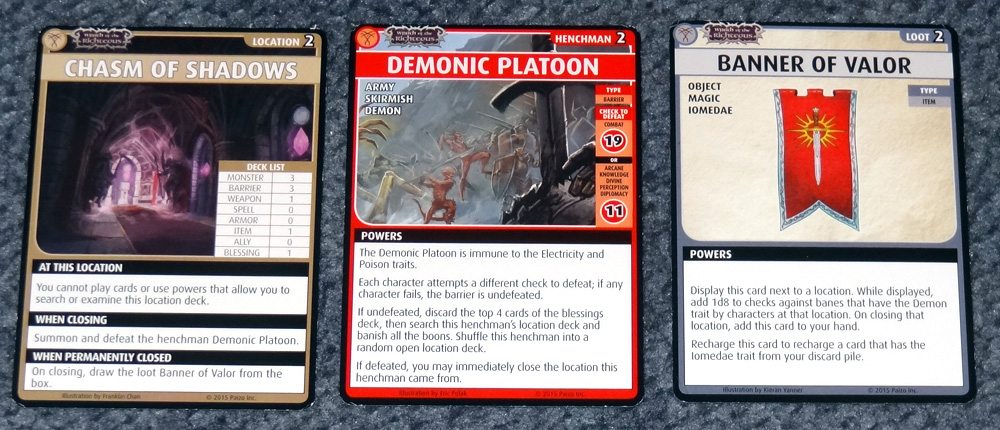
This scenario is about tracking down the demon Eustoryiax, who has taken the Banner of Valor–you can’t defeat him without the banner. The special rules state that you can’t defeat Eustoryiax unless the Chasm of Shadows location is closed, so we decided to start there. Shardra used the Misthorn to reduce damage from monsters for a round, and we plowed in. Unfortunately, to close out this location, you have to deal with the Demonic Platoon–another army barrier henchman. We threw ourselves against this thing three times, burning up a bunch of resources in the process, before we finally got it closed, because none of us had Perception or Diplomacy. Not even the Knights of Kenabres help with that. The penalty for losing is pretty significant, too: four cards from the Blessings deck, plus the Demonic Platoon gets shuffled into a random other location, plus you remove all the boons from the location deck.

Our one saving grace was that the location had the Rallying Cry barrier–everyone attempts to acquire an ally, and if anyone fails, you get a choice between banishing the barrier or keeping the allies that were acquired. We went for keeping the allies, putting the barrier back in … and managed to rally several new allies for most of us before we finally got rid of it, and eventually closed the Chasm of Shadows. The reward for that was the Banner of Valor loot card, which can be displayed at any location and gives an extra d8 on any checks against a demon if you’re at that location.
The other rule in this scenario is that whenever you encounter a demon or cultist monster, you recharge your entire hand and draw back that number of cards. So you can’t prepare ahead of time for some things (including Eustoryiax himself). Still, we did manage to close out the Abbatoir (nasty place!) and got it down to 5 locations.
We figured we would try to close out the Corruption Forge, because when you close it, you get to redeem a Corrupted card in somebody’s hand. We had two weapons that we wanted to redeem–the Soulshear and the Unholy Aspergillum, both powerful weapons that had some drawbacks. Well, it turns out that Eustoryiax was hiding in the Corruption Forge. The first time we encountered him, we failed the Wisdom check and he evaded us, doing some damage along the way. So then we spent a round getting set up and spreading out so that we would all be in position for the very last turn of the game, ready to attack him.

It was an epic last turn. Ekkie actually used the Blood of Eustoryiax–a barrier that attaches to your character and allows you to make a terrible bargain: bury d4-1 cards from your deck to draw an extra d4+1 cards. But between that, Ekkie’s power to draw a card whenever she discards a card, and the hand-refresh when encountering a demon, we figured she would be the best bet to face Eustoryiax, churning through her whole deck to pull the weapons back out (and have them in hand to redeem one when the location was closed). Most of the other locations weren’t too difficult to close: the Molten Pool made you take Fire damage (which Enora could avoid), Shardra figured she could take on the Wight henchman at the Family Tomb, and Balazar went to the Torture Chamber because it just required everyone to take 1 Mental damage. Finally, Adowyn went to the Cell, where you just needed to bury an Ally. No problem.
Ekkie started the turn with several allies–enough to get through all four cards remaining in the location deck, assuming she survived. The first two were monsters, easily dispatched. And then we hit the Demonic Horde barrier. Ah, but Ekkie had Aron Kir, a cohort who lets you evade a barrier and explore again. Done! … except that the Demonic Horde came up again, instead of Eustoryiax. The random choice meant that Ekkie had 3 to fight, and Adowyn had 2 to fight. It took a while to figure out which cards to use and what order to fight (particularly with all the hand-refreshing), but we made it–all 5 demons defeated (with ranged weapons, even, to avoid losing them). Ekkie spent another ally to explore again, and we got to Eustoryiax, the last card in the location deck. Ekkie assembled her dice and we all prepared to temporarily close our locations to prevent the villain’s escape … and then realized that Adowyn no longer had an ally because it had gotten recharged in the encounter with the Demonic Horde.
Well, Ekkie did manage to defeat Eustoryiax, so we closed the Corruption Forge and redeemed the Unholy Aspergillum … but we ran out of time to chase Eustoryiax down again and will have to try again another day.
If and when we do manage to finish off this last scenario, our reward is some loot: the Ring of Forcefangs. Plus, we get to check one more medal on the Knights of Kenabres, and then everyone gets all of the skill feats checked on the Knights of Kenabres card. That’s pretty powerful–instead of boosting just 1 skill, we each get 5 (except for Ekkie, who can’t increase Wisdom).
For now, we’ve got a week off because our kids have spring break, but we’ll be attempting this one again in a couple of weeks and then (if we survive) on to Deck 3!