Here’s some of the progress. See the lighter shade (antique gold) over the copper, black, and patina base. The gold buttons have a bit of pewter paint showing through on the edges. For good measure, I’ve painted the buckles from the straps as well.
Once everything is dry, you can polish it up (the Buff of Rub ‘n Buff), but too much buffing will make it look really shiny. That’s great for the right project. For this pair of goggles, we only want the shine on a few areas.

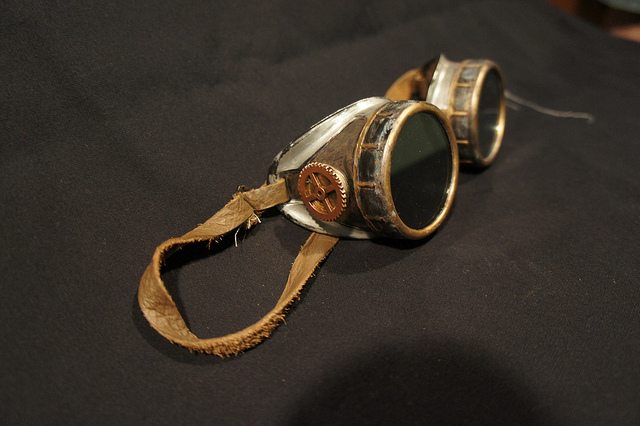
Once everything is dry, reassemble the pieces. Here’s the progress so far. I’ll probably go back and add another layer to a few areas, but the painting is pretty close to finished. In the next part of the tutorial, we’ll replace those very modern elastic straps with leather and put the final touches on our new goggles.
Step 6 – Bag of gears and scrap leather –>


Love it! Must make a pair.
Awwh what a piece 🙂 Need to try it
Do I really need to use Rub N’ Buff? I have Modern Masters and Folkart paints in most of these colors, and I really want to start on these.