It’s a very long time since I’ve posted a GeekDad Paints! post but in the last 12 months, I’ve been painting more than ever. The arrival of Kill Team: Octarius means I’ve switched from Warhammer Underworlds to the Warhammer 40,000 universe. I don’t have much experience with these types of models, but I loved the grimdark feel of the new Death Korp of Krieg from the Kill Team core set.
I wanted to create a color scheme that would be quick to produce as I was keen to use the models in Kill Team battle reports. I was also hoping to capture the grimdark feel of one-on-one combat in the 41st Millenium. Here’s what I came up with. To paint a single model takes under 30 mins, and I’m very happy with the results.
Generally, I don’t use Citadel paint. Whilst the paint is fine, I hate the pots and in particular, the lids. I mainly use a mixture of Vallejo and Scale Color paints. I’ve labeled each photo with the paint I used and (where applicable) a suitable Citadel alternative.
Step 1: Priming.
To begin with, I sprayed the model with Chaos Black primer. I used a very simple base for these models. Just some very fine sand with the occasional nugget of aquarium gravel added. I usually add the sand at the end of the process. This time I added it before I stuck the model on the base. This actually made some of the Krieg hard to stick on their bases. What I think I would do in the future is add the sand before the priming stage but after I’d stuck the model down.

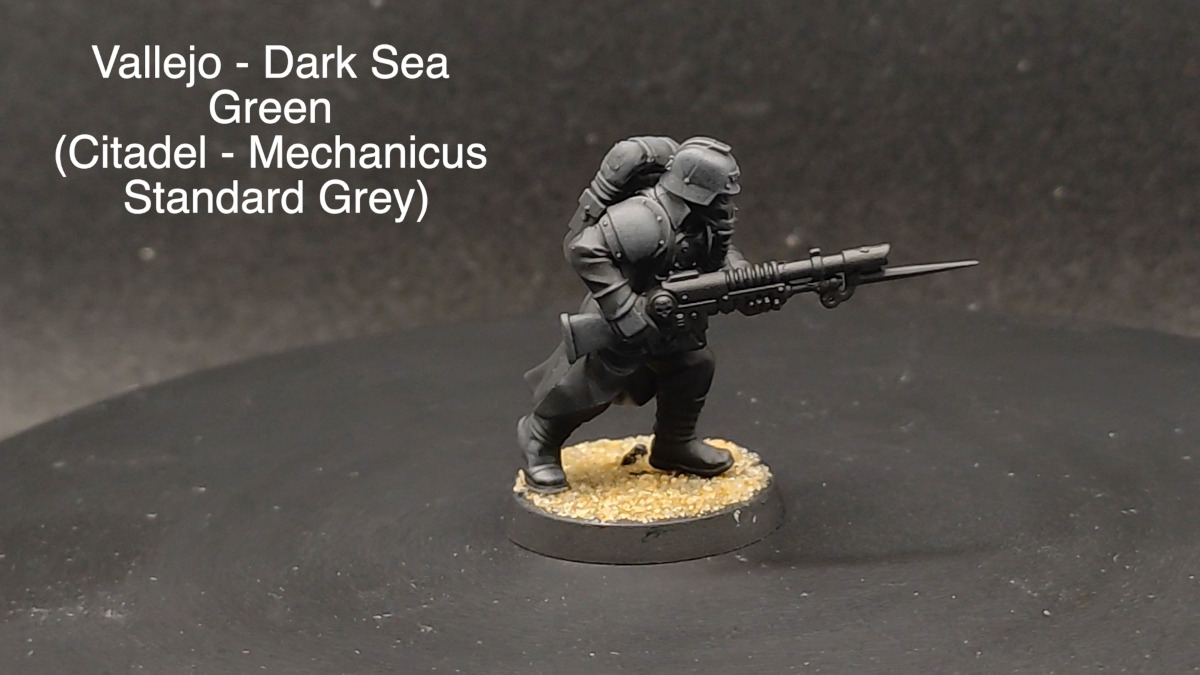
Step 2: Drybrush the Gray Areas.
I don’t mean the 40K universe gray areas that come with a continual war waged against everything that is different to humanity but the bits of the model I essentially want to keep black. These are the armor plates and helmet. On my test model, I did this in two stages, but actually, a single fairly heavy drybrush of Dark Sea Green does the trick. You could push things further by using a lighter gray on the most prominent parts of the armor.
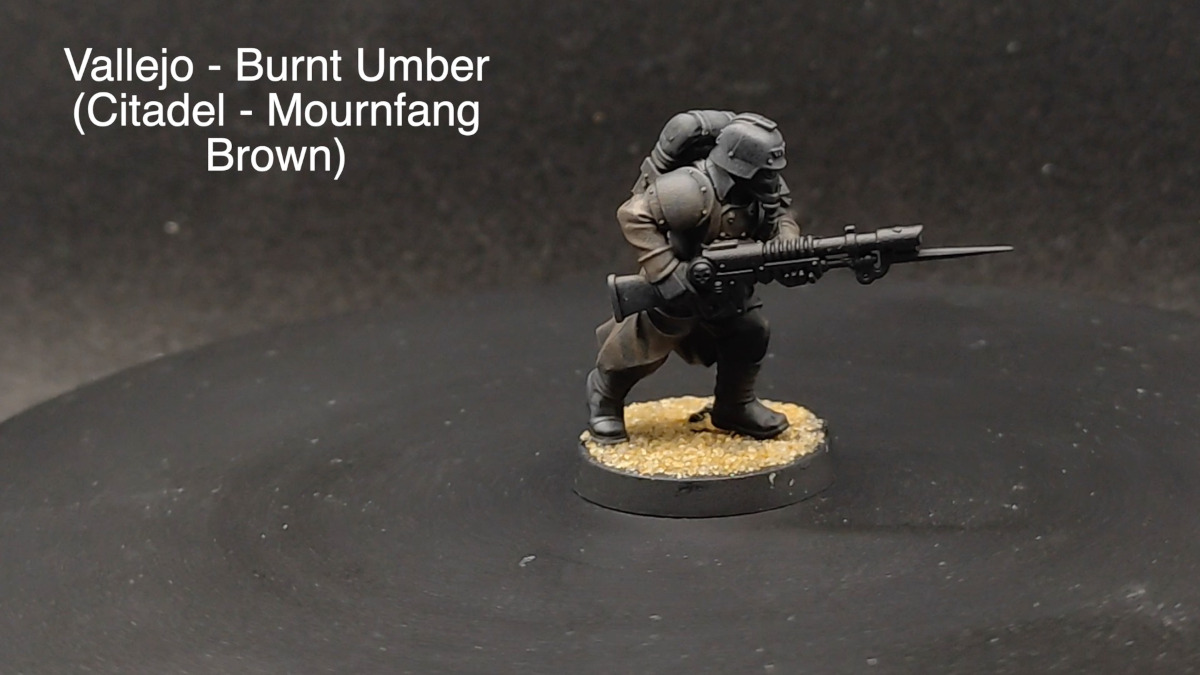
Step 3. The Leather.
Burnt Umber, again drybrushed on, creates an excellent leather effect, over black. I gave this quite a heavy coat to ensure the brown stood out from the grey/black of the metal. It’s important to try to keep the grey and brown areas separate here, especially at the brown drybrush stage. Having said that, the grimy appearance we’re aiming for is fairly forgiving of overlap. Everything just looks beaten up and tired.
Step 4: The Trousers.
I wanted to add some color to the model. In this case some green via Vallejo’s German Uniform. This was applied normally, using a couple of thinned layers. 
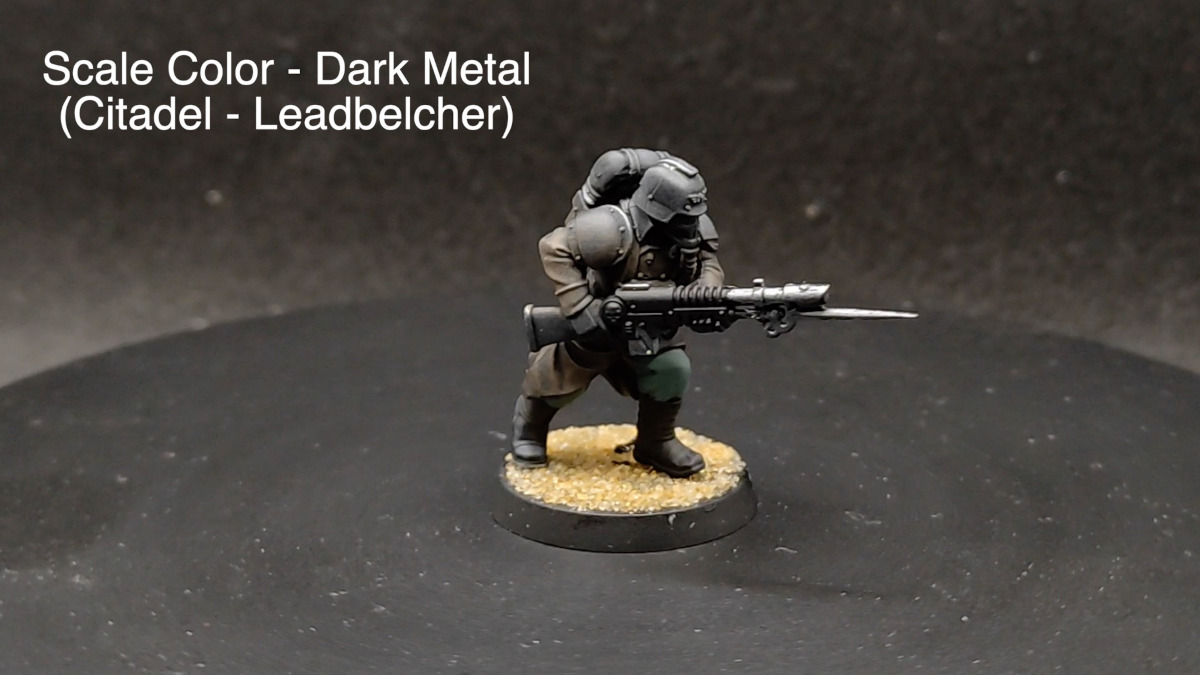
Step 5: The Metalwork.
All the metalwork was painted using a dark silver color. This is mainly the barrel of the gun and the bayonet. I also added some very light scrapes of the metal color on the edges of the armor, in particular the pauldrons. This is was to suggest scratches and wear and tear.
Step 6: The Gas Mask.
I didn’t use this in my test model, and it looked a bit…errr…faceless. I added a very heavy drybrush of Flat Earth over the black of the mask. This gives the model a focal point and breaks up the drab grey of the front of the model.

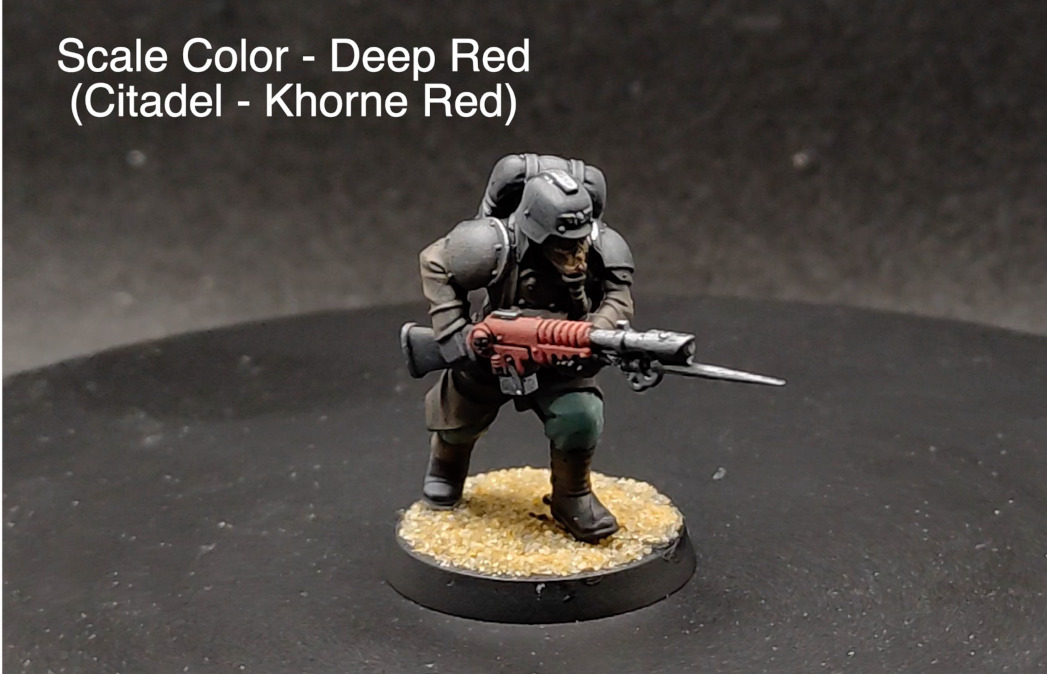
Step 7: The Gun Stock.
Speaking of focal points, it’s a bit of a favorite motif of the Games Workshop paint studio to paint their gun stocks red. I rather like this myself and often add it in. Here, again, it breaks up the model and adds some much-needed brightness. It also unifies the unit as a whole, when they are all put together.
I’ve realized, whilst writing this, that I completely forgot to paint the skull on the gunstock for this model. Not essential, but I’d use a bone/ivory color for this at this point, ready for Stage 8.
Step 8: Let’s Dull Things Down.
You don’t want too much brightness in the grim and perilous future, so next, everything gets an Agrax Earthshade wash. This ties everything together and gives the model a dirty, life in the trenches, look. You might want to add one or two coats of this, or perhaps dirty down specific patches.

Step 9: Basing.
This has a very simple base. Paint the whole base with Deep Sea Green/Mechanicus Standard Grey, wash with a 1:1 mix of Citadel Agrax Eathshade and Nuln oil, and finish with a drybrush of light grey (Vallejo Heavy Bluegray or Adminstratum Grey, from Citadel.) After a quick run around the base edge with some black paint the model is finished!

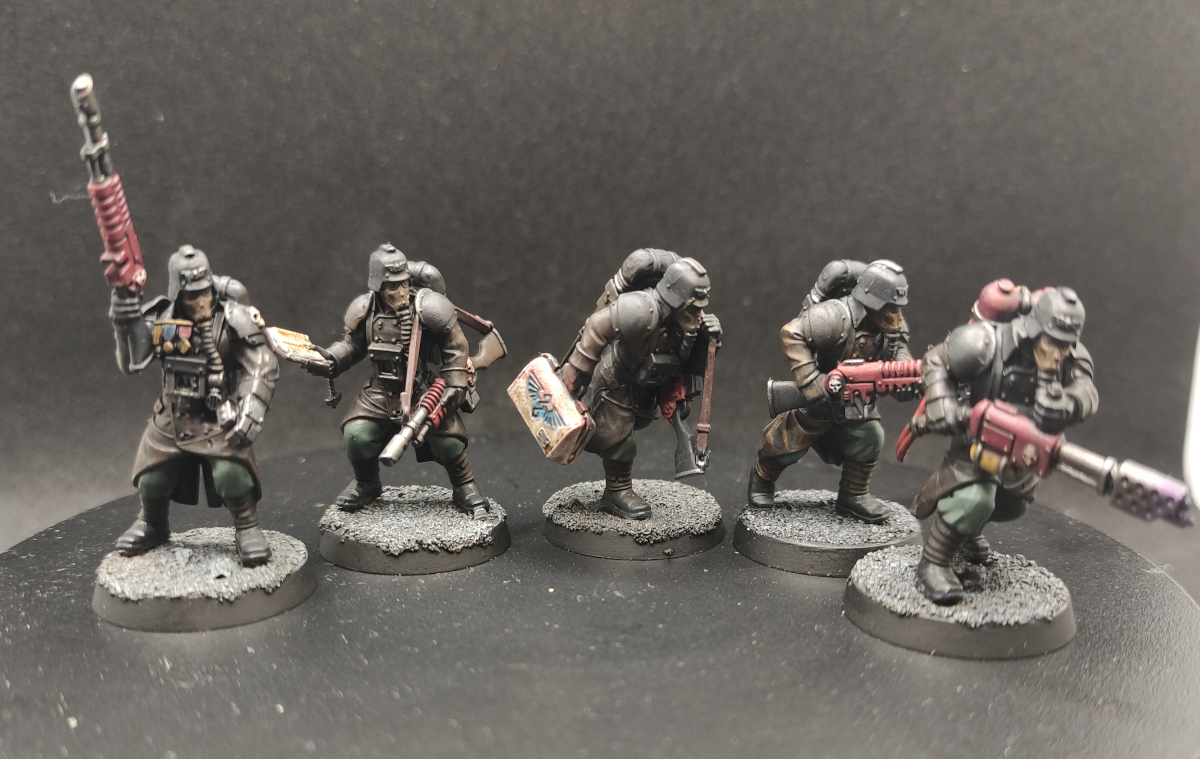
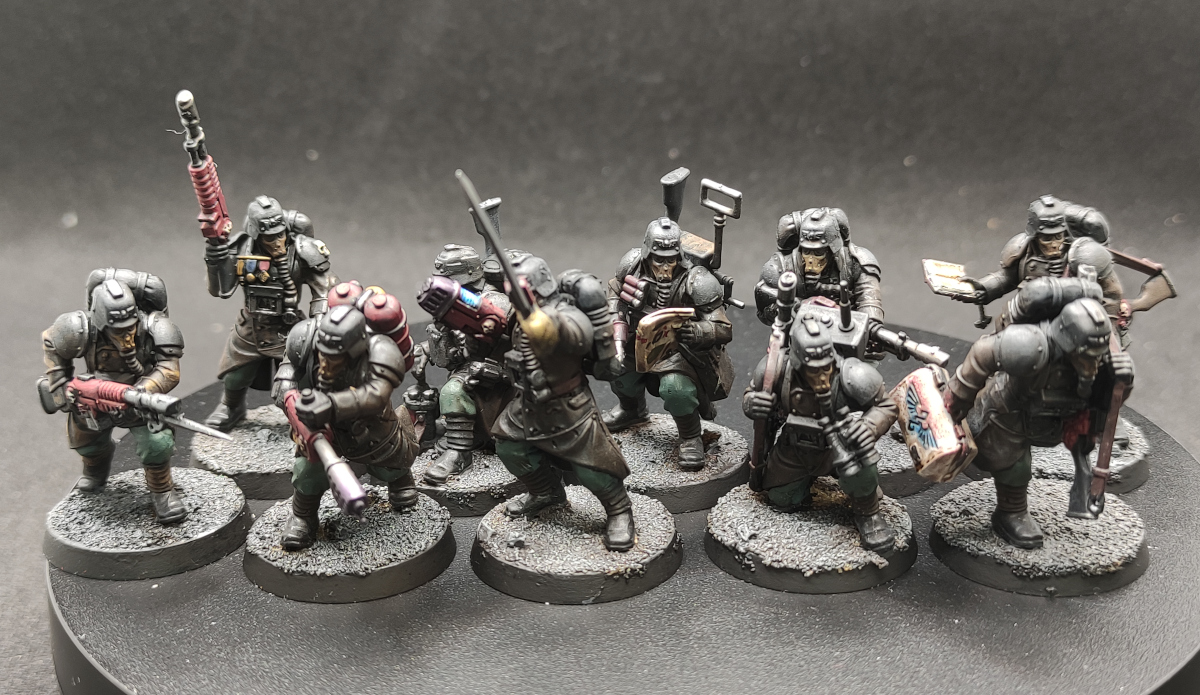
Here’s a family photo to finish off with! I had a great time painting these models. I think in recent years I’ve overlooked the power of drybrushing for producing an excellent look for large groups of miniatures. I feel that, as a painting technique, drybrushing has largely fallen out of favor, replaced by more subtle layered highlighting. For this sort of rough look on a large scale, however, I have found it supremely effective!
If you want to see more of my painting or check out the miniatures in action, find me @agentsofsigmar on Instagram and YouTube!
![]() To subscribe to GeekDad’s tabletop gaming coverage, please copy this link and add it to your RSS reader.
To subscribe to GeekDad’s tabletop gaming coverage, please copy this link and add it to your RSS reader.
Click here to see all our tabletop game reviews.
Disclosure: GeekDad received a copy of this game for review purposes.