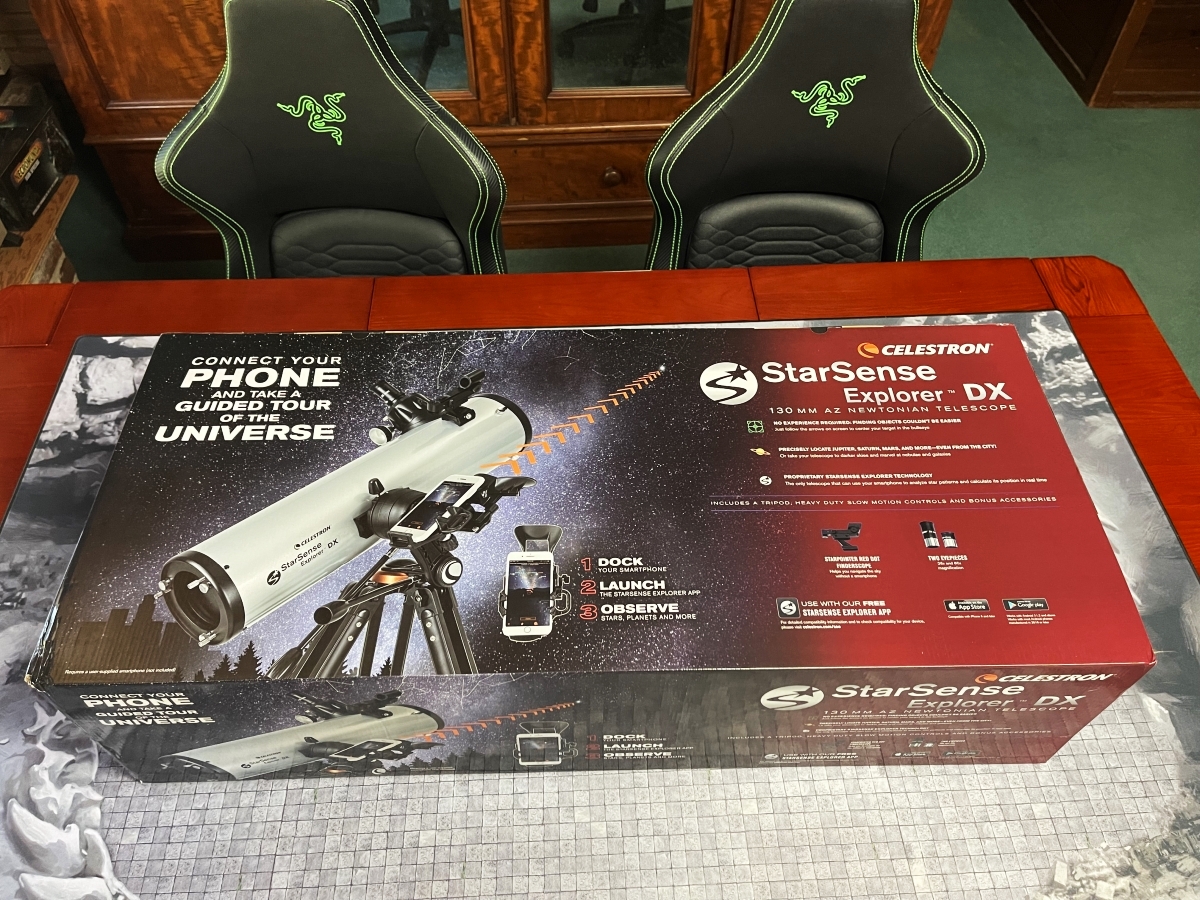
Is your dad a fan of stargazing, but he’s been relying on an old pair of second-hand binoculars to watch the night sky? This Father’s Day, maybe he deserves an upgrade. Something that’s easy to use for beginners, but can give you great views of planets and stars, even with a light-polluted sky. Something like the Celestron StarSense Explorer DX 130AZ.
What Is the Celestron StarSense Explorer DX 130AZ?
The DX 130AZ is part of Celestron’s popular line of StarSense Explorer telescopes, which uses the award-winning StarSense technology to find and track objects in the night sky. It has a 130mm (5 inch) Newtonian reflector, and It includes a manual altazimuth mount.
The Celestron StarSense Explorer DX 130AZ retails for $479.95, and is available directly from Celestron or from the Celestron store on Amazon.
Newtonian Reflector Telescopes and Collimation
There are several different types of telescopes. One type is a refractor telescope, such as the Popular Science by Celestron StarSense Explorer DX 100AZ, which I reviewed last year. A refractor telescope uses a lens to form its image.
A Newtonian reflector, like the DX 130AZ, uses a concave primary mirror and a flat diagonal secondary mirror to form the image. So what does that mean for you?
Most importantly, the design of a reflector allows it to gather more light than a refractor. This translates into being able to see more objects in the night sky.
But there are some potential downsides, too. For one, the image on the DX 130AZ appears upside down. This is certainly an issue if you want to use it for terrestrial observing, but also not an insurmountable one. There are eyepieces that you can purchase separately should you need to correct the image to fall in line with what you’re seeing with your naked eye.
The other issue, is that a Newtonian reflector will need collimation.
What Is Collimation?
Collimation is the proper alignment of the optical elements in your telescope. In the case of the DX 130AZ, the mirrors can get out of alignment, especially when transporting the telescope from location to location. When the mirrors are out of alignment, the image can become distorted.
Collimation is not particularly difficult, and takes a few minutes. The primary mirror is adjusted by loosening and tightening the three collimation screws at the back of the telescope, after having unlocked them.

While the secondary mirror, at the other end of the telescope tube, also has screws that can be adjusted to move that smaller mirror:

The one bit of bad news is that you will likely need an additional tool to collimate your DX 130AZ. The good news is that these tools aren’t very expensive. One of the ones that Celestron carries is a Cheshire Collimation eyepiece. There are also several other inexpensive options, like a laser collimator.
There is also “the star test,” a completely tool-less method for collimation. However, this method generally requires some experience, and is more time consuming than using a dedicated tool for the job. I should note that my DX 130AZ maintained its alignment through shipping, unpacking, and setup of the telescope. But eventually, with continued use I’ll need to go through collimation on the telescope.

What Comes With the Celestron StarSense DX 130AZ?
Here’s what you’ll get:
- 130mm Newtonian reflector optical tube
- StarSense dock for your smartphone
- Low powered (25mm) and high powered (10mm) eyepiece
- StarPointer red dot finderscope
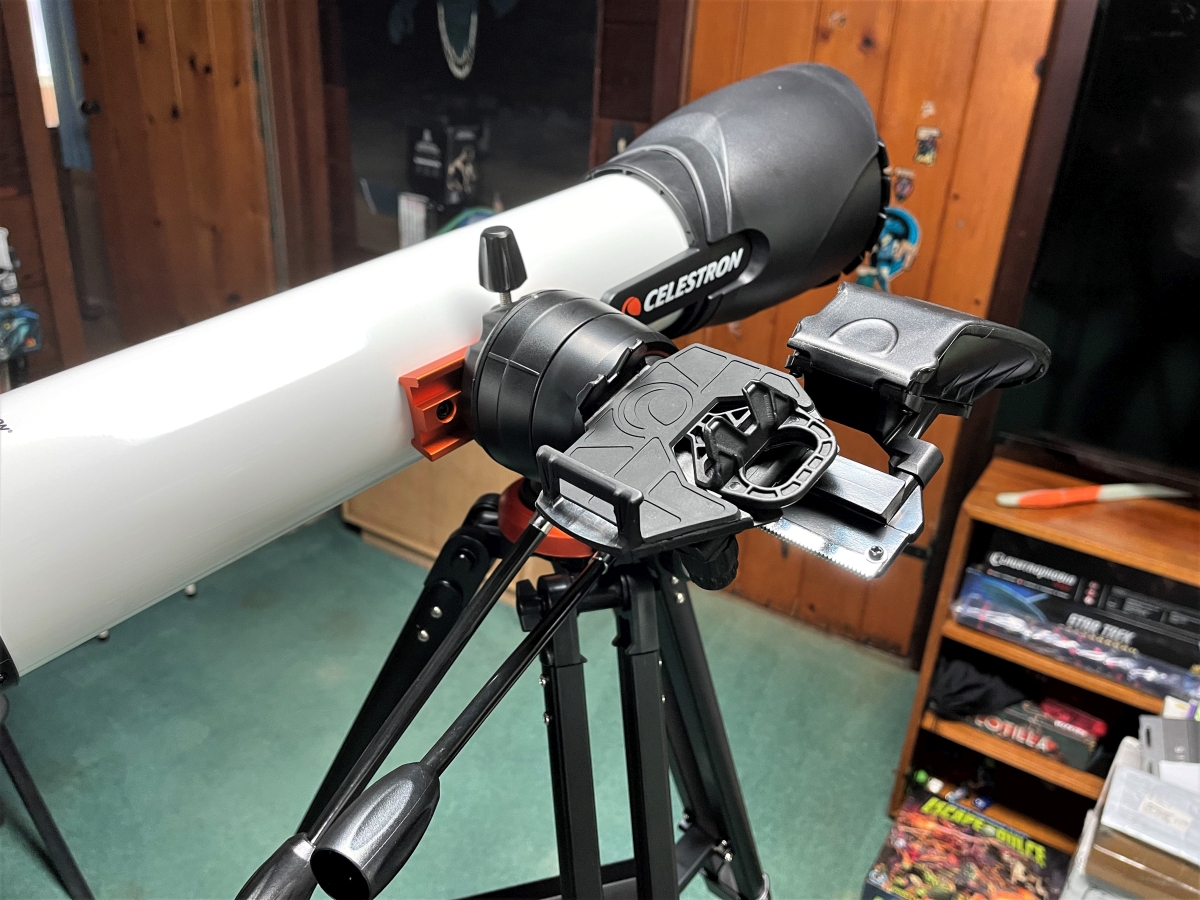
- Altazimuth mount with slow motion controls
- Full-height tripod with an accessory tray
- 2″ eyepiece adapter
The metal telescope tube is 6.5″ in diameter, and 25″ in length. There is an included adapter, so you can use both 1.25″ and 2″ eyepieces, though the telescope only comes with two 1.25″ eyepieces.
The metal and plastic tripod, StarSense dock, accessory tray, and finderscope are identical to the ones that came with the Popular Science by Celestron StarSense Explorer DX 100AZ.
The StarSense Explorer App
Free to download, the StarSense Explorer App includes a lot of useful information for your stargazing on your phone. You can read general information about celestial bodies, or play an audio narration instead! You can also look at helpful tips for how best to observe different objects, as well as look up the relevant scientific data.
But likely the number one way people will use the StarSense Explorer App is to locate objects in the night sky with your telescope. One of the accessories that comes with the telescope is a StarSense Explorer phone dock, which attaches right onto the telescope mount.
Once you have gone through a simple aligning process, you can use the app to choose a celestial object that should be visible to you in the night sky. Then, it will show arrows on your phone’s screen to help you to align the telescope directly with the object you’d like to observe.
Using the Celestron StarSense Explorer DX 130AZ

If you’re observing the night sky, your best bet for locating objects will be using the StarSense app. With the location of the finderscope near the top of the tube, using it can be a challenge, especially if you’re trying to locate something higher up in the sky. Additionally, the StarSense app is so easy to use, it’s a clear choice over the finderscope.
For either method, you manually tilt the telescope tube into the approximate facing you want, and then turn the two slow-motion controls to fine tune until you have the object you’re looking for centered in your eyepiece. Slowly turn the focusing knobs to bring it into focus.
The DX 130AZ comes with two eyepieces, a 25mm and a 10mm. You’ll generally start with the 25mm, which gives the lower magnification, 26x. When you find an object you’d like to observe more closely, you can then remove the 25mm eyepiece, and swap in the 10mm, which gives you a magnification of 65x.
It’s also worth considering adding a Barlow lens at some point, which effectively doubles the magnification of whichever eyepiece you have in the telescope.

Using my iPhone and a cellphone mount to take pictures through the telescope lens can be a fairly frustrating experience. It can be difficult to bring the image into focus, particularly if you are trying to take pictures at night. Also, if you’re using your phone to try and take photographs, you can’t use it with the StarSense app!
That said, you’ll just have to take my word for the fact that the image you’ll see directly through the eyepiece is far superior to what I can reproduce for you with my iPhone camera. I was able to get some very nice views of the night sky, even under less than ideal conditions. While I was unable to view the recent lunar eclipse thanks to extremely cloudy conditions, I was rewarded that night with some beautiful views of stars such as Castor and Pollux.
The Celestron StarSense Explorer DX 130AZ – The Verdict
The DX 130AZ shares almost identical focal lengths and magnifications with the DX 100AZ I reviewed last year. They also share the exact same tripod. So why would you choose the DX 130AZ over that other scope?
It’s all about the aperture. To again quote Celestron’s knowledgebase:
The job of a telescope is to gather light and bring that light to the eyepiece or camera. The larger the telescope’s aperture, the more light the telescope can gather making the image brighter, sharper, and able to produce more detail. The larger the lens or mirror diameter or aperture, the more light your scope gathers and the higher resolution (ability to see fine detail) it has.
The DX 100AZ has an aperture of 100mm. The DX 130AZ has an aperture of 130mm.
The difference can be striking, depending on what you’re trying to observe, as well as your viewing conditions. The highly reflective mirrors of the DX 130AZ, combined with the larger aperture, allows you to cut through light pollution much better than the DX 100AZ. Additionally, you’ll be able to see more distant objects. If you’re looking for a telescope that you can enjoy in your urban backyard as well as the countryside, then the Celestron StarSense Explorer DX 130AZ is an excellent choice. You can get some great views of the night sky, and it’s a solid telescope to upgrade with better eyepieces for expanding your viewing experience.
Note: Celestron provided me with a unit for evaluation but had no input into this review.