My youngest daughter, who’s in third grade now, loves listening to music. Specifically, she loves listening to the Encanto soundtrack, on repeat. (I’m sure many of you parents are quite familiar with this phenomenon.) We’ve bequeathed my teen’s old smartphone to her for use as an MP3 player, and she knows how to connect it to a Bluetooth speaker so we can all enjoy the soundtrack with her.
Recently, I was sent the Doodle Hog DIY Boombox Speaker, a kit that lets you build a little cardboard boombox. My kiddo loves crafts, so this was a fun way to combine two of her interests.

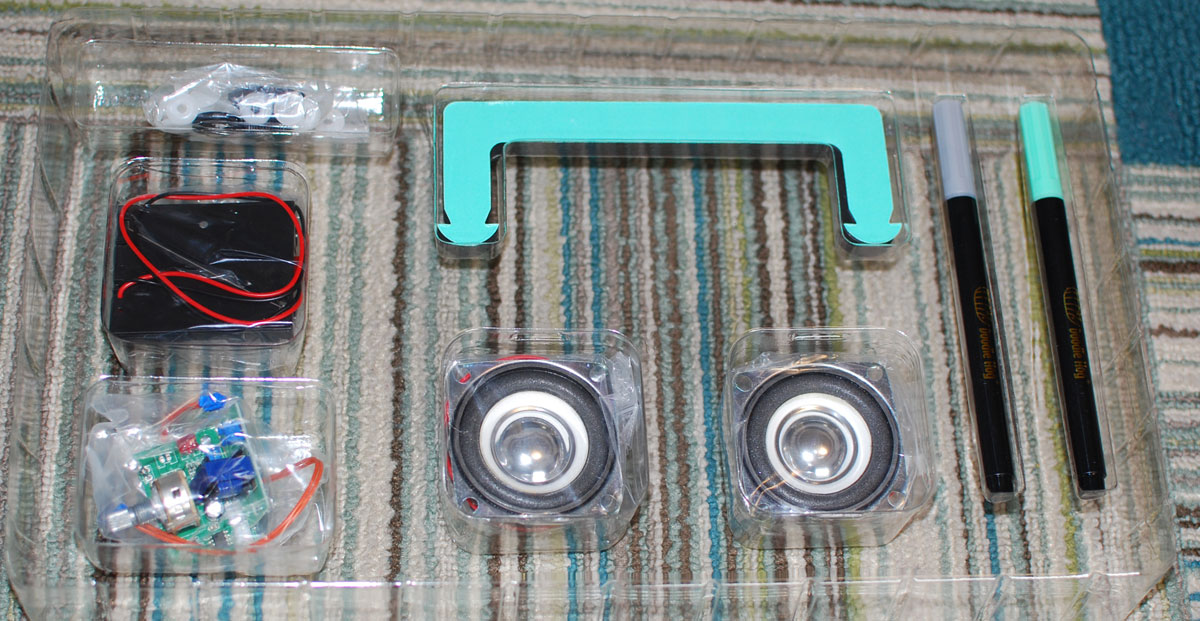
The kit comes with a pre-cut cardboard frame, a foam handle, and a smattering of electronic parts, along with plastic rivets to attach everything together. It also includes a stencil and two paint markers, along with some stickers, for decorating the boombox.
Putting it together was mostly straightforward: the step-by-step instructions show you how to fold the box together and where to attach the various parts: two speakers, a volume dial, a battery box, and… well, a device that functions as a microphone. (We’ll get to that later.)
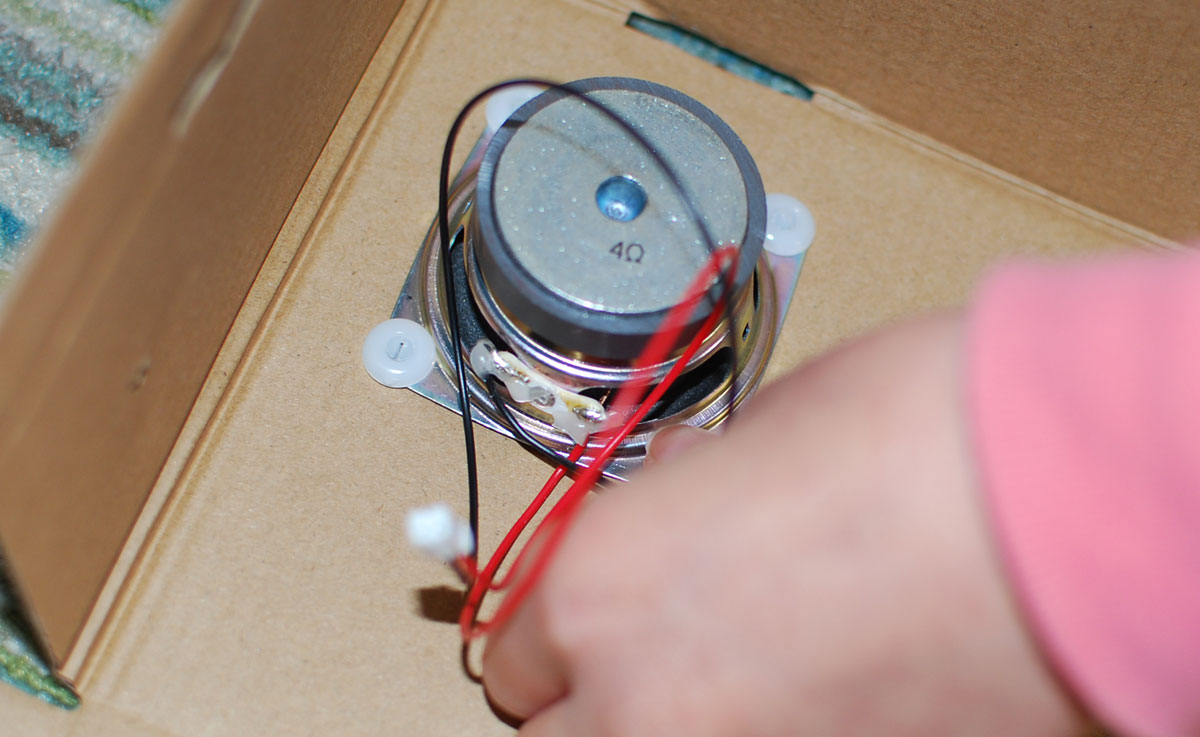
The plastic rivets can be a bit hard on your fingertips, but my daughter managed to press them against the floor to snap them in herself, for the most part. There were a couple that I had to help with simply because the positioning of the holes made it a tight squeeze.
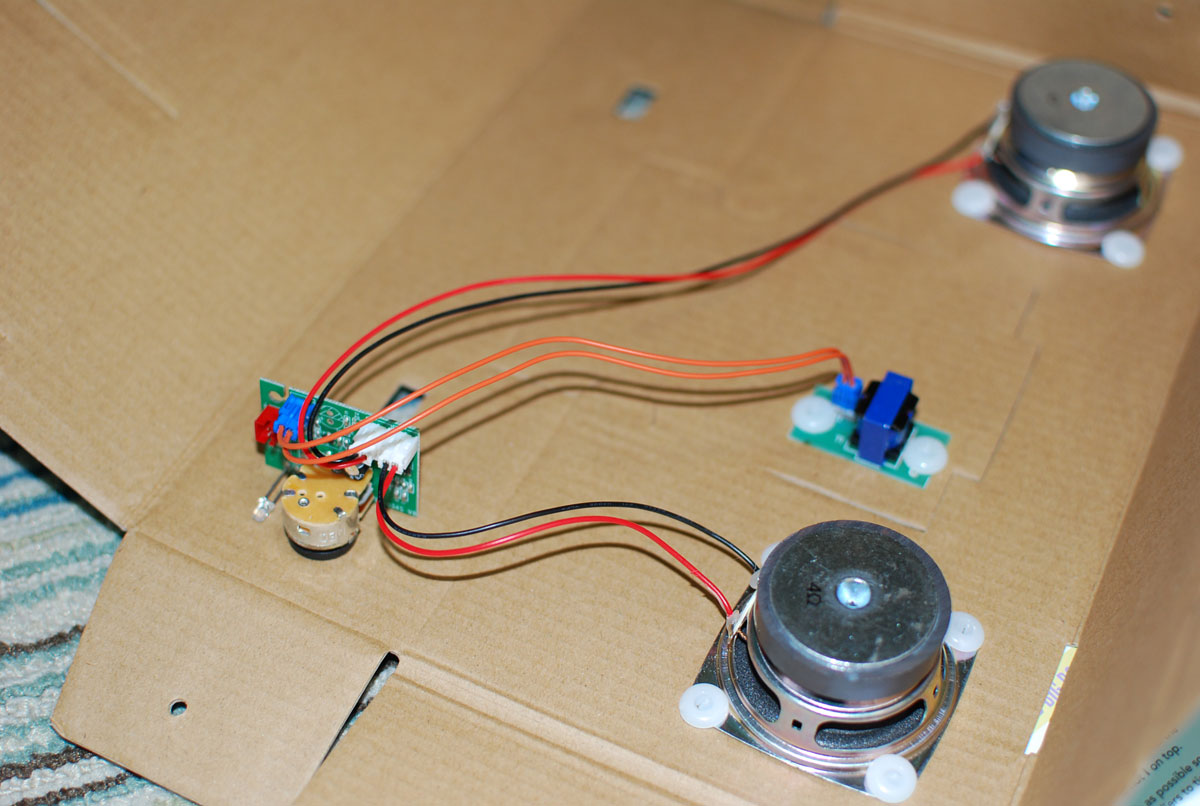
One issue we ran into was that one of the wires was a bit short, so it would barely reach the volume control board as directed in the instructions. We were able to rotate that piece to make it work, but it would have been nice to have a little more slack there.

The battery box was also a little trickier to install—it’s meant to attach to the interior of the box using some magnetic tape so that you can open a little cardboard flap and pull the battery box out. However, what we found was that the magnets were almost stronger than the adhesive, which meant that when I pulled the battery box out, it was easy to pull out both strips of magnetic tape, including the one that was supposed to stay on the box.
After assembly, my daughter used the stencils and stickers to decorate it. Some of the stickers were meant to emulate the various parts of a boombox: an equalizer graph, control buttons and sliders and dials, and even a cassette tape in the center. (“What’s that, dad?”) There are also some decorative stickers—a smiley face, lightning bolt, and so on. My daughter liked the metallic silver marker pen and stenciled on some jagged patterns on the back.
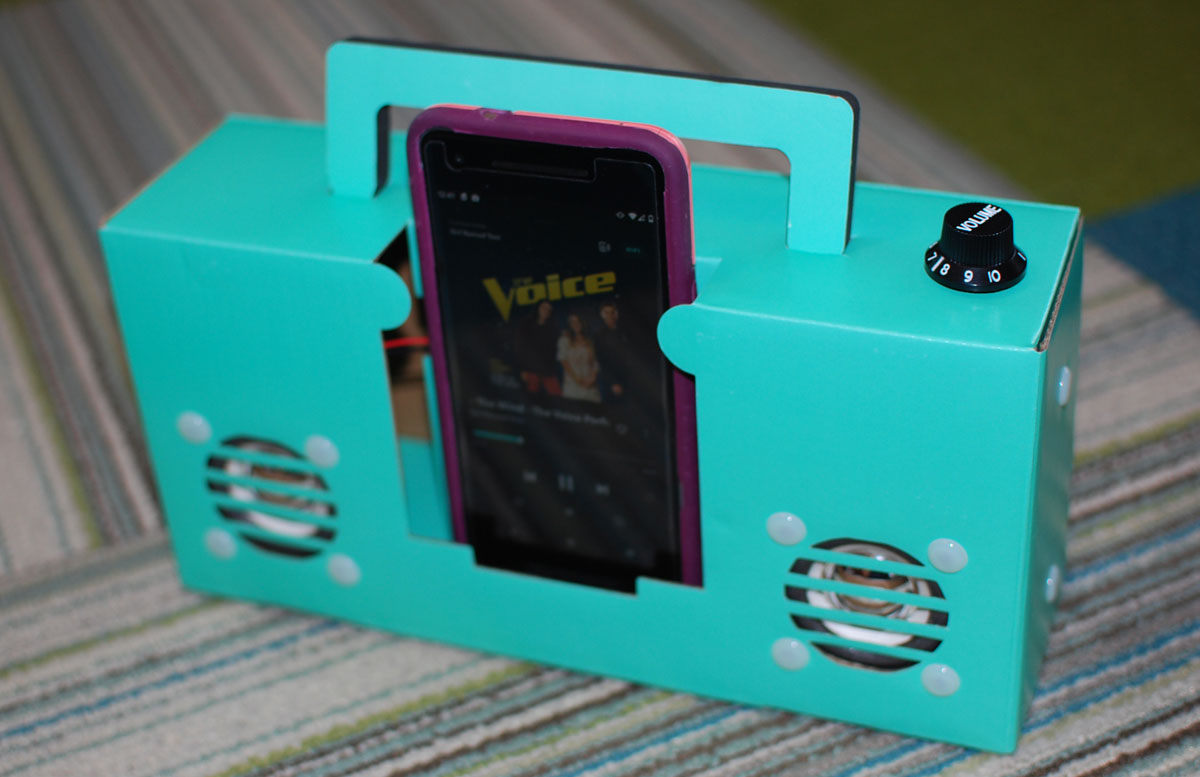
To use the speaker, you just place the phone in the slot in the center, and turn the volume dial up. It doesn’t connect via Bluetooth or a wire; instead, it’s actually just picking up vibrations directly from the phone, via the component attached to the cardboard directly behind the phone. Now, I’m not an electronics or audio guy, so I had to just poke around online, but my guess is the component is a transducer. What this all means is that you do have to turn the sound up on the phone itself, and then the boombox helps amplify it through its two speakers. However, even turned up all the way, this boombox doesn’t really boom—it’s a bit louder than the phone speaker, but not by a whole lot, and is a far cry from the Bluetooth speakers we usually use. Still, it’s a cute way to carry the phone around as a music device, and it was a fun afternoon project to put together.
I do wish that the kit included a bit more about how the electronics work. One of the selling points for the DIY Boombox Speaker is that it promotes STEM education—but then the kit itself only provides instructions on assembly without actually explaining how any of it actually works. That seems like a missed opportunity. I was able to explain a little about how transducers work to turn sound into electrical pulses, and then how the reverse is used for the speakers to turn those pulses back into sound, but that information wasn’t provided in the kit itself.
Overall, I think it may be a fun project to work on for younger kids (who have access to a smartphone), but older tweens may be underwhelmed and would probably just prefer a nice Bluetooth speaker. Though I will admit I don’t mind that sometimes “We Don’t Talk About Bruno” isn’t blasting at full volume if my daughter opts for the boombox.
The Doodle Hog DIY Boombox Speaker retails for $29.99 and is available directly from Doodle Hog.
Disclosure: I received a free sample of this kit for review purposes.