What Is Gorinto?
Gorinto is a game for 1-4 players, ages 10 and up, and takes about 30 minutes to play. It is currently available on Amazon and at your local game store. (Note: as an Amazon affiliate I may earn from qualifying purchases.)
Note that both the Kickstarter edition of the full game and the Kickstarter add-ons (including the Dragon mini-expansion) can be purchased from the Grand Gamers Guild website, as can a fifth player expansion.
Gorinto Components

Inside the box, you’ll find:
- 1 Game board
- 1 Scoreboard
- 4 Player mats
- 100 Element tiles, 20 of each of five elements
- 12 Goal cards
- 5 Key element cards
- 1 Season marker
- 4 Wisdom markers
- 1 Start coin
- 1 Draw bag
- 10 Burrow tiles
- 5 Kitsune tiles
- 1 Kitsune coin
- 5 Movement chits
- 1 Head marker
- 1 Tail marker
Also shown in the image above are the five dragon tiles and instructions for the Dragon Expansion.
The components are as beautiful as I’ve come to expect from games put out by Grand Gamers Guild.


Both of the main boards—the game board and the scoreboard—are well laid out and contain enough visual clues to assist you during play that you won’t have to go back to the rulebook. Both of these are on heavy cardboard and sure to last for the many plays this game is certain to get at my house.

The player mats are likewise well laid out. They are very simple, containing only the spots for the five elements you’ll be collecting through the game and a small band along the side for the player color, but I appreciate that they contain only the exact amount of information they need, with nothing extraneous added that would create confusion for new players.

The element tiles are plastic chips that stack on top of each other. The gameplay necessitates that the stacking be fairly stable, so it’s good that they really lock into place, even though that will often do so inside the draw bag, so when you draw them you’ll often have to separate them. It’s a minor annoyance, though, and easily outweighed by the knowledge that even large stacks gained during gameplay aren’t likely to fall over.

Likewise the goal cards. The twelve cards are divided into four sets: eight are pairs, indicated by letters A-D in the bottom corner. These cards have goals that either conflict with each other or simply wouldn’t play well together, so the instructions tell you to draw a new card if you get both of any lettered card. The remaining four cards work no matter what, and so do not have the letters.
All editions of the game include a full set of these cards in English, French, German, and Spanish.

The key element cards are a set of five where each card simply shows one of the five elements in the game and provides an additional scoring opportunity at the game’s end.

The season marker exists in two forms. The Kickstarter edition is a molded plastic piece that is simply gorgeous. But while the regular retail edition only includes a cardboard piece for this, it’s still a very nice piece that plays a relatively small role in the game anyway.

Finally, there are a set of four player tokens, which are custom wooden pieces in roughly the same shape as the season marker. Also included are four tokens to allow players to track when their score exceeds 50; the reverse side of each allows for tracking over 100.

The starting player coin is another value-added element in the Kickstarter edition: it’s a real metal coin with some genuine nice heft. But here again, the retail version may only be cardboard, but it is still nicely designed and definitely doesn’t detract from the game in the least.
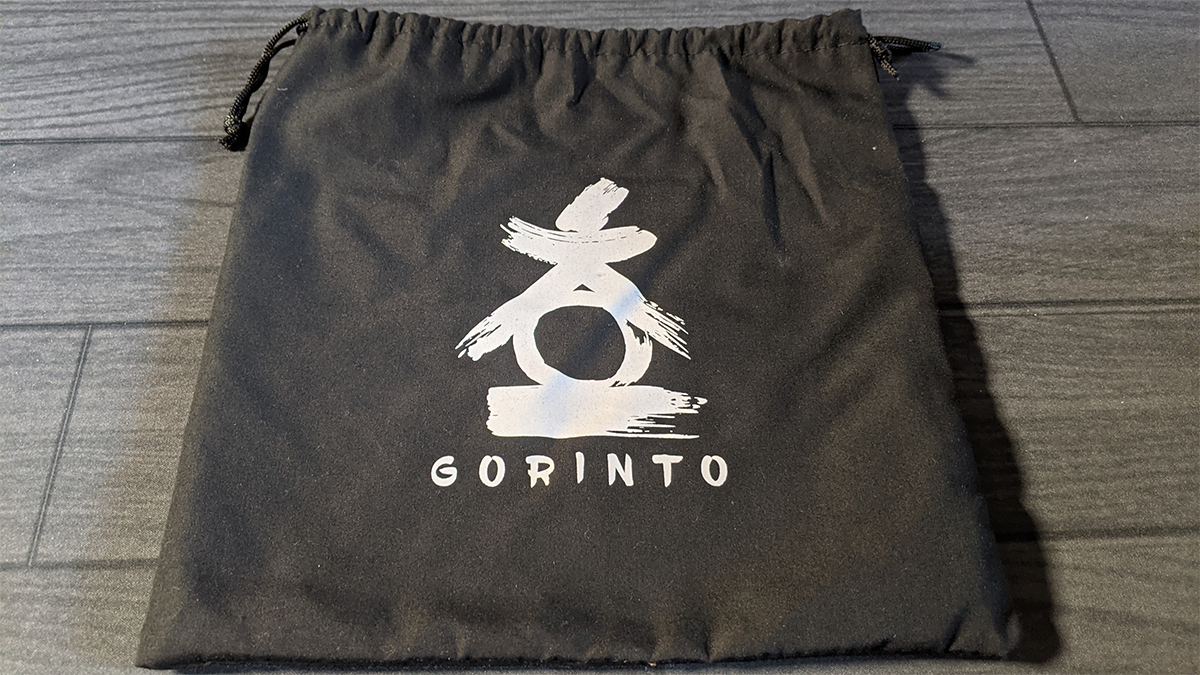
The draw bag is a nice heavy-duty cloth bag with the game’s logo screened on it.

The pieces for the Kitsune Solo Mode include five Kitsune tokens, five movement chits, a Kitsune coin, and head and tail markers, while the Burrow tokens are available for the two-player variant. All of these are printed on heavy cardboard.
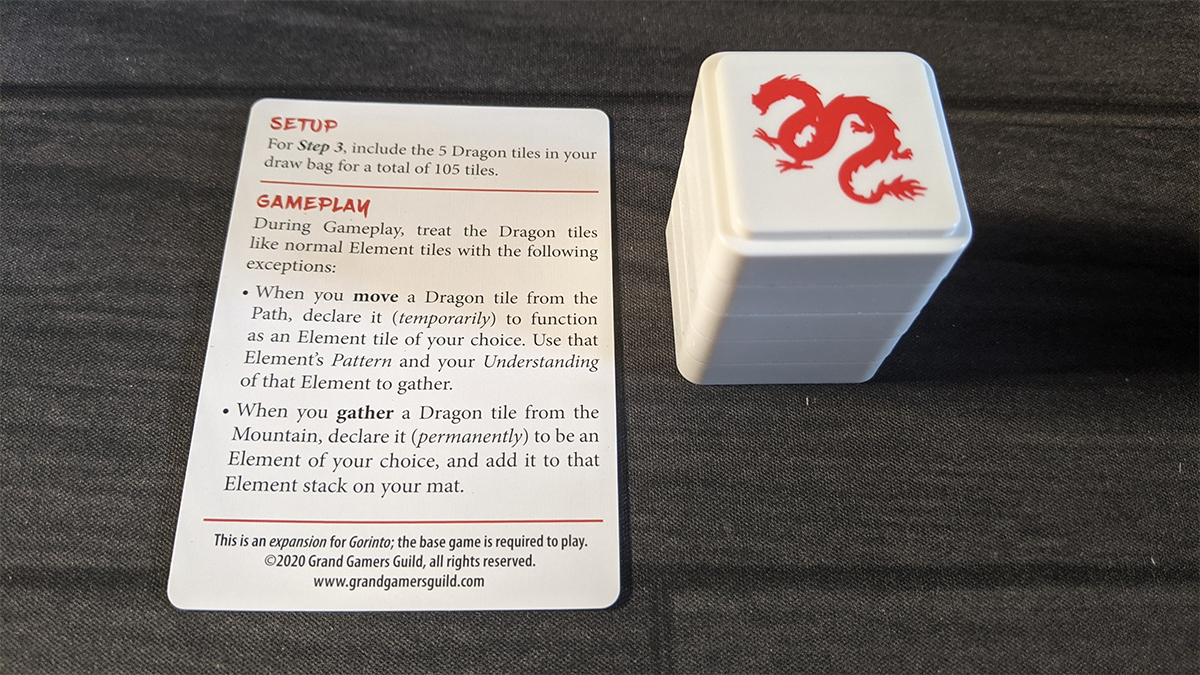
Finally, the Kickstarter edition includes the Dragon mini-expansion, which adds five Dragon tiles to the game.
How to Play Gorinto
Download a copy of the rulebook.
The Goal
The goal of the game is to collect the most wisdom (element tiles), according to the four goals laid out for the game, by the end of the fourth season.
Setup
First, place both boards on the table next to each other. Place the season marker on the first spot of the season track (located on the scoreboard).
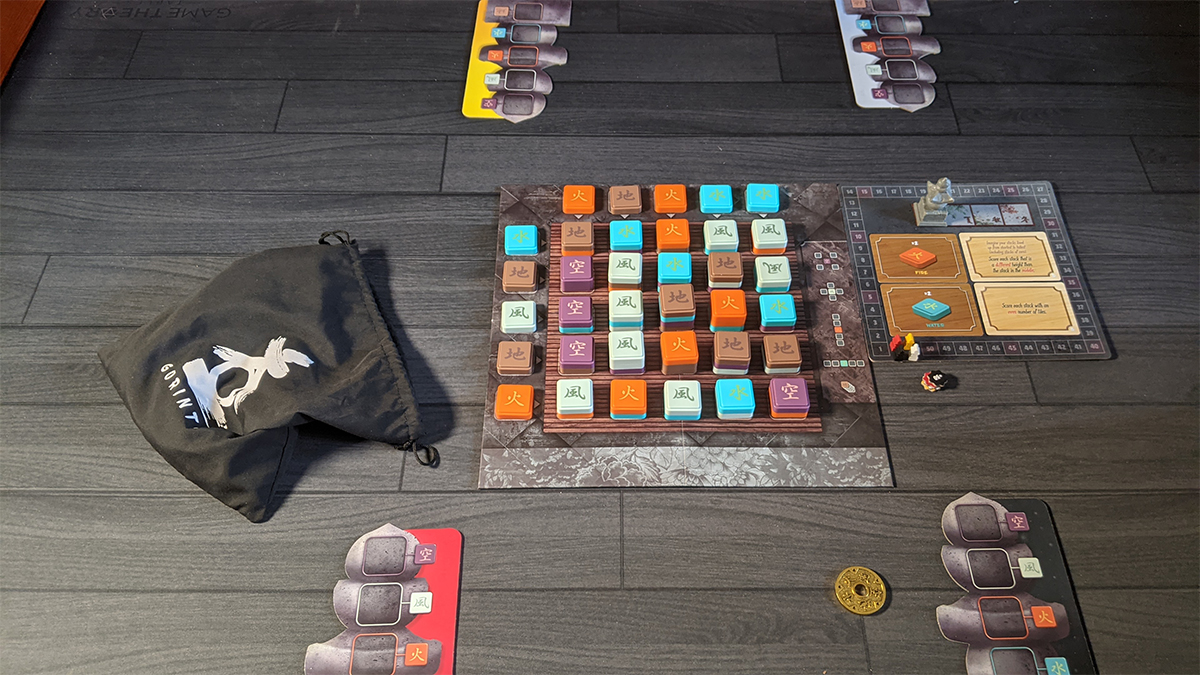
Second, dump all of the tiles into the bag and give them a good shake. Then, draw tiles randomly and build up the mountain. The default “Peak” landscape has two tiles on each of the squares around the border, then sets of three tiles on the inner ring, and four on the middle space. Again, I’d ideally like to see these numbers printed on the board itself, but that’s a minor quibble. Also worth noting: the rules do have a few other suggested layouts, but the Peak is the one to start with.
Third, ten more tiles are drawn at random and placed along the path, which wraps around the top and left sides of the board.
Fourth, shuffle the goal cards and draw two of them. If they have the same letter printed in the bottom right corner, discard one and draw another, and place them face up in the spots on the scoreboard. Then shuffle and draw two of the key element cards. Place them in the spots on the scoreboard to the left of the goal cards.
Finally, each player selects a color and takes the matching player mat. They put their wisdom markers next to the starting spot on the scoreboard. Randomly select a starting player, give them the coin, and you’re ready.
Gameplay

The starting player begins by selecting any tile along the path—the ten tiles on the top and left sides of the mountain—and moving it in a straight line onto the mountain. The tile can be moved any number of spaces and can be placed either on top of an existing stack or on an empty space.
Then, the player collects tiles off of the mountain based on the type of element of the tile they moved. The number and location of the tiles depend on a combination of the number of tiles the player has already collected of the same type as the one they moved—what the game calls “understanding”—and the type of element played. The only really important rule to know at the outset is that the tile the player moved can never be collected by that player.

The “understanding” each player has of an element is based on the number of tiles of that type they have already collected. As they move and get new elements, they are stacked on their player mat. For each element, a player’s “understanding” is one more than the number of tiles they have collected. In the image above, the player has one Void tile, one Wind, two Fire, one Water, and zero Earth. So, their “understanding” of Void, Wind, and Water are each two (one tile plus one), Fire three, and Earth one. Earth in this example here is the reason for the “plus one” part, so even before you have collected any tiles (say, the beginning of the game), you have some “understanding” of things and so can pick up new tiles.
This “understanding” is the total number of tiles a player can in theory collect from the mountain when they move. Again, referring to the image above, if that player moved a Fire tile, they would be able to pick up a total of three tiles, as that is their “understanding” of Fire. They could collect two tiles if they move Wind, Water, or Void, and one if they moved Earth.
It’s important to remember as well that players must collect as many tiles as they are allowed. If you’re “understanding” of Wind is four, you have to pick up four tiles when you move Wind. The only exception to this is if the player is unable to collect the maximum number because there aren’t enough tiles to be picked up. It just can’t be your choice. And that’s an important strategic decision late in the game: there can be times when it’s advantageous to pick up fewer tiles (even zero) so that you don’t overshoot a scoring goal.
The tiles you pick up will be from a pattern determined by the element you are moving. Void tiles allow you to pick up tiles from stacks in the four corners diagonally adjacent to the spot to which you move. Wind tiles allow you to pick up from the four orthogonally adjacent tiles. Fire allows you to pick from any spot in the same column as the place where you land, and Water does the same, but from the same row. Earth allows you to pick tiles from the same stack but keeping in mind the rule that says you cannot pick up the tile you moved itself. Each of these patterns is helpfully printed to the side of the main board for easy reference.
Once the number of tiles on the path is less than the number of players, the season ends. (This means that in a four-player game, there will be two left, in a three-player game, one tile, and with two players, no tiles.)
At the end of the season, all players simultaneously score their player mats based on the goal cards. This is the key strategic element in the game, as it should be dictating how players choose what to move and collect. Both goal cards are scored, but neither of Key Element cards yet (those are only scored at the end of the game.)
Once scoring is finished, there’s a quick reset phase for the next season. Any remaining tiles on the path are discarded from the game, and then 10 new tiles are drawn from the bag to reset the path. Note that the mountain itself is never reset. The season marker is moved, and the first player coin is passed to the player with the lowest score, and a new season begins.
Game End
The game ends at the end of the fourth season. At that point, the goal cards are once again scored. (Also of note: the goal cards are not reset each season—you use one set of goal cards for the entire game.) After the goal cards are scored, you score the Key Element cards, which are all the same: score 2 points for each tile you have collected in each of the two indicated elements.
The winner is the player with the highest score. If there’s a tie, the victory goes to the player with the fewest overall tiles. If there’s still a tie, both players win.
Kitsune Solo Variant
In the solo mode, the player competes against the Kitsune, which are Japanese “powerful and mischievous spirits.”
The setup for the solo mode is mostly the same as the regular game. You as the player take one player mat and matching score marker, and select another color for the Kitsune. Set up the goal cards as normal, but none of the goal cards in set “C” will work in Solo mode, so they should be removed. As in the normal game, two key element cards are placed on the scoring board, but then two of the remaining three cards are also drawn and placed below the scoreboard. The mountain is set up as normal, but the path is left empty.
The ten Burrow tokens are shuffled and placed in a facedown stack, as are the five Kitsune tokens. The top tile from each stack is then revealed, and the Kitsune tile is placed on the path in the spot indicated by the Burron token. This is repeated four more times to place all five Kitsune tokens. Then, random element tiles are drawn from the bag to fill the rest of the path.
Finally, the five movement chits are mixed up and placed in a facedown stack. The first chit is removed without looking at it. Then, the next one is drawn and revealed, and the Head token is placed on the row or column with the matching Kitsune tile. The number of spaces is indicated by the tile, so if you draw the 2 tile, you place the head two spaces along the row or column where the 2 Kitsune tile is. This is repeated for the tail.
To play, you alternate turns with the Kitsune, each getting three turns per round. You play the game as normal, but you cannot move the Kitsune tiles. For the Kitsune’s turn, you flip the Kitsune coin. Heads activates the head, tails the, well, tail. If the activated head or tail is on a tile, it gathers tiles per the normal game rules for the tile it is on, with unlimited understanding, so it always gathers all tiles it can. If it’s on a blank space, its magical powers activate, and it gathers the most plentiful visible element. If there’s a tie, it prefers a Kitsune key element–one of the two extra key element cards you drew at the beginning of the game. Finally, if there are any movement chits left on its stack, the activated token moves by drawing one movement chit from the stack and placing it as above. If the Kitsune has no more available movement tiles, the season ends.
You score as normal for the goals. The Kitsune never scores goals, but instead, it scores 1 point for each regular key element on its board and 3 for each Kitsune element. All remaining element tiles are discarded, and then the path setup process outlined above occurs again.
At the end of the game, the Kitsune does not score any additional points, but you do, gaining 3 points for each key element (or, in a more challenging variation, 2 points.) If you outscore the Kitsune, you win.
Dragon Mini-Expansion
The Dragon mini-expansion, included in the Kickstarter version, adds five additional Dragon tiles. These are added to the draw bag at the beginning of the game. When drawn, they are placed like normal tiles, but if you move a Dragon, you declare which element you want it to act as for that turn, and collect tiles accordingly. When you gather a Dragon tile, you declare which element it will be and add it to your board in that slot.

Gorinto is GeekDad Approved!
Why You Should Play Gorinto
Gorinto, in fitting with its theme, is beautiful in its simplicity. It’s a game that can be taught in just a few minutes and played in about a half-hour. Yet in that simplicity is some real strategic depth: do you go for the move that will net you the most tiles, or do you collect fewer tiles but get a key one you’re missing? Do you try to balance the two goals for each season, or work towards the end goal of collecting the key elements?
The surprising thing we discovered in playing the game was that the scoring system is designed so that all of the players will tend to stay pretty close. There were a few times when it looked like one of us might pull out to a big lead after a season, but that usually ended up not being the case, and even when it did happen, the next season tended to see the scores tighten again.
Abstract strategy games have always had a certain appeal for me. While I’m certainly down for a deeply thematic game full of miniatures and rolling of dice, there’s something almost calming about being able to focus in on the strategy.
Gorinto beautifully manages its perfect information elements with a minimal amount of luck, truly leaving it to the players to manage their own destiny. And the random board setup, combined with the changes to the key element and goal cards in each game, means that no two plays are ever going to be quite the same, and thus, the strategy you used in the last game is unlikely to work in the next.
I’ve been reviewing games for Grand Gamers Guild for some time now, and I continue to be impressed by their attention to detail and the quality of the components they produce time and again. Each of their games has real table presence, and Gorinto is no exception. They’re beautiful, but they’re also well made and ready to stand up to being played over and over—something you’re almost certainly going to want to do.
All of these are why I’m giving Gorinto our GeekDad Approved seal of approval. It’s definitely a game anyone who enjoys abstract strategy will want to add to their collection.
Click here to see all our tabletop game reviews.
![]() To subscribe to GeekDad’s tabletop gaming coverage, please copy this link and add it to your RSS reader.
To subscribe to GeekDad’s tabletop gaming coverage, please copy this link and add it to your RSS reader.
Disclosure: GeekDad received a copy of this game for review purposes.