
As doctors have been telling us for years, sitting for long periods of time is bad for our health. It increases your risk of diabetes, heart disease, and obesity. So how can you break that cycle, and improve your health without hurting your productivity? You could get a static standing desk, but that can create its own problems as it can also be uncomfortable to stay standing for hours at a time.
Enter the FlexiSpot Adjustable Standing Desk Pro Series. This desk allows you to freely alternate between sitting and standing, with the touch of a button.
Here are some of the features of this desk:
- Weight capacity of 220 lbs
- Lift speed of 1.26″/sec
- Height range of 27.2″- 46.5″
- Enhanced Column lifting mechanism
- 5-year warranty frame and motor, 2-year electronics
FlexiSpot sent me a desk with a 60″ x 24″ desktop, but you can choose sizes ranging from 48″ x 24″ all the way up to 80″ x 30.”

Packaging
The FlexiSpot desk arrived via FedEx in two boxes: one for the desktop itself, and the other containing the lift columns and all of the hardware and electronics. While an Allen wrench is included, you will also need to have a power drill with a Phillips-head attachment for assembly.

Both boxes are packed securely, using foam and cardboard spacers to provide protection for their contents.
Assembly
The FlexiSpot website says that you’ll assemble your adjustable desk in 15 minutes. It took me closer to 40, but to be fair, most people won’t stop during various steps in the assembly to take photographs, either.

In the initial stage of assembly, you’ll attach the Lifting Columns to the adjustable Cross Beam. The instruction manual illustrates how to assemble the 3-piece Cross Beam, but I happily was able to skip over that step as mine came preassembled.

Next up, you’ll attach the Side Brackets and feet:
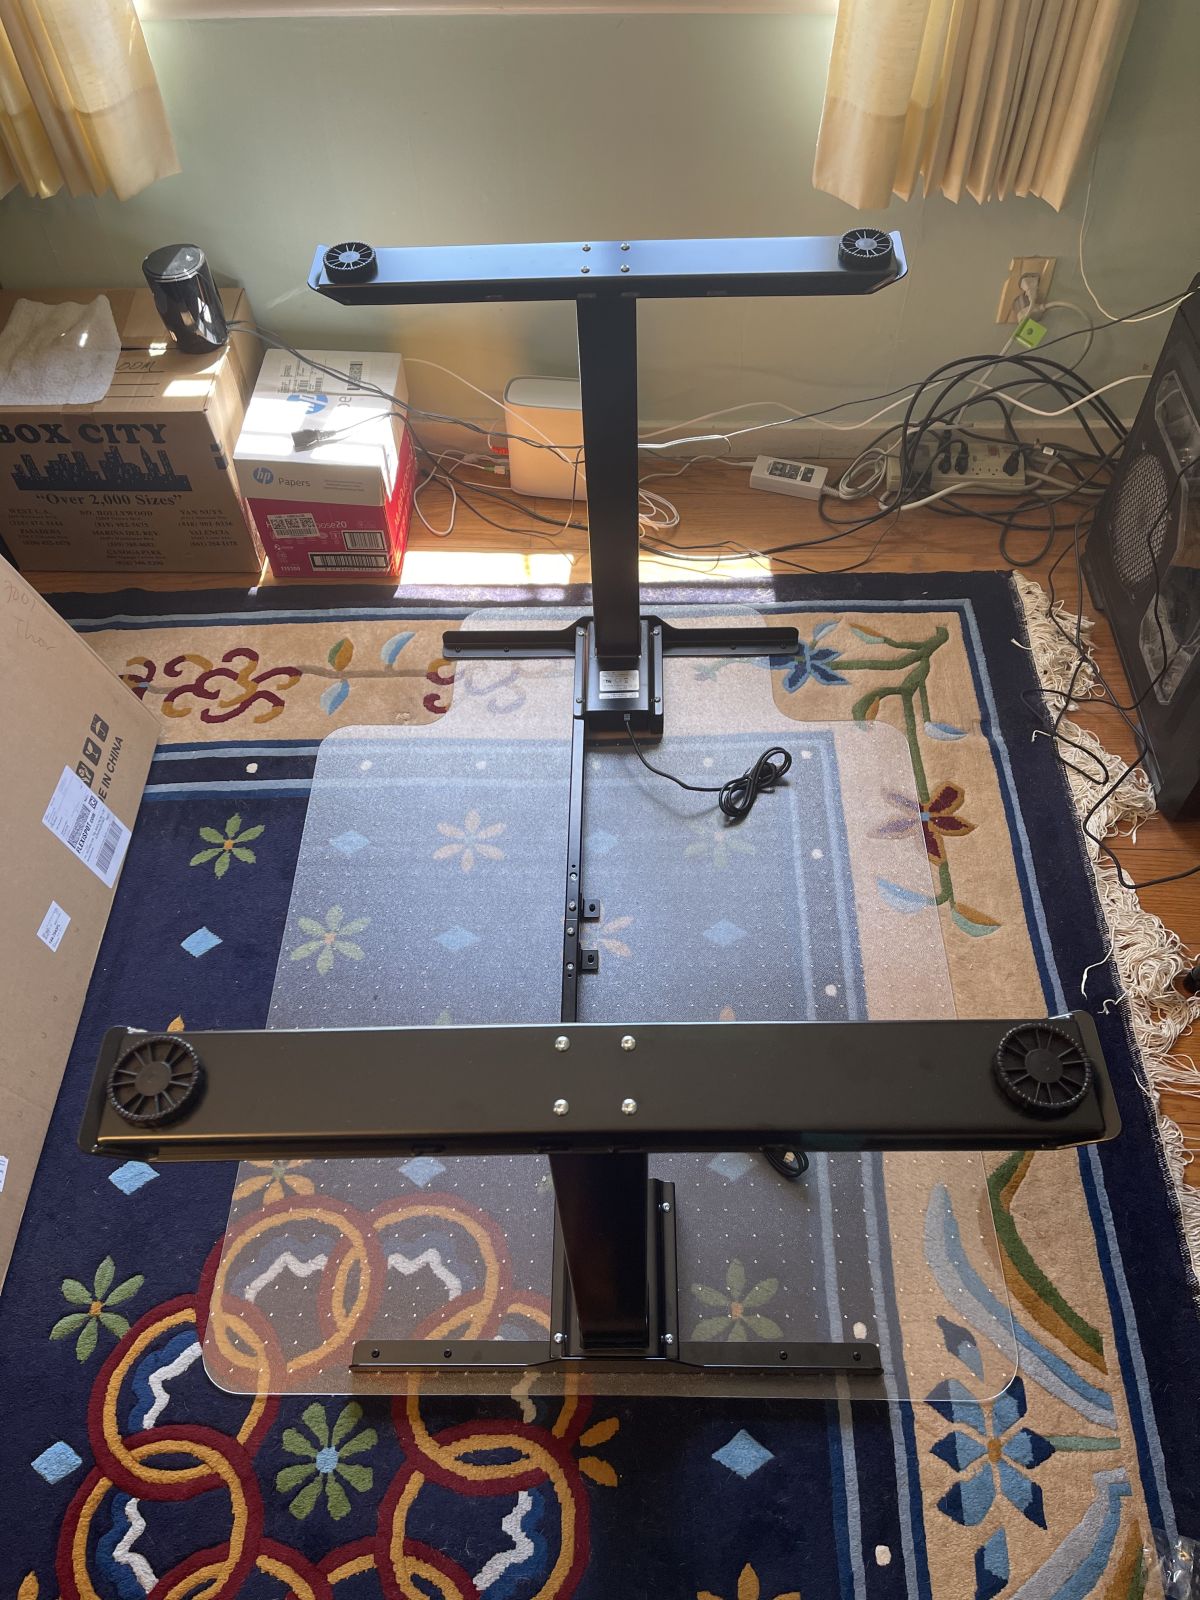
After that step, you’re ready to attach everything to the desktop. Your first step will be adjusting the width of the Cross Beam so that it fits the length of the desk. This is a simple matter of loosening the bolts holding the three pieces together, and extending the sides until they reach the pre-drilled holes in the desktop. This is also where that power drill will come in, as you’ll have a total of fourteen different screws to attach all the hardware and electronics to the underside of the desktop.

For some reason, there were no pre-drilled holes for the power supply. This was not really a problem, as I just marked where to put the screws, then drilled them in. You then plug the power cord, Hand Switch cord, and Lift Column cords all into the power supply. FlexiSpot also provides cable ties that attach to the bottom of the desk, so that you can secure those cables flat against the underside of the desk instead of having them all dangling down.
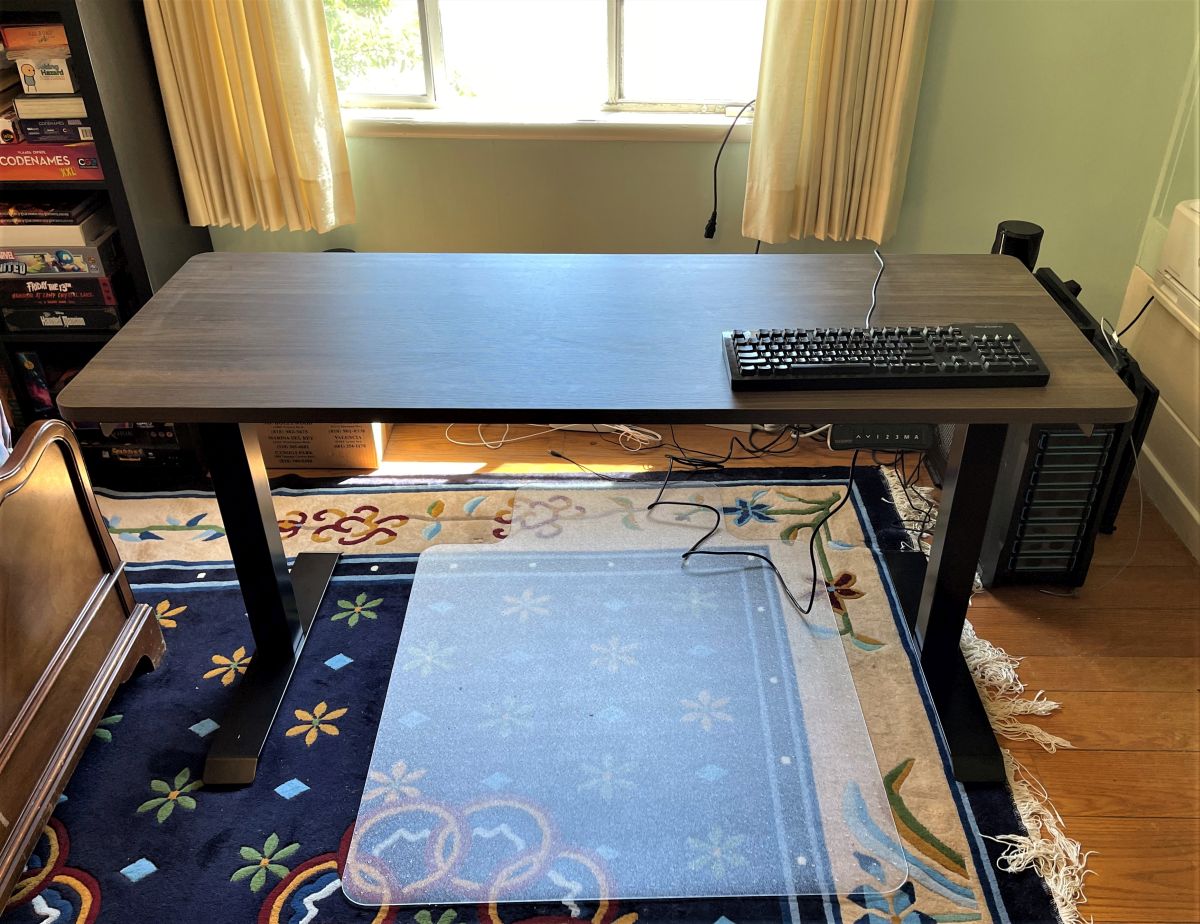
Finally, all that’s left to do is to put the desk right side up and plug it in:
The Verdict
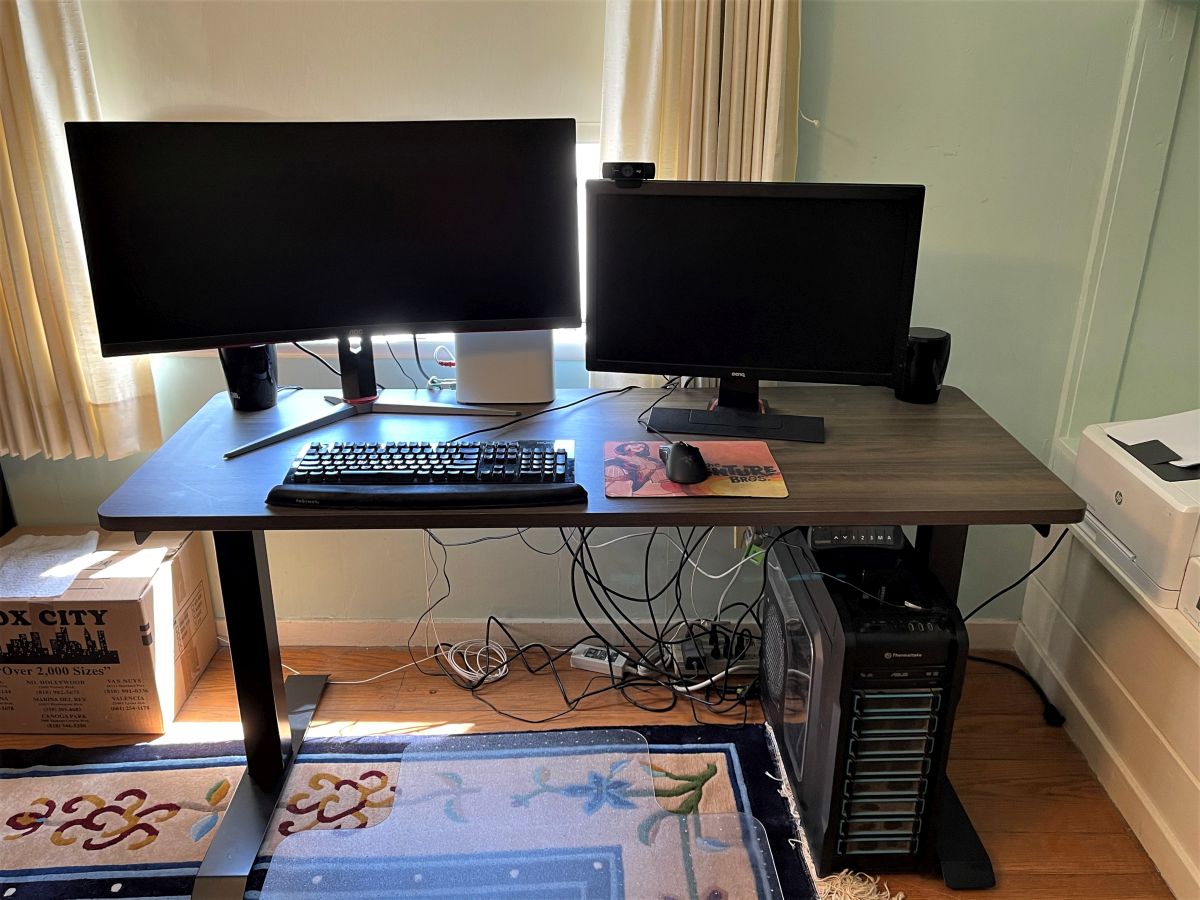
After putting my monitors and other computer hardware onto the desktop, it was time to take the FlexiSpot adjustable standing desk for a spin. The first thing to do was, of course, to adjust the height. This is done via the Hand Switch:
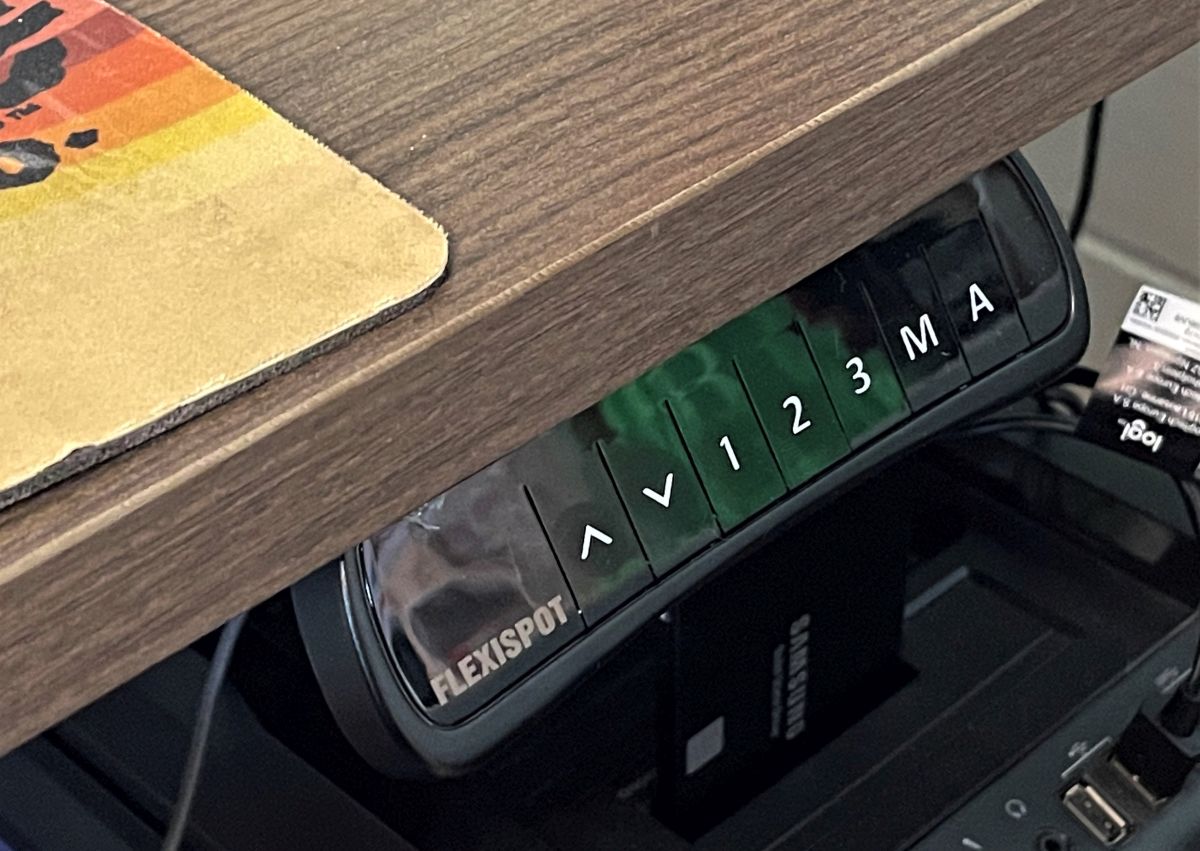
The desk is very easy to operate. To move the desk up and down, you press the up and down arrows. Movement is very smooth, with only a quiet whirring sound, and you will see the height in inches shown on an LCD display on the left. You can save up to 3 height settings on the desk. Much like a lot of car radios, when you’re at a height that you’d like to save to memory, you press the “M” button, followed by the number you’d like to save it as. After it’s committed to memory, pressing that number on the Hand Switch will move the desk to that height automatically. The “A” button will allow you to set an alarm, to remind you to stop sitting and start standing.
Using the controls, it’s fast and easy to go from this:
To this:

The only problem I had using the FlexiSpot standing desk had nothing to do with the desk itself: one of my monitors has a loosely-seated power cord, so the first time I used the desk, the monitor lost power. That issue’s since been fixed. As a matter of fact, I’ve written this entire review standing up.
I’ve been enjoying my time with the FlexiSpot standing desk. The desk is rock-steady at whatever height that I set it, and looks subtly stylish. One of the added benefits is that I’m able to get the desk at just the height I need for both sitting and standing, so I can have the absolute best ergonomics.
Prices for the FlexiSpot Adjustable Standing Desk Pro vary depending on the size and type of the desk. The configuration I was sent for review would retail for $539.99. However, FlexiSpot is also running a special promotion right now called FlexiSpot’s Day, now through May 30th. This is a customer appreciation sale with discounts up to 35% as well as daily deals. To purchase a FlexiSpot Adjustable Standing Desk Pro, or to see the many other desks and products FlexiSpot offers, you can go to the FlexiSpot website.
FlexiSpot provided a unit for evaluation, but had no input into this review.


