April 4-12, 2020 is officially National Robotics Week, so let’s take a look at one of the latest innovations in consumer robotics. Known for its spherical robots, Sphero rolls out an all-terrain hackable robot with a pair of treads designed for beginners as well and experienced users.
Background
Sphero RVR (pronounced rover) was first introduced last year as a successful Kickstarter campaign and began shipping in October of 2019. Unlike its previous products, Sphero has designed RVR to be compatible with other types of micro-controllers including Micro:bit, Arduino, and Raspberry Pi. However, even just out of the box, RVR has a lot to offer. RVR retails for $249 and can be purchased directly from Sphero’s recently redesigned website as well as other retailers.
First Impression
Right at the start, as I opened up the box, I was impressed with the design of the packaging. The RVR robot is located in the center with a box containing the battery and USB cord on the right and the roll cage and mounting plate in a box on the left. Instructions showed me how to charge the battery and then install it into the RVR robot as well as how to attach the roll cage. While waiting for the battery to charge, I was directed by the instructions to download and install the Sphero Edu app. The app offers some beginning lessons and videos about RVR that I watched as I eagerly waited for all four lights on the battery to stop blinking.

Once the battery was installed, I powered on the RVR and easily connected it to my iPad. Of course, the first thing I did was choose the drive option on the Sphero Edu app. I was immediately able to drive the RVR around the room with no difficulty and manually change the color of the LED lights. Next, I looked at the introductory lesson on Sphero Edu. It already included a program to demonstrate some of RVR’s features, so I ran it and watched RVR drive around with its LEDs changing color. Now having seen what RVR could do, I decided to try coding on my own. With the Sphero Edu app, I was given the choice to draw a program, use blocks of code, or even write text code. I opted for the blocks. Within a matter of minutes, I was able to write a quick code for RVR to drive around in a square, change LED colors along the way, and even try out some sounds which were broadcast from my iPad rather than the RVR.
After playing around with variables for speed and time to make my square bigger or smaller, I decided to try out some of the sensors built into the RVR. One of them is a color sensor located on the bottom of the robot. I laid out the color tiles that were included in the box and then programmed RVR to drive over them. As it did, the LEDs all changed to the color it sensed on the ground. Essentially, RVR was acting like a chameleon. The Sphero Edu app had several other activities to try out as well which helped me learn more about RVR’s capabilities. Needless to say, I easily spent a couple of hours putting RVR through its inaugural trials.

What Comes With RVR?
Here is what you get in the box:
- RVR programmable robot
- Cover plate
- Developer plate
- Removable roll cage
- Removable rechargeable battery
- USB cable
- Key/tool for opening battery compartment
- 5 color tiles
Specs and Features
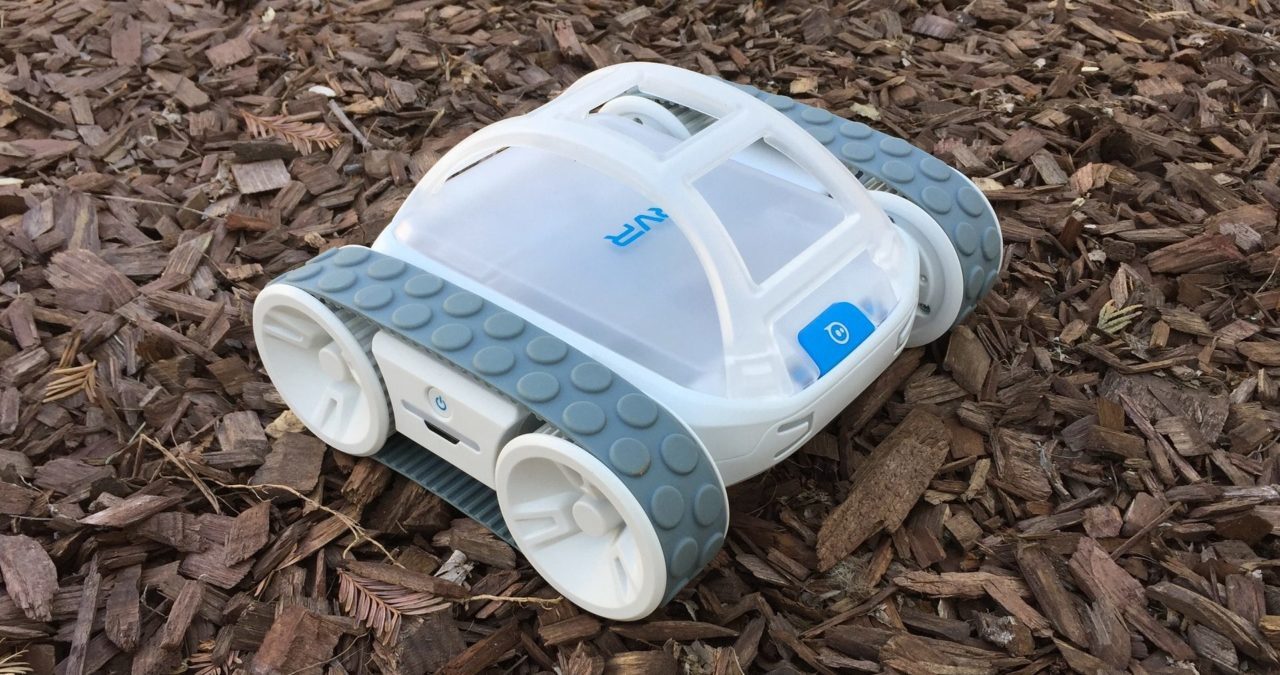
Now that we have looked at what is in the box, let’s get into the details about RVR. By removing the cover plate, you can see all the inner workings of RVR. It is all sealed inside clear plastic. The circuit boards, drive motors, gears, and other electrical components are all safely visible. The cover plate can be replaced with the developer plate to which users can attach other components. The roll cage can attach onto either of the two plates in case the robot rolls over.

The robot contains several LEDs that can be independently coded for customizable colors. The main LED lights up the front of the cover plate. There are two headlights, each with their own coding. In addition, there is an LED on each side and then an LED in the back like a tail light.

RVR can be programmed using the Sphero Edu app. This app is available for iOS, Android, Windows, Mac, and Chrome browsers. It will work with a Chromebook that many students and schools currently use. As mentioned earlier, there are three ways to program RVR in the app. In Draw, you literally draw the path you want RVR to move. The color you choose for the line is the color the LEDs will light up. This is great for younger children. Blocks uses blocks of code that users stack together to create a program. This is great for learning coding as well as for quickly trying out different tasks. The different types of functions are color-coded to make it easier to understand what the blocks do. For example, movement blocks are light blue, lights are a shade of green, sounds are maroon, and so forth. These are very familiar to those who have used Scratch or other block codes. Finally, you can program with text code using JavaScript. If you don’t know how to program using any of these three options, no problem. The app provides lessons and activities complete with videos to help get you going.
Even before you start hacking RVR by adding more components, it already contains an entire suite of onboard sensors. As I mentioned earlier, there is a color sensor on the bottom of the robot complete with its own light that can sense red, green, and blue as well as combinations of those colors. A light sensor detects ambient light. A 3-axis accelerometer and a 3-axis gyroscope detect motion as well as the orientation of the robot. A magnetometer acts like a compass but is not yet programmable at the time this article was posted. The next firmware update is scheduled to include this function. RVR also has an IR sensor so that it can communicate with other RVRs or Sphero BOLTs.

One of the unique features of RVR is the ability to connect it to other micro-controllers. Currently, it works with the BBC micro:bit, Arduino, and Raspberry Pi. These can be connected directly to the Sphero via a USB-A port as well as a 4-pin UART expansion port. The Sphero website has information on how to use these micro-controllers with RVR as well as links to where you can access the SDK (software developer kits) which import libraries necessary to control the RVR. Sample projects can also be found on the website to help users get started.
Final Thoughts and Recommendation
As a high school computer science teacher, I have had the opportunity to try out several of the types of robots on the market for education. While many are less expensive than RVR, they are fairly limited and do not offer the ability to upgrade or expand. The Sphero Edu app is designed to work with many of Sphero’s products, so if you have any experience with Sphero devices, coding RVR is the same but with more options for sensors and drive motors. On the topic of sensors, I was very impressed with the number and types of RVR’s onboard sensors. One of the features of the Sphero Edu app is the sensor data feature. While a program is running as well as at the end, the user can view graphs of data from all of the sensors and then even export it. These include distance, velocity, orientation, data from the color sensor, and more. As a result of these features, RVR is a great tool not limited only to computer science.
Since RVR can be paired with other micro-controllers, I wanted to test out how difficult this was to do. There are several lessons and activities on the Sphero Edu app and on the website with videos and instructions. So I tried writing a simple program to use a micro:bit to control the RVR. After downloading it to the micro:bit, I connected it to the RVR and it began running. It was very easy to do. However, I did discover that not all USB cords work. The short cord that came with the micro:bit worked; however, a longer cord that came with a different robot did not.
After testing out the Sphero RVR for several days, I must say that I am impressed by it. My kids also enjoyed trying it out and writing simple programs for it. Right out of the box, there is a lot to do with the RVR. The Sphero Edu app has many lessons and activities to help learn about the RVR and provide ideas for projects. The ability to hack the RVR and add other components adds even more to the value of the RVR. All ages can use the RVR. Younger children can drive it around and begin learning to code with it. However, those 12 and up with get the most out of it. Whether using it for school, learning to code, or hacking as a hobby, the RVR is capable of many of your robotic needs.
Disclosure: GeekDad received a Sphero RVR for review purposes.


