What Is PARKS?
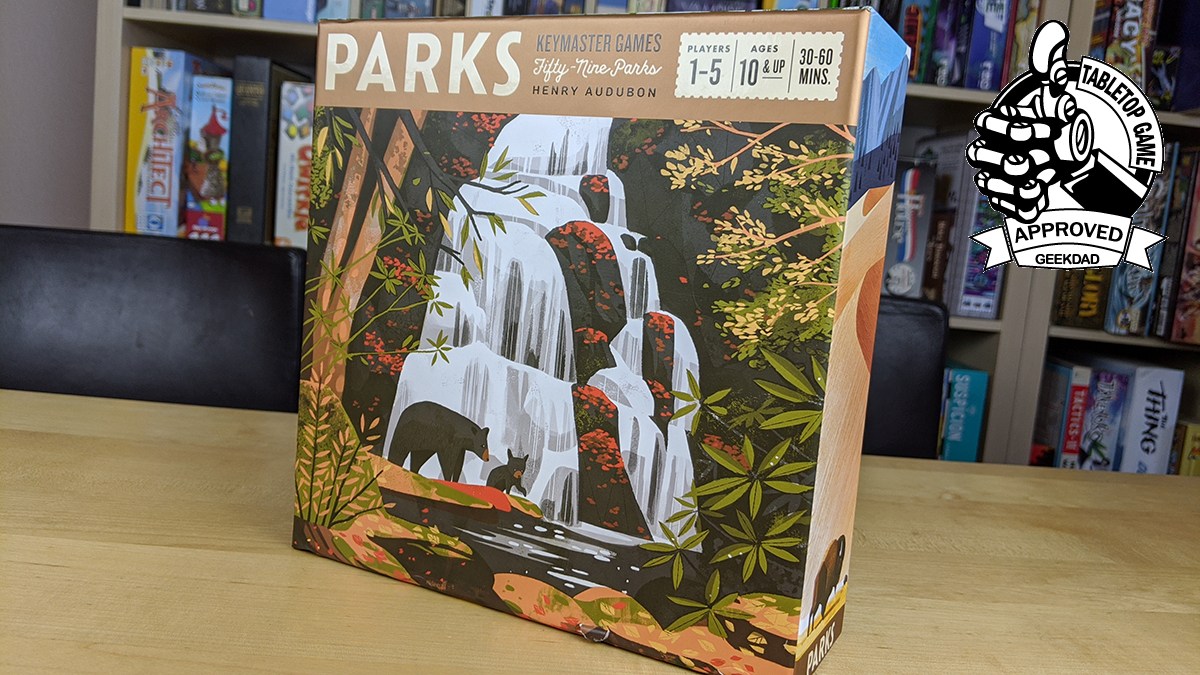
PARKS is a game for 1-5 players, ages 10 and up, and takes about 30-60 minutes to play. After a successful Kickstarter campaign last year, it is now available on Amazon and at your friendly local game store.

PARKS Components
Inside the box, you’ll find:
- 1 tri-fold board
- 2 token trays
- 48 Tarot-sized park cards
- 10 season cards
- 12 year cards
- 36 gear cards
- 15 canteen cards
- 9 event cards for solo mode
- 10 trail sites
- 1 trailhead
- 1 trail end
- 10 wooden hikers (2 each in five colors)
- 5 campfire tokens
- 1 camera token
- 1 first hiker enamel marker
- 16 wooden forest tokens
- 16 wooden mountain tokens
- 30 wooden sunshine tokens
- 30 wooden water tokens
- 12 unique wooden wildlife tokens
- 24 cardboard photo tokens

The first thing you’ll notice about PARKS is that it is, simply put, a gorgeous game. The artwork on the park cards is from Fifty Nine Parks, a series of spectacular art prints from a variety of artists that celebrates America’s National Park System. Basing the look and feel of the game around this art essentially guaranteed that it’d have great table presence.
In addition to being really nice to look at, the components are all of such high quality that the game is great to play, too. There are in essence three kinds of components in the game: cards, cardboard tokens, and wood tokens.

As mentioned above, the main deck of cards is the park cards set. Each of these tarot-sized cards features the artwork for one of the parks, a few facts about the park, and then two game details: the number of points the park is worth and the resources needed to “visit” or claim it. Also worth noting is that not every park is represented in the deck. There are two cards each for Arches, Yosemite, and the Grand Canyon, and then 42 others, so the deck only represents 45 of the 59 parks.

The rest of the cards are divided into five decks. All of these are the same size—50 x 75 mm. The seasons, canteen, and year cards all feature a cropped piece of art from the parks series, which nicely ties them into the look of the rest of the game.

The gear deck, which at 36 cards is the largest of these smaller cards, has a different art style on it that does a nice job of differentiating them from the others while not being so different that they still feel like part of the same game. The final deck, the event cards, is used only in the solo game and has a look closer to that of the gear cards.

The cardboard components are all a nice heavy 2mm stock. The main components in cardboard are those that make up the trail. There are trail start and trail end pieces, with the start showing the Delicate Arch in Arches National Park (it’s the thing on the Utah license plate) while the end shows the Northern Lights from the Denali artwork, but it’s mostly covered by the various spaces players can move to at the end of the trail.

The other ten pieces, which are each in a sort-of arrow shape, show various locations along the trail (more on them below in the “How to Play” section, but these also show details from the artwork, along with icons depicting what that site does.

The three other cardboard pieces are the camera, which depicts an old SLR camera (named, I assume, for Mattox Shuler at Keymaster Games), a set of campfire tokens, and the photograph tokens, each of which depicts a miniature of the art from one of the parks.

The biggest piece of cardboard in the box is, of course, the game board, but when I purchased PARKS I splurged and also got the neoprene playmat, so we have yet to use the board that is in the box.

Finally, there are the wooden tokens. The player movers are the simplest of these, with two tokens in each of five colors, and each with a simple line drawing of a hiker on both sides.

The main wood components, though, are the resources. These are all custom shaped to match the type of resource and are a bit thinner than normal wooden tokens you see in most games, which I’m guessing was done to allow them to fit in smaller trays and thus allow the game to be in a smaller box. The forest, mountain, sunshine, and water tokens are all nice in that they express, through both shape and color, what they are.

But the really special pieces here are the wildlife tokens. There are twelve of these, with each representing a different animal. They’re really very nice and while they may not have too much of an impact on the game (see below), they are fun to have and play with when it’s not your turn.

Oh, and there is one more component that is of a different material altogether: the first player marker, which is this really beautiful metal and enamel piece.

The other thing worth mentioning here is the custom game trays from Gametrayz. As always, these not only fit each and every component perfectly, they also then all fit back into the box with ease. I personally think that games that include these trays should add something prominent to the box proclaiming this because I’m a big enough fan of them that I’d probably go out of my way to buy games that used them.


How to Play PARKS
Download a copy of the rulebook.
The Goal
The goal of the game is to acquire the most points from parks, photos, and personal bonuses at the end of the game year.
Setup

Setup for the game is pretty quick. Place the board (or playmat) in the middle of the table, with the token trays on either side so that everyone can reach everything. (There is room in both token trays for the tokens to be split between them so that things should be close to everyone.)
Next, set up the trail. You place the trail start and end pieces below the board (or on the playmat, since there’s room for it there). Then, you pull out the five basic tiles from the rest—these are the ones without an asterisk. If playing with 4-5 players, the waterfall is added into this set. If playing with fewer than 4, the waterfall is returned to the box. Then, the advanced tiles are shuffled and one is added to the basic tiles, which are then shuffled together and laid out between the trail start and end pieces to form the trail. The remaining advanced tiles are placed to the side, as they will come into play in later seasons.
Then, shuffle the parks deck and place it face down on the spot on the board for it. Then, the top three cards are revealed and placed in their spots on the board.
The gear cards are shuffled and placed in a face-down deck on their spot on the board, and then the top three cards are revealed and placed on the board from that deck.
The canteen cards are shuffled and one card is dealt, face-up, to each player. The rest of the cards are placed in a facedown deck on the board.
The year cards are, you guessed it, shuffled. Two cards are dealt to each player, who then decides on one to keep and one to discard. These cards are kept hidden until the end of the game. Any unused cards, and any cards that are discarded, are returned to the box.
Shuffle the seasons deck and place it on the board, revealing the top card. If the card says to add tokens to the parks, do that now.
Each player selects a color and takes the campfire token of that color, and then places both of their hikers on the trail start piece. The first player token is given to whichever player went on a hike last, and the camera is given to the player on their right.
Gameplay
The game is played over a series of four seasons. Each season, the players will move their hikers along the trail, mainly collecting resources to visit parks.

Before the first season, consult the top card on the seasons deck. It will depict a weather pattern of sunshine and rain tokens.

Starting from the second trail site from the start, these resources are placed, one per tile, on the remaining hiking sites, repeating the pattern if necessary. That way, each site except the first one will have a resource on it.

The player with the first player marker then selects one of their two hikers and moves it to any space on the trail. The rules for movement are very simple: you can go to any space on the trail that is in front of you, but you can never go back. And this makes up the most important strategic element of the game: deciding when to push your hiker forward, knowing that if you skip over a space that hiker will not be able to go back to it this season.
One other important movement rule: you cannot move onto a space occupied by any other hiker, including yours. The campfire provides a way around this, but it is the key decision point in almost every move.
Once a hiker moves onto a space, they collect the resource that was placed there by the season card and then takes whatever action is dictated by the tile. The forest and mountain tiles simply give the player one of that type of token, which they take from the supply. The valley and ocean tiles give two each of their resources (water and sunshine, respectively). The vista tile allows the player to either draw a new canteen card (which is the correct choice most of the time) or allows them to take a picture. More on both of those later.
In 4 and 5 player games, the waterfall will also always be in the mix, and it provides one sunshine and one water token.

The advanced tiles offer additional choices. One will be on the trail in the first season, and then an additional one gets shuffled in each subsequent season. So, all four will eventually come into play, but the order will always be random.
In the lodge, you can exchange any two resource tokens for any two others. The two you turn in must not match the two you collect, so you do need to end up with different tokens from where you started, but you can collect two of the same tokens. Also, you cannot turn in a wildlife token here.
The lookout allows you to perform a parks action, which is important and probably the most useful of these advanced sites. See the section below on the trail end for details on these actions.
The wildlife site allows you to exchange one resource token you currently have for a wildlife token, which are, as the name implies, wild. An interesting note in the rules: if the wildlife site has a resource on it from the weather pattern, you do collect that first, and so can use it as the piece you exchange for the wild. Also, you cannot swap a wild for a wild—you must give up one of your other resources.
Finally, the river action lets you spend one water to perform the action of any other site on the trail, so long as at least one hiker (yours or anyone else’s) is on that site. This is the second-most useful of these, although since this does allow you to perform the actions of the lookout, you might argue it’s the most important.
The problem with those advanced sites is that not only is the order in which they appear random, the order of where they will be on the trail is random. The wildlife site, for instance, is much more useful in the early game when you’re trying to collect resources, but we’ve had several plays where it came out last, rendering it mostly useless. The lookout is the opposite—it’s practically useless in the first season, but incredibly powerful in the last. Still, this randomness adds additional strategies to the game as you try to work out how to use the lookout in the first round, so this isn’t in any way a weakness of the game.
Before we get to the trail end, we need to talk about canteens, photos, and campfires.

The canteens are cards that give you bonus actions when activated. This is the thing you’re most likely to overlook in your first game or two, but become really powerful when you figure out how to use them in the game. Each canteen must be activated by playing a water token on it, but—and this is a really great twist—you can only play a water on the canteen on the turn in which you gain the water. So, you cannot stockpile water tokens and then activate your canteens when you feel like it. If you need a canteen, you need to figure out a way to gain water on that turn.
Most of the canteens give players bonus resources. For instance, there is a canteen card that gives you two sunshines, so you basically use it to trade a single water for two suns. There are canteens in the deck that allow you to perform a two-for-two swap, so in essence, you can perform the lodge action whenever you want. But best of all—and it’s worth doing what you can to dig through the deck to find these—are the three canteen cards that allow you to either exchange a resource for a wild or (even more useful) reserve a park. Because reserving parks not only allow you to pay for them later when you can, but also removes the ability for other players to claim them, this can be a game-altering move, and having the canteens and being able to do this essentially any time you get water is very powerful.
One other limit to canteens to be aware of: once you fill a canteen, it remains filled until the end of the season, so as powerful as they are, each card can only be used once per season. (And this essentially limits the power of these cards and keeps the game balanced.)

Taking photos is one of three ways to gain points in the game. Anyone can take a photo anytime they visit the vista site, although I much prefer to draw more canteens there. Photos simply cost two resources of any type, and then you grab one of the photo tokens (it doesn’t matter which one) and place it in front of you. Each photo is worth one point at game’s end.

The camera token allows its holder to take a photo at the vista for one resource instead of two. More importantly, though, is that the player with the camera token also gets to take a free photo at the end of each season, so holding on to it throughout the game can mean four free points. The camera is given to the player to the right of the starting player (so, the person going last) during setup, but then is given to any player who takes a photo at the vista.

The campfires allow players to overcome that second movement rule and go to a site already occupied by one or more other hikers. Visiting an occupied site simply means flipping the campfire token over to its “extinguished” side, but here’s the catch: once you do that, you cannot move onto another occupied site until you relight your fire, and that can only be done by getting your first hiker to the end of the trail. So, if you already have one hiker at the end of the trail and you use your campfire, you cannot use it again this season. The rules point out the careful use of your campfire is a key element of the game. At a simple level, you always want to use it while you still have both hikers on the trail, so that you will be able to relight it and use it a second time for your second hiker. But, you still need to be very careful as to when you choose to use it because you don’t want to have to force your lead hiker to the end of the trail too soon just to relight your campfire.
The Trail’s End

Once a hiker reaches the end of the trail, they have a few choices as to what to do. The first is to reserve a park. This means taking one of the parks cards—either a face-up one or a blind draw from the deck—and placing it in front of them. They still don’t get points for the park, but they ensure that no one else will claim it before they are ready to pay for it. The first hiker to move to this spot gains the first player marker for the next season.
The second option is to buy gear. Gear costs either one, two, or three sunshine tokens to buy, although the first (and in a four and five-player game, first two) player to choose to buy gear each season gets a one-sun discount (which, yes, does make gear that costs a single sun free). Gear cards provide additional bonuses that, unlike canteens, are always available. There are gear cards that make parks cheaper, give ways to fill canteens for free, or even to make future gear purchases cheaper. Gear, like canteens, is an element of the game that’s easy to dismiss, but we found in playing the game and judicious use of gear can make a huge difference.
The third and most important option is to visit a park, which basically means to buy it (but, they’re national parks for everyone to enjoy, so “buying” the park doesn’t work in the game’s theme). Each park has a cost, in resources. Parks that cost more resources are worth more points but obviously take longer to buy visit. When visiting a park, the player can choose from any park they have reserved or any park that is faceup on the board. If they choose a face-up park, a new one is immediately drawn.
Visited parks are where the vast majority of points come from at the end of the game, so this is really the goal of the game.

It’s important to note that while most reserving and visiting of parks happens at the trail end, there are two other ways to do it. If you land on the lookout site, you can choose to perform either of these actions. That means that with enough resources and no small amount of luck, you could, in theory, visit four parks in a single two—twice by landing each of your hikers on the lookout, and twice more by sending them both to the visit parks space at trail’s end. And in fact, if it was later in the game, you could, in theory, visit the river space, which (as long as some other hiker was there) would allow you to perform the lookout’s actions two more times in a round. It’s highly unlikely that you’d be able to have enough resources on hand to visit six parks in one turn, but, in theory, it could be done.
Reserving parks—which again takes them out of circulation so that only you can visit them—can be done at trail’s end, at the lookout, and then almost any other time if you have the canteen that allows for that action.
End of a Season
Once a player has both of their hikers at the trail’s end, they are done for that season and can perform no more actions. The season ends once every player has both of their hikers at trail’s end. It’s therefore possible—and this has happened more than once in our plays—that a single player could be left with both hikers alone on the trail and be able to perform a series of turns one after another. However, the rules do state that once a single hiker—not a single player, but a single hiker—is left on the trail, for their next move they must move to the trail’s end.
When that happens, there’s a quick reset of the board before the next season starts. First, all of the hiking sites are collected. An additional advanced site is added, they’re all shuffled, and then a new trail is set up. This is also the round tracking mechanism in the game—there are four advanced sites, with one added to the trail in each season, so once you shuffle in the last site you know it’s the last season.
All water on all canteens is returned to the supply, and everyone relights their campfires. The next season card is revealed, and whatever effects it has, including its weather pattern, are applied. All hikers are placed back at the trailhead and the player with the first player marker starts the round.
Player Interaction
From a first reading of the rules, it might sound like PARKS does not involve much player interaction, so I want to call that out separately because it turns out there are a lot of ways to play the game offensively against the other players that aren’t necessarily obvious.
The first thing you can do to mess up others is to think about where you are moving your hikers. If you’re early in the turn order, you might choose to jump to an important site, like the lookout, and then just hang out there as long as possible. Others will be able to join you, but you will force them to use their campfire earlier than they planned.
A second way to mess with your opponents is through the reserve parks action. If you saw that someone was collecting resources and it was obvious that they were hoping to visit a high-point park that was faceup on the board, you could use your canteen to play the reserve a park action when your opponent wasn’t ready for it and grab the park they were trying to buy. Parks you have reserved don’t give you points—you only get points for visiting parks—but there’s also no penalty for having them, so other than losing the water token for activating your canteen, there’s not a lot of downside to offensively reserving a park over reserving one you actually wanted.

The final way you can get your opponents is by leveraging the rule that says a single hiker left on the trail has to move to the end. We have one game where my wife and I were the only two players left on the trail, each with one hiker. We had both slow-played that round so both of our hikers were still fairly early on the trail. But, thanks to some lucky moves in the prior round, I noticed that I already had the resources I needed to visit a park, while she needed to move along the trail to collect hers. So, I surprised her by jumping all the way to the end and visiting a medium-point park. This forced her hiker to the end as well, depriving her of the resources she needed to visit a higher-point park herself.
Game End
The game ends at the conclusion of the fourth season. All players score their year cards. They then total up the points from their parks, photos, and personal bonus. The player holding the first hiker marker gains one additional point, and the winner is the player with the most points. In the case of a tie, the player with the most parks wins. If still tied, it’s a tie.
Why You Should Play PARKS
PARKS has a better “table presence” than most games I’ve played recently. As I mentioned earlier, it’s a strikingly beautiful game. The components are extremely well crafted, and the artwork is stunning. So even if you don’t get into the gameplay, you’ll enjoy just looking at this game.
But you’d have to be crazy to not get into the gameplay. The mechanic of figuring out which hiker to move each turn, and to where, adds depths of strategy that aren’t immediately apparent. If you are early in the turn order and can get your first hiker to the prime location for that season (which will often shift season-by-season), you can just have that hiker hang out and essentially block that space (because of the cost of using your campfire to visit an occupied space, you have to be careful when you use it). But, blocking the space means you have only one other hiker to complete whatever you need to complete that season. Plenty of games provide the means by which you can block your opponents, but few attach a price to doing so as well as Parks.
Smarter players will figure out how to use the campfire effectively. Because it resets once one of your hikers reaches the end of the trail, you should try to use it just before your first hiker finishes, which allows you to use it twice per season—a powerful tool if used correctly.
Like other resource-driven games, PARKS forces you to balance collecting resources and spending them, but it adds in the ability to do other things as well, such as taking photos, that don’t require you to spend tokens but do use up the very limited supply of actions you get each turn.
Another subtle but really great element of the game is the trail setup. The way that the spots on the trail are randomly positioned not only ensures a huge variety between games, but also between seasons. And the addition of a new advanced trail site in each season further adds to the game’s replayability.
The one criticism I would offer of the game is that the theme doesn’t always completely make sense. The entire point of the National Park System is to provide a resource that every person can share in equally, so the idea of essentially “buying” parks that you and only you benefit from is kind of antithetical to the NPS. But, it’s likely you’ll be having so much fun playing that game that you won’t have to worry about things like that.
Within the first playthrough, it became readily apparent that PARKS was going to be a family favorite in our house, and it’s why it was an easy call to make it a GeekDad Approved title. It’s definitely a game I’d recommend adding to anyone’s collection.
(One final note: Keymaster Games, the publisher, insists on calling it PARKS. I was initially going to resist doing this, but when I went back over this review and discovered the number of times I was using the word (51, including references to the title) I realized that it really does help to make it clear when I’m talking about the game and when I’m using it in other contexts, so I went ahead with writing it how the publisher does.)
Click here to see all our tabletop game reviews.
![]() To subscribe to GeekDad’s tabletop gaming coverage, please copy this link and add it to your RSS reader.
To subscribe to GeekDad’s tabletop gaming coverage, please copy this link and add it to your RSS reader.
Disclosure: GeekDad received a copy of this game for review purposes.


