What Is Jaws?
Jaws is a game for 2-4 players, ages 12 and up, and takes about 50 minutes to play. It’s currently available exclusively at Target for $29.99.
Jaws Components
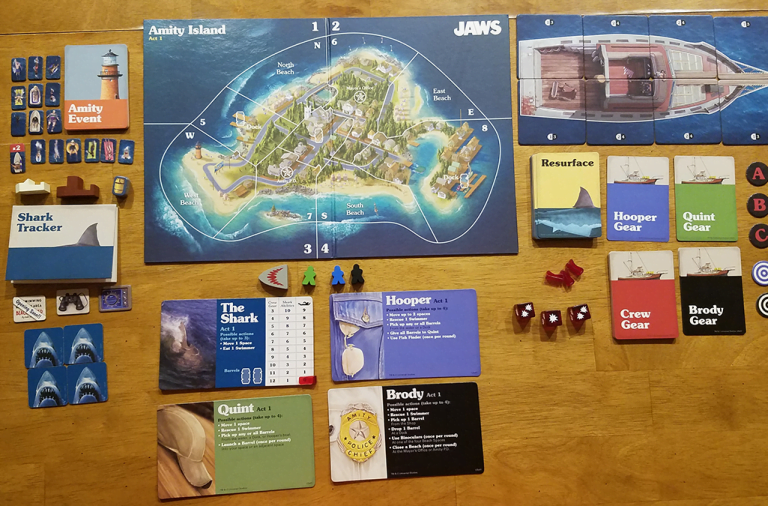
- 1 double-sided game board
- 1 Shark Mover
- 2 Boat Movers
- 3 Crew Movers
- 16 Shark Ability cards
- 16 Resurface cards
- 22 Gear cards
- 16 Amity Event cards
- 3 dice
- 1 Shark Tracker pad
- 4 character boards
- 8 boat tiles
- 1 Beach Closed token
- 1 Binocular token
- 1 Fish Finder token
- 3 Resurface tokens
- 3 Target tokens
- 5 Barrel tokens
- 4 Shark Power tokens
- 4 clips
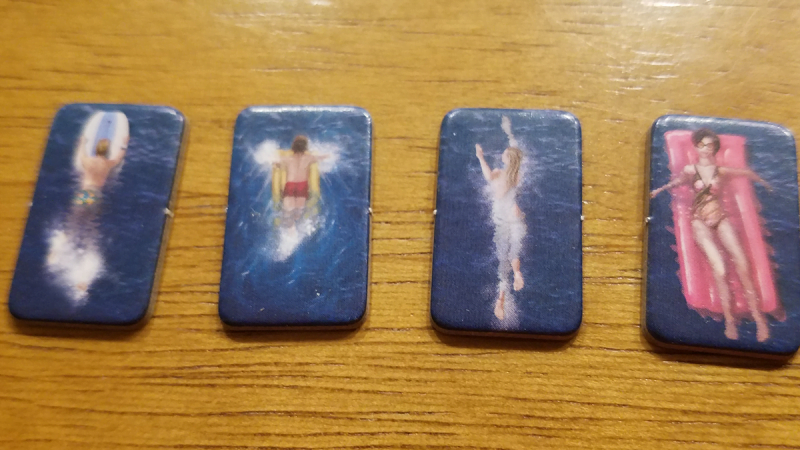
- 16 Swimmer tokens
The components are all very nice and high quality, exactly what you’d expect from a finished game from Ravensburger.
Jaws is basically two games in one: Act I is played out on Amity Island, and Act II is on the Orca. Each uses a slightly different set of components.

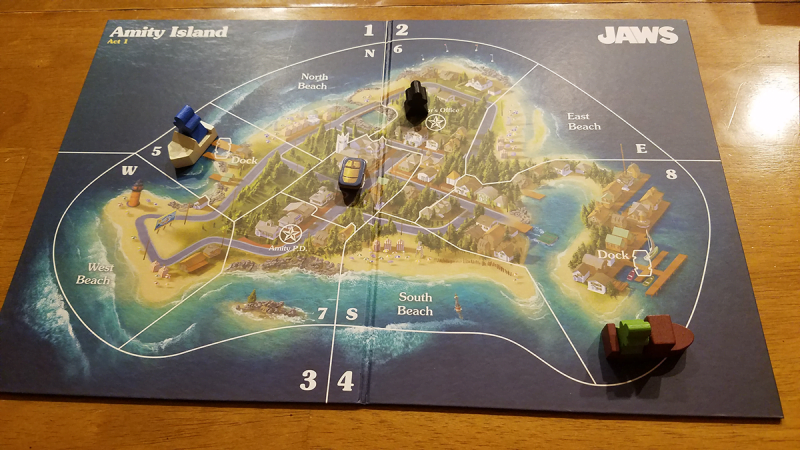
Act I uses the Amity side of the board, which shows an illustration of the island divided into 12 segments: 8 numbered and 4 identified by the cardinal directions. A few key elements from the movie are shown, including the docks, the Amity police department, the Amity Mayor’s office, and of course the beaches.

The player or players representing the heroes, or Crew, have a set of wooden movers to use. Chief Brody gets a black mover, which is kind of boring in comparison to the other two, but seeing as how Brody doesn’t like the water, it fits his character.

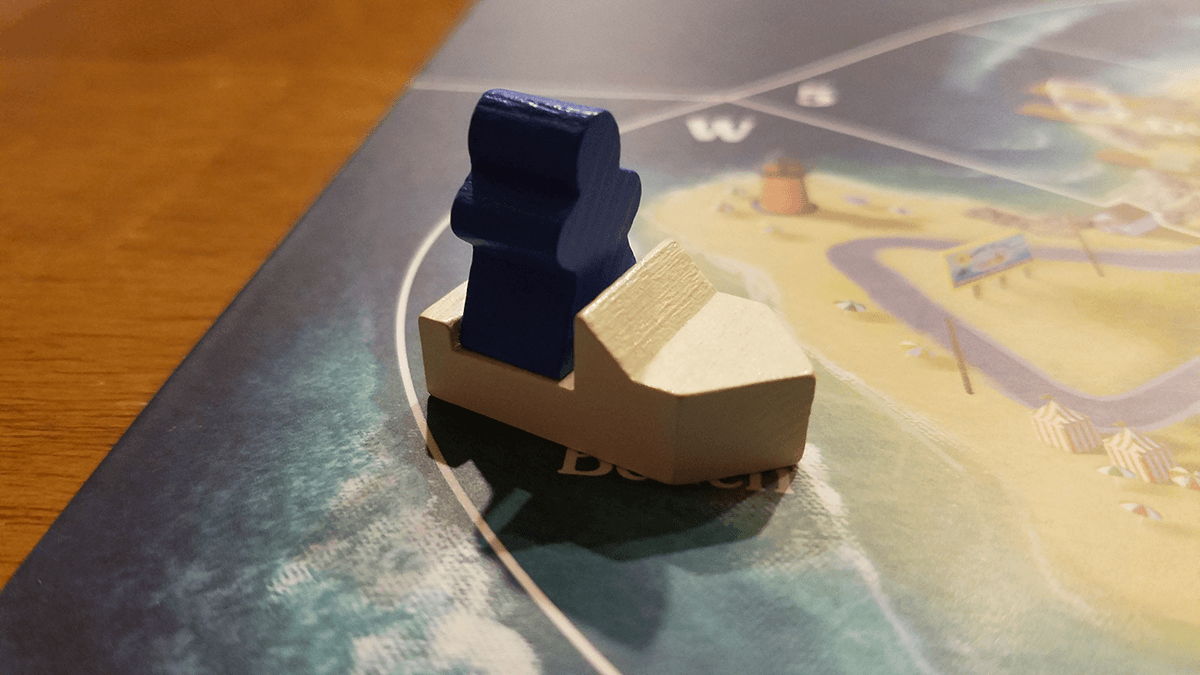
Quint and Hooper each get both a colored mover (green for Quint, blue for Hooper), along with boats–a white one for Hooper and a brown one for Quint. While both characters obviously do come ashore in the movie, in the game, both spend the entire time in their boats.

Each character also has a set of cardboard tokens to use. Brody has Binoculars and a Beach Closed token, while Hooper has a Fish Finder. Quint’s job is to put out barrels to try to catch the shark, but he only starts with 2 of them. The rest start out in the middle of the island and have to be brought to him by Brody or Hooper.

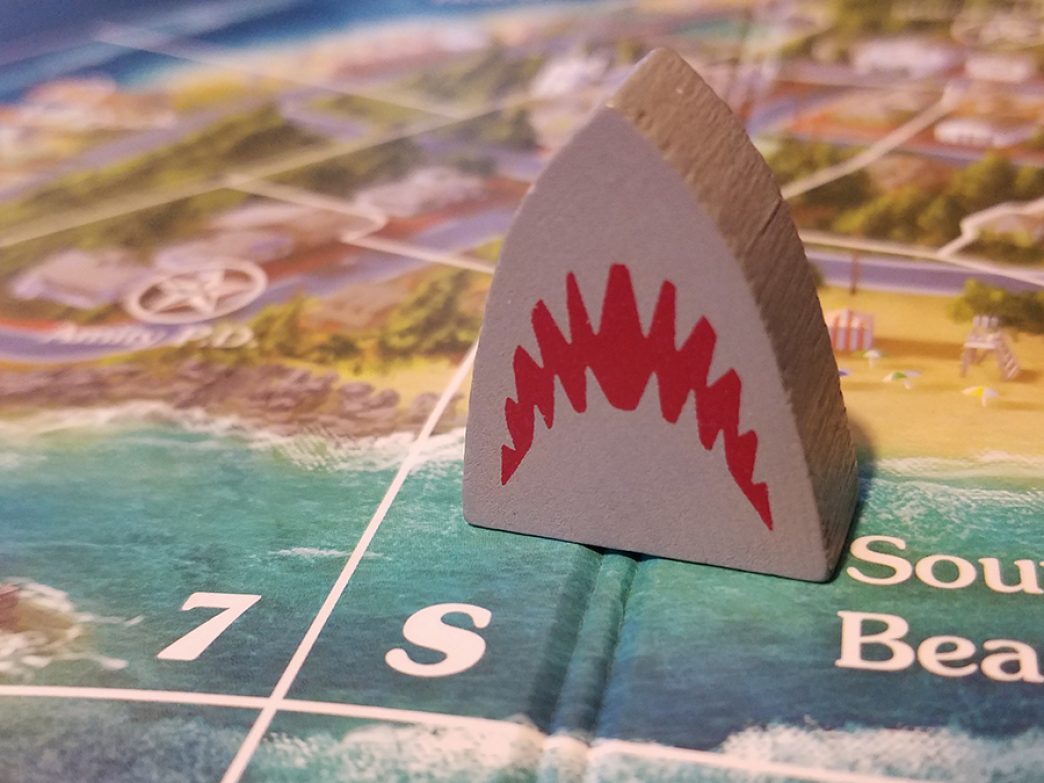
The shark player gets a pretty cool Shark Mover, which is the menacing open mouth that is the iconic image from the movie’s poster. The shark player also gets a set of Shark Power tokens and the Shark Tracker pad.

This part of the game also uses a set of Amity Event cards, which are loosely based on events from the movie but mostly exist to distribute swimmers around the island and to give the Crew special abilities.

The second portion of the game, Act II, uses the reverse side of the board, which shows the sunken Orca. There are also eight double-sded tiles showing undamaged and damaged parts of the boat. This Act uses a set of Resurface cards that will show which part of the boat the shark attacks.

The Crew players use the opposite side of their character cards and red plastic clips that will be used to track their wounds. These players also use a set of Gear cards: two specific cards for each, and a set of shared cards. Each Crew member also has a colored Target token. Finally, they use the same colored Mover pawns from Act I, sans boats.
The shark player keeps the Shark Mover and the reverse side of their character card as well. They also get a set of cards with special shark abilities and a set three tokens that will be used to target the boat.
How to Play Jaws
Jaws is played in two “Acts” or rounds, roughly mimicking the movie’s two main sections: the setup on Amity Island and the fight against the shark on the Orca.
The Goal
The goal of the game for the shark player is to eat as many swimmers as possible on the beaches of Amity without getting caught, and then either kill all three Crew members or totally destroy the Orca.
The goal of the Crew, who work cooperatively, is to find the shark quickly and save swimmers, and then defeat the shark before being killed or before the Orca is destroyed.
Setup
The game needs to be set up twice, for each of the two Acts. I’ll describe the Act II setup when we get there in the Game Play section.
Act I: Amity Island
Place the board with the Amity Island side up in the middle of the table. The Amity Event cards are shuffled and placed in a face-down deck next to the board. The Swimmer tokens are likewise set next to the board. Each Crew member takes their Mover pawn and Crew card. (Note that in a two player game, one player is all three Crew members, while in a three player game, one player takes on the role of two of the crew.)
The player with Brody also takes the Beach Closed and Binoculars tokens, and places the pawn on the Amity P.D. space. The Quint player takes two Barrel tokens and the brown boat, places their Mover in the boat, and puts them in the spot marked 8 on the board. The Hooper player likewise places the Hooper Mover in his boat and puts them on the board in the 5 spot, and then takes the Fish Finder token and puts it on their character card.

The Shark player takes the Shark Mover, Shark Tracker pad, and four Shark Power tokens. They also put one of the red plastic sliders on their character board on the zero slot. The Shark does not place anything on the board, but does secretly decide on the spot on the board where they will begin the game, which they mark in the first space on the Tracker pad.
All other components are placed aside and will be used in Act II.
Gameplay
Act I is played in a series of rounds, each divided into three phases.
Event Phase
The top card of the Amity deck is turned over. Swimmers are placed from the supply in the quantity and locations indicated. Then, the text from the card is read out loud and whatever effect is on the text is applied.
Shark Phase
The Shark player now goes, and takes up to three actions. They can perform any of their possible actions, can perform them in any order, and can do any action more than once if they wish.
Move: The Shark can move to any adjacent ocean territory. Throughout the game, “adjacent” never means “diagonally.”
Eat 1 Swimmer: If the Shark is in a beach space with one or more swimmers, they can eat one.
Whichever actions are chosen are decided in secret and recorded on the pad. Then, the Shark player informs the crew how many swimmers were eaten and from where, and then removes the appropriate number of tokens from the board and places them back in the supply.
The Shark mover is not placed on the board yet.
In future rounds, the Crew may have placed barrels in the water. Each barrel has a motion sensor. When the Shark player moves through a space with a barrel, they need to make a mental note of it. At the end of their turn, they also need to inform the Crew of any sensors they triggered. They do not, however, have to reveal when they triggered the barrel or in what order they were triggered. So, they would same something like, “I ate a swimmer from the south beach, and triggered the sensor on the barrel in space 4.” It’s up to the Crew to try to figure out if the shark moved through space 4 and then ate the swimmer, or vice versa.

Power Tokens: The Shark also has a set of four Power tokens that they can use on their turns. They can play up to one token per turn, and can only play each token once per game.
The Feeding Frenzy token allows the Shark to eat all of the swimmers in a space. Evasive Moves lets them avoid triggering motion sensors in spaces they pass through. Out of Sight lets them lie when the Crew uses the Binoculars or Fish Finder, and the Speed Burst lets them move up the three spaces in a single action.
When the player uses a token, they must announce to the Crew that they used one, but do not reveal which token they used.
Judicious use of the tokens is a key strategic element of the game. As the Shark, you can move to a beach, use the Feeding Frenzy token to eat two swimmers, and then move out of that space. But then, you tell the Crew that you ate all three swimmers on a particular beach, and that you used a token. The Crew won’t know for sure whether you performed those steps, or if you were already at the beach and used two actions to each the swimmers, and then used the Speed Burst token to move away.
Crew Phase
Each Crew member can take up to 4 actions. The Crew decides amongst themselves in which order they will go, and that can change from one round to the next, but each Crew member must complete their turn before the next one goes.
Quint can move, rescue swimmers, and pick up or launch barrels. He can move to an adjacent water space (again, diagonals are never adjacent in the game.) Rescuing a swimmer involves simply removing a Swimmer token from the board. If Quint is in a space with Barrel tokens, whether a dock or water space, he can pick up any number of them. He can also collect barrels from Hooper if they are in the same space, but each source is a separate action. In other words, if Quint was in a dock space with Hooper, and there were barrels on the dock, in the water, and on Hooper’s boat, it would take three actions to get all of them. Picked up barrels are placed on Quint’s character card.
Quint’s main role in this Act of the game is to launch those Barrels into the water. You’ll recall from the Shark phase that the barrels have motion sensors, so they are a key element in tracking down the Shark. Quint can launch a barrel only once per round by taking a barrel from their card and placing it in either their space or an adjacent space. When Quint does this, the Shark must announce if they are in that space. If so, the barrel is attached to the shark, so instead of going on the board, the barrel is placed on the Shark’s character card.
Brody moves around the island and is responsible for saving swimmers, closing beaches, and getting barrels to Quint. Like Quint, Brody can move to an adjacent space, although he must remain on the island. If he’s in a beach space, he can rescue a swimmer. He can also pick up a barrel (but only one at a time) and begin carrying it (place it on his card.) If he’s carrying a barrel, he can drop it off when he reaches one of the two docks, so that it can be picked up by either Quint or Hooper.
Once per round, Brody can use his binoculars if he’s at a beach. To do this, he places the Binoculars token on the beach space. If the shark is in the water at that beach, the Shark player announces this and places the Shark mover in the water. Note, however, that if the shark player used the “Out of Sight” power token this round, they can lie about their location when Brody uses the binoculars.
Brody can also, once per round, close a beach. He can only do this from the Mayor’s Office or the Amity P.D. space. He can only close beaches with no swimmers. The Beach Closed token is placed in the space indicated. On a later turn, if an event card would place swimmers at that beach, they are ignored, but the token is flipped to the “Opening Soon” side. The next time an event would place swimmers at that beach, they are again not placed, but the token is removed from the board, and Brody would need to returnt o the Mayor’s Office or PD to place it again, although he can use this action to move the token to a different beach if it is currently on the board.
Hooper spends his actions to move, rescue swimmers, and pick up barrels, using the same rules as Quint. However, his primary roles are to find the shark and to get barrels to Quint.
If Hooper is in the same space as Quint, he can use one of his actions to give all of the barrels he has to Quint. Note that this is functionally the same as Quint taking the barrels from him, so it’s up to the crew to decide whose action they want to spend to perform this swap.
Once per round, Hooper can use the Fish Finder by placing it in the water space he’s in. The Shark must then indicate this relative location. If they are in that space, they have to say so and place the Shark mover in that space. If they are in an adjacent space, they say “nearby”. If they aren’t in either space, or if they played the Out of Sight token, they say “not nearby”.
End of Act I
Act I ends immediately if the crew attaches a second barrel to the shark, or if the shark eats their ninth swimmer.
Act II Setup

Everything is cleared off the board, which is then flipped over to reveal the Orca. The eight tiles are placed on the board to show the undamaged sides.

The Crew also flips their character cards over, and attach the red sliders to the edge of the card on the zero space. They are each given their target token and the two gear cards specific to their characters, and then they are collectively dealt a set of gear cards. The number of cards is based on the results of Act I–the more swimmers the shark ate, the fewer gear cards the Crew gets. The players can divide these cards between them however they choose. The three crew take their mover pawns (minus the boats for Qunit and Hooper) and place them wherever they choose on the Orca.

The Resurface cards are shuffled and placed at the bottom of the board in the indicated space.
The Shark player gets their shark mover and the three large Resurface tokens. The Shark Ability cards are shuffled, and the Shark player receives a number of cards based on the number of swimmers eaten in Act I. The player then also flips over their character card and resets the red slider to the zero mark.
The smaller resurface tokens and dice are placed next to the board. All other components are returned to the box.
Act II is played in rounds, each with 6 steps.
Resurface Step

The top three resurface cards are flipped over and placed in the three spots below the board. Each card indicates a section of the Orca that the shark can attack, an evade value, and a number of attack die for the shark. The cards may also have a “shake off” icon.
The smaller resurface tokens are placed on the sections of the boat the shark will target so that everyone is clear on those.
Shark Chooses Step
The Shark player now secretly chooses which of the three cards they will use this turn. They indicate this by selecting the appropriate Resurface token and placing it face down in front of them. They can also choose to play one of their Shark ability cards at this point, which they place face down below the token. Each ability card can only be used once, so the player has to choose carefully when to play them.
Crew Prepares Step
The crew now prepares to do battle. They have to guess which card they think the shark chose and respond accordingly.

The crew first moves if they wish. They can move up to two spaces on the boat, and as usual, they cannot move diagonally. Next, they choose a weapon from their available gear cards.

Once they have moved and chosen their weapons, they place their target tokens in one of the spaces indicated on the Resurface cards. If they are using a Melee or Attachable weapon, they must place their target in their space or an adjacent space, but if they are using a ranged weapon, they can target any water space.

Some of the gear are accessories, rather than weapons. A crew member can plays the Chum card immediately after the Shark locks in their resurface token. The Shark removes one of the resurface cards that they did not chose.
Ammunition is played with a pistol or rifle. At the end of the round, the Ammunition card is discarded instead of the gun.
The Shark Cage card is played before the shark rolls for their attack, and prevents the crew member from taking any wounds.
Shark Reveals Step
The Shark player now reveals which Resurface card they chose. The other two are discarded. If the Shark played an Ability Card, it is also revealed and resolved.
If the chosen Resurface card has a “Shake Off” icon, all attached weapons are discarded.
The Shark mover is placed in the spot indicated on the revealed card.
Crew Attacks Step

Now that they know where the shark is, any crew members who targeted that section of the boat attack.
If the crew member used an attachable weapon, they simply hand the card to the Shark player, who keeps it face up in front of them until they can shake it off.

If they played a melee or firearm, they need to roll dice to resolve the attack. Each weapon shows the number of dice to be rolled. The crew member rolls the dice and adds up the number of hits shown. Then, if the number of hits is greater than the Shark’s evade value–the number in the fin icon on the chosen Resurface card–they subtract the Evade value from the number of hits, and the shark takes that many points of damage, which they indicate by moving their slider up on their character card.

If more than one crew member targetted the same space, the crew decides in which order to resolve the attacks.
Shark Attacks Step
Now it’s the shark’s turn to attack either the crew or the boat. If they can do both, they get to choose which one they want to attack.
The shark’s attack is the number of dice shown on the Resurface card. They roll these and add up the hit icons they get.

If they are attacking the boat, they will look at the boat space they are attacking–which can be either the one shown on the card or one adjacent to it. The top of the card will have two numbers for undamaged spaces, and one for damaged spaces. The lower number on undamaged spaces is the number of hits needed to damage the space; the higher number and the only number on damaged spaces is the number needed to destroy it.
If the space is damaged, you flip the card over to show the damaged side. If it’s destroyed, you remove the tile altogether. Either way, any crew members on the tile fall into the water. Crew members must spend both of their movement points the next round to climb back onto the boat.
Crew members can only be attacked if they are in the space targeted on the card and are in the water. The shark player rolls the attack dice and takes a wound for every hit. Crew members are killed (removed from the game) if their wound marker reaches the top of the card (5 wounds each).
Bonus Attack
Finally, it what is really a sixth step, even though it isn’t written that way in the rules, the Shark gets one last bonus attack against any crew in the water. They roll one die per crew member in the water in their space and in adjacent spaces.
End of the Round
Once all of the attacks are over, assuming the game isn’t finished, the Shark dives again. The Shark mover is removed from the board. The remaining Resurface card is discarded. All resurface tokens and targeting tokens are removed. If the crew used a firearm, they either discard it or discard an ammunition card. If the Shark used an Ability Card, it is discarded from the game.
A new round then begins, and play continues.
Game End
The game ends in a victory for the Shark when either all of the Crew members are eliminated or the Orca is totally destroyed. The Crew wins when the Shark takes more than 18 points of damage.
But either way, we know the Shark will be back for at lots and lots of sequels.
Why You Should Play Jaws
I hadn’t sat down to watch the movie in years, and my son had never seen it, so we decided to watch it before playing the game. While it certainly isn’t a requirement, I think he got more out of the game knowing the references than he would have otherwise.
As with Ravensburger’s other recent movie-related titles, Jaws relies on a one-against-many mechanic. This creates an interesting dynamic in multi-player games. But it also means that the solo player needs to play well or the game is going to end fairly quickly. The first time we played, my son wanted to be the Shark, and he didn’t fully grasp the strategy necessary, so Act I ended after only a couple of turns, and as such, he had only a very few cards to play in Act II. (Remember that the number of Shark Ability Cards and the number of Crew Gear Cards is dependent on how many swimmers the Shark eats in Act I. The two numbers are inversely proportional, though: more eaten swimmers means more cards for the Shark and fewer for the Crew, and vice-versa.) This, added to the fact that the crew gets many, many more actions than the Shark, meant that he was really handicapped from the outset, and so Act II didn’t take long, either.
On a subsequent play, though, he figured out how to do a better job hiding his location, and so it took me as the Crew a lot longer to track him down. As such, the odds were closer to even in Act II, and while I still won in the end, it was a much better game.
Jaws very nicely captures the feel of the movie, and will definitely appeal to its fans. But it has enough strategy to work for other people as well.
And best of all, even though it has a lot of components, you aren’t going to need a bigger table.
Click here to see all our tabletop game reviews.
![]() To subscribe to GeekDad’s tabletop gaming coverage, please copy this link and add it to your RSS reader.
To subscribe to GeekDad’s tabletop gaming coverage, please copy this link and add it to your RSS reader.
Disclosure: GeekDad received a copy of this game for review purposes.