The latest in Fantasy Flight’s ever-expanding universe of Star Wars-themed boardgames is Outer Rim.
What Is Star Wars Outer Rim?
Outer Rim is a game for 1-4 players, ages 14 and up, and takes about 120 minutes to play. It’s currently available from Amazon and your local friendly game store.
Outer Rim Components

As with pretty much everything Fantasy Flight produces, Outer Rim has lots of components.
- 12 ship sheets
- 4 player boards
- 4 plastic Fame markers
- 16 reputation markers, in 4 sets of 4 colors
- 22 contact tokens
- 16 patrol tokens in 4 sets of 4
- 8 character standees
- 8 plastic stands
- 40 damage tokens
- 60 credit tokens in 1000, 5000, and 10000 increments
- 70 encounter cards in 7 decks of 10
- 70 market cards in 6 decks of varying sizes
- 53 databank cards
- 8 character cards
- 4 player reference cards
- 12 goal tokens
- 10 AI cards
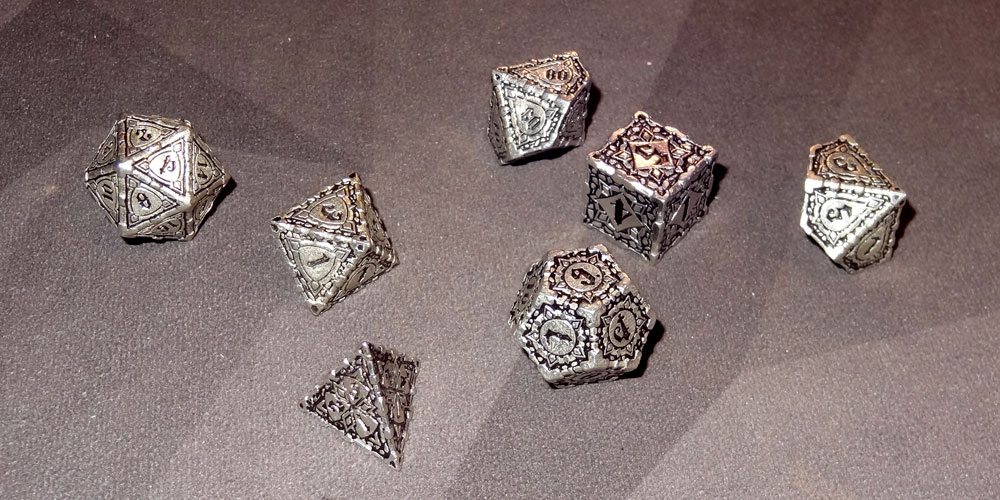
- 6 dice
- 2 map endcaps
- 6 map tiles
- 2 rule books
Most of the components are heavy-duty 3mm cardboard. The only plastic components are the Fame markers and the character stands. Given the company’s heavy use of plastic in most of its other Star Wars titles, this honestly came as something of a surprise.
The cards—all 205 of them—are plastic-coated poker-sized cards.

One deck stands out in its design: the Databank. This is a set of cards with large numbers printed on one side. Unlike all of the other decks, this is never shuffled, and is intended to remain in its numerical order. Throughout the game, cards will be pulled from this deck based on number, so keeping it in order makes this faster. An interesting note is that the deck contains 53 cards, but the numbers don’t quite match that count. There are some numbers (including 1) that have multiple cards, but the deck also jumps twice: there are no cards numbered 24-39, nor are there cards between 54-89. I assume the missing numbers are for future expansions to the game.
The components are of the high quality one would expect from Fantasy Flight. The graphic design on the cards is particularly notable: quite a few of the cards have a lot of text on them, but it’s all clear and easy to read. Many of them have flavor text that is small and out of the way enough to be easily ignored. However, the company has unfortunately decided to recycle the art for the main Star Wars characters from their other games, rather than giving each title a unique set of artwork, which is kind of disappointing.
My biggest complaint about the components is that, as with other FF games, is an over-reliance on icons. While some of them are now-standard SW symbols like the Rebel and Imperial symbols, others are new to the game, meaning you’ll be spending a lot of time in your first few play-throughs looking up things in the rulebook.
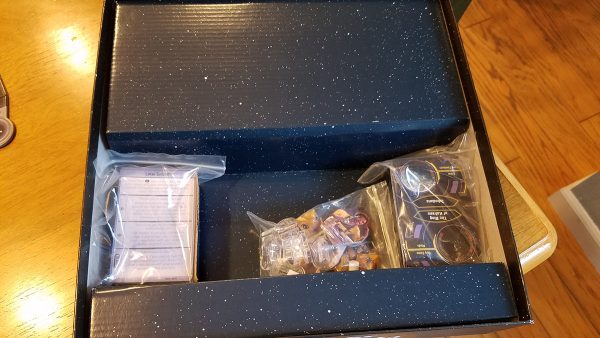
No, wait: one more complaint, and another thing that will not be a surprise to anyone who owns other titles from this company, is that the box insert is absolutely worthless. One would think that a game that costs close to $70 would at least include enough plastic bags to properly sort and store the several hundred cardboard components, or include an insert that contains more than one large opening, but of course that just isn’t in Fantasy Flight’s DNA.
How to Play Outer Rim
Outer Rim is, at its core, a pick-up-and-deliver-game. It reminded me, both in its design and gameplay, a lot of Firefly.
The Goal
The goal of the game is be the first to gain 10 Fame points. Fame is gained by completing missions, delivering cargo, and collecting bounties.
Setup
For a game this complex and with this many components, setup is surprisingly quick. (Well, it will be quick once you supply your own bags to keep the components properly sorted.)

The first step is to build the map. Oddly, the map is supposed to be put together in a specific order, but the map pieces themselves aren’t marked at all, so you will need to refer to the picture in the rulebook to get the planets in the correct order. (There is a variation of the game that uses a random setup, but this doesn’t seem to really justify the lack of markings on the board pieces for the standard setup.)

You then place the two end pieces on either end of the map to close it off. These end pieces also provide the starting spaces for the patrol tokens. To set these up, you sort them first by the four factions (Rebel, Imperial, Hutt, and Syndicate), and then, within each faction, by number from 1-4 based on small dots on the pieces. These are set, 1 dot to 4, on the appropriate icon on the end piece.

Next, the contact tokens are shuffled face down and then distributed on the board. The tokens are in three groups, designated by color—white, yellow, and green—and are placed in corresponding spots next to the planets on the board.
The remaining tokens—credits, damage, and goals—are placed somewhere on the table. Here’s where the semi-circular layout of the board comes in handy, since there will be a large open space in the middle of the table for these.
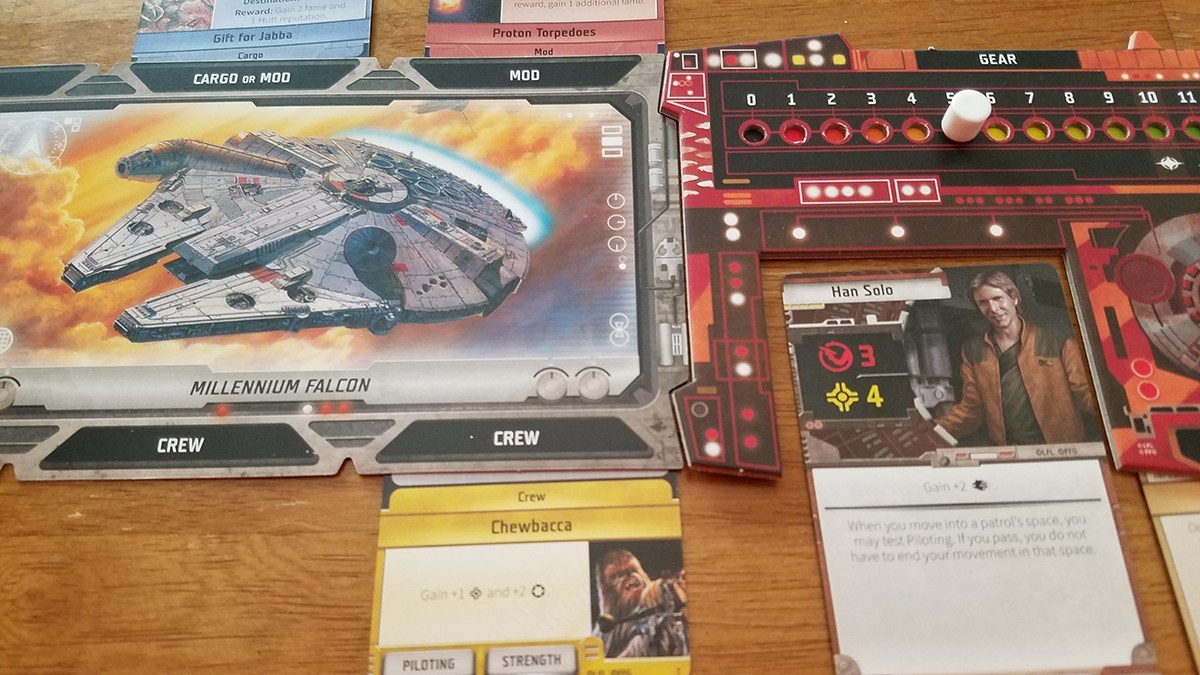
Next, players choose characters. Everyone rolls all six dice and counts up the explosion symbols to determine the first player, who chooses which character they want to be. The characters are a mixture of people familiar to even non-Star Wars fans, including Han Solo, Lando Calrissian, and Boba Fett, characters well known to casual fans like IG-88, Jyn Erso, and Boskk, and two quite obscure characters in Ketsu Onyo (from Star Wars Rebels) and Doctor Aphra (from the eponymous comic book series). Each character has a unique ability that will impact gameplay.

Once a player chooses a character, they take the character card and the standee. They also grab a plastic stand, a player board, a Fame marker, one set of four reputation tokens, and a reference card.
Each player also chooses a starting ship, selecting either the G9 Rigger or the G-1A Starfighter. The Rigger has more cargo capability, while the starfighter is faster and will do better in a fight.
Finally, players get starting credits. The first player gets 4000 credits, the second 6000, the third 8000, and the fourth 10000.
Once players have all of their materials, they need to set up their play area. They put the player board in front of them, and place their character card in the spot provided. Their ship sort-of fits alongside the player board, but unfortunately and somewhat oddly, the ships aren’t the same heavy cardboard as the player board, so they don’t quite sit well next to each other. (The ships being made from cardstock rather than cardboard also makes them needlessly hard to slide cards under, which unfortunately is a common task during game play.) They place their Fame marker in the zero spot on the tracker, and their reputation tokens in their four appropriate sliders on the right side of the board, each set at the “neutral” middle position.
The last step of the character setup is determining a starting location and job. To do this, players look at the bottom of their character card, which will instruct them to draw a particular card from the 90s in the Databank Cards. These cards are all either bounties, cargo, or jobs, and vary depending on the chose character, so Boba Fett and IG-88 start with bounties, Han Solo and Lando Calrissian start with cargo, and Jyn Erso starts with a job.

These cards are placed in their appropriate spot on the player board. Each card also specifies a starting location for the character, so the standee is placed there. Finally, each character card may have an additional instruction to preset one of the reputation sliders.
Once the characters are setup, all that is left to do is the decks. Each of the six market decks are shuffled individually and placed somewhere on the table, and then the top card is revealed in each. The seven encounter card decks are also shuffled individually, and then placed near the planets they reference on the backs. These cards are all left facedown. Lastly, the remaining ship cards are placed nearby.
The remaining deck—the AI cards—are only used in the solo game.
Gameplay
On each turn, players complete three steps or phases in order.

The Planning Step
In the planning step, players can choose to do one of three things: move, recover from damage, or gain money.
Movement is going to the choice most of the time, and thankfully it’s mostly straightforward. The board has marked hyperspace lanes between the planets, marked off by semi-regular waypoints. Each waypoint or planet is a space, and characters can move up to their ship’s maximum speed (which may be modified by certain cards). The only two real limitations on movement are the Maelstrom and the patrols. The Maelstrom is a specially-marked waypoint outside of Kessel, and simply requires ships to stop, regardless of how many additional moves they may have left. The same is true if a player reaches a space currently occupied by one of the patrols, unless you have position reputation with the faction that controls the patrol (more on both of those concepts in a bit). Players can choose to stop moving before their maximum distance if they wish.
Recovering from damage is basically resting for a turn. It’s handy if you’re on a planet and want or need to repeat actions there, but it can also help prevent you from being “defeated,” which is what happens when either your character or your ship reach their damage threshold. If this happens, your turn ends immediately, and on your next turn, you must use the Recover option. When you do this, you simply remove all damage from both the character and the ship, and then proceed with your turn as normal.
Gaining money is your third choice for the Planning step, and it’s basically the other option when you want to stay put. If you either do not have any damage to recover from, or you simply need some cash, you can choose to not move and instead collect 2000 credits.
The Action Step
The action step is the most flexible of the three phases. You have four options, and you can perform any or all of them, in any order, but you can only perform each action once per turn.
Trade: If you happen to be on the same space as another player, you can trade cards with them. The terms of the trade are entirely up to the two players. Cards to be traded can include mods, bounties, jobs, crew, gear, and cargo.

Market: As long as you are on a planet, you can do two things each turn with the market cards. First, you can take the top, faceup card off of any deck and discard it (place it facedown at the bottom of the deck), and then draw a new top card. This is great when you’re either trying to search for something in particular, or if you simply don’t like the card that’s showing. (You can also do this if you’re pretty sure an opponent really wants the current card and you want to deny it to them but not buy it yourself.)
Second, you can buy one card from any deck. All cards are available for purchase from any planet, unless the card itself specifically says otherwise. All of the cargo cards, for instance, have a prohibition from being purchased on the planet where the cargo is supposed to go. This is a spot where I think the game missed out on a mechanic that would have added more depth, by only have certain markets on certain planets, so for instance if only some of the planets had places where you could pick up cargo. I’ve seen this concept in just about every other pick-up-and-deliver game, and I’m surprised it wasn’t used here.
Once you buy something, you pay the “bank” and then take that card, putting it in the appropriate space on the board. If you don’t have room for cargo or crew, you can freely discard what you don’t want.
You then reveal the next card in that deck and put it faceup. More often than not, this will trigger movement from the patrols.
Patrols represent random ships flying around the galaxy (or something). Each of the four factions always has one patrol ship out there, and most of the market cards require that one faction’s ship be moved. Movement is always towards the current player’s character.
Here is where I have another design quibble with the game. While the symbology of the movement is always the same—a yellow number and the faction’s symbol—its placement on the card varies from one market deck to the next. It’d have been a much better choice to lay the cards out in a way that made this consistent and more obvious.
Note that patrol ships only move when a card is purchased. Cards revealed because another card was simply discarded does not trigger the movement.
Deliver: If you have cargo or a bounty that needs to be delivered to the planet you’re on, you can do so. For the most part, this simply involves turning in the card and collecting the money (and sometimes other bonuses like increased reputation or fame), but occasionally requires a bit of luck with a die roll.
Resolve Action Ability: The big thing that’s easy to forget. Several of the characters have a special ability that can be used at this point.
Encounter Step
Once you have completed the Action step, you move on to the Encounter. Once again, you have several options, but this time, you can choose to perform only one.
If you are on the same space as a patrol and have negative reputation with that faction, you must choose the Fight option here.

Combat in Outer Rim is very simple, which is both good and bad. First, whichever party is attacking rolls the number of dice indicated by their character’s strength (if performing a ground attack against a character) or the ship’s strength (if fighting in space against a patrol). Add up the number of explosion symbols, with the explosion with the open middle counting as two hits. Then, the defender rolls their attack dice, and again, adds up the hits.
That’s it. One roll of the die per side and we’re done. Both sides take whatever damage the other side rolled, and then whichever side rolled for more damage wins. It doesn’t matter whether or not one side was defeated.
If you are fighting a patrol and you win, you eliminate the patrol (remove the token from the game) and gain the reward, which is a sum of credits, from the bank. However, you also lose one reputation for the faction you just defeated. Finally, you spawn a new patrol for that faction by flipping over the next token in that faction’s stack.

Your next choice in this step is to Encounter the Space you’re on, which the rule’s fancy way of saying “draw the top card from the deck for the current space.” If you’re on a planet, this means drawing the card from that planet’s deck. Each deck actually serves two planets (except Kessel, which shares its deck with the Maelstrom), so you’re only going to read and deal with the portion of the card that applies to your planet. The planet’s decks all do slightly different things, such as allowing you to purchase addtional items or giving you crew.
There’s a separate deck of cards for the waypoints, so you do have this option when you’re between planets.
Back in the setup, you took the character tokens and arranged them next to the planets. So, when you are on a planet, your third option you can flip one of these tokens over, then find the appropriate card in the Databank, and then perform the actions on that card. A lot of the time, this will involve performing a skill test and then getting the choice to bring that characted on to your crew. However, if you have a bounty for that character, you instead perform combat against them. If you win, you can either eliminate them and take a quick reward or capture them and carry them to a designated planet for a bigger reward.
Those are the choices for the Encounter step in the rulebook and on the reference card, which is very strange as there is a fourth choice: Complete a Job.
If you picked up a job at some earlier point and you are now on the planet required by the job, you can chose to complete it as your encounter. To do this, simply follow the directions on the card. Some are very straightforward, while others require you to draw a card from the Databank and complete it.
Most jobs necessitate performing one or more skill checks in order to pass. Each character and crew card has one or more skills listed on the bottom. If you or your crew have the skill listed, then you roll two dice and pass the check if you get either explosion icon on either die. If you do not have the skill, you roll two dice and only pass if you roll the bigger (open in the center) icon. If you roll anything else, you fail.
Here’s another point that is needlessly confusing and could have been solved by just relying on the same icons over and over again a little less. I could never quite remember if passing a test without the skill required the open or the closed explosion because neither of those symbols makes any sense in this context. I truly don’t understand why FF couldn’t have included just two more custom dice with the game, with meaningful pass/fail icons, instead of recycling the combat dice.
Game End
The game ends immediately when a player reaches 10 Fame. The Fame track does have spaces for 11 or 12 Fame if you want to play a longer game, or you can of course shorten it by requiring less fame to win.
Solo Variant
The game does include rules and an extra deck for solo play. (And yes, all of the Solo jokes have already been said.)
Playing this variant is very similar to the regular game. During setup, you select a character, and then select and setup a character to play against. Setup of the characters, board, and everything else is the same as the regular game, except that you also shuffle the AI deck.

To play, you take your turn as normal. Then, the AI player goes by drawing the top card from the AI deck. Each card has instructions for the AI player to perform each of the three steps. The Planning phase is always the same: the AI player will try to move to the nearest goal first, but if they can’t or if there are no goals, they will try to recover damage, and only if neither of those two are possible will it take the 2000 credits.
The Action step is where you find the most variation on the cards. Here again is a list of steps that AI player will attempt. Often, it involves buying a card from a certain deck or delivering cargo if possible. (The AI never tries to collect bounties.)
Finally, there’s a list of steps to try, in order, for the Encounter. It usually involved encountering the patrol if needed, and then usually involves either completing a job or encountering the contact, in which case it simply says to draw the appropriate card from the Databank and add it to the AI’s crew. Occasionally, the AI will buy fame for 8000 credits, which is an option human players do not ever have.
The AI wins if it reaches 10 fame before the human player.
The Verdict
Despite quite a few not-insignificant flaws, Outer Rim is an enjoyable enough game. When compared to other pick-up-and-deliver games, it’s not as deep as Firefly, and doesn’t hold on to its theme as well as Merchants and Mauraders, but it does a decent job at avoiding getting bogged down in complexity.
It definitely suffers from a common problem of all pick-up-and-deliver games, which is that oftentimes, multiplayer games are really just a bunch of people playing solitaire at the same time. There’s very little player interaction, and in fact players are specifically prohibited from attacking one another unless they have a card that specifically allows it, such as when you have a bounty on a contact that is on another player’s crew.
There are a few things that could have been done to increase this interaction. For instance, a simple rule that says that if another player has negative influence with a particular faction, you could attack them, and if you win, you gain influence with the faction.
Providing some kind of chase for bounties would help, too, wherein a bounty is available on some planet, and it’s a race to get there and grab it, but even when you have the bounty, the other players can chase you down and steal it.
I’ll admit I haven’t played with either of those adaptations, and with more than two players it’s entirely possible the map would be too crowded for those to work, but I might give them a try next time I play just to see if it makes things better.
There are aspects of the game that aren’t as thought out as they should be, like the inconsistent placement of patrol movement icons and the lack of pass/fail dice, but those are things that will become less of a problem as I learn and internalize the game.
There are also several rules that need to be better explained. With two separate rule books (well, technically, a rule book and a rules reference), you’d think that all of the answers would be there, but they aren’t. Case in point: the rules say that patrols always move towards the active player. What they don’t say is what you’re supposed to do if a patrol is already in the same space as the active player when it’s supposed to move. This isn’t a fringe case, either, as it has come up in every game I’ve played.
The solo variant was a good way for me to play through a few times and figure out the quirks in the rules before I tried teaching my friends, but overall it’s probably the weakest aspect of the game. There were multiple points where the AI card required its “player” to draw a crew card, but that never made any sense because the AI player simply completes any job it has to do without performing any tests, so there’s no advantage at all to the AI having crew. None of the AI cards upgrade the ship or use the character ability, meaning that it basically doesn’t matter which character you choose for the AI. It’s seemed clear that the whole idea of allowing for solo play was a poorly tested afterthought, which is a real shame.
Overall, fans of Star Wars games probably won’t be disappointed to have this on their shelves. Fans of pick-up-and-deliver games will likely be better off with other titles, but for those in that middle section of the Star Wars/pick-up Venn diagram, this is the title you’ve been waiting for.
Note: I did not receive a free review copy of this game for this review. However, the links to sources to purchase the game are affiliate links to my account.
Click here to see all our tabletop game reviews.
![]() To subscribe to GeekDad’s tabletop gaming coverage, please copy this link and add it to your RSS reader.
To subscribe to GeekDad’s tabletop gaming coverage, please copy this link and add it to your RSS reader.