Also pictured, Nolzur's Marvelous Brush Set and a few bonus minis for Part 3! (Image: Anthony Karcz)
If you haven’t read Part 1 yet, you’ll definitely want to check it out and see what can be done with Army Painter’s impressive D&D Adventurers Paint Set. In this installment, I’ll be covering the biggest set in their D&D lineup!
Whereas the D&D Adventurers Paint Set is the starter set, the D&D Monsters Paint Set is for when you’re ready to move on to the next level. While it doesn’t contain any brushes or the wonderful paint-on primer, it does give you 36 new paints to play with. In addition to new colors, you also get impressively shiny metallics, a vial of Glistening Blood effect paint, and, most importantly, washes!
What had me most excited about this set, however, was the exclusive Owlbear miniature. By Gale Force 9, just like Minsc and Boo, it’s insanely detailed and impeccably sculpted. There are some seriously goofy Owlbear minis out there. This is not one of them. It’s the kind of creature that you’re going to plop down on the table to make your players doubt every choice they made to arrive at that moment.
I followed the impressively thorough PDF guide on the Army Painter site to paint the Owlbear. For this, you’ll need to dip into the colors and supplies provided in the D&D Adventurers Paint Set as well as the Monsters Paint Set.
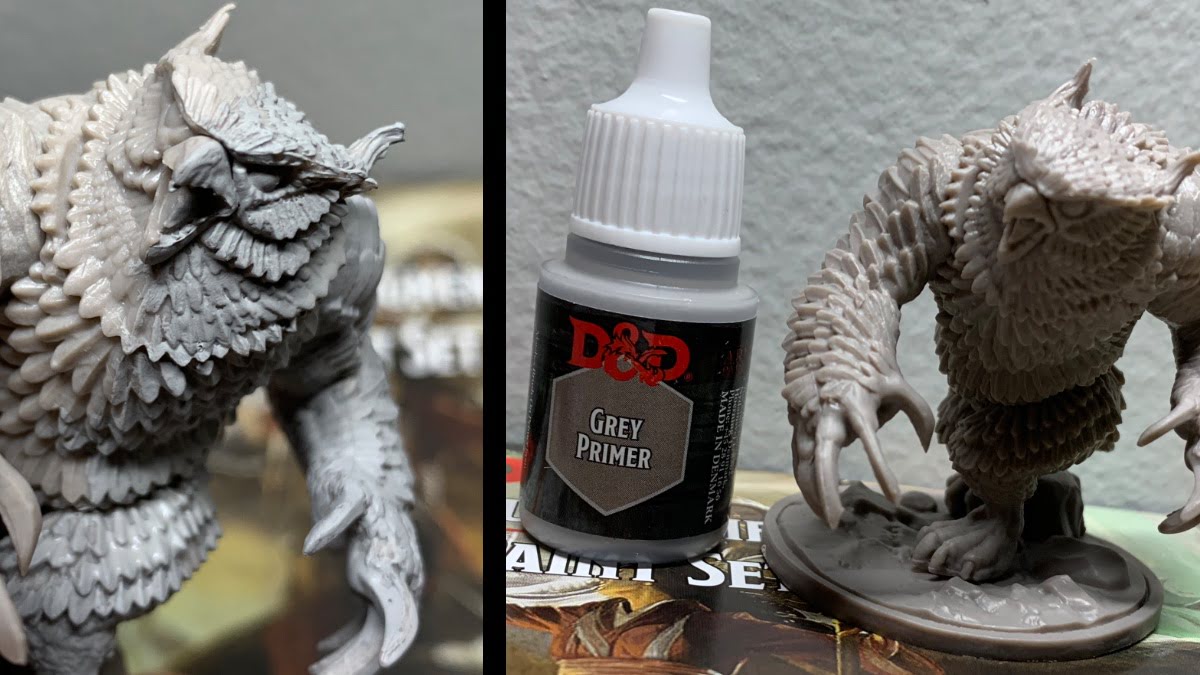
As with Minsc and Boo, the Owlbear got a scrub in warm, soapy water and a layer of grey primer once dry.
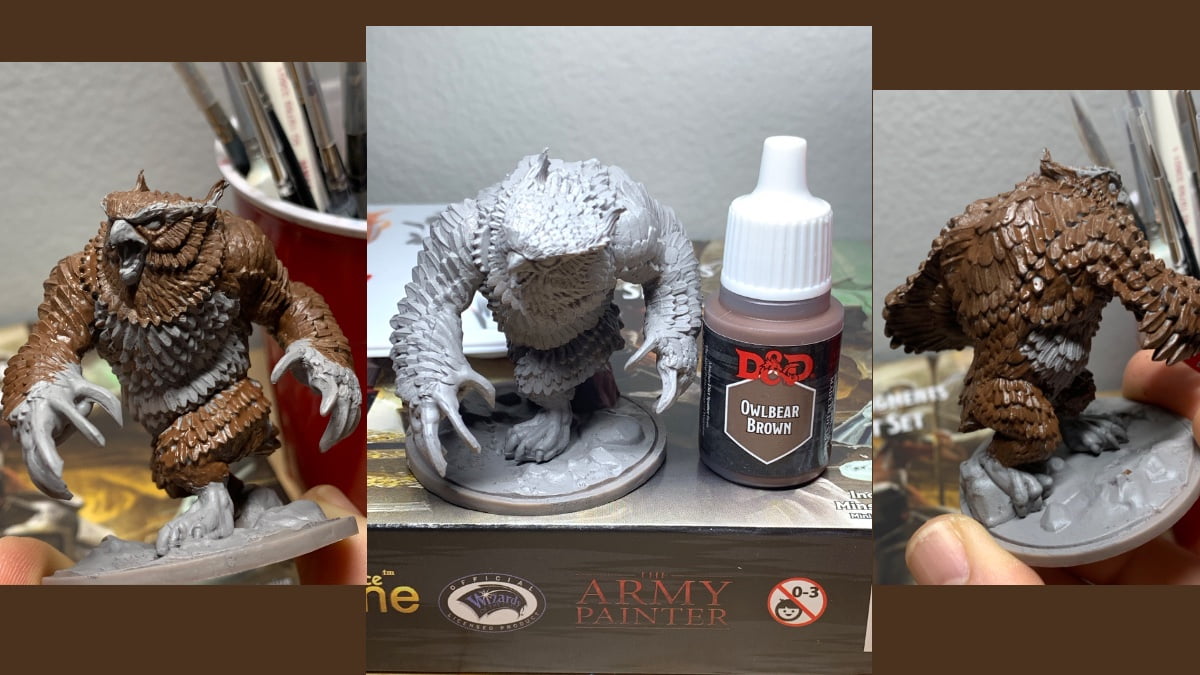
After the primer dried, I grabbed the appropriately named Owlbear Brown from the Monsters set. While, usually, I’d use my Rosemary & Co Series 33 #2, the Owlbear is a big figure and you’re covering roughly 70% of it with the Owlbear Brown, so I switched to a Sable Series 402 #2, which made the work go much faster.
Once I was happy with the main color, I grabbed the Otyugh Brown (really more of a mustard yellow) and painted around the feet and hands. The Orc Skin grey is meant to be the base color for the dirty white face and chest.
That’s when I realized I’d gone a bit too far with the Owlbear Brown and needed to course correct, painting over the neck, around the face, and under the arms with the Orc Skin.
Next came the Abyssal Black from the Adventurers set. I used this to paint the beak, the talons on the hands and feet, and some detailing on its face and crest.
With that done, I painted the eyes with Lawful White to give the Firenewt Orange a chance to attain its full yellowy brilliance.
A quick splash of Cambion Crimson on the tongue and mouth, some carefully placed pupils freehanded into the dried eyes (don’t worry, they’re big enough that it’s very hard to end up with cartoon eyes), and the Level 1 Owlbear is complete. You could stop here if you wanted to get the Owlbear to the table. But taking the figure to the next level is almost embarrassingly simple.
For the next step, I covered the brown and yellow parts of the figure with Brown Wash and the white feathers with Flesh Wash. If you haven’t used wash before, note that it’s thinner than regular paint and has a tendency to pool. Which is good! Except when it’s not. If you see big puddles of wash in places that you don’t want darkened, use your brush to soak it up and redistribute.
It takes a bit longer for wash to dry, so this was all I did for the evening (well, that and painting the base with some Minotaur Brown). I needed my rest for the next part.
OK, so remember how I said wash was easy? This is the flip side of that coin. In order for all those lovely darkened areas to stand out, you need to brighten up your original colors on the raised areas. I grabbed that same Minotaur Brown I used for the base and drybrushed it on to the brown areas, focusing mainly on the top of the head, the upper back, and the tops of the arms.
Drybrushing is where you grab an old brush (or a brush specifically made for the task), dip it in the paint, then wipe most of it off on your palette. Using a swiping technique, you very lightly brush the raised portions of the figure. This helps maintain your newly darkened areas and provides some nice gradation of color, especially on fur and feathers.
I continued by grabbing the original Otyugh Brown and Orc Skin and very carefully painting the hands, feet, face, chest, and underarms. The trick is to not cover up the recessed bits that you darkened. If you do, don’t fret, just wait until your layer is dry, then got back with a little more wash to touch up.
And that’s Level 2! This is a perfectly acceptable place to call it a day, seal the figure with some spray lacquer, and toss it in your bag of horrors.
But then you’d miss out on all the detailing fun.
I came back to the figure the next day and grabbed lighter tones than the base colors I’d been working with: Fair Skin for the yellow, Lawful White for the grey, and Ruddy Skin for the brown. Grabbing my finest-tipped brushed, I meticulously traced the edges of the brown feathers with the Ruddy Skin. I will readily admit to rushing this and getting sloppy once I’d done about half of the back and the arms. But at tabletop distance, it blends wonderfully.
Then I went back to my Series 33 #2 and painted the tops of the grey feathers white and added some pops of Fair Skin to the topmost raised yellow portions. I also added two dots of Lawful White on the pupils for a reflection effect. I also splashed in a bit of Pixiedust Pink on the tongue to highlight it.
The last detail was thin lines of Lich Skin on the very peaks of the talons, the beak, and on its temples.
Did I say last detail? I did. I should have said “last detail on the Owlbear.” Because as nice as that sculpted base is, with just a little bit of extra effort, you can turn it into something that really stands out on the table.
I grabbed my Army Painter Battlefields Basing Set and covered the flat parts of the base in glue. Any raised rocks, I left alone. I used a pair of tweezers to place a couple of smaller “rocks” on the base, then dipped the entire base in a bowl of brown basing sand, shaking off any excess.
Once that dried, I carefully (so as not to knock off the sand) drybrushed the whole base with Skeleton Bone, then glued on a few field grass tufts.
A quick touchup of the Abyssal Black around the base and the Owlbear was complete (really this time)!
As you can see, you get a much more comprehensive toolset to bring to (owl)bear on your minis with the Monsters Paint Set. The wide variety of shades keeps you from having to mix custom colors (which are always impossible to replicate the next paint session), and while I wish there were a green or blue wash in the set, the three provided satisfy almost every need.
Army Painter’s quality is on par with Citadel. It flows well, mixes perfectly, and comes in a range of colors. The 36 paints you get in the Monsters set give you more than enough options to paint a whole host of minis. That is until you go looking for that “one perfect shade” and then you’re down the rabbit hole of buying individual bottles.
Speaking of, I wish that everyone in the industry would adopt Army Painter’s dropper bottle method. There’s much less chance to spill, you can easily dole out exact measurements, and there’s practically zero chance of a poorly sealed paint pot drying out.
And not to repeat myself, but the exclusive Owlbear mini is the best rendering I’ve ever seen of the beast. When the D&D sets were first announced, I almost purchased the Monsters Paint Set just for that.
The Monsters Paint Set is priced at around $70 and is available right now on Amazon. You can also pick up the Adventurers Paint Set (for your base colors and that wonderful paint-on primer) on Amazon for around $30. The Battlefields Basing Set is $20 and is a great add-on if want to give your minis a little bit of extra pop.
I also recommend visiting Army Painter’s D&D Official Painting Series page for tutorials (both in PDF and video form) and more information on the sets.
This post was last modified on January 24, 2019 7:22 pm
You probably learned in school that Lewis and Clark were commissioned by the President to…
As the search for Wally continues, Amanda Waller sets her sights on the Flash Family.
Penguin has returned to Gotham—but his daughter intends him to have a short stay.
Harley has a new purpose—and a first client, in the form of Maxie Zeus.
It's time for Power Girl to enter the House of Brainiac—for a team-up with Crush.
Bruce Wayne finds his escape from prison in the Army—but Vietnam proves to be more…
This website uses cookies.