
Here in Atlanta, Georgia, there are twelve of us who are playing in a Frostgrave campaign. Frostgrave is a skirmish wargame — low cost of entry (Core Rulebook is only $16 on Amazon), only 10 miniatures needed, a couple of D20 dice, and you’re ready to play. The game takes place in the lost (and frozen) city of Felstad… aka Frostgrave. Players create a warband consisting of a Wizard, an Apprentice, and 8 Soldiers. You take your warband into the city to recover treasure, but it’s not as easy as it sounds. You’ll be going up against another opponent who also wants that treasure, plus there are random monsters, traps, and all sorts of surprises. There are 10 scenarios in the Core Rulebook… and our group is playing one scenario per month. Most of us are busy, so the only real rule is get a game in once a month. Below is an account of my first game in the campaign.
For more information on Frostgrave, I’ll include some additional links at the end of this battle report.
The Mausoleum
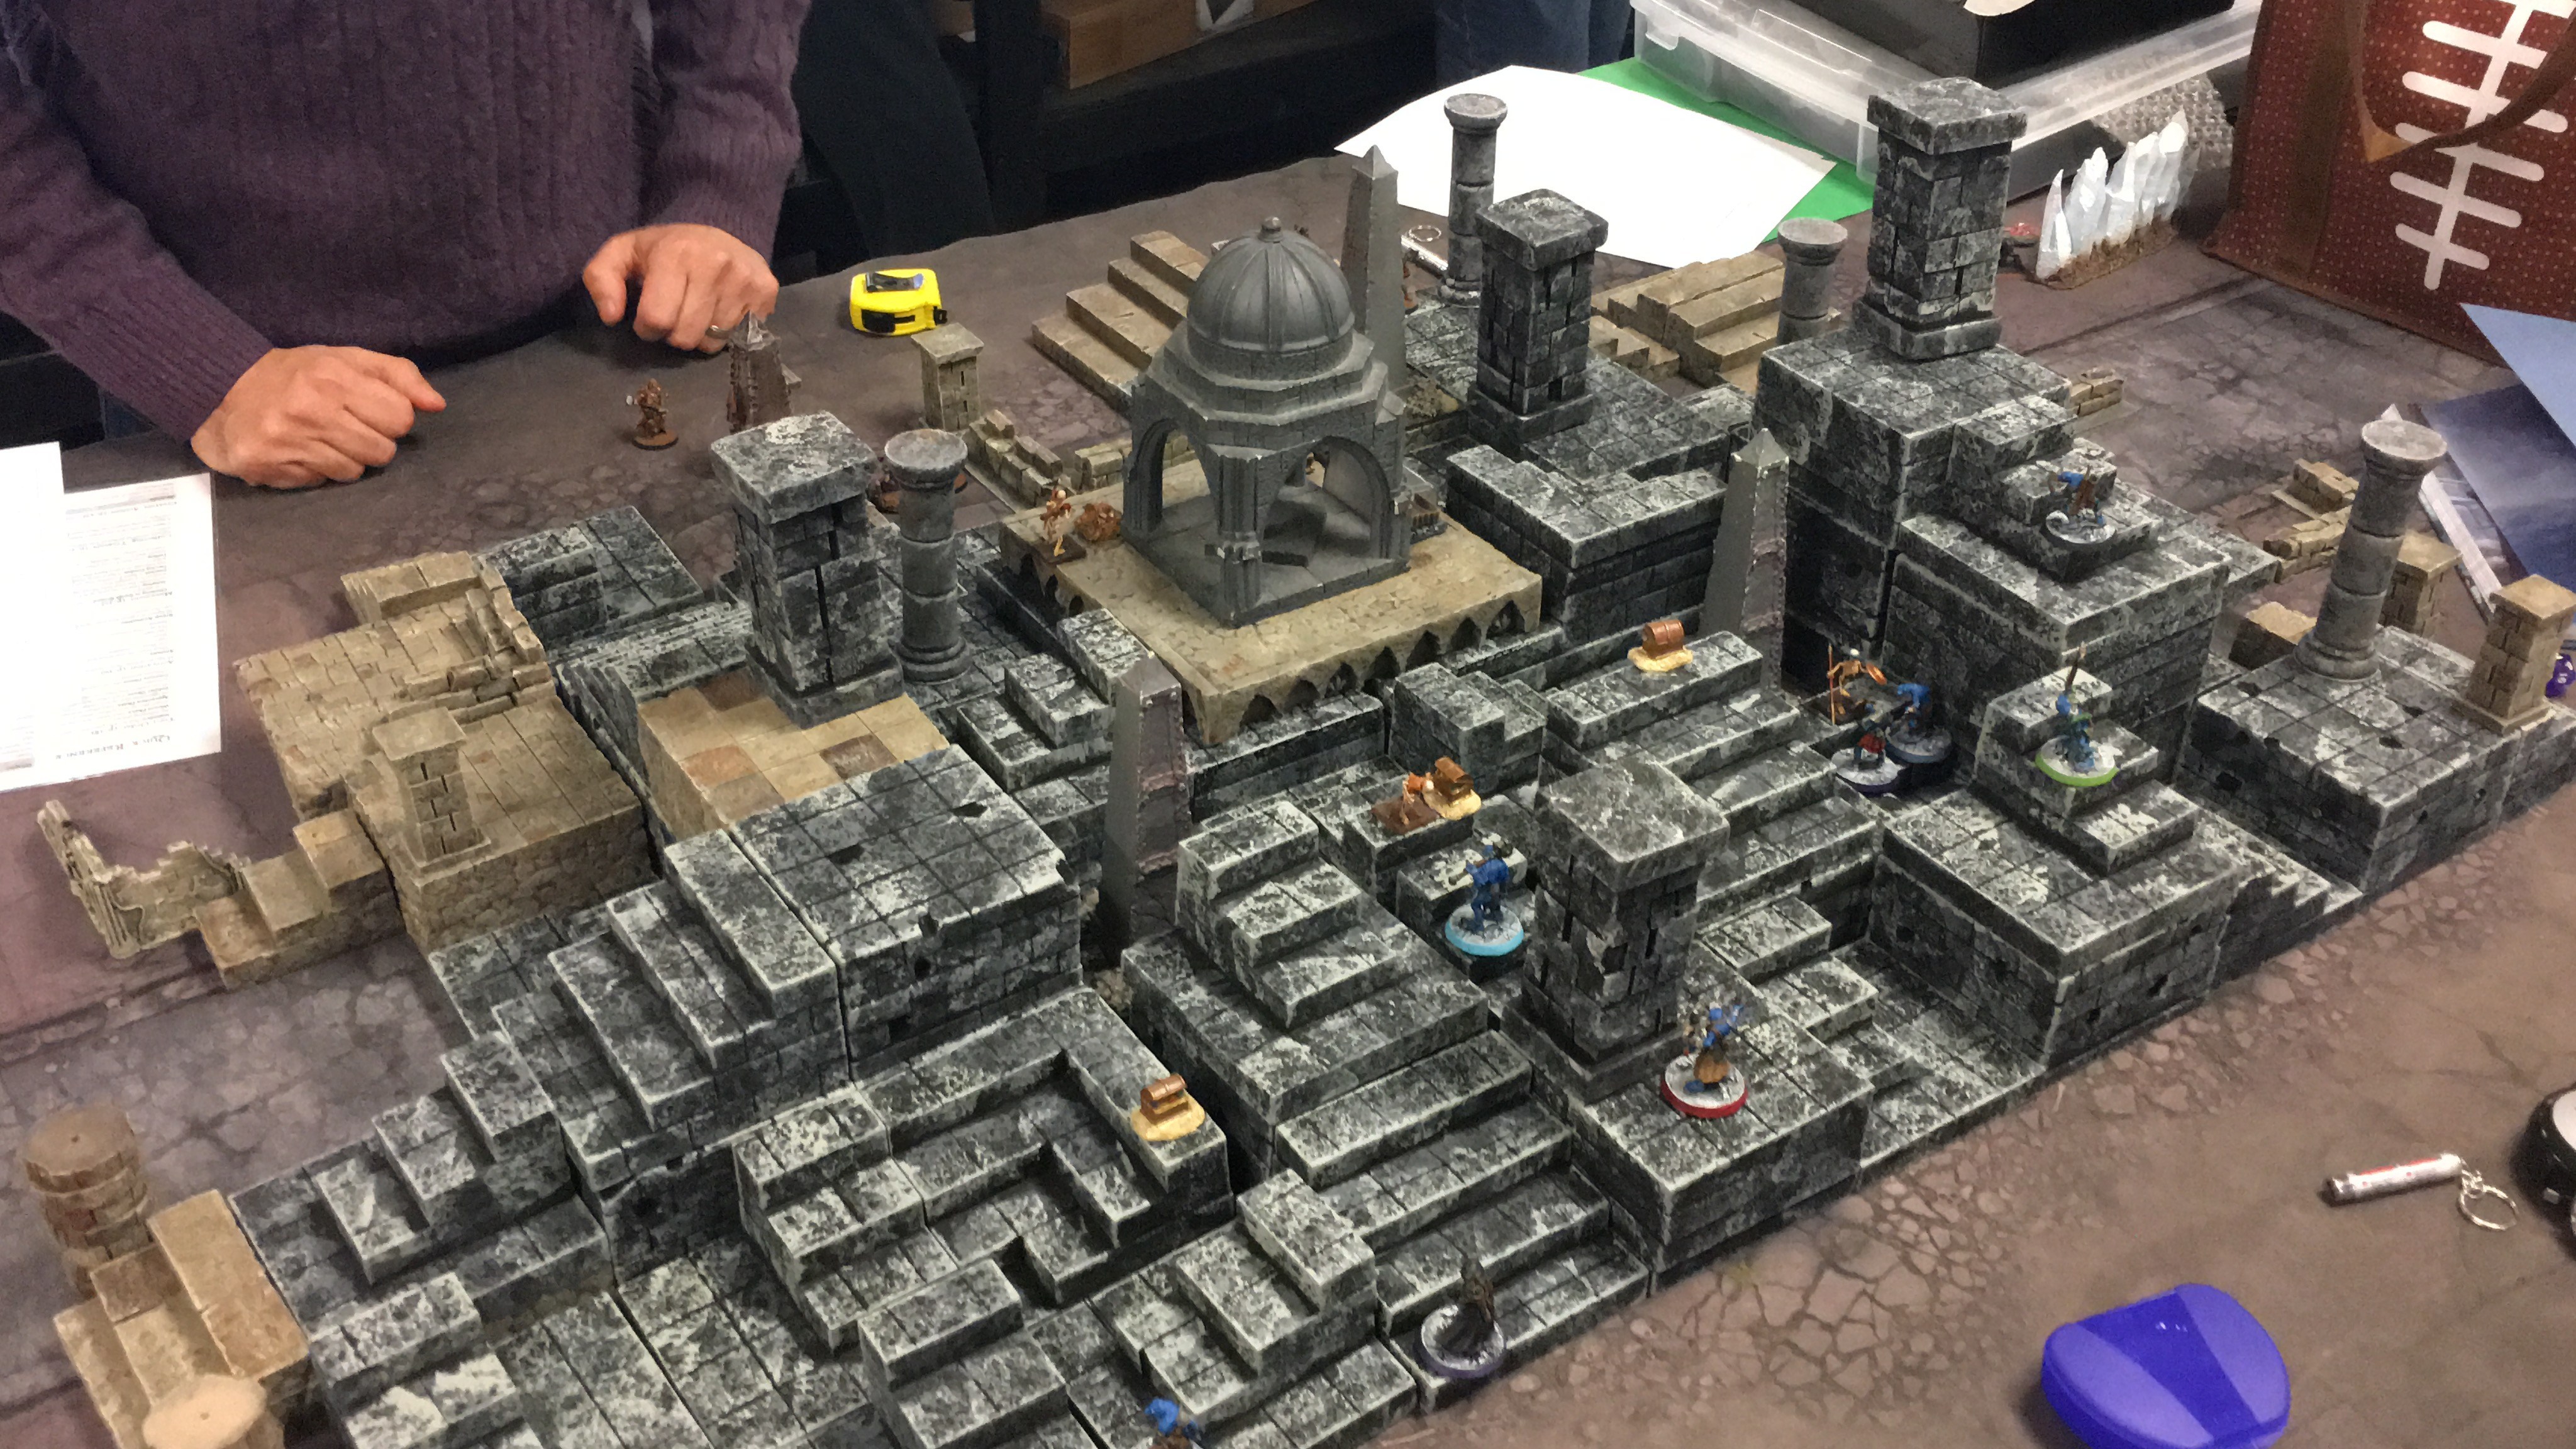
The first scenario was played on a 3′ x 3′ area of terrain. The terrain was provided by me and my opponent, Sebastian. We mixed and matched our collection of foam block terrain to create a three-dimensional area of battle, with plenty of places to hide and block line-of-sight… which can be critical to surviving.
The scenario called for a 6″ x 6″ mausoleum in the center of the table, with four treasures placed, one per corner. Additionally, each player is allowed to place one treasure within six inches of their side of the play area. You roll to choose side of the table you want — I won the roll and selected the side that I felt had more hiding spots. I placed my single treasure in a place that would be difficult for Sebastian to target early in the game, dedicating one of my soldiers to dash in, grab it, and get out. The campaign game is ALL about surviving and collecting treasure…not so much about eliminating your opponent and his warband.
The scenario also calls for random skeletons — at the start of the game, each player places two wherever they like. Sebastian chose to place his close to my warband, while I chose to place my two guarding two treasures closest to his side of the mausoleum. Because creatures will move in the direction of an enemy they spot within 10″, I figured this would be a good way to initially pin him down and limit his movement towards the treasure unless he wanted to engage the skeletons.
For this campaign, I am using a Snakeman warband… they’re blue and have adjusted to the cold weather, of course. My oppponent had a human warband. The rules are open and do not limit you… I’ve seen warbands of all types – undead, dwarven, gnolls, and more.

Each turn, both players roll for Initiative. I won the first turn (and pretty much lost the rest except for the very last one!) and immediately had my wizard cast Telekinesis to move one of the mausoleum corner treasures 6″ closer to my side. My apprentice also succeeded using the same spell to move another treasure closer. In Frostgrave, collecting treasure not only awards you XP to level up your wizard, but it also means you get to roll on some random treasure tables to see what you actually found. Options are potions, scrolls, grimoires (a book containing a spell), and magic weapons and armor.

I kept my wizard and apprentice hiding behind columns as best I could. Sebastian took a shot at my Apprentice once, but for most of the game, they were both safe from targeting and cast spells long distance. Sebastian, however, cast a nasty spell that I hate called Wizard Eye. It places an eye anywhere he likes and allows his wizard to cast spells as if he were standing at that point with 180 degree vision. It’s hard to hide from that eye, and although he failed to cast it quite a few times, he eventually was successful. (In Frostgrave, you roll to see if you succeed on casting spells – failing to do so can even result in damage done to the spellcaster.)
The first casualty of the game was his Tracker. I took him down with a shot from one of my archers. HIs apprentice hit my archer for a few points of damage, so I kept him hidden for most of the rest of the game. The next casualty was his thief who took a hit from my Barbarian. My barbarian was hit by one of Sebastian’s soldiers, but not killed… that would come later. (In Frostgrave, a warband member doesn’t really die in a game… they are removed from play. At the end of the game, all warband members, including a Wizard and Apprentice, roll to determine if it was a true death or resulted in injuries. Some injuries heal but require the warband member to sit out the next game… other injuries are permanent and can affect things like movement distance and the ability to cast spells or shoot arrows.)
At one point, Sebastian attempted to cast a Wall spell (a solid stone wall) between one of my soldiers and a treasure, but it failed. I took this opportunity to use Telekinesis to move one of the treasures on Sebastian’s side of the mausoleum closer to my side… it was successful. That meant I had four treasures closer to my warband while he had two. At this point, my goal was to rush my soldiers in and grab the treasures. Once a treasure is picked up, the holder moves at half speed, so I considered using more Telekinesis spells to get them closer, but my Wizard took a hit from an archer and I had to use a Heal spell to get him back up to health. This was successful, and a good thing — you can choose to burn Health points to raise the value of a roll for a spell casting. If the target roll for Telekinesis is 12 and I roll a 10, I can use to burn 2 Health to bump that roll to 12. This accomplishes two things in Frostgrave: (1) you get XP for every successful spell your wizard or apprentice cast and (2) the spell’s effect happens! So because my wizard was concealed well, I was okay with burning his health in the hope that he wouldn’t get hit by my enemy.
Towards the end of the game, Sebastian’s archer and Apprentice took out my Barbarian and Warhound. The Barbarian is an expensive member of my warband… 100 gold versus the standard 20 gold for a thug. I didn’t want to lose him, so all I could hope for was a good roll at the end of the game to determine if he was truly dead, injured or okay.
For this first game, Sebastian and I weren’t really wanting to tangle Wizard-vs-Wizard, so we grabbed what treasures we could and ran. The game ended with me holding 4 and Sebastian holding 2. We also both lost two members of our warbands. The Mausoleum scenario also has a random skeleton pop up at the end of each turn, and these were a real nuisance, more to Sebastian as they kept popping up more on his side than mine.
End of Game Result Rolls:
Jim: Barbarian and Warhound — I rolled high (17 and 15), so they were safe and can return next game.
Sebastian: Thief and Tracker — he rolled low (5) and the rules state those two figures are injured for one game. Sebastian will have to play without them OR spend gold to hire healthy soldiers.
Our campaign is using a rule of a Max of 300 XP per game… this keeps things from getting out of control. 100 XP can be used to lower the cost to cast a spell by 1 (so my Telekinesis requires a 12 but I could burn 100XP to lower that to 11). 100XP can also be used to improve one stat per game (such as Fight or Shoot or Health) or to learn one new spell. You gain XP by casting spells successfully, eliminating enemies, finding treasure and other options. The amount of XP gained can change from scenario to scenario. For this first scenario, I cast 8 spells successfully for 80XP, and 70XP per treasure… which put me over the 300XP max.
Out of Game rolls: Some spells are cast out of game, either before or after. My sigilist wizard and apprentice both have the opportunity to craft a scroll after a game. The wizard succeeded but the apprentice failed. (The apprentice always rolls at about a +2 penalty than the wizard.) By creating a scroll, you create a way to cast a spell that auto-casts successfully… useful!

End of Game Treasure: At the end of each game, players roll on some random charts to find their treasures (as well as gain 50 gold per treasure bonus in the Mausoleum scenario). This is one of my favorite parts of the game. For my four treasure rolls, I found the following:
- 50 gold and 2x potions
- 200 gold and a Grimoire
- 30 gold and 3x scrolls
- 30 gold and 3x potions
For Potions, Scrolls, and Grimoires, you roll on separate tables to determine their type. I received the following:
Potions: Elixir of Life, 2x Elixir of Speed, Potion of Strength, Potion of Toughness
Scrolls: Control Undead, Elemental Ball, Blinding Light
Grimoire: Banish
You can sell items for half their listed value with the exception of Grimoires… you can only sell those if you already know the spell. My wizard and apprentice can now cast Banish!
So, I ended up with 510 gold, 5 potions, 3 scrolls (4 with the one I rolled out of game on), and a new spell…
Finally, after your first game you can choose to create a Base inside the frozen city. There are many types of bases that provide special abilities or bonuses. I chose the Inn because it allows me to increase the size of my warband by 1… to 11. In addition to the base (which costs nothing, but you can only have one), you can buy base upgrades. These also provide bonuses, but I haven’t decided whether to perform an upgrade or not.
The first game was a good one. No injuries, lots of gold and magic items, a new spell, and a base that increases my warband size. My wizard is now Level 3 (they start at Level 0). That Elixir of Life is huge… should my wizard (or other warband member) ever die, I can use it to revive him. That was a seriously GOOD random treasure roll as it costs 500gold to buy one!
Next month’s scenario: Genie in a Bottle
Six treasures are placed (3 by each player). When a treasure is picked up, roll a d20 — on a 15-20 the warband member finds a bottle and releases a genie that is NOT happy and doesn’t grant wishes! The genie counts as a major demon… a pretty serious creature that I do not want to tangle with. After the genie kills three warband members, it flees the board. Oh, and the finder of the bottle gets 300 gold for it!
Frostgrave Links:
Introducing My Kids to Frostgrave: https://geekdad.com/2017/01/frostgrave-february/
Basic Rules video: https://www.youtube.com/watch?v=mrW3P_T41DM
Core Rulebook: https://amzn.to/2CiFhAE


Awesome table!