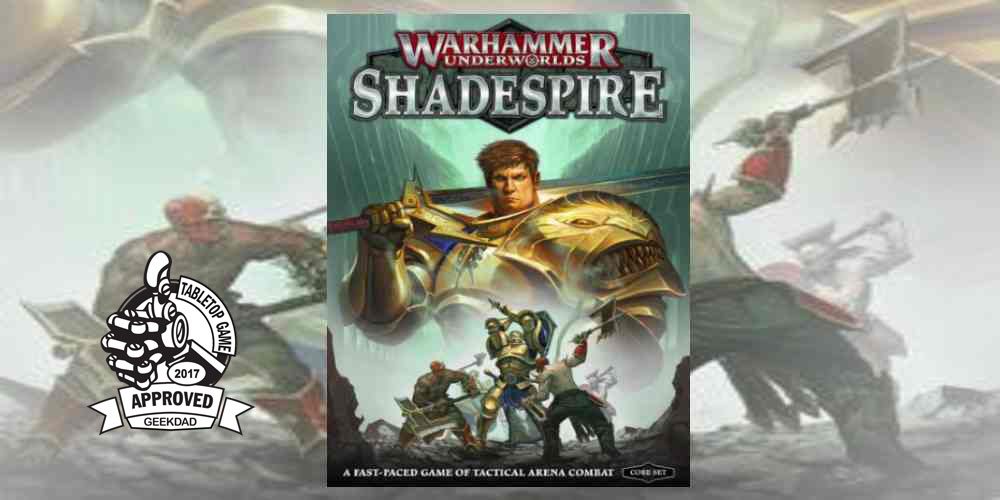
 This is the second part of my Warhammer Underworlds: Shadespire review.
In part one, I looked at the game with a broad overview, examining where it might fit in the current games market. Whilst writing that review, I found I had more to say about the game’s mechanics.
This post is an in-depth look at Shadespire, focusing on how the game is played and some of the deckbuilding and gameplay tactics you might adopt using the warbands that come with the core set. With that in mind, this post is intended to be read alongside yesterday’s and not on its own.
Hopefully, between the two posts, you’ll have most questions you have about the game answered and also understand why I consider Shadespire good enough to be considered GeekDad Approved.
How do I set up a game?
Lay your warband hero cards out in front of you, with their associated models. Hero cards have two sides: silver basic side and a golden “inspired” side. See more in becoming inspired later in the review. You’ll also need two decks of Shadespire cards: an objectives deck and a power deck.
How do I create a deck?
- The game requires two decks. An objective deck (gold cards) and powers deck (grey cards)
- You must have 12 cards in your objective deck.
- You must have at least 20 Cards in your powers deck
- There are two types of power card. Upgrade: Generally a card played on a hero to give a continual improvement. Ploy: Quick tactical decisions that might briefly give you an edge.
- No more than half your powers deck may be ploys.

Who’s on first?
There is a specific order in which the game is set up, with players rolling off to see who chooses who goes first for each step.
The Dice:
The first use of the dice is the roll off. Shadespire uses custom dice. 5 attack dice and 3 defense dice. These have various symbols on them.
On the attack dice there are:
- 2 Hammers.
- 1 Crossed Swords.
- 1 Single Assist.
- 1 Double Assist.
- 1 Critical.
On the defense dice there are:
- 2 Shields.
- 1 Dodge.
- 1 Single Assist.
- 1 Double Assist.
- 1 Critical.
A roll-off consists of rolling four dice and comparing the number of criticals rolled. (The chances of a critical are equal on both a defense and attack dice so it doesn’t matter which four you roll.)
The first step is board placement. There are 2 boards, one per player. One player places first and the other places their board so that at least 3 hexes on each board line up. Boards must be placed with the same length sides against one another. i.e. with either widths adjoining or lengths adjoining. They cannot be placed with a length against a width, in a t-shape.
Board placement may seem like a trivial choice, but can (and should) make a tactical difference. Some warbands do better when defending a narrow frontage, whilst others have a speed advantage and may want a more open table. These things need to be considered when placing your board.
Next, whoever placed the first board (a disadvantage) gets to place the first objective tokens first. In a 2 player game, there are 5 objective tokens. This means they will get to place three of them. Tokens are chosen randomly and placed face down, so neither player knows which objective is where. There are a small number of rules to be followed when placing objectives. They can’t be on hero starting hexes, must be two hexes apart, and only the final hex may be on a board edge. Once all the objectives are placed, they are revealed to all players.
Warhammer: Shadespire is GeekDad Approved!
The next step is drawing cards. Each player draws 3 Objective Cards and 5 Power Cards from their corresponding decks. Either draw can be cast aside (a ‘do-over’) and another set taken. Beware though: Cards are finite and throwing away cards is not without risk. If both players are happy with their cards, they roll off to see who starts to place their models first.
Note: The game is meant to be played with all cards hidden, but when learning the game, or playing with younger players, the game works perfectly well with the cards face up. It removes the element of secrecy and surprise, but the game mechanics still work perfectly well.
Players take it in turns to place their models, starting with the person chosen after the roll-off (the winner of the roll-off gets to choose.) Once both sides have placed, there is one more roll off to see who goes first. The player who finished placing their models first can add one extra critical to their dice roll. In the starter set, this will always be the Stormcast Player.
 Playing the game: How is a turn broken down?
A Shadespire turn has very little in common with its parent game Warhammer: Age of Sigmar.
- Games are broken down into 3 Rounds, each made up of an Action Phase and an End Phase.
- In the Action Phase, players take turns to activate their warband. They will do so four times each. Each one is called an ‘activation.’
- In the first part of an activation, a player will (usually) make one action.
- The 2nd Part of the activation is called the Power Step. Both players can take part in this step regardless of whose activation it is.
- After all players have had four activations, the Action Phase finishes and play moves to the End Phase.
What can you do in an Activation?
This is the lifeblood of the game. What you do, when, is vitally important. On each activation players may do ONE of the following.
- Make a Move Action.
- Move one hero up to the distance indicated on its hero card. This hero may not move again this round (or take a charge action.)
- Make a Charge Action.
- Move one hero up to the distance indicated on its hero card, bringing an enemy into range of one its possible attack actions. Make that attack action. Heroes may only charge once per round and may take no further actions after charging, unless a special rule applies.
- Go on Guard with one character.
- This makes the hero harder to hit. Instead of using either armor (shields) or dodging (a curved arrow) when defending, heroes on guard use both.
- Make an Attack Action with a hero (or another attack action printed on a card.)
- You can attack once per activation, unless card effects allow you to make another.
- If the character hasn’t charged, this can be done multiple times in a round (but not an activation.)
- Draw a new power card.
- Discard an objective card and draw another.
- Pass.
How is combat resolved?
There are a number of subtle variations to combat, though nothing that isn’t easy to pick up after a few turns. Here is a broad overview of combat.
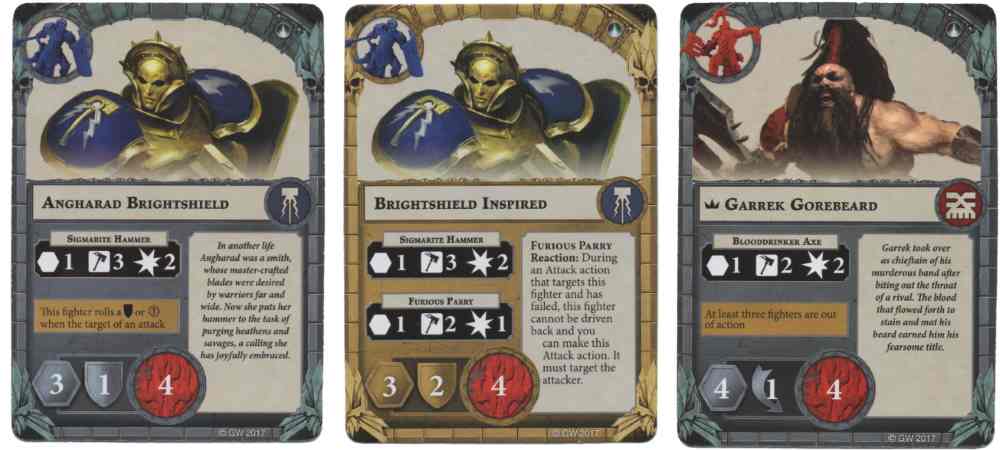
- The hero being used this activation fights, either through a charge action or an attack action. In both cases you use the attack bar on the hero’s card.
- This has three figures on it.
- Range. The number of hexes your attack can cover. Usually 1, occasionally 2.
- Attack Dice. This has a number and a symbol, hammers or swords. The number shows how many dice to roll. The symbol shows which symbol on the attack dice gives a hit. There are more hammers on the attack dice than swords, making them easier to hit with.
- A star with a number. The amount of damage (wounds) caused by a successful hit.
- The attacking player rolls his attack dice.
- The defending player now rolls his defense dice.
- When defending, heroes will either use their dodge ability or rely on the armor they are wearing. This is given on the hero card (either as a shield or a curved arrow.) The symbol also shows the number of defense dice the player rolls for this character. A shield with a 1 in it, means they roll one defense die and must score shields to stop the damage.
- If the defender rolls the same number (or greater) of defense successes, as the attacker rolled attack successes, the attack is successfully deflected.
- If not, the attack has hit and deals the damage specified by the damage given on the card for the attack used. Note: Multiple hits do not cause multiple damage. Partial defense does not mitigate any of the damage. Damage is an all or nothing affair in Shadespire. If it a hit gets through it does all its damage. If it is blocked, no damage is caused.
- After damage has been applied. If the attacker managed to land a hit, even if did no damage, they have the option to push his opponent’s model back one hex.
- If the defending player has no square to be pushed into, they instead take damage.
- If no hits were caused or the defender blocked more hits than were scored, there is no pushback.
- There are two other things to consider when rolling dice to resolve combat.
- Criticals. The “!” symbol on the dice is a critical hit. There’s only a 1:6 chance of one coming up, but when they do, they’re potent things.
- A critical can only be canceled out by another critical but a critical cancels all non-criticals. e.g. If a Stormcast player rolls three hammers, that’s three hits, but if his opponent rolls 1 critical on his defense die, that will cancel all three out hammers out.
- Some faces on the dice have “assist” symbols on them. These count as successes if the attacker or defender has people in their warband on adjacent squares to the combat. This allows members of the same warband to help one another out. Assists on both sides of the combat cancel each other out.
- Criticals. The “!” symbol on the dice is a critical hit. There’s only a 1:6 chance of one coming up, but when they do, they’re potent things.
- If the attacking player kills an enemy hero they gain a glory point.
How do heroes become inspired?
One of the key elements of the game is the concept of heroes becoming “inspired.” Each hero can become inspired and when they do, they become a better version of themselves.
For heroes in the current warbands, there is no way to actively become inspired. Heroes become inspired as a reaction to events on the tabletop. This reaction is not part of combat per se, but it does come about as a result of combat. In the case of Garrek’s Reavers, they become inspired the moment 3 heroes (any 3) are killed. The Stormcast become inspired the first time they make an armor save.
After an Activation: The Power Step.
After a player has completed his activation, whatever they may have done with it, play proceeds to the Power Step. In this step players use their power cards.
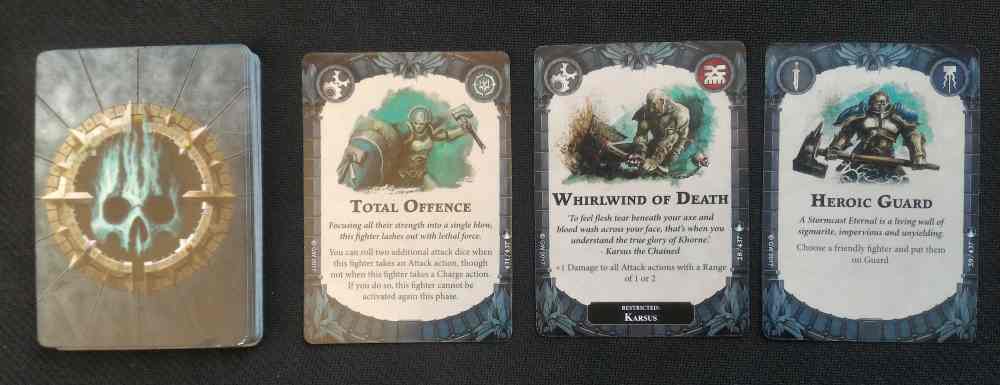
There are two types of power card, “ploy cards” and “upgrades.”
- Ploy cards are free to play and represent tactical maneuvers used in the hope of bringing an advantage.
- Upgrades cost 1 glory point to play. They permanently improve one of your characters. Some upgrade cards are specific to certain heroes, others are universal. Note: Although you spend glory to make an upgrade, you don’t lose it for the purposes of counting victory points at the end. You may only make 1 upgrade per glory token won.
Players can keep playing power cards until both players pass, taking it in turns. Once both players have finished, play progress to the next player’s activation. You are allowed to start playing power cards even if you passed at an earlier opportunity in the same power step.
Once all players have made four activations, and the final power step is completed, play moves to the End Phase.
What is the End Phase?
The End Phase could also be termed the “wash up.” In this phase, the following occurs, starting with the player that started the round.
- Check whether any objectives have been met. If they have, claim the glory and discard the completed cards.
- If you wish, discard any remaining objective cards.
- Play any upgrade cards you wish (assuming you have the relevant glory.) Note: Ploys cannot be played at this time.
- If you wish, discard any power cards you no longer want.
- Draw back up to 3 objective cards and 5 power cards.
Once both players have completed their end phase, assuming it’s not the final turn, players roll off to see who chooses who goes first in the next turn. If it is the final turn, there is no need to redraw cards. Objective points are totaled and the winner declared.
Playing the Game: Beyond the mechanics
The mechanics of the game may take up what seems like several thousand bullet points, but once you play they are fairly straightforward. When you start to play, you’ll discover that you need to be tactically astute to get the most from your warband. The mechanics on the surface are quite rigid and winning the game will require exploiting whatever flexibility you can find.
With only four activations per turn, you have to think about the best way to bring your heroes into the action. This means everything, board, objective and hero placement should all be dependent on your game plan.
The game plan will then affect how you play the game. Whether you hunker down, and try to minimise casualties, whether you burst into enemy territory, or whether you spread out, hunting down the placed objectives. Games become cat and mouse affairs as you try to maximise your plan, whilst running interference on your opponent’s.
The platform that all good game plans are built on, is the decks.

Deck Construction.
Building you Objective Deck.
Your objective deck may well be where the game is won or lost. You need to pack it with as many things that suit you and your warband’s style of play. Don’t, for example, pick lots of things that require quick movement, if you’re playing Stormcast.
I’ve only explored the tip of the deckbuilding iceberg, though there aren’t that many alternative cards available yet. The cards contain a mix of traditional, capture the flag type objectives, and more situational cards, such as suffering no damage or killing the opposing leader.
For some objectives, it’s easy to see how they can be obtained, but others take a little more thought. One or two seem virtually impossible. Objective values vary, most are 1 glory point only. A few are 2, fewer still are 3. “Annihilation” is a whopping 5. Very tempting, but you have to consider, how likely it is that you’re going to destroy all your opponents forces.
“Supremacy” is a great card for Garrek’s Reavers, but a terrible one for the Stormcast. It requires that at the beginning of the end phase, you hold three objectives. For the Reavers, particularly against slow, fewer numbered enemies, this card is a godsend (albeit a bloody one.) It’s worth 3 glory. If you can win it early in the game, that’s three points to spend on buffing your more fragile troops.
“Eternals” for the Stormcast is a card that I can’t see the point of including. It requires that all of your Stormcast Eternals survive until the end of the game. This is hard to pull off. Even if you do manage to hunker down and avoid damage, it will give the Reavers free rein to run about the board, picking up Supremacy plus all the objective tokens they turn up.
Whilst most objectives cards give glory only in the end phase, there are some that can be cashed in, the instant their conditions are met. Consider loading your deck with these cards. Not only do they give an instant glory hit, they also allow the immediate drawing of a new objective, offering further opportunities to score yet more glory.
Playing to your objective deck’s strengths.
The Stormcast are hard to kill. That’s why, so far, my tactic is to push them into the opponent’s half. There are a number of objective tokens that give glory for controlling the board in enemy territory. If you set up near the center of the board, it’s easy to capture enemy hexes and stay there. You only need 1 hero to survive until the end of the game, and you can claim the glory.
It’s worth noting that even after your warband has been destroyed, you are allowed to keep cycling through your objective deck when it’s time for your activation. Mostly this is futile, but if the scores are close, then maybe, just maybe, you’ll have chosen something you can achieve from beyond the grave, to give your warband victory from the unlikeliest position. (In the faqs, released as I was editing this piece, it says that the Stormcast card “Sigmar’s Bulwark,” one that gives glory if you take no damage in a round, is claimable even if all your warriors are dead!)
It will be interesting to see what new objective cards become available in the future expansion sets. At the moment, I don’t think there are too many different ways to play the game. There has been some question among the game’s forums of whether objective decks need to contain all “hold objective X” cards. Using only the core set, I think the answer is yes.
I don’t think there are enough different objective cards to employ any effective alternate strategies. Certainly, you should include either all of the hold objective cards or none of them. To include only a portion puts too much store in the luck of the initial placement. Hopefully, the new objectives from the expansion packs might encourage alternative game plans. Plans that don’t revolve around objective capture.
Building your Power Deck.
Once you’ve built your Objective deck, you need to tailor your power deck to ensure as many of the cards as possible will help you obtain those objectives. You may only take half of the cards as ploys, so think carefully about which ones you need. Upgrades? Some of them are universal and very useful. Some are for a specific hero. These upgrades can be useful, but not if the hero is dead before you get to use them. Then you have to go through the frustration of wasting a card draw on a useless card.
Some power cards only work on a given roll of the dice. These can be potent if successful, but equally, lead to disappointment if they fail. You don’t want to be relying on these cards at a crucial moment, and it’s important to decide if you’re the type of player who can manage these sorts of setbacks, or if you prefer a steadier, more predictable outcome.
Stormcast are slow, so I tend to pick anything that gives them a free hex of movement, such as ‘Sidestep.’ Cards like this enable you to move into position without using up a valuable move action, or better still, move into a position where you can attack without charging.
For the Khorne players, buffs for the weaker members of the team are vital. It’s very hard, initially, for the Reavers to “one-shot” kill a Stormcast warrior. But if you can buff them, this becomes possible. A Stormcast player can (almost) bear to ignore the weaker members of the team, and instead, focus on your heavier hitters. The more heroes you can create that can deal significant damage, the better. With only three heroes at their disposal, the last thing a Stormcast player needs is to worry about fighting strong enemies on multiple fronts.
Rudimentary Tactics
The Reavers move quickly but don’t deal out much damage, and they certainly can’t take it. The ponderous Stormcast, crawl across the table, but are like tanks in battle. How will this affect your tactics?
Board placement may be everything! I’ll be honest, I haven’t explored this option very much, but the more I think about this the more it seems, that particularly for Stormcast, victory starts with board placement. For our videos we’ve used a simple, perfect rectangle placement, to make it easy to capture the playing area on camera. As I gain more experience, I think this puts the Stormcast at a disadvantage. At least that’s my excuse, and I’m sticking to it!
Turn one is about maximising your glory so you can buff your heroes for brutal combat in later rounds.
From the moment the game starts, you need to be thinking about your objectives. Even whether to “do over” your initial draw of cards is an important decision. You may have drawn some good cards, but if you can’t achieve any of them in the opening turn, you may find yourself too far behind to catch up. As a Khorne player, playing a less numerous opponent, I would consider a do-over if I didn’t draw Supremacy. This means that you’ll have looked through half your cards so have a 50% chance of having it in your hand from the start of the game.
The power step is vital. How you stack your deck, and what you do with the cards that come out makes the difference between winning and losing. For those moving beyond the basic game, it means the path victory begins long before arriving on the tabletop.
It’s worth playing your buff cards early. There’s a temptation, particularly with Stormcast, who may be able to withstand several hits before dying, to hold off playing a card that gives an extra wound, or extra damage, just to see if a better opportunity comes along. Particularly with the extra wound cards, I recommend playing them as soon as possible. Your opponent may have some nasty tricks up their sleeve, and before you know it, your “safe” hero is dead, and that one wound may have made all the difference. Even if it turned out not to be all that useful, you’re cycling cards, and maybe one draw closer to that killer ploy.
Never give up. A few times in my games, seemingly futile actions have paid great dividends, shifting am enemy hero one hex backwards, suddenly puts an objective out of reach. A desperate run into the center might pay off. Opportunities for attack are limited in this game and the odds of success are not always great. A hero on a single wound, might remain alive on the objective in enemy territory, and suddenly bring you the vital glory that wins the battle.

What comes next?
Play some games! See how the mechanics work. Learn to understand the ebb and flow of the game. I’ve laid out some simple tactics, that I think work, but there are many other varieties, many of which are probably better. With new expansions on the horizon, the tactics are only going to get deeper. Hopefully, I’ll bring you a follow-up strategies post when I’ve got to grips with the wealth of new options.
As I said in my previous post. Shadespire is a great game to play. You can easily play two or three games in an evening, giving great scope to get to grips with the rules and explore different tactics. I would recommend trying as many different tactics as possible. I imagine that as players become more experienced, it’s those who are able to pull off the unexpected or cope with fickle twists of the dice who will come out supreme.
So that’s all from me on Shadespire for now. Do check out Agents of Sigmar for additional coverage too. Let me know in the comments if you have some killer tactics or must have cards. Shadespire is a new game and everybody is learning. It’s a great time to jump in on this GeekDad approved game and it would be great to generate some discussion and debate some strategies. Who knows maybe one day our warbands may even clash in the lost city of Shadespire!
Click here to see all our tabletop game reviews.
If you’d like to stay up-to-date with all of our tabletop gaming coverage, please copy this link and add it to your RSS reader.
Disclosure: GeekDad received a copy of this game for review purposes.


This is exactly what I was looking for – a good thorough breakdown of the game. Shadespire has quite a bit of interest at my FLGS and I’ve been curious about it. The price is very reasonable, and I’m all about only having to paint up a few models.
Awesome review! I’m sold at this point.
Glad you liked the review! I still love this game. It’s the best thing GW have made in years.
I was literally just linking this article to a new one that will go live in the next couple of days, when your comment came through! Look out for “10 Reasons to Play Shadespire With Your Kids” very soon!
Also, I regularly post videos at Agents of Sigmar, do check us out there and say hello. We’re always happy to answer questions and will soon be making rules FAQ videos too. https://www.youtube.com/channel/UCgHUrefFPIx5_ppXbwqT4Pw
Do join the Warhammer Underworlds: Shadespire Facebook group. It’s a great bunch of people.
Informative and thorough explanation. Thank you, Geek Dad