We continue our journey through Pathfinder Adventure Card Game: Mummy’s Mask with Deck 2: “Empty Graves.” In case you missed it, we started here with an overview of the base set, and you can read about Deck 1 here. And, of course, there are spoilers ahead!
Scenario 1: Evening at the Canny Jackal
Well, it seems we had a pretty successful journey through the necropolis of Wati. Now it’s time to head to the auction house, the Canny Jackal, where the severed hands of dishonest scavengers are mounted on the Pillar of Second Thoughts as a warning. But it seems that tonight those hands are a bit creepier than usual.
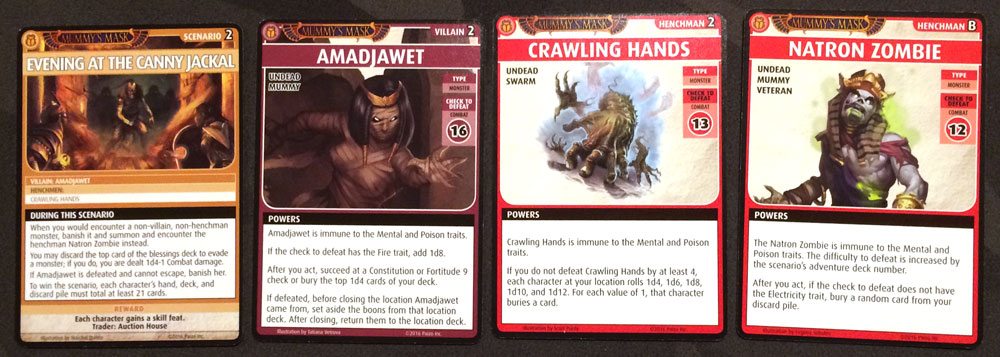
We knew this scenario was going to be a tough one. For starters, any time you encounter a regular monster, you banish it and face the Natron Zombie henchman instead. He’s not terrible, but if you don’t have Electricity, you have to bury a random card from your discard pile… which is particularly bad in light of the other rule for this scenario. To win, each character has to have 21 or more cards in their hand, deck, and discard pile. Since we start with 17 cards each, that means each of us needs to acquire 4 more cards before the end of the scenario to win. (Tup actually has 18, with Deliverance, so that’s a slight help.) We didn’t have to worry about taking damage quite as much as burying cards, because buried cards don’t count.
Neither the Natron Zombie nor the Crawling Hands henchmen allow you to close a location after defeating them—not that we’d want to. We really wanted as many boons as possible to collect. This particular set of locations doesn’t have as many monsters, and there are two locations that had none at all (except for the potential henchman or villain).
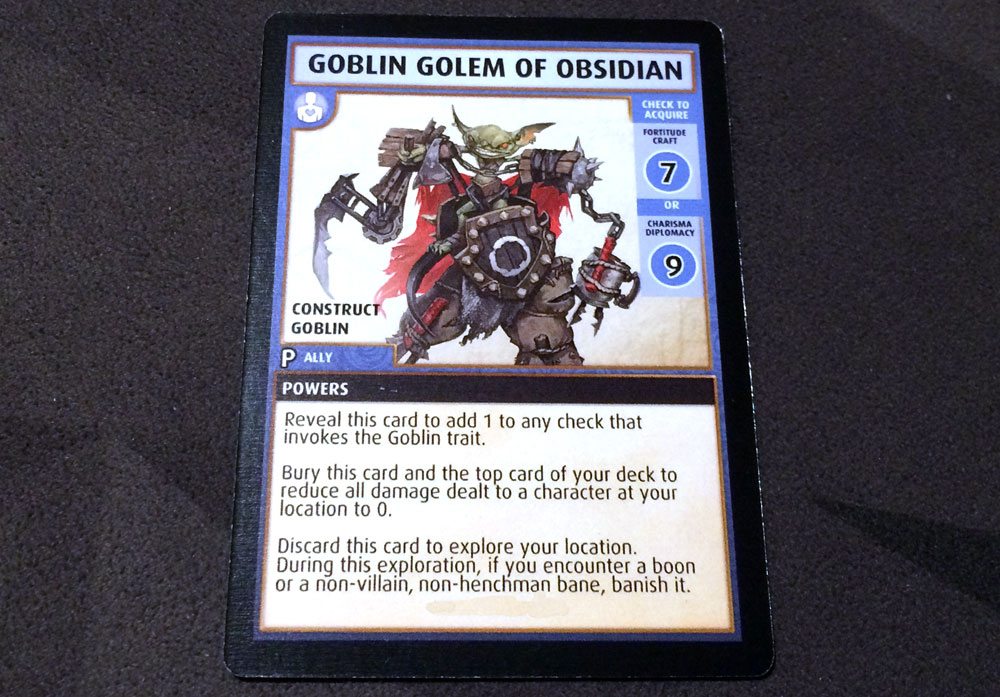
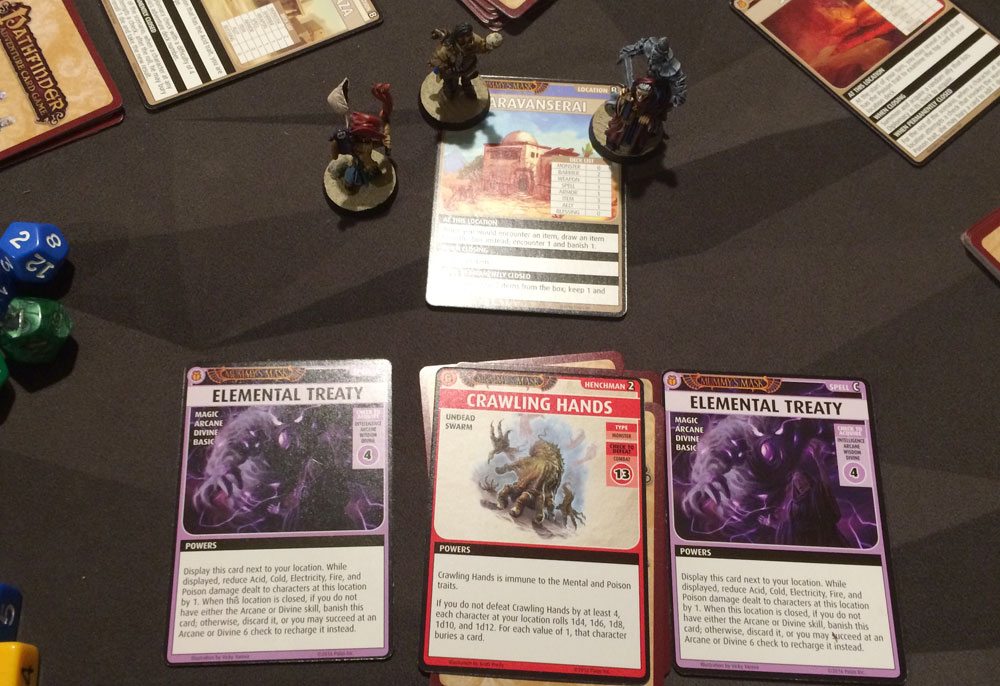
Yoon started off at the Canny Jackal, and used a Blessing of Nethys to peek at the top two cards. One was the Goblin Golem of Obsidian—a promo ally card I’d gotten with Deck 2, which is basically Ranzak in a mech suit. The other card was the Crawling Hands henchman, so we got our first look at it then. She put the Golem on top (and acquired it) and the Crawling Hands next. The Crawling Hands aren’t too hard to defeat, but you have to beat them by at least 4 or you risk burying cards: everyone at the location would have to roll a d4, d6, d8, d10, and d12, and then bury a card for each 1 rolled. Ouch! We wanted to avoid that as much as possible, so we threw blessings at Yoon. She defeated the Crawling Hands, but since they don’t allow you to close the location, she just stayed there to continue exploring.
Several of us started at the Caravanserai, thinking we’d try to acquire some cards before going after the locations with monsters. Estra used her power to look ahead at the top two cards, and found a Poison Blade Trap and another Crawling Hands. She decided to attempt the trap—and failed, so then the trap and the Crawling Hands were both shuffled back into the deck.
Since Ahmotep had some Electricity-based attacks in hand, she went to the Dye Market to look for some monsters. We knew we wanted to use Electricity against the Natron Zombie to avoid burying cards. Unfortunately, rather than a regular monster, she found the villain, Amadjawet. Amadjawet is a Combat 16 to defeat, but then after you act, you have to succeed at a Constitution/Fortitude 9 check or bury d4 cards from the top of your deck. Ahmotep managed to defeat the mummy and avoid burying cards with some help, but there were four open locations left for Amadjawet to flee to. When she’s defeated, you get to close the location, but then put all the boons back into the location deck so you can continue to acquire them.
Estra peeked again at the Caravanserai and found a blessing, so we knew that at least the villain hadn’t fled there, since the location doesn’t have a blessing in its regular card list. Tup did find and defeat the Crawling Hands at the Caravanserai, and we spent several blessings to ensure a sound victory, because so many people were at the location and would be at risk of burying cards. And then Estra encountered the Poison Blade Trap again (“Estra! We told you to leave that chest alone!”) but this time managed to succeed. The Caravanserai was empty of cards, and Estra closed it permanently.
Ahmotep, still looking for monsters to fight, went to the Dilapidated Plaza… and found Amadjawet again. Once again, she was defeated (and Ahmotep passed the Con/Fort check with some help), and we had another location closed with a bunch of boons left. Tup tried the Smoking Den and encountered the villain as well, but this time she failed the Con/Fort check. Fortunately, she only had to bury a single card. Unfortunately, to defeat her, she had to banish a card to use her fire power, and she was all out of spell. This time we knew for sure that Amadjawet had fled to the Alchemical Laboratory. We only had two locations left open, the lab and the Warehouse.

We did have a nice bit of luck: in one of Tup’s combats, he banished a spell to throw fire, which let him draw a random spell. He got Commune, which can be banished to get a random blessing: the Blessing of Maat. It’s a very powerful blessing with several different uses, including adding up to 3 to a roll, or changing all dice for a check to d8s. It’s the new blessing for Deck 2, and is typically a bit more difficult to acquire, so we totally lucked out on that one.
Yoon defeated Crawling Hands at the Warehouse, using her Lottery Urn to reroll dice when she didn’t beat it by quite enough—that saved her and Mavaro from having to risk burying cards.
But then we realized we were probably going to run out of time. Yoon had exactly 21 cards. Estra had acquired quite a few and could afford to give some away. Mavaro, Ahmotep, and Tup all needed just a few more. Ahmotep took a chance and went to the Alchemical Lab—if she encountered some boons that let her explore, then she might get enough cards. Luckily, she got a Tomb Raider, and then two Blessings of the Ancients, before encountering Amadjawet and chasing her to the Warehouse (which we purposely left open so the scenario wouldn’t end yet).
Tup acquired a Blessing of Wadjet, but Mavaro had to spend a blessing for him to get it. Then, the blessing let him explore again, finding the Kukri weapon, which he acquired. On Estra’s last turn, she gave a card to Tup, bringing him up to 21. Now it was down to Mavaro … who would only get one exploration.
He went to the Warehouse, which had two cards left. We figured that if the first card was a boon that let him explore again, he could then defeat Amadjawet—and then on closing the location, he would get a chance to acquire a weapon, armor, or item. Sadly, the one boon left in the Warehouse was an Armor… and then we ran out of time. We were so close, but just couldn’t quite get the cards we needed, and Amadjawet got away. Next time!
On our second attempt, we decided to stick together again, grouped together at the Caravanserai and the Canny Jackal. We started off strong, each managing to acquire a few cards, and as we progressed, Tup actually managed to get a lot more cards—we figured he could try to distribute cards to other players to even it out. The problem, though, lining up the turns so that you were at Tup’s location at the beginning of his turn and still getting spread out to close locations instead of hanging out at closed locations.
There were three instances where we fought the Crawling Hands and did not defeat them by at least 4, but luckily nobody ever rolled 1s and had to bury cards. Estra did have one fight against the Natron Zombie with no Electricity traits—two of us had just spent our Blessings of Horus the turn before to help somebody else—and so she had to bury a card.
In the end, we had pinned down Amadjawet at the Dilapidated Plaza, and everything else was closed. Everyone had at least 21 cards but only Ahmotep and Tup had extras. Estra took the last turn of the blessings deck, went to the Dilapidated Plaza (which had 4 cards left), and pulled off a nice trick to explore, then use an ally to explore again, then use her examine ability to peek ahead, find Amadjawet, and encounter her (because she’s Undead). Then, with everyone’s blessings and Ahmotep’s ability to add 2 to a check, we defeated Amadjawet. And then… uh-oh. You have to do a Constitution/Fortitude 9 check or else bury 1d4 cards from your deck—and Estra’s Constitution is a measly d4. With a blessing, she had 2d4, and Amadjawet could give her +2… but the odds were against us. She rolled a 5, too far to boost to a 9, and had to bury cards. SO CLOSE.
We finally did defeat the scenario the third time around—I won’t bore you with the details, but apparently, for us, it was three nights at the Canny Jackal. We did get some improved cards over the course of playing three times, but it was pretty tricky getting everyone the right number of cards before finishing off the scenario. As a reward, we each got a skill feat, and access to the Auction House traders, where you can find allies.

Scenario 2: Panic in the Streets
The Embalming District has some problems—Psychopomp spirits are as creepy as the newly risen dead that they’re supposed to be wrangling. Ah, if only we hadn’t spent so long at the Canny Jackal; maybe we could’ve nipped this problem in the bud.
In this scenario, there’s no villain, and you must close all of the locations. But there’s a catch: you also have a “panic deck” that starts with 5 blessings in it. If you fail a check against a henchman, you add a blessing to the panic deck. If you defeat a henchman, you banish a blessing from it. If the panic deck reaches 10 cards, you lose.
Since a lot of us now have skills that can assist other players at the same location, we tend to group up a little more rather than splitting up. In this scenario, since we didn’t need to worry temporarily closing locations to trap a villain, there was no reason not to team up.
Ahmotep, Tup, and Mavaro started at the Tooth & Hookah, where we ran into Old Eye-Taker, a former judge who has seen better days. He’s like the Red Skull… in a fez. He’s not too difficult, though he has some resistance to piercing and slashing (being a skeleton), but Ahmotep made quick work of him and closed the location.
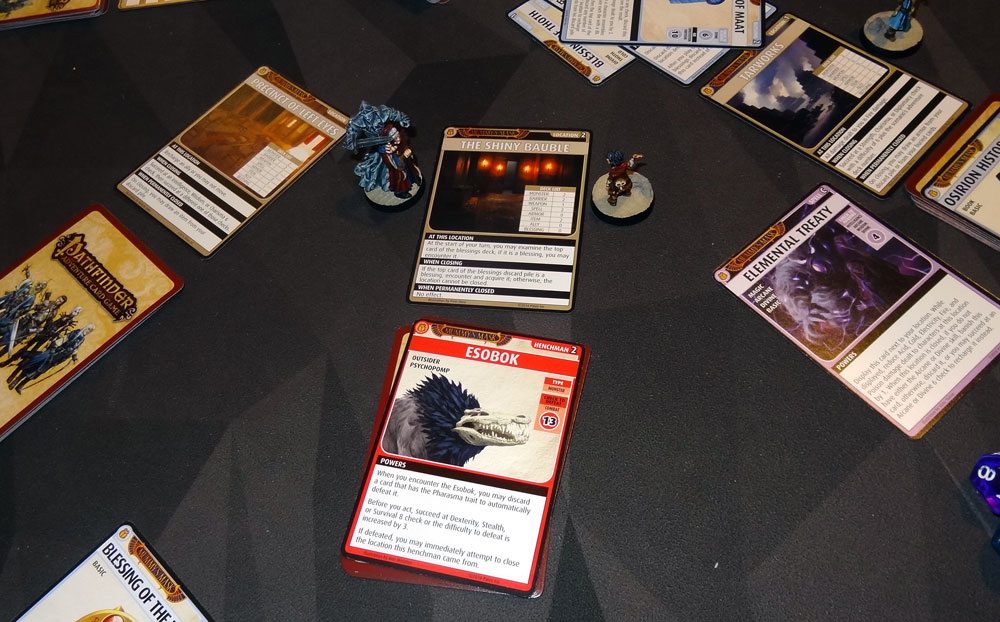
Meanwhile, Yoon and Estra were at the Shiny Bauble. It’s a location that has an interesting trade-off: you can look at the top card of the blessings deck, and (if it’s a blessing) you may choose to encounter it. Of course, that also means burning extra turns from the deck. We considered whether we wanted to do this much, but then we encountered a henchman pretty early on anyway.
The Esoboks are the psychopomp spirits and, well, they are creepy. It looks like an alligator skull attached to a lion-like body, with a feathered ruff like a vulture. You can defeat one automatically by discarding a Pharasma card—otherwise, you have to pass a Dexterity/Stealth/Survival check or it gets harder to defeat. Failing this check, of course, also adds to the panic deck. Estra had spotted the Esobok while examining the deck, and left it for Yoon (who has good Dexterity and Stealth) to fight. Yoon defeated it, but then failed to acquire the top card of the blessings deck to close the Shiny Bauble… so we were going to have to plow through the rest of the deck.
Ahmotep encountered another Esobok at the Tarworks, defeated and closed it (but failed the Dexterity/Stealth/Survival check).

Tup went to the Ghoul Square and encountered a Shrieking Plant barrier and failed, which then attracted the nearest monster (within the top three cards of the deck). It happened to be another henchman, Widow and Dearly Departed. (Estra says: “There’s only room for one widow and dearly departed in this town!”) You have to charm the living human sorcerer and then fight the undead mummy. Tup defeated them both, and then took advantage of their special effect: you can try an Intelligence/Wisdom/Charisma check equal to the panic deck to close the location (rather than the location’s usual closing check). Well, our panic deck was only at 2, so Tup didn’t even have to roll for that one.
Ahmotep found yet another Esobok at the Precinct of Left Eyes, with the same results as before. Yoon and Estra finally made it all the way through the Shiny Bauble, and then closed it.
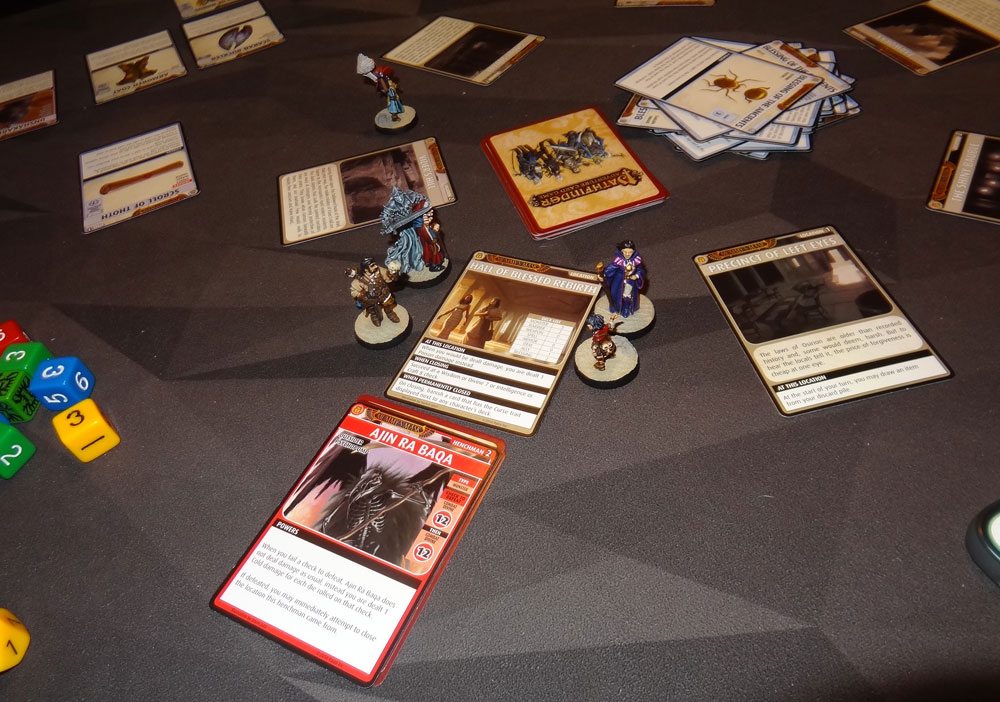
Finally, we all joined up at the Hall of Blessed Rebirth (except for Tup), the last open location. Mavaro was the one who found Ajin Ra Baqa, the head psychopomp. It’s two Combat 12 checks, and since there were four of us there, Ajin Ra Baqa didn’t stand a chance. Mavaro easily closed the location, and we won the scenario!

Compared to the Canny Jackal, this one was really easy for us—it was more like Mild Concern in the Streets. Our loot was the Hand of the Honest Man—kind of like that Hand of the Guilty Man Estra picked up last week except, you know, honest. Both mummified hands let you bury to banish a displayed Curse (or recharge with a Wisdom/Divine 8 check), but the honest man’s hand can also be recharged to add a die to your Charisma/Diplomacy non-combat check. Estra decided to keep the honest hand.

Scenario 3: Chains of Silver
The Silver Chain gang hasn’t been respecting the dead—they’re making alchemical drugs out of corpses—so we’ve been tasked with cornering the gang’s leader at tonight’s shipment. But it won’t be easy: we have to work our way through the locations, and the villain has Graven Guardians at her side.

This scenario has 1 fewer location than usual, but you must start at the Mumia Lab, and may only move when your current location is closed. The Mumia Lab has an extra henchman shuffled in: Ekram Iffek. Also, when you move, you may only move to the next open location on the list. We wondered how many times we’d encounter the villain along the way, since we wouldn’t be able to spread out to temporarily close locations.
Well, we all started at the Mumia Lab, and Tup was the first one to encounter a henchman: the Silver Chain Smuggler. When you encounter him, everyone at your location also has to encounter him—and since we’re all at the same location, we foresaw many of these fights in our future. You also have to make a Stealth/Diplomacy 5 check or take a Poison damage, but thanks to our Elemental Treaty spell, we were able to ignore that. Finally, if your check to defeat doesn’t have the Attack trait (i.e., you didn’t use a spell) then you examine the top card of your deck—and banish it if it’s a boon. Well, we all defeated the Smuggler (Mavaro and Estra both rolled exactly the result needed), and Tup closed the location.
The downside is that we never faced Ekram Iffek, the extra henchman at the Mumia Lab. When you encounter him, you can take a non-Basic item from the box, but then he gets away and runs to the next location on the list. If you defeat him, you get the loot Natron Fang. But since we never encountered him at all, I guess the Natron Fang is just lost to us—or we have to play this scenario again.
Well, then gradually we made our way to the next location, the Brickworks, and started exploring. Estra found a Void Glyph barrier, and failed… which actually sent everyone to random locations. From the looks of the scenario card, we couldn’t voluntarily move anywhere, but it didn’t say we couldn’t be moved, so the Void Glyph split up the party, which I think actually did us a favor.
Ahmotep, the only one who hadn’t moved at the time, moved to the Brickworks and found the next Silver Chain Smuggler. Since she was alone, nobody else had to encounter it. She defeated him, and closed the Brickworks. Yoon was alone at the Alchemical Lab, one of the later locations, and found another Silver Chain Smuggler. She defeated it, and then closed the location with some help.

Estra and Mavaro ended up at the Surgery, which is actually not a bad place to be. You get to randomly heal a card from your discard pile at the start of each turn. However, they kept running into a Magma Spirit, which is not a terrible monster usually, but it does fire damage to everyone at the location first. And they kept encountering it when they didn’t have the right cards for fighting. It took them three tries to finally kill it off.
Ahmotep had caught up to Tup at the Warehouse, and found a Silver Chain Smuggler. Tup defeated his, but Ahmotep failed, so she wasn’t able to close the location.
Yoon joined Estra and Mavaro at the Surgery, where Yoon found the villain, Meret-Hetef. Everyone there had to encounter the Graven Guardian of Nethys first—and if anyone failed, Yoon would first suffer a scourge, then examine all of the rest of the cards in the location, and then the villain would escape to a random other open location. Fortunately, Estra had her Sands of Time spell, which gives everyone at the location an extra die against constructs—like the Graven Guardians.

Oh, but Estra and Mavaro, rolling two dice each, both managed to roll 3s, failing to defeat their Graven Guardians. So Yoon suffered a scourge (which was immediately removed by Estra’s spell), and then examined the entire deck. Fortunately, the only thing with a trigger effect was a Bonecrusher Wizard, which Yoon defeated. After this was when Mavaro encountered and failed against the Magma Spirit, and then Estra finally defeated it so they could get on with closing the Surgery.
Meanwhile, the villain escaped to the Warehouse. Ahmotep found and defeated the Silver Chain Smuggler this time, closing the location. When closing the location, Ahmotep was able to acquire a Twin Serpent Staff, because the Nethys trait would allow her to automatically defeat her Graven Guardian. She and Tup then faced the villain, defeated the Graven Guardians, and then defeated the villain, chasing her to the Stonework Passages, the remaining open location. (Estra had temporarily closed the Surgery.)
Yoon was able to finish exploring the Surgery and closed it, and then the rest of us started making our way toward the Stonework Passages to find the villain. Mavaro and Tup were present when Mavaro encountered the last of the Silver Chain gang, defeating it and closing it, leaving Meret-Hetef as the only card left. Since everyone present would have to fight the Graven Guardians, Yoon and Ahmotep opted to stay out of the fight.
Tup, Mavaro, and Estra defeated their Graven Guardians, and Estra finally put Meret-Hetef to rest.
Our reward for this scenario was a hard-earned card feat. More life for everyone!
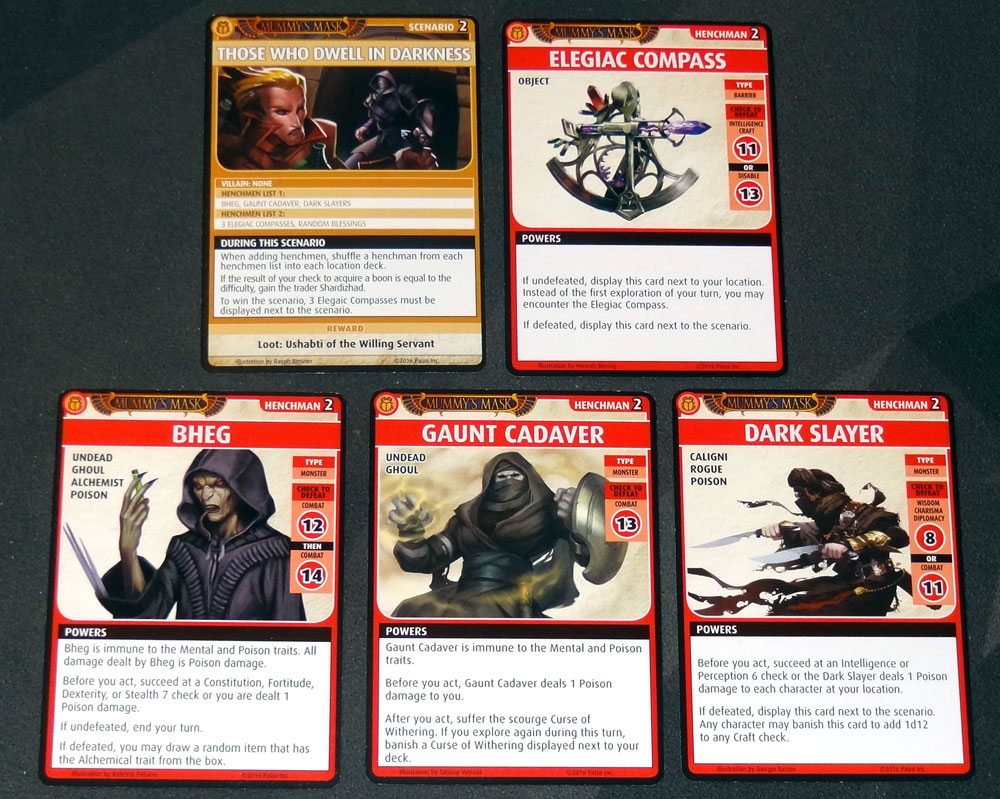
Scenario 4: Those Who Dwell in Darkness
Our task in this scenario is to activate the Elegaic Compasses—but first, we have to retrieve them and fix them. I dunno, apparently those who dwell in darkness don’t know the difference between compasses and sextants, judging from the picture. Maybe it’s been too dark to see.
This scenario doesn’t have a villain, and we don’t have to close all the locations. Instead, each location has a henchman, and also has either a compass (which is a henchman barrier card) or a random blessing. To win, we just have to find and activate all three Elegaic Compasses. Of course, that means that you can’t close a location until you’ve been through the whole deck—not only because closing a location with a compass in it would banish it and make it impossible to win, but also because none of the henchmen in this scenario allow you to close the location if defeated.
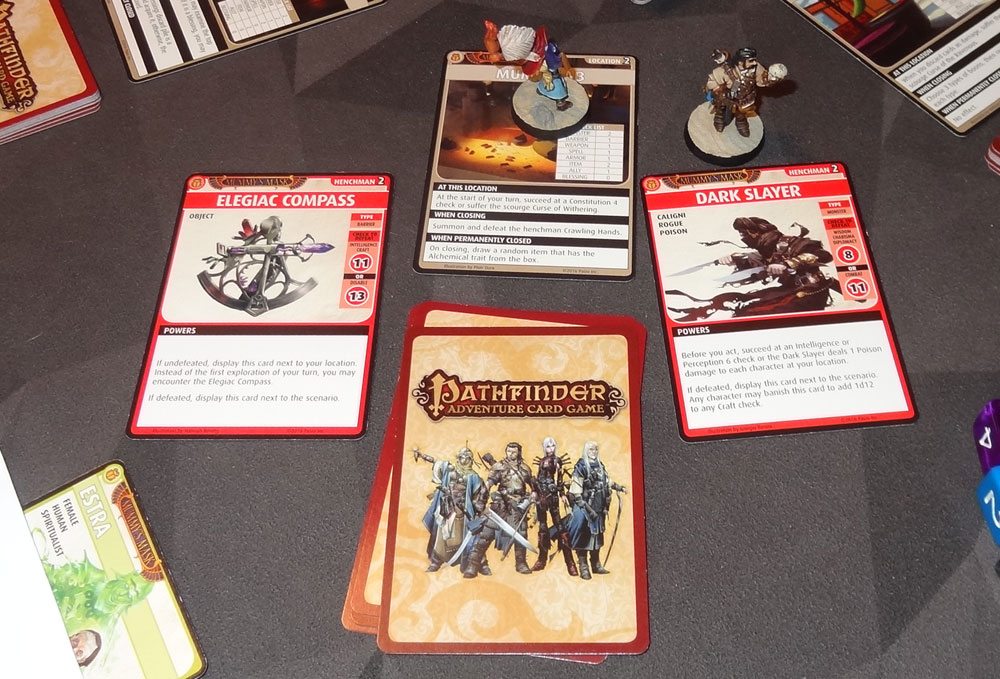
Since we didn’t have to worry about covering locations, we grouped up for this scenario a little, too. Tup found the Compass at the Mumia Lab, but didn’t have enough Intelligence/Craft/Disable to defeat it, so it just sat next to the location deck. He kept exploring, and ran into the Dark Slayer henchman (of which there were several in the scenario). The Dark Slayer first does Poison damage to everyone else if you can’t pass an Intelligence/Perception check (“You’re not paying attention? I’m stabbing your friend here!”), and then can be defeated with Wisdom/Charisma/Diplomacy 8 or Combat 11. That’s not actually that hard, and Tup has Charisma oozing out his ears… but missed by 1. Oh, well, back into the Mumia Lab he goes.
Mavaro followed up at the Mumia Lab to defeat the Elegaic Compass very easily. One down, two to go!
Tup went over to Vizier’s Hill, and found another Dark Slayer. This time he won: the slayer is displayed next to the scenario, and can be banished to add 1d12 to any Craft check later in the game, handy for those Elegaic Compasses.

Estra went to Ghoul Square and had a bit of a shopping spree before finding another compass, and she also succeeded. She peeked ahead and found another henchman, the Gaunt Cadaver, but it looked pretty nasty. First, it does 1 Poison damage to you, and then after you act you’ll suffer the Curse of Withering unless you explore again on the same turn. Well, since we didn’t need to close the location and the Gaunt Cadaver didn’t help make Craft checks later, we decided to just leave it alone.
One of the odd scenario requirements is that if you acquire a boon by getting exactly the result needed, you then gain the trader Shardizhad, who deals in melee weapons. Although we had acquired many boons throughout the scenario, we kept rolling too high or too low—and Ahmotep was never present to use her +/-2 ability. Finally, though, Yoon acquired a Torch and got the exact result with Ahmotep’s help, so we added Shardizhad to our traders list.
Yoon then moved to the Canny Jackal and defeated another Dark Slayer, so we had two of them in our pile.
We had gotten to the very last card in Vizier’s Hill, and knew that it was either the last compass or a random blessing because we had seen everything else. We left it up to Mavaro to find out, and it was indeed a compass. He defeated it (with help from the Dark Slayer), and we thought about continuing to plow through some of the other locations to dig for more boons, but opted instead to jump right into the next scenario, since we finished this one in record time.
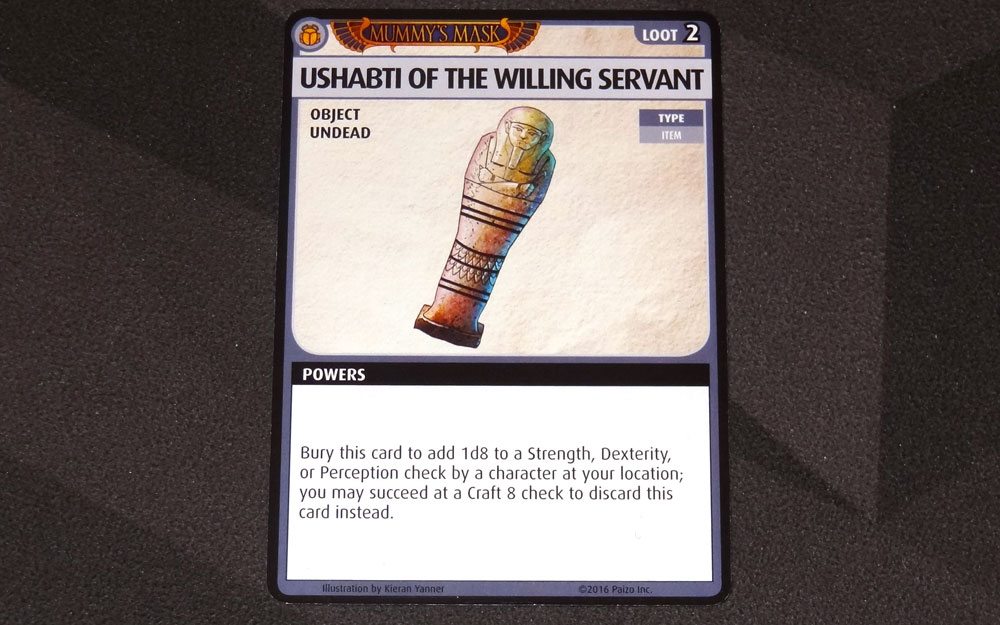
Our loot for this scenario was the Ubashti of the Willing Servant, a little object that can be buried to add 1d8 to Strength, Dexterity, or Perception. If you have Craft, you could potentially discard it instead of burying it. None of us were really keen on getting rid of any of our current items for this one, so it went back into the box with the other items.

Scenario 5: The Gilded Mask
Oh, look! It’s another bad guy in a mysterious mask, this time a necromancer who’s been lurking in the Pharasmin tombs. This one is a more normal scenario—we just need to find and trap the villain. Two special rules apply: all Undead monsters are a little harder to defeat, and if we fail at any barriers, we have to summon and encounter the Crawling Hands henchman. (And there were a lot of barriers.)
Things got off to a rocky start when Ahmotep used a Blessing of Nethys to peek ahead, and found an Ubashki Swarm, which then makes everyone at the location also encounter it unless you succeed at a Stealth check. We decided it was better to spend some blessings helping Ahmotep pass the check rather than having four of us fight the swarm, since most of us all started at the same location. Whew!
Estra was the first to find a Forgotten Pharaoh Cultist at the Golden Lake, which she defeated. The cultist isn’t too terrible to fight, but if you lose, you have to examine all of the cards in your location, and then add a scourge to the location deck. That’s particularly scary if you find one early in the location deck, because who knows what you’ll trigger. After Estra defeated the cultist, Tup used Deliverance to get to the Golden Lake, so she could help Estra fight the Graven Guardian of Nethys to close the location.

It took a while to find another henchman—Ahmotep finally encountered one at the Hall of Blessed Rebirth with only two cards left in the location. She defeated him and closed the location.

Then, at the Precinct of Left Eyes, Mavaro encountered the villain for the first time: Nebta-Khufre (of the gilded mask). First, you have to look through your location and deal with any Undead monsters in it. If there aren’t any, then somebody at your location has to fight the Natron Zombie (who buries a random card from your discard pile if you don’t have Electricity). Well, there weren’t any Undead monsters in the location, but, fortunately, Mavaro had a Lightning Bolt spell for the Natron Zombie. Then he and Tup took on the villain. Ahmotep even got to help with her Twin Serpent Staff, which can boost combats at another location. The Precinct was closed, but the villain got away because we weren’t spread out to close all the locations.
Yoon defeated another Forgotten Pharaoh Cultist at the Ghoul Square and closed it, and we found the villain there. Ahmotep was at the Sepulcher of the Servant, tracked down a henchman as well and defeated it, and then buried some magic armor to close the location.
Tup went to the Mausoleum to help Estra (who had failed against the Voices of the Spire for temporarily closing), and found a Shrieking Plant. Well, we all knew what happened the last time Tup found a Shrieking Plant, but this time he actually managed to avoid setting it off.
By then we decided we were probably ready to go after the villain: we got set up to temporarily close the remaining two locations, and Estra joined Yoon at the Ghoul Square to fight the villain. Since there were no cards left in the deck, Estra had to face a Natron Zombie first. She took the first check, which could be Divine or Combat, and then Yoon finished off the second Combat check with her Scorpion Whip. Success!
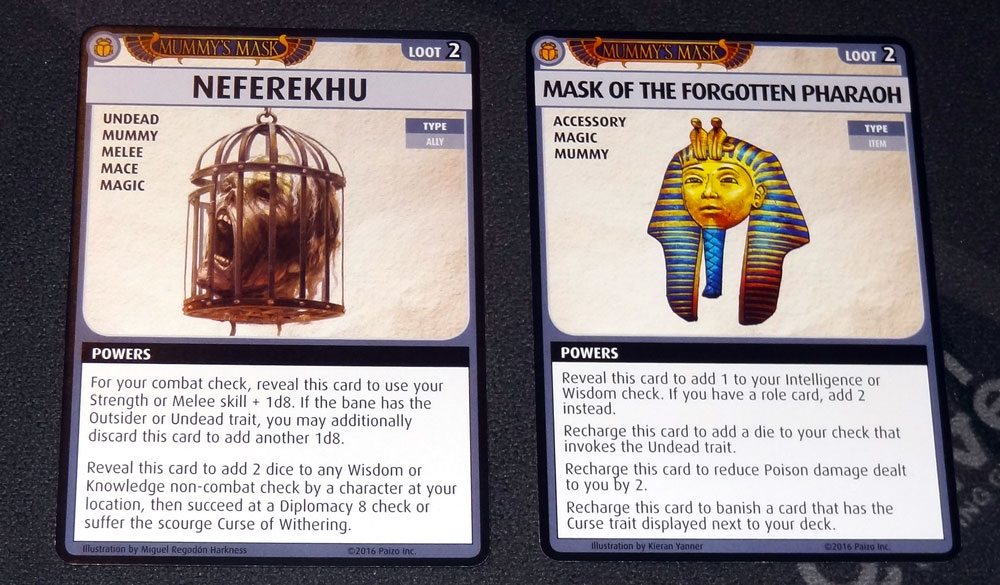
Our loot for the scenario was two cards: Neferekhu and the Mask of the Forgotten Pharaoh. Neferekhu is, from the looks of it, an undead mummy’s head in a cage—and it’s an ally! But it’s also a melee weapon that’s particularly good against Outsider and Undead. It can also boost non-combat Wisdom or Knowledge, but then if you can’t talk Neferekhu down, you suffer the Curse of Withering. Ahmotep didn’t really care for it because she really likes staff weapons when possible—plus it was unlikely she’d make a Diplomacy 8 check for the second bonus.
The Mask, however, seemed like a pretty nice deal: you can reveal to add 1 to Wisdom or Intelligence (2 once you have a role card). You can recharge to add a die on an Undead check, or reduce Poison damage by 2, or to banish a Curse. Estra often invokes Undead when using Honaire, so this seemed like a pretty nice item for her to take.
Since we finished the entire Deck 2 adventure, we also all gained a power feat. Now it’s on to Deck 3: “Shifting Sands”!
Disclosure: I received a review copy of this game.