After the success of our “Tinker Birthday Party” for child one, child two also wanted to tinker together with his friends for his birthday. So we decided to have a “robot tinker party” and build bristlebots. For a bristlebot, in case you haven’t seen one yet, a vibration motor is placed on one or more brushes, usually toothbrush heads. Because of the vibration, the resulting “robot” starts to move around and often displays an uncanny ability to work its way along and around obstacles – check out the little video of our “Bristlebot Arena” at the end of this post to see the finished bristlebots in action.
The challenge of building eight bristlebots with eight kids aged between seven and nine is to keep the construction simple enough (no soldering!) and cost manageable (you can build bristlebots of all sizes, but with several toothbrush heads and a larger vibration motor, things start to get costly.) So we went for a minimal bristlebot that is moving around on a single toothbrush head and we used adhesive tape to avoid soldering.
The image below shows what we used to build a bristlebot. The bot itself is assembled from a battery, a toothbrush head, a vibration motor, a Cent, a bit of aluminum foil and cardboard paper. To put everything together, foam tape (which is sticky on both sides) and insulating tape were used.

The first step was the most tricky one. We use the insulating tape both to (1) create a little “conducting pocket” formed by the aluminum foil and one side of the battery and (2) glue one of the contacts of the vibrational motor to the other side of the battery. The “conducting pocket” serves as switch: by pushing the other contact of the vibration motor into the pocket, the motor is “switched” on. The image below shows the necessary steps.
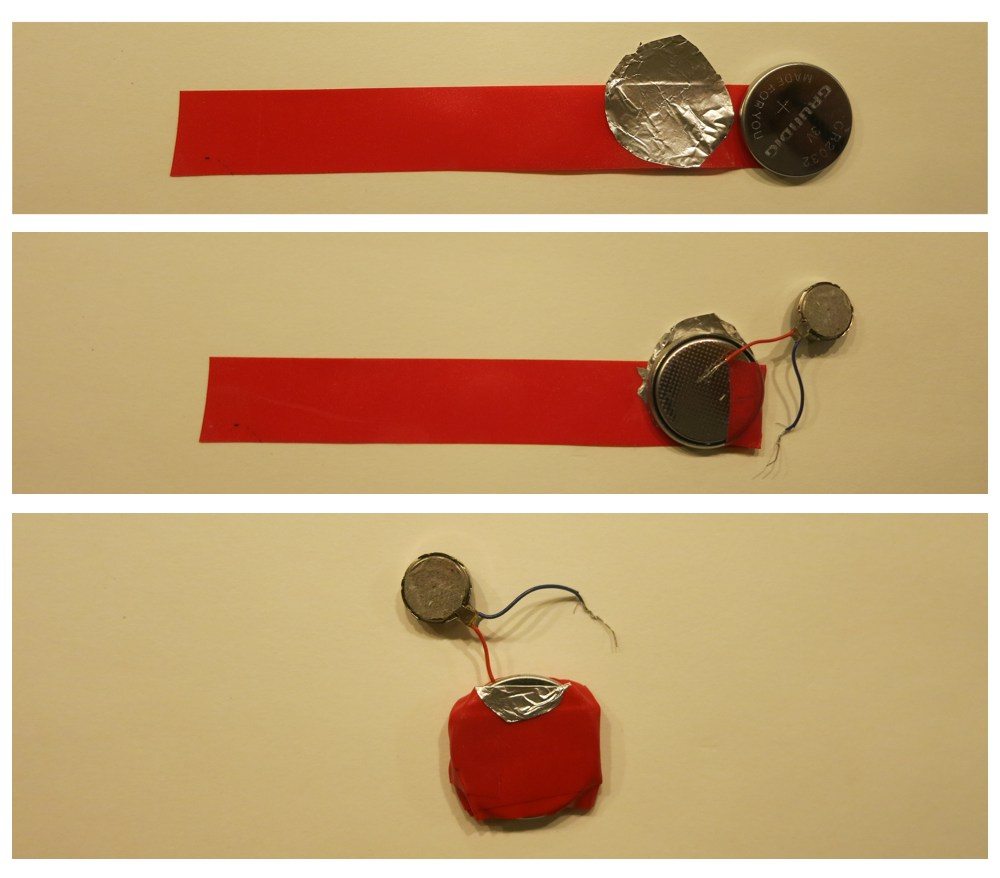
This step turned out to be more challenging than I had thought. Firstly, you must make sure that the kids glue the right contact to the battery. Secondly, you must take care that the kids do not short circuit the battery with the piece of aluminum foil. Thirdly, it turned out that the contacts of the vibrational motor are rather brittle and may break – I did have to do some soldering during the party, after all.
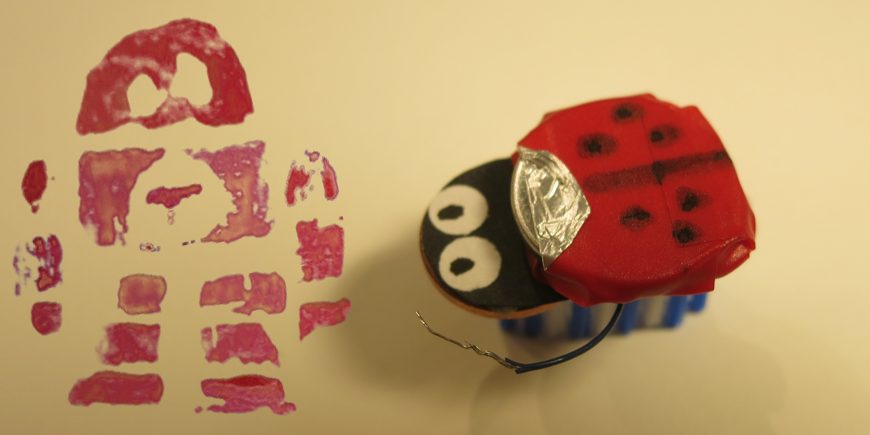
For the final assembly, we placed a piece of foam tape on the toothbrush head and stuck the vibration motor and a Cent on top. The Cent serves several purposes. Firstly, it levels out the surface for the battery, which in the next step is stuck on top of the motor and half the Cent – on the remaining part of the Cent, a face for the robot can be placed. The Cent further provides a bit of additional weight, which helps to transfer the motor’s motion to the surface. Finally, later when the robot is moving around and hits an obstacle, the metal cent will make a satisfying clicking noise upon impact. The figure below shows the assembly of the bristlebot.

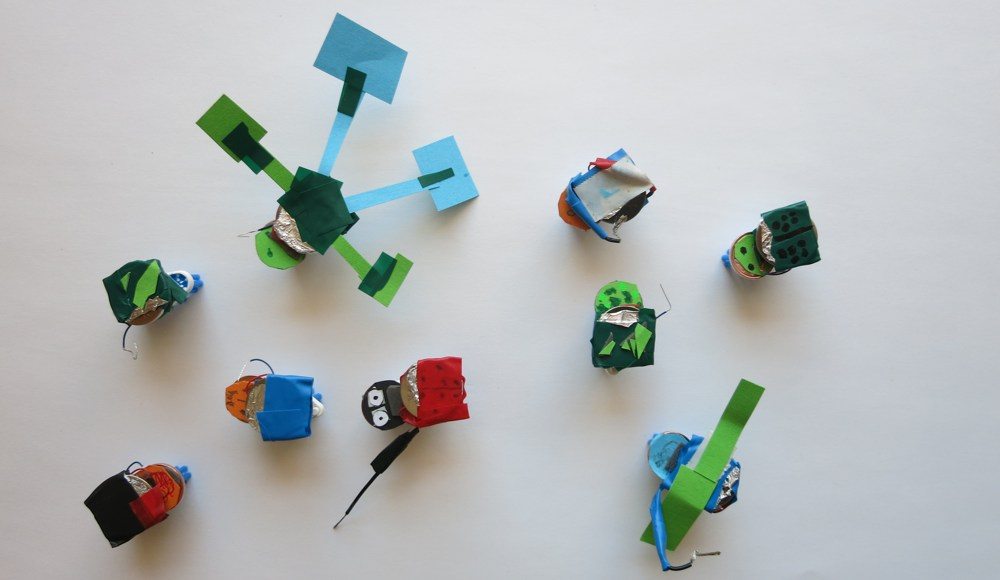
The kids were free to create their own bristle bot designs – we had several colors of insulating tape and cardboard paper available, and thus a colorful and varied family of bristlebots emerged.
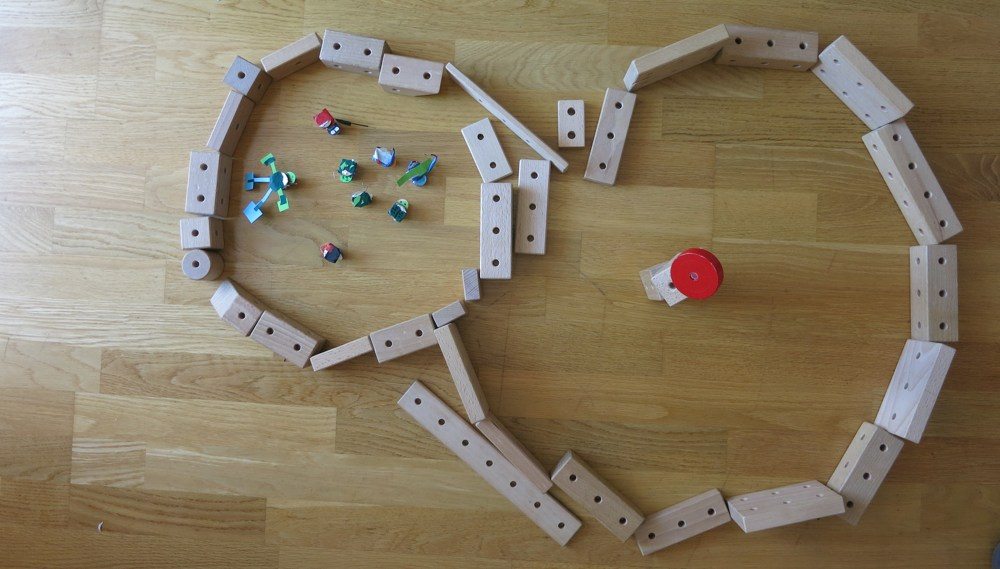
Using blocks from a wooden construction set, the kids built the “Bristle Bot Arena ™” and let the bristle bots loose. Below, you find a photo of the arena and a short video of the bristle bots in action.
We all had fun with building the bristlebots and experimenting with them, but I must admit that the design of the bristlebots was not ideal. I got around soldering during preparation, but when the flimsy contacts started breaking, I had to solder anyways, and in a hurry at that. Therefore, a design using a motor to which robust contacts can be soldered (as suggested, e.g. by the Evil Mad Scientist blog) probably is preferable. But whichever design you use: Have a go at building some bristlebots with your kids!