I’m always looking for rainy day projects to do with my boys, and I especially enjoy those that involve crafting and keeping those little hands active. Both of my boys do well with scissors and glue and tape, so it’s fun to get them started on something and then just let them go. Of course, I also enjoy making things, so when Polimind reached out to let us know about its new papercraft projects they’re raising funds for on Indiegogo, I knew I’d found some great rainy-day hands-on projects that my boys and I could do together.
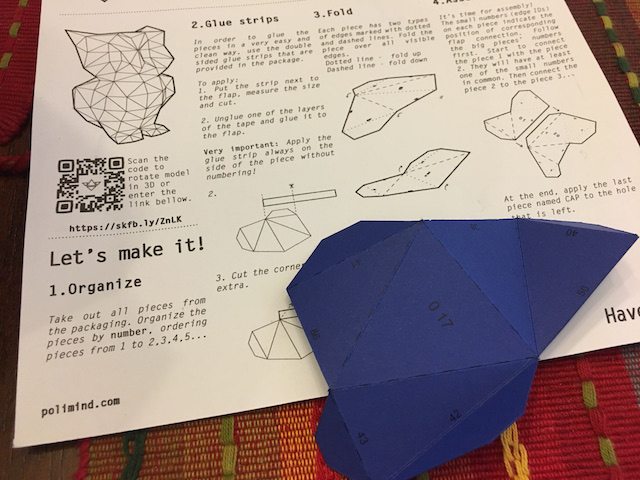
The first thing you need to know about these papercraft projects is just how easy they are to put together. The individual pieces are already cut and scored, making folding on the dotted and dashed lines super easy. You’ll spot a number of large numbers and small numbers printed on the indiviudal parts, too… these help with putting the projects together in an organized manner. Finally, you get a bunch of double-sided tape — plenty to get the job done without worrying about running out. A set of instructions comes with the kit, too.

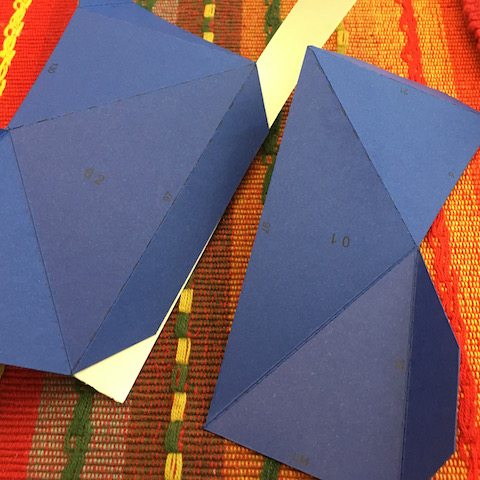

Here’s how it works: Each piece of paper has a large number on it. The owl I made with my boys had 39 individually cut pieces of paper. We sorted the piles into four piles — 0-9, 10-19, 20-29, and 30-39 to make it easier for us to find the next part as we built. On each piece, there are also smaller numbers printed near the edges and flaps. Typically one or more of these small numbers will match numbers on the previous part you attached to your model. For example Paper Part 01 might have 11, 23, and 39 printed in small numbers. You take Paper Part 02 and examine it. On Paper Part 02, you see 13, 15, 23, and 32 printed in small numbers. What this means is that you’ll attach Paper Part 02 to Paper Part 01 by connecting them at point 23, the number the two Paper Parts share. Make sense? In some instances, two Paper Parts you are connecting will have two or more smaller numbers in common, so you’ll make multiple connections using the double-sided tape. In other instances, one Paper Part might have matching numbers printed on it; the owl’s feet, for example, had this because the feet Paper Parts formed the base and needed to have more connections.
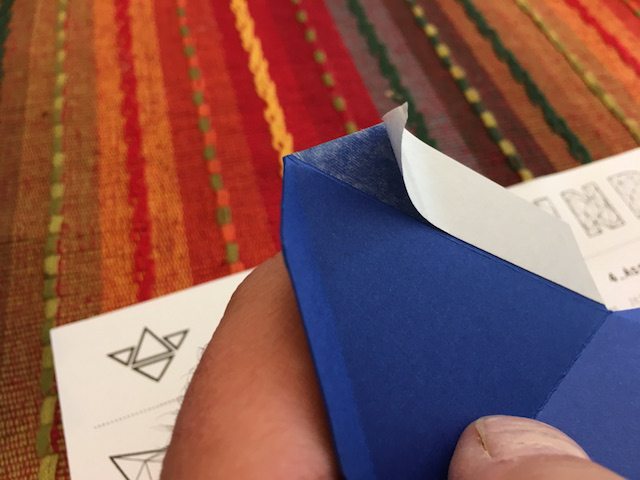
The double-sided tape is SO MUCH BETTER than using glue. I love Tacky Glue, but even Tacky Glue would have slowed this assembly down. The double-sided tape works great — you take one of the many strips (we must have used 50 to 60 strips and still had 30-40 left over) and apply one sticky side to a flap. Press down a few times to make sure the strip sticks to the flap and then just peel it off. It leaves behind a clear bit of adhesive that you then press to the matching small number on another Paper Part. Press a few times on the connection and you’re done! No waiting for glue to dry!

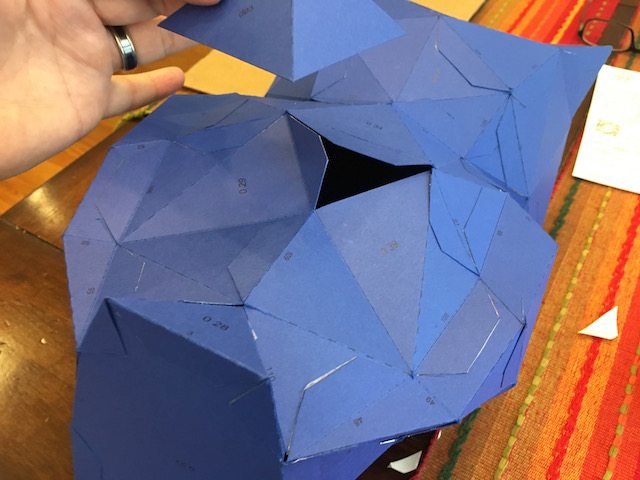
When you first start building, it’s a bit hard to see exactly where you are in the project (at least, this was the case with the owl), but eventually as you add more pieces, the final shape starts to appear. We didn’t realize we were working on the head until about 15-20 pieces were placed… and then it was a race to get the owl done. We built it over two days, with the head on Day 1 and the rest of the body on Day 2. All in all, it took us a little less than 2-1/2 hours to finish. I probably could have finished it faster on my own, but I let my boys take turns with the various duties (finding matching small numbers, applying and cutting and trimming tape, peeling tape, sticking pieces together).
We had a BLAST building this thing, but more importantly… I got to spend two hours with my boys talking about all sorts of things, laughing at their jokes, pondering some new projects, and just spending quality time together.

The pre-cut kits will run between $20 and $40US, and bundles are also available if you wish to grab multiple kits. They also have an amazing number of colors you can choose from for your kits. You can also choose to back the project and receive PDF files — this will require you to print and cut them yourself, but this could very well be a good investment as you’ll have the files and can print and make as many of one object as you like.
What caught my eye from the beginning was the Dragon head. Oh, man… I can easily see that thing hanging on my workshop wall! And I imagine many of you can, too.

The Polimind Indiegogo project has about a month left to reach its funding goals. I can tell you that the quality of the paper is top-quality and the accuracy of the cuts and flaps is dead-on and will ensure sharp looking models on your wall or shelf. The models are graded by complexity, with the owl getting 2 out of 5 stars (not complex) and the Dragon head getting 4 out of 5; this should make it easy for you to pick a project that will be suitable for you or your child’s skill level.

I’d like to thank the folks at Polimind for sending over the owl kit to test out. My boys and I had fun building it, and it’s now perched high up in my oldest son’s room.
You can get more information on the Polimind Indiegogo project here.