Gaming and Crafting with the Kids – Part I
Gaming and Crafting with the Kids – Part II
Gaming and Crafting with the Kids — Part III
My boys and I finished up the month of February having played a number of games, including Frostgrave. Removing the iPads from our lives for a month was a little tough the first week, but the boys and I found plenty of projects and games and time to spend outside… definitely worth it, and I think they enjoyed the change of pace as well as getting their hands dirty a bit with glue and paint. I’ve had a fun time showing them some of my hobbies and letting them try their hand at making some game terrain and painting miniatures.
One of my goals for the month was to use the time with my boys to explore the Frostgrave game and introduce them to a skirmish-style wargame. I think they had a good time playing the game, and I’m hoping my oldest son will join me in some more scenarios in the coming months. Part of playing Frostgrave involves putting together a gaming area filled with ruins and statues and walls and other obstacles. You can buy ready-made terrain (some painted, some not) or make your own… I have chosen the latter and followed along with some great YouTube mentors (DM Scotty, The DMG, Mel the Terrain Tutor, Black Magic Crafts, and Wyloch) to create a number of small pieces to scatter across my gaming table. All I can say about making your own terrain is this–it’s very addictive. I’ve started small and made some mistakes, but as I continue to make more terrain, I keep aiming for more complex creations.
Below I’ll show you some of the newer terrain objects I’ve created this last week. A few were done with my sons… one was not. (And I actually missed having them in the workshop with me asking questions and offering to provide help.) I’m getting closer to the gaming area I have in my head… just a few more objects to create and I’ll then move on to another area of the frozen city of Frostgrave. Right now, I’m trying to create a bit of a graveyard mixed with a few structures related to the study of… well, that would be telling. Instead, I’ll keep working on it and share the final vision when it’s completed along with a mini-scenario I’m creating for this setting.
I’m also going to discuss how Frostgrave can be played as a one-off style game or as an ongoing campaign with character development and more. Right now, my boys and I are just playing one-off games, but I’m definitely itching to develop a wizard.
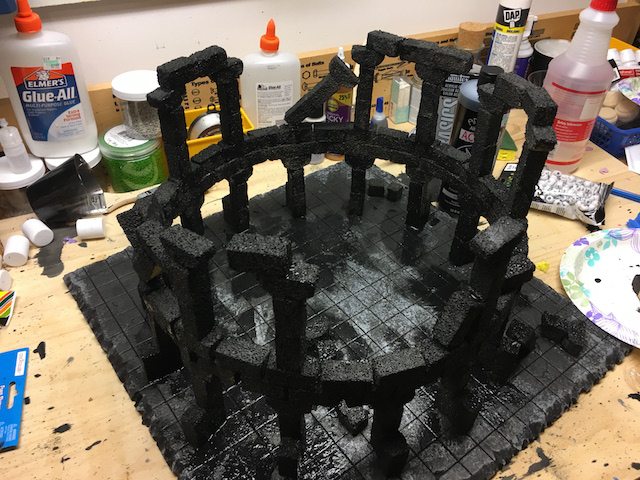
The Colosseum
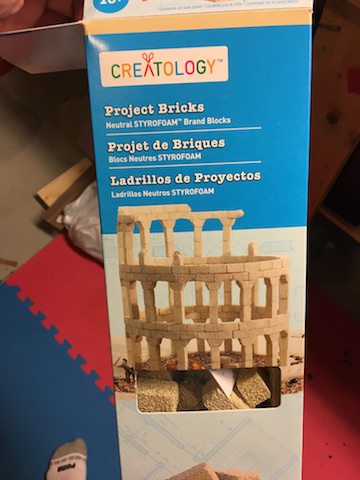
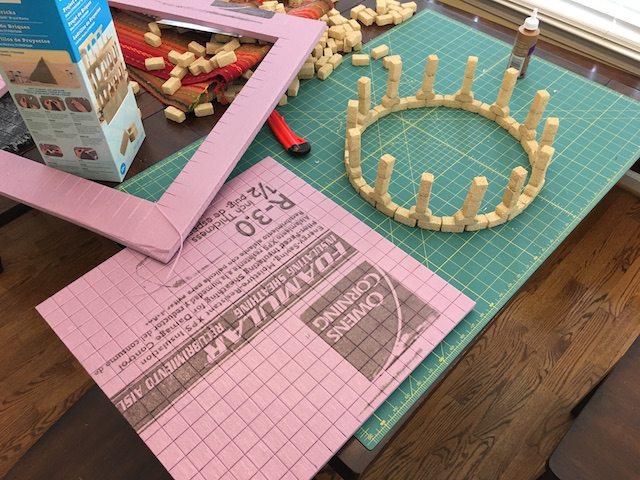
I had a 50% coupon burning a hole in my wallet, so I got this $14 foam brick kit for $7. What grabbed my attention was the Colosseum on the front of the box. Other sides showed other structures (such as a pyramid), but I had been wanting a larger centerpiece structure for my Frostgrave games, and this wouldn’t require me to cut the 100+ bricks from foam.
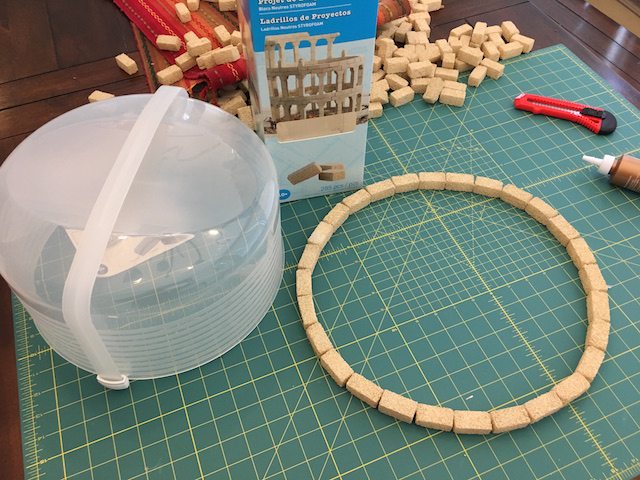
I started by placing a plastic lid down on the table and using it as a template to create the circular shape with the first round of bricks. I used Tacky Glue to hold them together. While the glue was drying, I started to work on the columns, which consisted of two stacked bricks and then a third brick turned on its side. The instructions state that the foam is easy to mold with just your fingers, so a little pressure confirmed that. I applied some curve edges to the top of each column’s side-laying brick and created 14 columns. While that glue was drying, I examined the picture on the box. The Colosseum there had a bottom ring of bricks, but I didn’t want that; instead, I wanted to glue the whole thing to a piece of gridded 1/2″ foam. I took some measurements and found that an 18″x18″ square of gridded foam would be a suitable base, so I cut it out, applied the grid with a ballpoint pen, and added some cracks and rocky edging with a hot foam cutter. A black coat of paint followed by sponging on some gray gave it the rocky surface to match the other gridded terrain pieces I’ve already made.
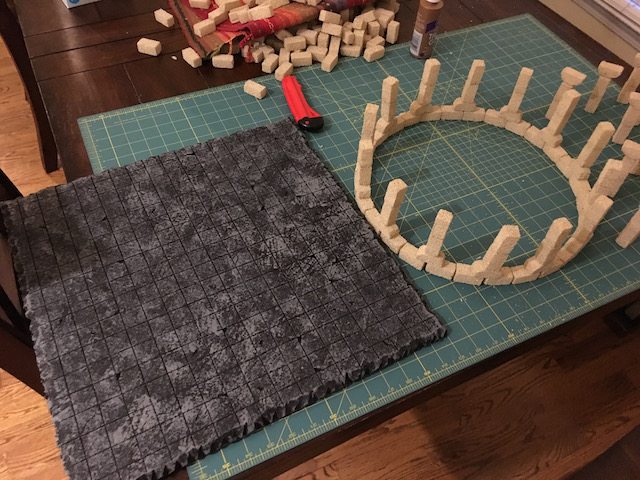
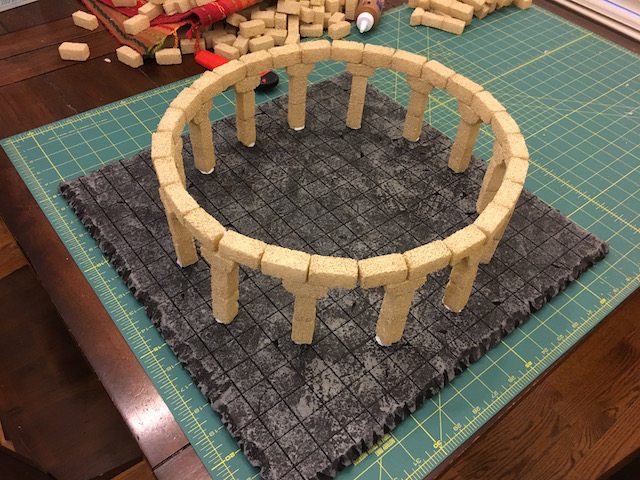

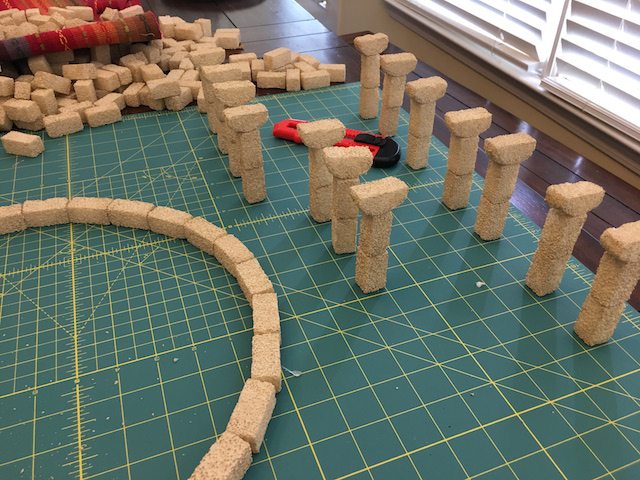
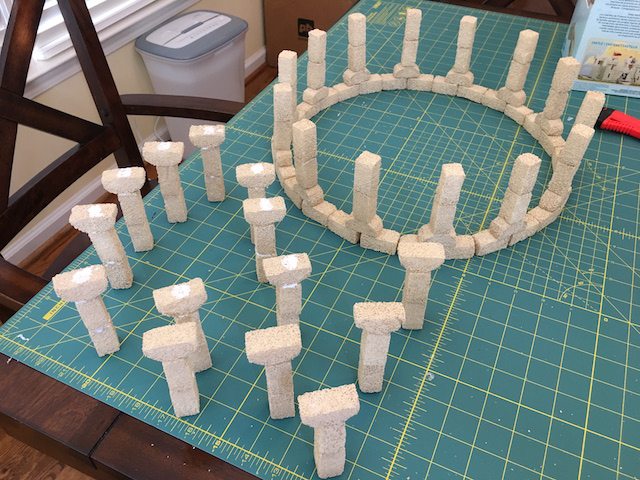
While the base circle of foam bricks dried, I realized that it would be easier to glue on the 14 columns upside down onto that initial ring. Once the glued columns dried, I could glue them on the gridded base to give some immediate strength. Worked great, and when I flipped over the foam base, the columns were solid and the ring was ready for the second level of columns. I broke some bricks in pieces and glued them to the ground to simulate fallen columns. Other columns were made and tilted and glued in place to look like columns close to falling. A few more bits of foam debris here and there, and the entire thing was done and ready for paint.

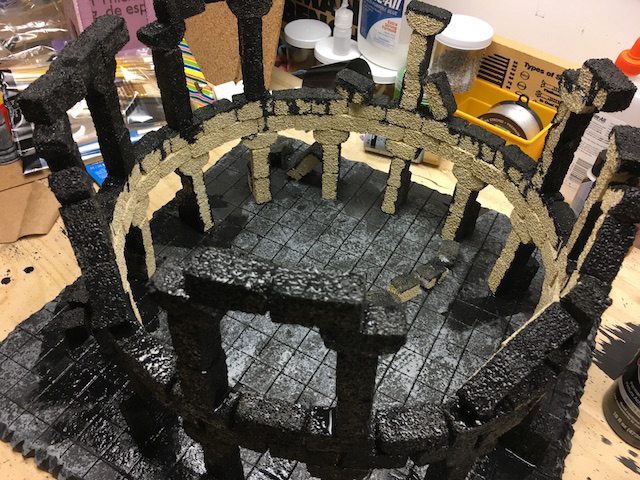
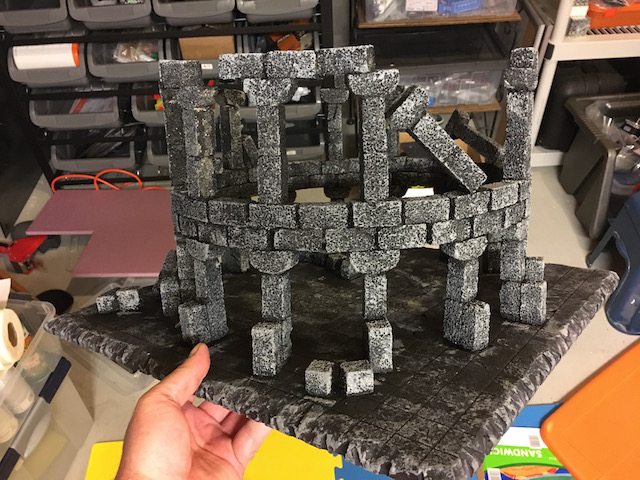
You should know that these bricks are a pain to paint. They have this unusual coating of light sand color and a very scratchy surface. Experimenting with paint, I realized that plain acrylic is just too thick. I created a 50/50 black paint/water mix for the initial coat that allowed the paint to get down into the foam surface and between the bricks. The problem is that when it dried, it looked horrible and was very faded. It took a second coat of 75/25 paint/water mix to darken things up a bit. I followed that with a medium gray applied with a wet sponge to give it a stony appearance. The photos don’t do it justice–it looks really cool in person (not as dark as it does in the photo below), but I am still going to apply a slightly lighter shade of gray here and there for highlighting. I’ve also got to repaint the gridded base black and reapply the stone texture because the two coats of paint-and-water-mix dripped and dried and completely darkened (for the worse) the grid base paint scheme. Still… the thing looks totally cool and will offer up a nice centerpiece for my next Frostgrave game.

What would I do differently now that it’s finished? If you’re looking to make one, here are some suggestions:
- Paint the entire Colosseum before gluing to a base–one option is to use Krylon’s foam-safe white primer (I learned about this too late) that won’t eat the foam like regular spray paint. After the white coat, hit it with black spray without the worry of melting.
- Connect most bricks with hidden toothpicks for a stronger structure. Tacky glue probably isn’t going to keep this thing together forever, and I anticipate making repairs over time.
All in all, I’m quite happy with the thing. And I have about 1/3 of the box of foam bricks still left because I didn’t go for the third level as is shown on the box. I have enough bricks left to create something else… gotta think on that one.
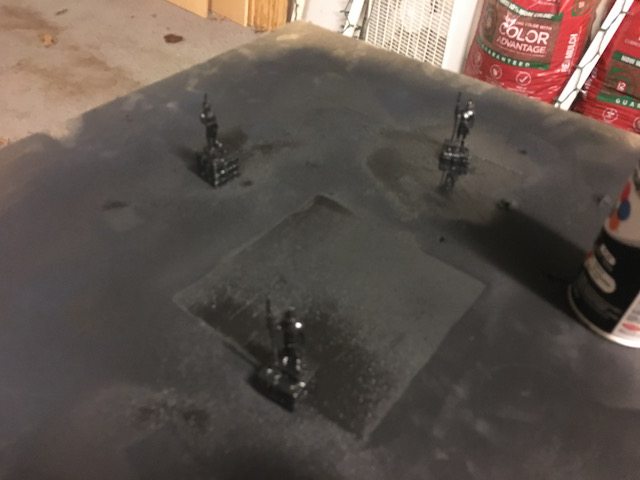
Statues
My boys enjoyed this one… I showed them how to remove the Heroclix figures from their bases and then we glued them to a series of three pedestals that I 3D printed. The pedestals are three different heights, a suggestion my 9-year-old made that turned out to be a good one. After gluing on the figures, I applied some hot glue to hide the ugly base beneath the feet and blend it with the top of the pedestal. Each one of us took a statue and hit it with primer and then dry-brushed with some metallic gray. They turned out great!
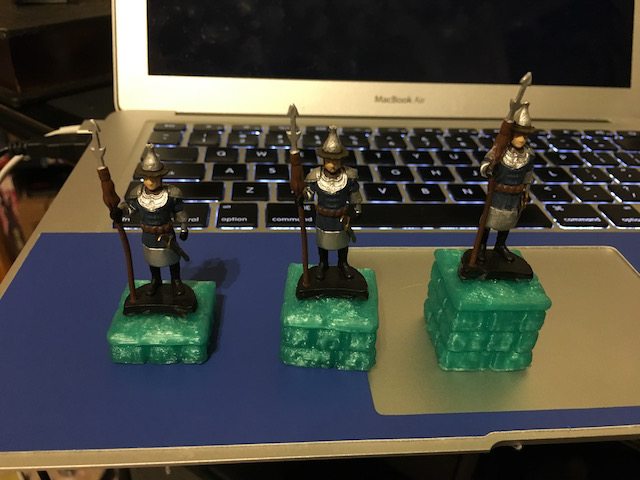

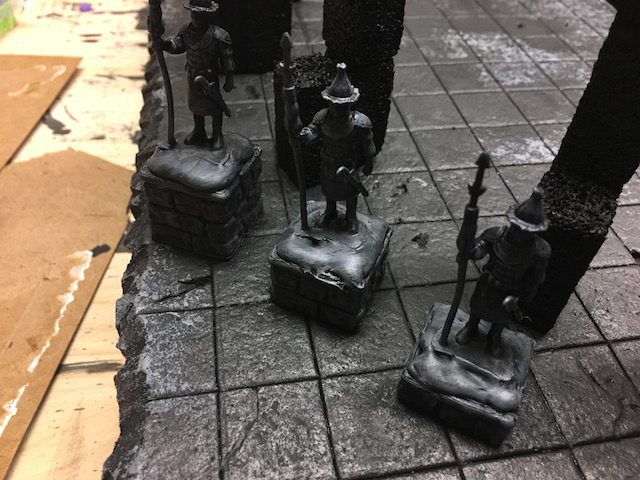

We also have three matching archers (same style armor) that need 3D printed bases. Those should look nice paired with these first three, possibly as statues guarding the entrance to something?
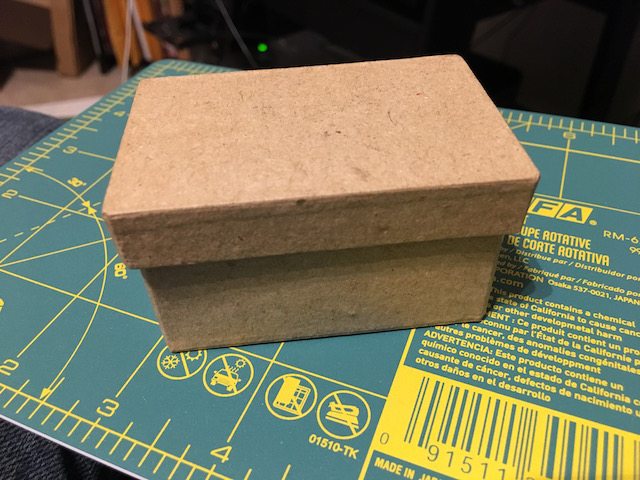
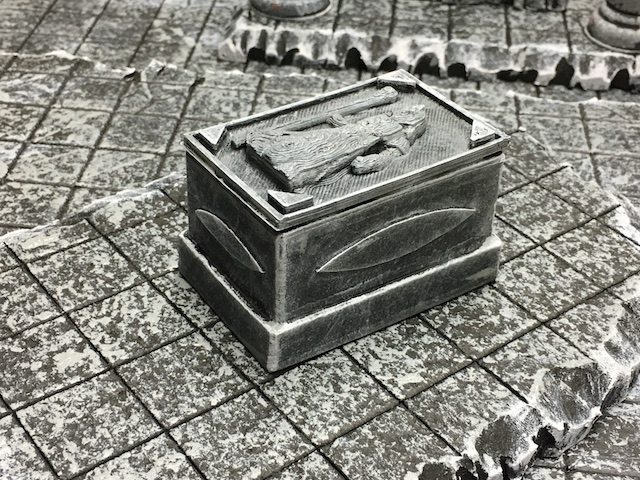
The Tomb
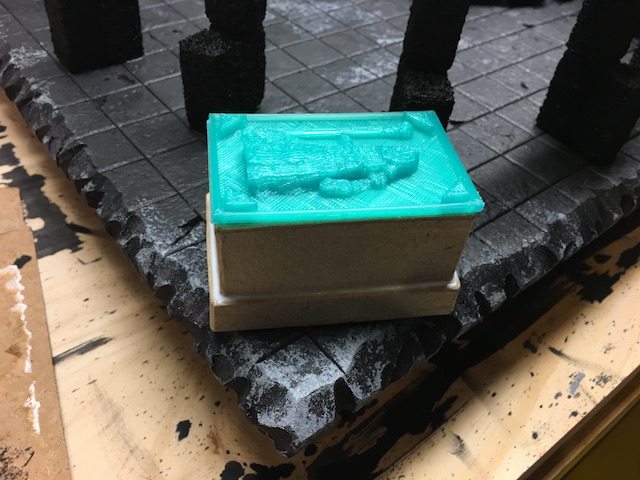
This one was something that just came to me when I found this little $1 box at the craft store. With about $0.25 worth of 3D printed plastic and some cardboard embellishments, I was able to turn the little box into an above-ground tomb for a long-dead wizard. If you’ve got access to a 3D printer, this one is easy to do. I started by downloading a suitable wizard figure from Thingiverse.com designed by user dutchmogul–this one. It comes in two varieties–complete and two halves that can be printed and glued together. I chose to print just the top half.
I created a box in Tinkercad with the same dimensions as the little box–this allowed me to create and 3D print a small cap for the box that would have a “carving” of the buried wizard on top. If you’d rather not design your own, feel free to download my file here.
I glued on the printed cap, used some Tacky glue to seal the gap between the box and its lid, and added some cardboard cutouts to the sides to liven them up a little.


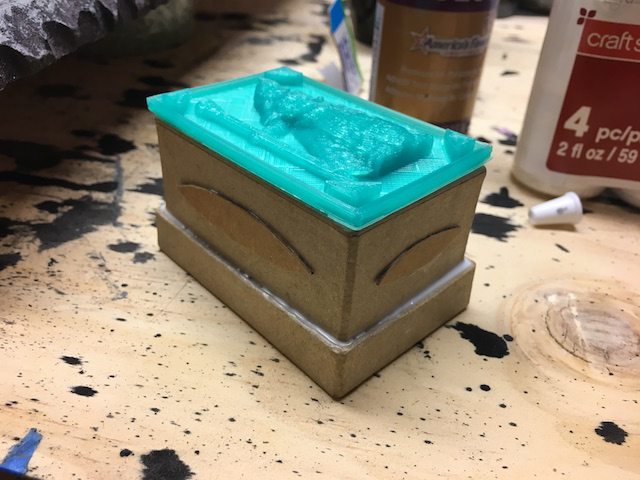

Next comes the painting. Black base coat was followed by dry-brushing gray on top and sides. I also highlighted all the edges with a lighter shade of gray. I’m so impressed that I’m going to make another one… with a different cap, of course. This tomb will make a great hiding place for a skulking Frostgrave soldier!

Frostgrave Campaign
The most basic Frostgrave rules sets up a 2-player skirmish with no almost non-existent roleplaying elements. The two battling wizards start with the same stats, and only the choice of school and selection of spells is how you distinguish your warband leader. Each player is given 500 gold coins to spend on the remaining warband members (up to 9 more for a total of 10) that can include an apprentice (100 gold) and classes such as archer, barbarian, thief, and man-at-arms. Soldiers die frequently in one-off games… wizards and apprentices do, too.
But the basic rulebook does include some campaign rules that allow you to develop both your wizard and your apprentice. (Rules also exist for developing a single soldier called a Captain–I’ll go over this in an upcoming review post of the new Frostgrave Folio book.) With the campaign, there are a number of ways the rules allow you to keep moving forward with scenarios or just stringing along one-off battles:
- Wizards and apprentices can level up — When playing scenarios, wizards earn XP that allow them to increase stats, pick new spells, and increase the chance of a casting a spell properly. (Wizards take damage when they miscast a spell!) Apprentices also increase in power as their wizard-trainer levels up.
- Dead isn’t necessarily dead — When any member of your war party dies in a game, they’re removed from the game but they’re not necessarily gone forever. Charts exist where you roll a d20 and consult the chart to determine if a warband member is dead, injured, maimed, or some other fate. I’m particularly fond of the permanent injury chart that can cause a Wizard to lose an eye or a limb… these kinds of injuries have long-term effects such as limiting movement speed or adding penalties for shooting.
- All Your Bases Are Belong to Us — Wizards in a campaign can build a base! There are bases that allow you to purchase soldiers at a lower rate, heal faster, and much more. In addition to bases, there are also upgrades to your base. Bases and upgrades cost money, though… so you’ll need to keep exploring Frostgrave and finding treasure to buy more stuff.
- Magic Items — In a one-off game, the winner is often the one who manages to sneak the most treasure off the map. But in a campaign, those collected treasures allow you to roll on charts to determine if you found gold, scrolls, potions, and spell books. Most of these items can be sold to raise funds, but you can also buy many items between games.
- Between Games — In between games, wizards who have selected certain spells can do things like gain XP (studying when not in battle), create spell books (to sell for profit), and more.
If you’re participating in a campaign, record keeping is important. You’ll want to roll out-of-game charts in front of the other player(s) as well as roll for the fates of those warband members removed from a game. While it’s not full-on role-playing, there’s enough action and possibilities out-of-game to keep players focused on developing their warbands.
Note: The expansion books to Frostgrave offer even more character and game development, with special magic weapons that can only be gained by winning certain scenarios, new types of bases, and new classes for your warband.
Up Next
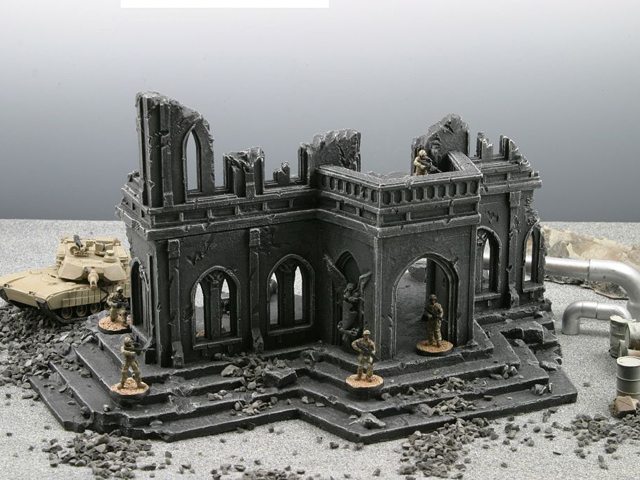
I’m almost done with this little section of the city… just two or three more elements and I’ll be happy. Of course, I’m already pondering another section of the city and how to best bring it to life. One thing I haven’t really done yet is create a set of building ruins with crumbling walls. I’ve found a number of third-party terrain products that would work great such as the one below from Thomarillion.
But I’m now thinking it would be fun to take one of these third-party structures and try to recreate them for less money. Yes, that would be an interesting challenge…


