Looks like nobody learned their lesson the first time around, because a new set of heroes is back, making audacious claims about surviving the dungeon. Welcome Back to the Dungeon, folks. Hope you’re ready for some pain.
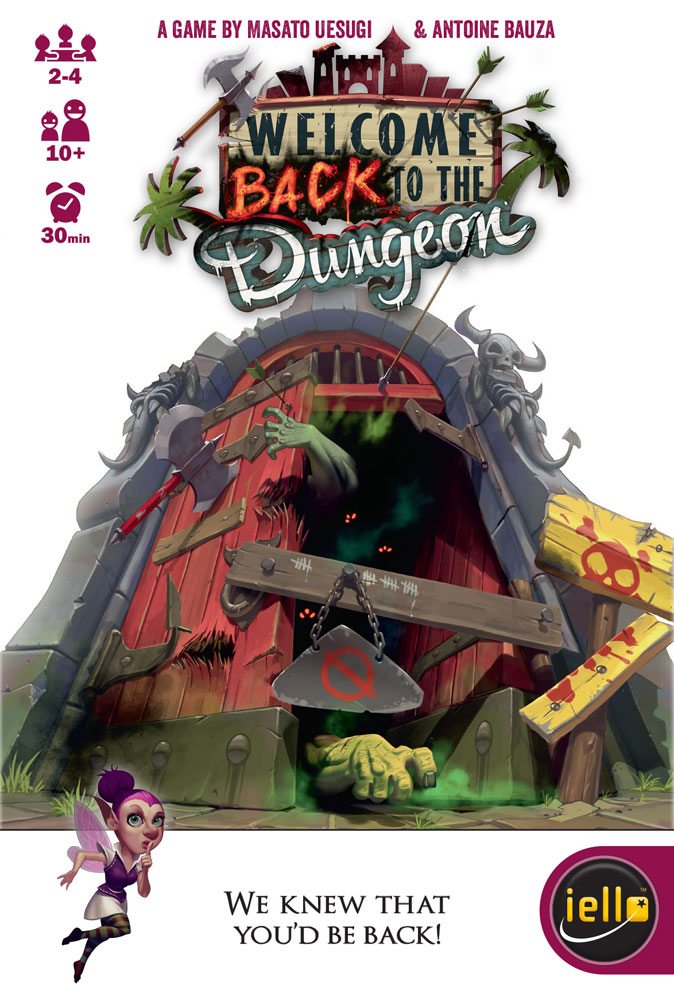
At a glance: Welcome Back to the Dungeon is a stand-alone sequel to Welcome to the Dungeon and does not require the original game to play, though they can be combined for greater variety. It was designed by Masato Uesugi and Antoine Bauza and published by Iello Games. It’s for 2 to 4 players, ages 10 and up, and takes about half an hour to play. WBttD retails for $14.99 and is available now both online and in game stores. The game uses a combination of bluffing and bidding; there are monsters but there’s nothing too scary–the style is a cross between scary and goofy–so the age range is about right.
Components
The components for this are very similar to the original, though with a few additions.
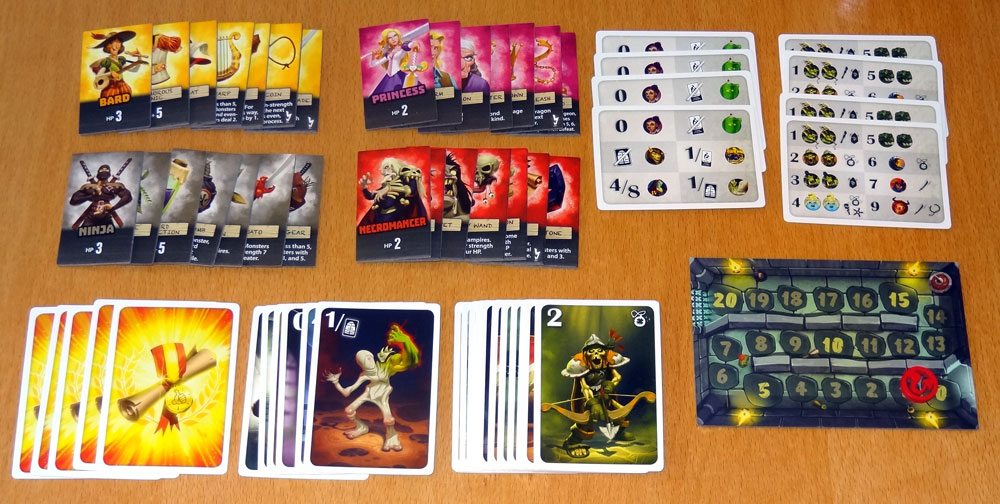
- 19 Monster cards (13 regular, 6 special)
- 8 Player Aid cards
- 5 Success cards
- 4 Adventurer tiles
- 24 Equipment tiles (6 per hero)
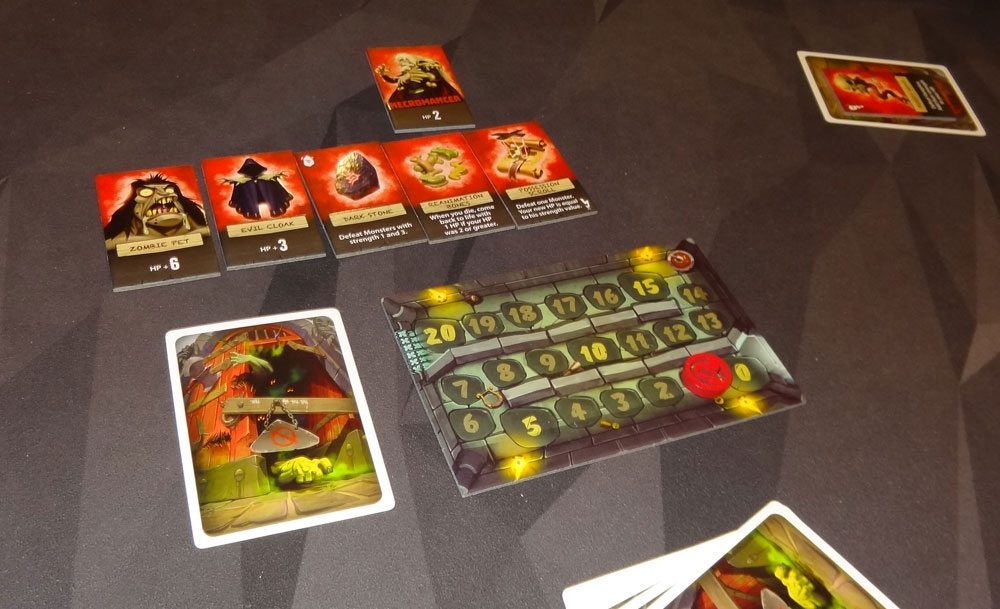
- Health Point board
- Dragon token
This version of the game adds special monsters and has more player aid cards to reference those. There are fewer Success cards, but it turns out that you don’t need more than 5 because the game ends as soon as a player gets 2 successes. The biggest addition is the health point board, which just has a track from 0 to 20 to help you keep track of how much health a hero has left. The dragon token, which indicates the health, is a small wooden disk with a dragon-tail design, and it’s pretty fancy.
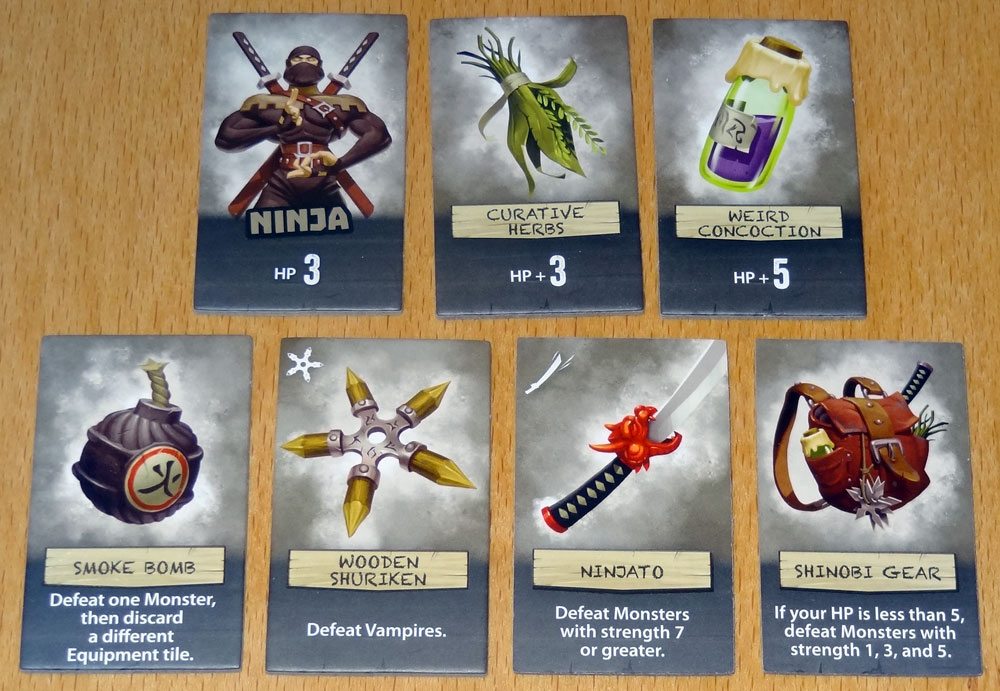
The Adventurer and Equipment tiles are small, rectangular cardboard punchouts, identical on each side, with an illustration and a small description at the bottom. The Adventurer and Equipment are color-coded so you can tell which equipment goes which with hero. There’s a nice bit of spot-gloss on the tiles so that the images really pop. The illustrations are by Paul Mafayon again and have a fun, exaggerated fantasy style. This time the four Adventurers are the Bard, the Princess, the Ninja, and the Necromancer.
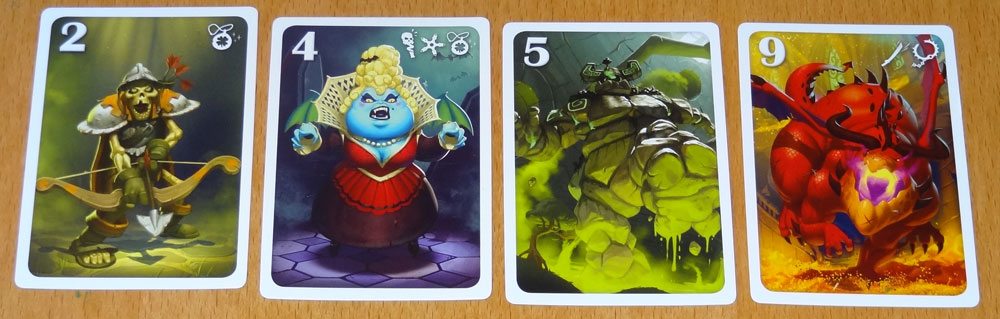
The Monster cards are fairly simple: a large illustration of the monster, a strength number at the top left, and some icons at the top right showing what equipment can defeat the monster. Success cards are just cards with a big gold scroll on them. The Player Aid cards show how many of each monster there is in the deck, along with their strengths and the equipment needed to defeat each one. The back side of the Player Aid cards show the same information but the background is dark red instead of white, indicating that the player has lost once.
The one thing is that the special monsters (and the corresponding player aid cards) use icons that are a little less intuitive. There are descriptions of each of the special monsters in the rulebook, but it does sort of give it away when somebody peeks at the next card, and then says: “Oh, I need to look at the rulebook.” Until everyone is familiar with the special monsters, expect a little more information to be accidentally revealed while playing.
How to Play
You can download the rules as a PDF here.
The object of the game is to survive two trips into the dungeon, or be the last player remaining after everyone else has lost twice in the dungeon.
The game is played in a series of rounds, during which players try to out-brag each other—and the last player to pass will take a trip into the dungeon.
To set up, give each player a set of Player Aid cards. Then choose one of the Adventurers and set it on the table, along with all of its Equipment tiles. Shuffle the regular Monster cards along with two randomly chosen special Monster cards and set them near the tiles. (Put the remaining special Monster cards away without revealing them.)
Each Adventurer has a little bit of health, plus two Equipment tiles that give additional health, and then other Equipment tiles that give other powerful effects, from defeating specific Monsters to coming back to life to taming the dragon.
Each round has two phases: the bidding phase and the dungeon phase.
During the bidding phase, you have to decide whether to draw a card from the Monster deck (in which case you’re bragging about surviving) or pass (chicken out for this dungeon). If you draw a card, you look at it secretly and then either add it to the dungeon stack, or else set it aside, face-down, and remove one of the Adventurer’s Equipment tiles. If you pass, you will skip your turn for the rest of this round, and join back in after the dungeon phase is over. If there aren’t any more Monster cards in the deck on your turn, you must pass.
If you are the last player to pass, the bidding phase ends and you must enter the dungeon as the Adventurer with whatever Equipment you have left. Add up your hit points, and then reveal monsters one at a time from the dungeon stack. If you have the right Equipment to defeat the Monster, it doesn’t hurt you. Some Equipment (marked with an icon) is discarded after use, but some can be used more than once. If you can’t defeat the Monster, you lose HP equal to the Monster’s strength. Get through the whole dungeon stack, and you succeed. Run out of hit points, and you die.
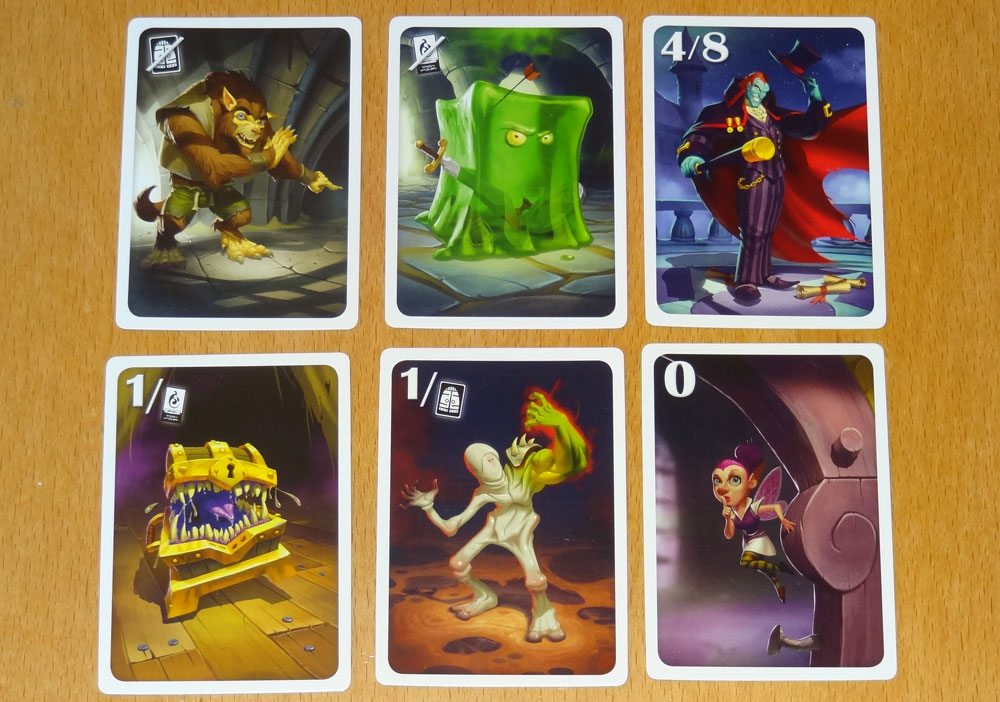
The special Monsters have special effects, and unless you draw one of them yourself, you won’t know which ones are in the dungeon until somebody encounters one. (You’ll use the same two special Monsters for the entire game.) For instance, the Fairy has 0 strength, so it’s like a free pass, and the Ally lets you ignore the next Monster in the dungeon. On the other hand, the Mimic’s strength is the number of Equipment tiles you have left when you face it, so you want to find it later, when you don’t have anything left.
You take a Success card if you succeed, and you flip your Player Aid over to the dark red side if you fail. Succeed twice, and you win the game. Fail twice, and you’re eliminated.
If nobody has won the game, then the last player to enter the dungeon picks the next Adventurer and the next round starts.

The Verdict
Iello has been building up its line of small-box games, and I really like this expansion to Welcome to the Dungeon. The special monsters add some really interesting twists, though—as I said before—they’re a little tricky to keep track of when you’re new to the game, and I might actually recommend leaving them out the first time you play just so you get a better feel for the flow of the game. Once everyone’s comfortable with the rules, though, the special Monsters add even more unpredictability, since you don’t know for sure which two are in there.
Once you’re familiar with the game, however, you could also mix the two games—bring the Adventurers from the first game to explore the new dungeon. The regular Monsters are actually the same in both sets, though with new artwork: #1 is a goblin, #4 is a vampire, #9 is a dragon, and so forth. So the Equipment tiles will work with either set, though the icons on the Monster cards won’t match up and you’ll just have to do the translation yourself.
The health tracker board, while not strictly necessary, makes it a lot easier for everyone to see exactly how much health an Adventurer has at any given time without having to check equipment and review monsters that have already been encountered. I’m glad they decided to include it in this version.
As I said in my review of the original, the game is a nice blend of memory, bluffing, and balancing risk and reward. You either want to make the dungeon so hard that nobody could survive (but pretend that it’s not that bad), or you want to keep it safe enough to get through (but pretend it’s going to be impossible). The trick, of course, is that every time you add a card or remove an Equipment tile, everyone else has a chance to pass, leaving you with the task of entering the dungeon.
The new mix of Adventurers introduce new variety and, I think, even more humor. The Ninja has a wooden shuriken that’s useful against vampires. The Necromancer has a Zombie Pet that gives him an extra 6 hit points, and has ways of gaining more health from monsters. The Princess is a no-nonsense, take-charge woman who happens to like rainbows and smiley hearts on her giant sword. And what can I say about the Bard? Well, he certainly looks pretty cheerful and charming.
If you enjoyed Welcome to the Dungeon and you want some more variety, then you’ll certainly enjoy Welcome Back to the Dungeon. If you’re new to the game, I think Welcome Back may be a better place to start just because it has the health points board and the special monsters—you get a little bit more for the same price.
Look for it at your local game store, or order a copy online.
Disclosure: I received a review copy of this game.


