Wizards of the Coast has announced the next resource for Dungeons & Dragons 5th edition, and it’s called Tales from the Yawning Portal. This new book will provide updated versions of a number of classic D&D adventures that includes:
Against the Giants
Dead in Thay
Forge of Fury
Hidden Shrine of Tamoachan *
Sunless Citadel
Tomb of Horrors *
White Plume Mountain *
Three of these (marked with asterisks) are familiar to me from my Advanced Dungeons & Dragons days. I was the DM for two of them, and by far my favorite to run was Tomb of Horrors. I won’t go into details here because I want to avoid spoilers for those players who never had the pleasure to DM or adventure through it. Suffice to say, it’s got a reputation that is well deserved, and I’m glad to see it being updated for 5e.

For the past three months, I’ve been playing D&D with my oldest son (age 9) at the Wednesday nights’ Adventurers League weekly event. I have DM’d for the last three seasons, so it’s been a good break. Rather than planning out adventures and creating maps and terrain, I’ve been enjoying playing my (now 5th level) wizard side-by-side with my son’s Dragonborn fighter, but I have missed scratching that creative itch that is part of being a DM. A recent teaser (seen at left) from Fat Dragon Games included a picture of a new 3D tile for the FDG’s DRAGONLOCK 3D printable terrain series… and that image prodded me to warm up the 3D printer and create something… a Tomb of Horrors-themed dice tray.
If you want to duplicate what I’ve done here, you’ll need the following DRAGONLOCK kits:
DragonLock Starter Set or DragonLock Free Sample Set – this includes the 2×2 tile (you’ll need one of these)
DragonLock Expansion 5 — this includes the half-wall (3 of these) and the half wall corner tiles (4 of these)
DragonLock Expansion 8 — this includes the demon face tile (this Expansion Set will release very soon)
Note: I chose to use the half wall tiles (1″ tall) as opposed to the 2″ tall tiles — if you go this route, you won’t need Expansion Set 5.
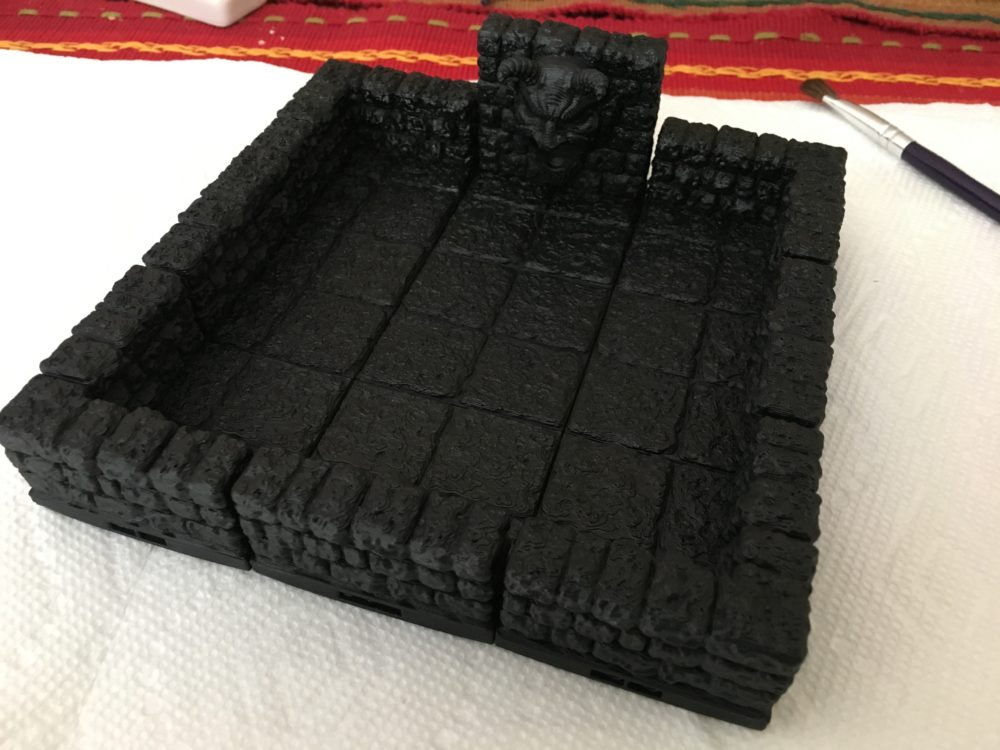
Depending on your printer, the tiles can each take anywhere from an hour to two hours. The demon face tile comes in two pieces — the face is printed horizontally and must be glued onto the vertically-printed wall tile… and the matching is perfect in terms of the stonework! You can see the unprimed/unpainted dice tray below. (I chose orange so it would be easy to see any unprimed areas.)

After printing and assembling, I primed it with a solid black as shown below. To keep the detail, I did a number of very light coats instead of one or two heavy coats.
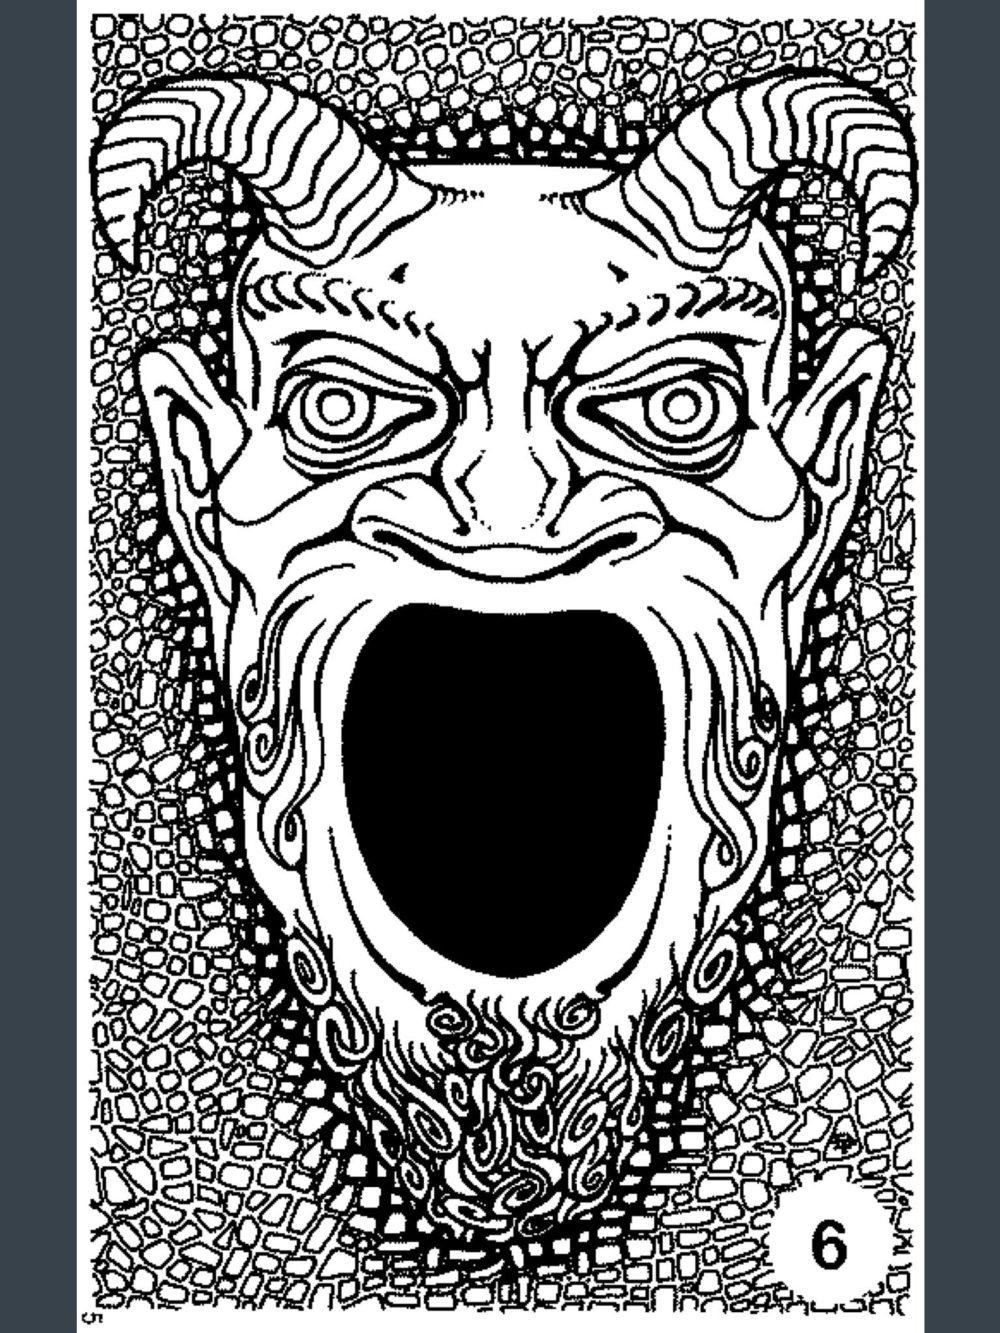
After the primer dried, I used a mixture of dry brushing along with diluted colors (browns and grays mainly) to paint a few odd bricks here and there. As for the demon face tile… here’s the original description and image from the module that contains the only detail regarding color:

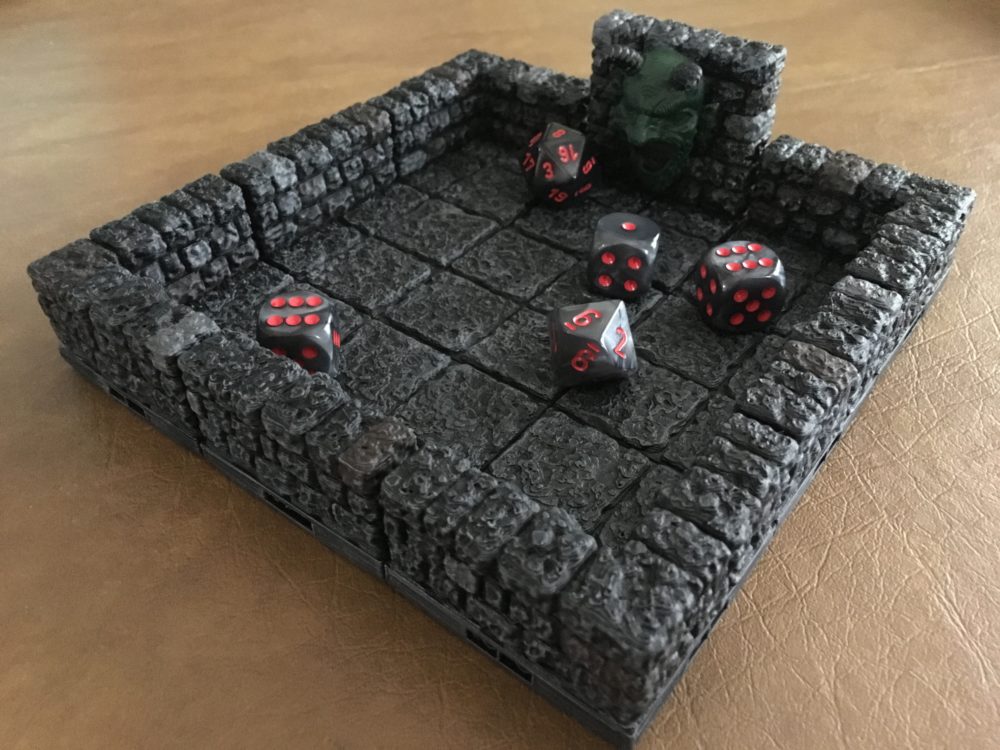
After applying a clear coat to protect the paint, my next step was to apply a non-slide rubber pad to the bottom and some black foam trim around the bottom to cover the holes where the Dragonbite clips would be inserted to attach additional tiles.
The DRAGONLOCK system has a lot of variety in terms of tiles, so it’s possible to create a dice tray of your own with rounded corners or cavern tiles or even a tavern-based tray using the newly released Buildings I Set. This won’t be my first dice tray — this is quite addictive, and I’ve already got some additional ideas that I can’t wait to test out.
I’d like to thank Tom at Fat Dragon Games for providing me with the demon face tile early — this dice tray looks awesome and I cannot wait to use it this Wednesday.


That…is simply awesome.
(And I may have to finally buy a 3D printer…)