
When I reviewed The Annotated Build-It-Yourself Science Laboratory last year, I made a crude version of the rain gauge the book suggests. I had never thought much about how rain gauges work—water drips in and you measure it, right?—but the book made me realize that a rain gauge is a lovely use of mathematics.
The mouth of a rain gauge is a certain diameter. If the whole rain gauge were that diameter, a quarter-inch of rain in the world would be a quarter-inch in the gauge. But funnel that rain into a more narrow space, and it will rise a lot higher. It then becomes easier to eyeball the difference between, say, one-eighth of an inch and one-quarter.
This isn’t some mathematical secret, of course. Volume in a cylinder is the cross-sectional area times the height. Reduce the area and the same volume needs more height. I had just never appreciated the way that simple truth could be used to magnify small amounts of rainfall into more readable separations.
The joy of that minor bit of applied math stuck with me, and I decided to make a new gauge that would replace the crude, cobbled-together gauge I had made that had not, to be honest, benefited from my neglect. I thought, hey, I have a 3D printer; I’ll just print one. As I thought it through, though, I realized that none of my filament would print clear enough to be good for reading the numbers. I imagined myself holding the gauge up to the light and squinting to see the numbers.
Then I found an old graduated cylinder in the pantry. A glass cylinder, easy to read. All it needed was a funnel. A funnel sized just right to magnify rain levels enough. That’s when I broke out the math.
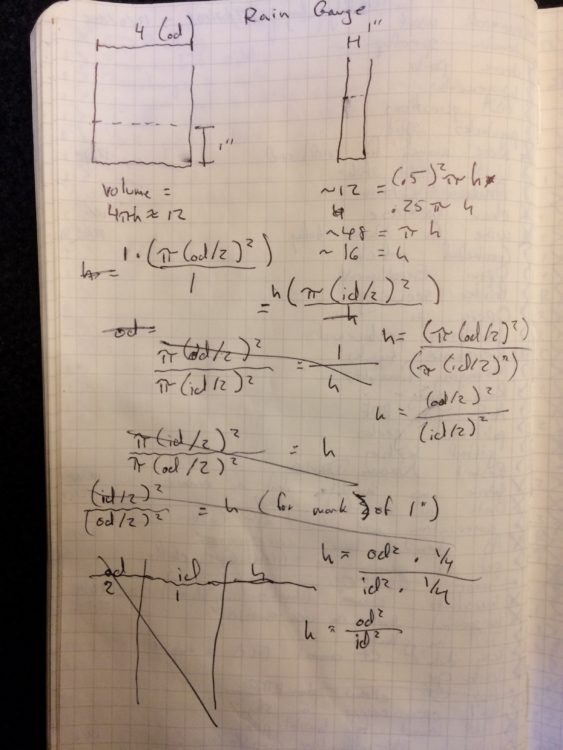
If a funnel of arbitrary width catches an inch of real-world rain, I started scribbling, how high would that same volume reach in another cylinder of some other, smaller arbitrary width? In the end what I came to was simple: the ratio of in-gauge inches to real-world inches was the ratio of the square of the funnel diameter to the square of the cylinder diameter. I wanted one-quarter inch of real-world rain to look like one inch in the cylinder, so I needed a funnel mouth twice the width of the cylinder, which would produce a 4:1 ratio of rain height in cylinder to rain height in the world.
I went to work in OpenSCAD, using its polygon and extrude functions to get myself a funnel of exactly the size I needed for the graduated cylinder, and then I printed it. I put some duct tape around the printed funnel’s stem to make it more snug in the cylinder, marked off one-inch sections of the cylinder with more duct tape, and put the new rain gauge outside a week or so before the rush of recent storms swept through the Bay Area. I didn’t wholly trust my math at first, so I compared my results to a nearby digital rain gauge. Success!

The project was satisfying way beyond what you’d expect. I mean, really: rummaged-from-the-mind math, 3D printer, reusing stuff around the house, science? It checks all the boxes. Each morning now, I loudly announce the previous day’s rainfall. When I hear it raining during the day I pointedly ask say to my wife, “I wonder how much rain this is.” I’m keeping a record of rainfall so that I can, a few weeks from now, show my daughter how to tell a little story with a graph.
And I don’t, actually, care about the answer. It rained some amount yesterday. It will rain some amount today. I mostly care if I should bring an umbrella. But tackling a problem without really knowing where I’m going is something I want my daughter to see regularly.
But now I’m thinking, “You know, maybe I can figure out how to hook up a Raspberry Pi to this.”


