 Follow along as I do a custom prop build of the coffee can that once contained Genesis on AMC’s Preacher.
It’s no secret that I love Preacher. I’ve written about the show and even interviewed the cast and crew. And thanks to a customer, I’ve gotten to make a piece of Preacher. About a month ago, a friend of a friend reached out to me to ask if I could build a custom prop–the coffee can from Preacher. I jumped at the chance.
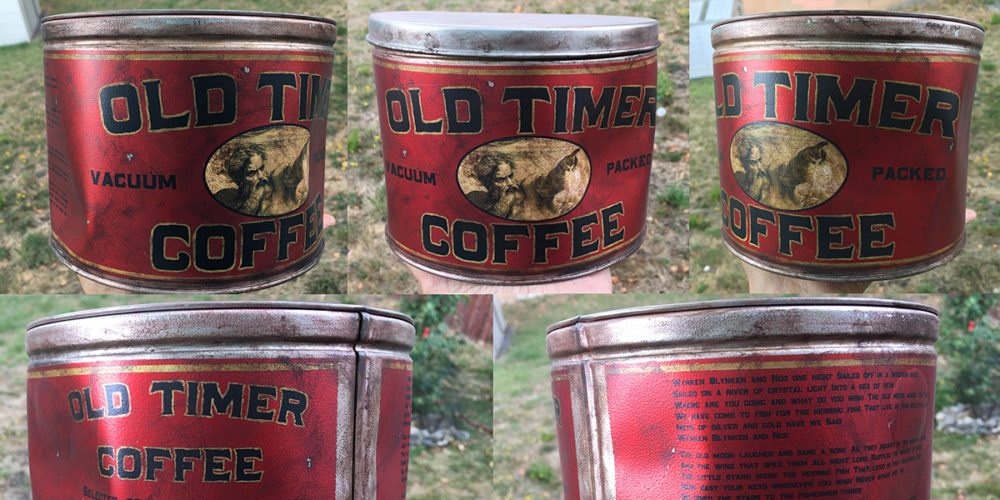
The first step in building a custom prop is research, research, research. I went through hours of video and Google image searches to find images of the can. Surprisingly, it was really hard to find good quality images from all the angles I needed, so I knew I’d have to fill in some of the blanks on my own. My next step was to research real vintage coffee cans. I put together quite a collection of vintage coffee can photos to get a good feel for the layout and content on those old cans, especially the back side since there are zero images where the back is legible.
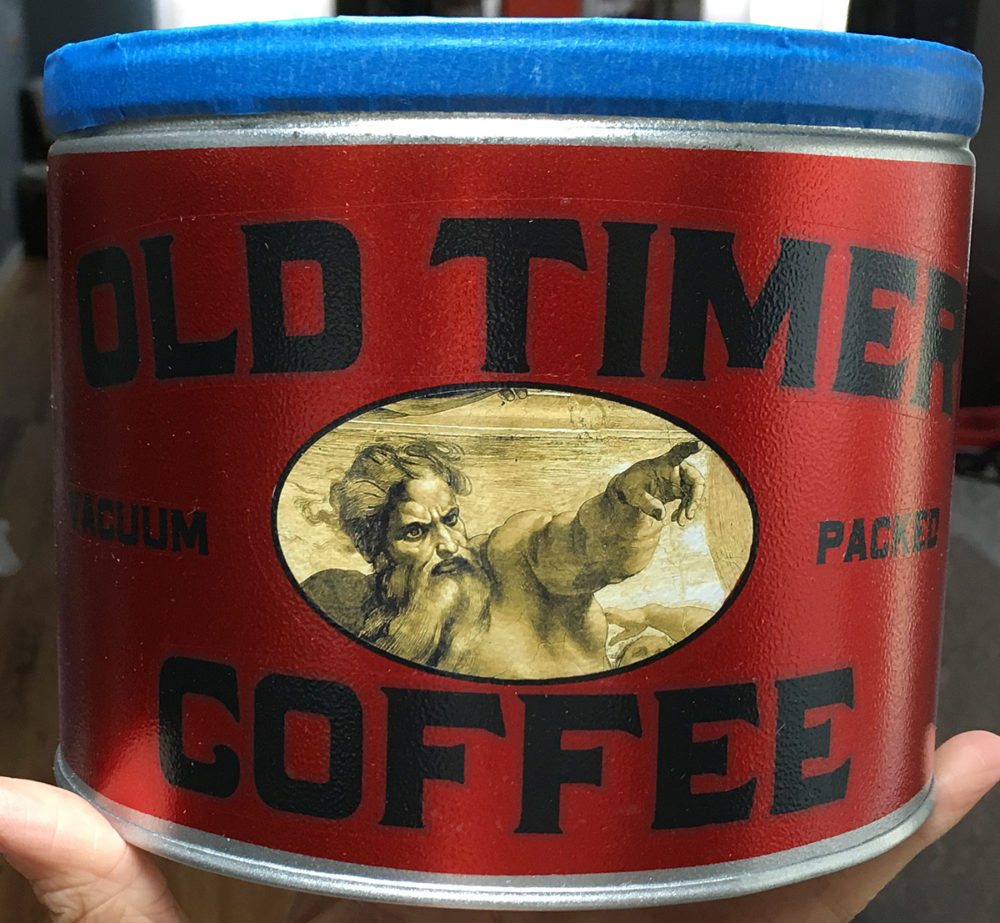
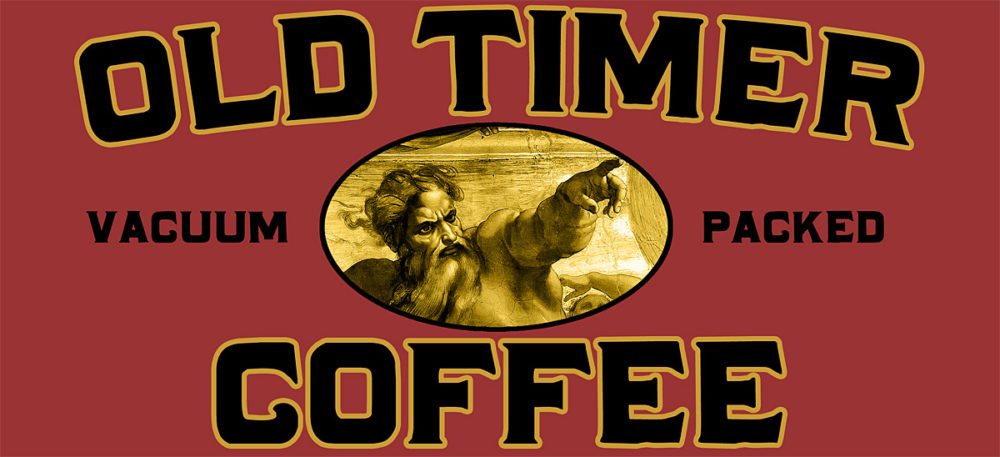 I popped open Photoshop and spent several hours across several days laying out the label to get it just right. The “Old Timer” text on the front and back was the easiest once I got a little help from some other GeekDads on finding the font. After agonizing over all of the can images, I decided that the image in the front oval was an old man (“old timer”–makes sense), but since this was the can that held Genesis, I decided it should be the God from Preacher. After trying several different images, I opted to go with Michelangelo’s “The Creation of the Sun and the Moon.”
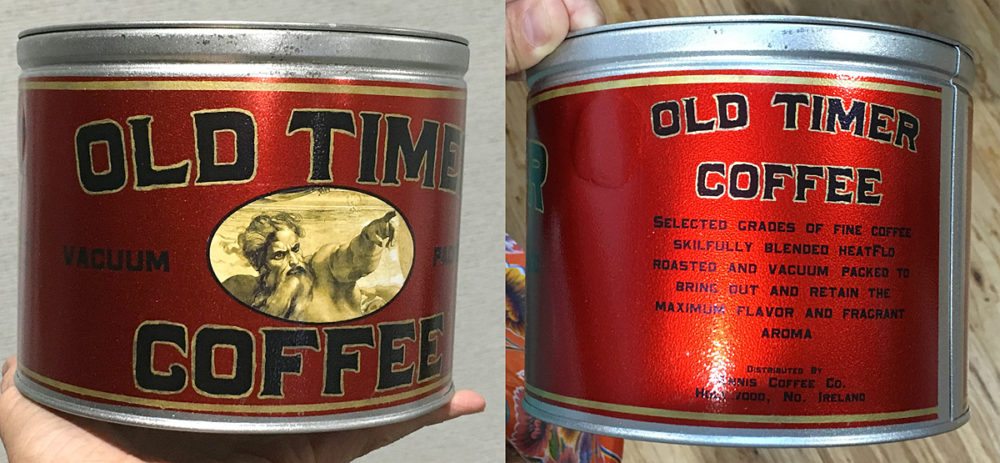
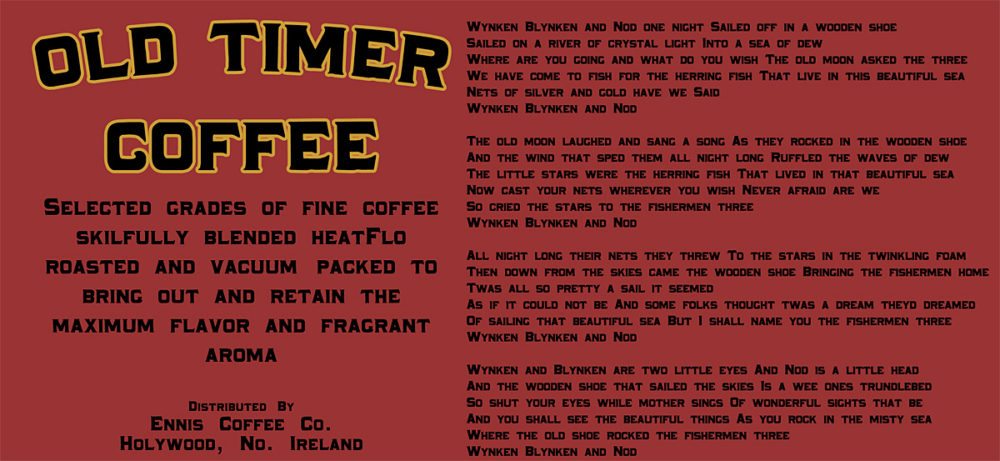 For the text on the back, I copied the “about the coffee” text from one of the vintage cans I liked, but then, as a nod to Preacher‘s creator, made the coffee distributor “Ennis Coffee Co” based in Enni’s birthplace Holywood, Northern Ireland. For the other side of the back, I decided to find the full lyrics to the lullaby that DeBlanc sings in the show. The lullaby is “Wynken, Blynken, and Nod,” a children’s poem by Eugene Field.
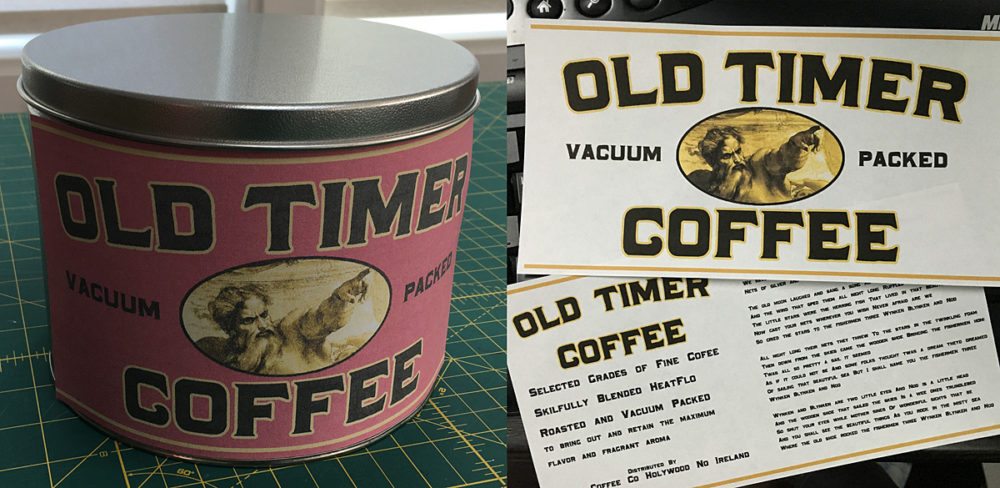 Once I had the label designed to my satisfaction, I printed it out on plain paper to test the sizing and layout on my can. I did this a couple of times with minor tweaks between each attempt before moving on to making actual decals. Because I’d used them many years when I used to do scale-modeling, I went with printable waterslide decal sheets. I printed out the decals on my Epson XP-430. Because the ink is water proof on their photo paper, I was hoping I’d be good to go. Turns out, I was wrong. I ruined my first decal set. So for the second go around, I made sure to seal the decals. I used Krylon Crystal Clear Gloss Spray Acrylic. I did three light coats and let it dry overnight. The following day, I did a test and the decal worked perfectly.
Meanwhile, I had to get the can itself ready for the decals. I found a perfectly sized aluminum can from The Container Store to use as a base (after searching both online and in person at many, many places). I masked off the top and bottom of the can and then used Tamiya’s clear red paint in my airbrush to get a nice even coat of the red base color for the can. The clear red got me just the color I wanted while still letting the metallic sheen of the can through.
 Once that was all dry, I cut up my decals and applied them to the can. I did forget that this was clear, not white, decal paper which makes it less important to trim exactly to your decal (which would have been impossible for my small text), but it does mean that any color below will show through or skew your decal colors. Since all of the text was black, that wasn’t an issue at all, but it totally messed up my old timer. I traced the oval onto the can and just hand painted a white oval. Once that was dry, I put the decal over top of it.
 The last painting step was the gold detail. I masked off and painted on the gold stripes and then I had to hand paint fold around all of the big letters. It was hard work but the payoff was huge. Having hand painted gold made a big difference compared to just a gold-colored decal. Once the decals and gold paint had dried for a day, I put several more clear coats over the entire can. It looked like a fresh off the assembly line vintage coffee can.
 But a vintage coffee can, especially the one in Preacher does not look fresh and brand new. This is where the most heartbreaking moment in prop building happens–you take a “perfect” prop, and then trash it to make it look real! Using the weathering techniques I picked up from both Punished Props Foamsmith 2: How to Forge Foam Weapons and Volpin Props Painting and Weathering for Props and Replicas, I went to work. For most of the grime and smears, I used my Basic acrylics, mixing in several colors to give it a more realistic look and feel. I made sure to get a lot into the nooks and crannies. I even did a streaky wash across the entire can to try to match the look from the show.
Because the can underneath the paint was already metallic, I was also able to easily just chip away some of my layers of paint and clear coat with an Xacto knife to give it some realistic chips. And then, the last step was to put some actual dents in the can. I help the can in my hands, took one last breath, and then squeezed, pressing my palm into it here and there, strategically placing random dents into the can. Once all that weathering was done, I sealed it all in with several more coats of the clear coat.
Now that I’ve gotten one of these cans under my belt, I’m anxious to make more. I am thinking about making myself one and doing a Preacher cosplay. Interested in getting a can of your own? I’ll make one for you too! Check out my cosplay and prop store where you can order one of these handmade Preacher cans or one of the other props I have for sale. I’m even open for more custom commissions if you have an idea for a prop or cosplay you’d like to work together on.


nice attempt!