
Fellow GeekDads and GeekMoms have been plagued by a chronic problem. How to best display our collectibles?
Traditionally we have just stood them up on shelves or desks in sort of cluttered manner. A few years ago I decided I wanted to see my classic Kenner Star Wars figures but was not content with the choices available to me. I wanted the classic feel of the carded figure but in a way I could easily hang on the wall. A trip to the hardware store solved my problem. What I bought was some 4’x2′ plywood and some 1″ x 2″ furring strips along with a box of finish nails.
So the first step was to determine the gaps needed to created the shelves for the figures. It is important to find the largest figure in the set to determine this. I made the mistake of using Bib Fortuna and not Chewbacca so Chewbacca had to stand in a slouched position.
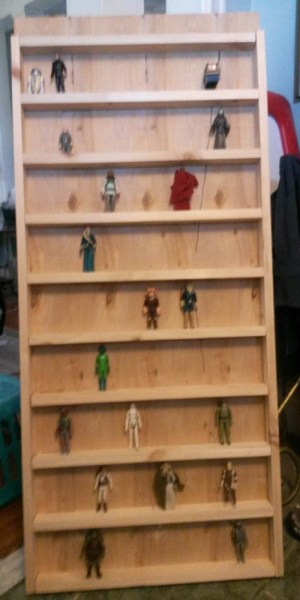
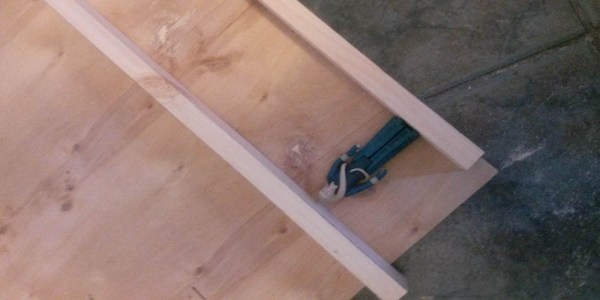
For Step 2 cut the pieces of ferring to create your frame. Secure them with would glue and finish nails.

Step 3 is painting. Here is the display covered in primer. After the primer I give it a coat of matte black.

Step 4 I went on-line and found some Hi-Res images of the original Star Wars card Backs and took them into Photoshop to create rows of colored backing as well as the original logo for the top.
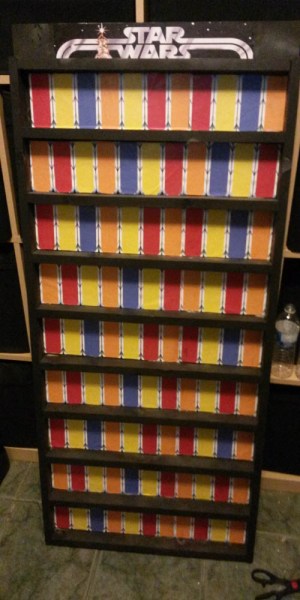
I used 3M spray adhesive to glue everything in place. Now I just needed to add figures.
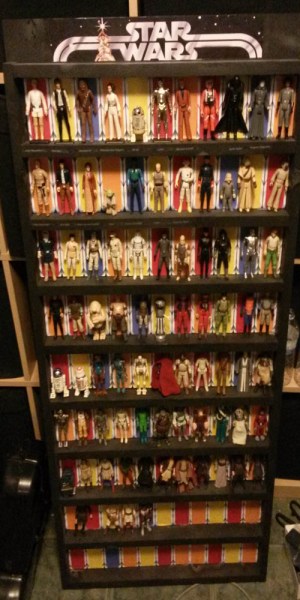
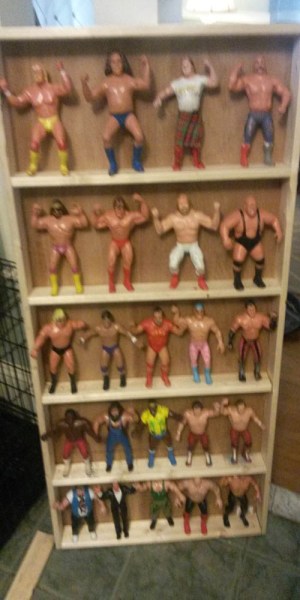
So now I have a great decorative display that I can hang on the wall and show my entire collection in a 2’x4′ space that only sticks out 2 inches. This is a great project that takes a little over a day to complete and needs a minimal knowledge of carpentry. The total project costs roughly 40$ which is infinitely cheaper than anything you can purchase. I was so happy with it I made a second for my LJN Wrestling figures.


This is a great project! I’d like to duplicate it. Any chance you’d be willing to share your photoshop files of the action figure box backing?
What a great way to display your figures!
Sure I can share them. I could e-mail them to you if you wish
Thanks for sharing this project! It turned out great.
I’d love a copy of those PS files, too, as I’d like to make this for a friend’s birthday that has just acquired his “holy grail” of a complete collection of the original 12 Star Wars figures.
BTW, typo in Step 2:
“Secure them with would glue and finish nails.” Probably meant “wood.” 🙂
Awesome DIY! Would you be able to send me the image files as well? I am excited to make this! Thank you!
Beautifull SW collection display!
I’d like to make one as this.
Please, can you share me your cardbacks hi-res pictures?
Thanks a lot
hello, can you please send me your Photoshop files? I am working on a similar shelf.
Great job! I would love those scans as well. I will send pics once this project is complete. Thanks!!
This looks great and I absolutely plan on trying to build one myself for my 1980’s vintage GI Joe collection. I also was curious about how you were able to Photoshop the card backs..etc.. so professional looking? Would you mind emailing me the info about it?
This looks great! I would love to get those photoshop files to do something like this for mine. Do you think there would be a way to add a glass cover the slides over the top?
I would love the files as well if someone would be so kind to email them to me. Also when printing them what printer would you use? An inkjet wouldn’t seem to be the preferred method so I was wondering. Thanks!
Hi Ricardo, great project. Is it still possible to get the cardback background from you as an email? Thanks