At the end of my Deck 3 recap, I mentioned that Arueshalae and Adowyn had yet to choose their roles. Well, despite the temptations of being Fallen, Arueshalae ended up choosing Redeemed: it allows her to help us even more, giving her some healing abilities and also allowing her to retrieve the Arueshalae’s Gift at the start of any turn rather than just her own. Adowyn chose the Pack Leader, which will give several options to make animal and ally cards even more useful.
Newly empowered, we dove into Deck 4: The Midnight Isles. It turns out that to seal the Worldwound, we’ll have to do it from the inside, which means journeying into the rift. This isn’t going to be pretty. The adventure card has a special rule: after the first scenario, all locations have the Abyssal trait. That means Outsider banes are no longer Outsiders, and in some cases there are other nasty things that happen when a location is Abyssal. The new servitor demon for this adventure is the Vulture Demon, who requires a Constitution or Fortitude check or you can’t use weapons or attack spells.
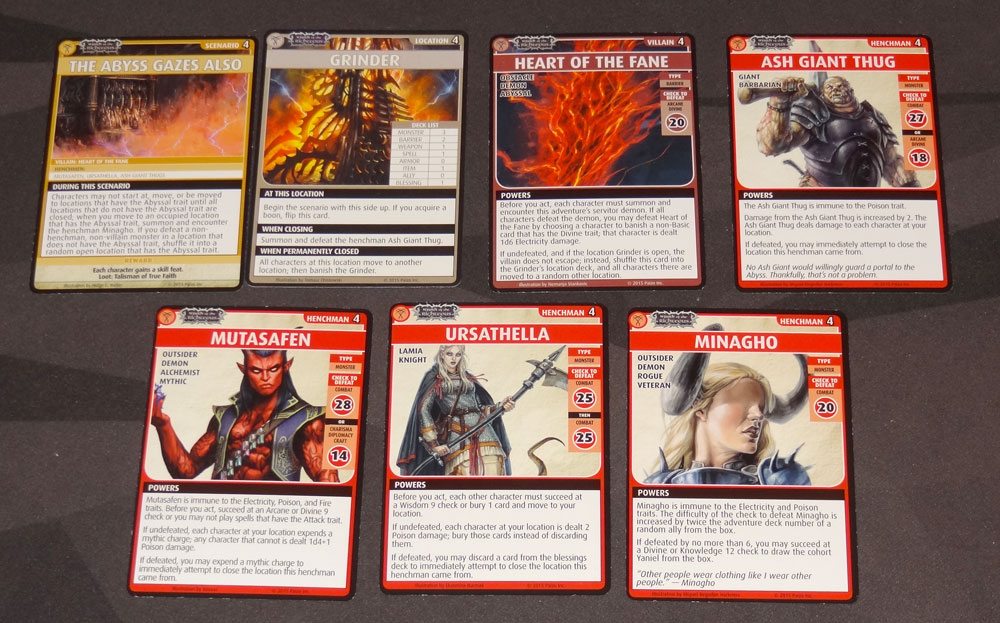
Scenario 1: The Abyss Gazes Also
This scenario is about the shrine of Pulura, which has been corrupted—there’s a portal called the Grinder, which shows up in the form of a new location card, another double-sided location. It starts off non-Abyssal, but if you acquire a boon, it turns Abyssal and banes get harder to defeat. If you defeat a bane, then it flips back to its original side.
A couple of other special rules: you can’t start at an Abyssal location or be moved to one until all the non-Abyssal locations are closed. (We missed this rule at first, and started playing a round, and then reset.) When you move to an occupied Abyssal location, the henchman Minagho shows up to fight. Finally, if you defeat a non-henchman, non-villain monster in a non-Abyssal location, you shuffle it into a random open Abyssal location. So, basically, all of the monsters in the first half of the game may show up again in the second half of the game.
Adowyn started off at the Grinder, and got a Pillar of Life spell—pretty awesome. It’s basically an entire round of healing at a single location. But then the Grinder flipped. Next she got Arboreal Blight, so we all got to face Fiendish Trees. Not too bad—we defeated that barrier easily with help from the Banner of Valor and the Mist Horn (to avoid that before-and-after ranged damage).
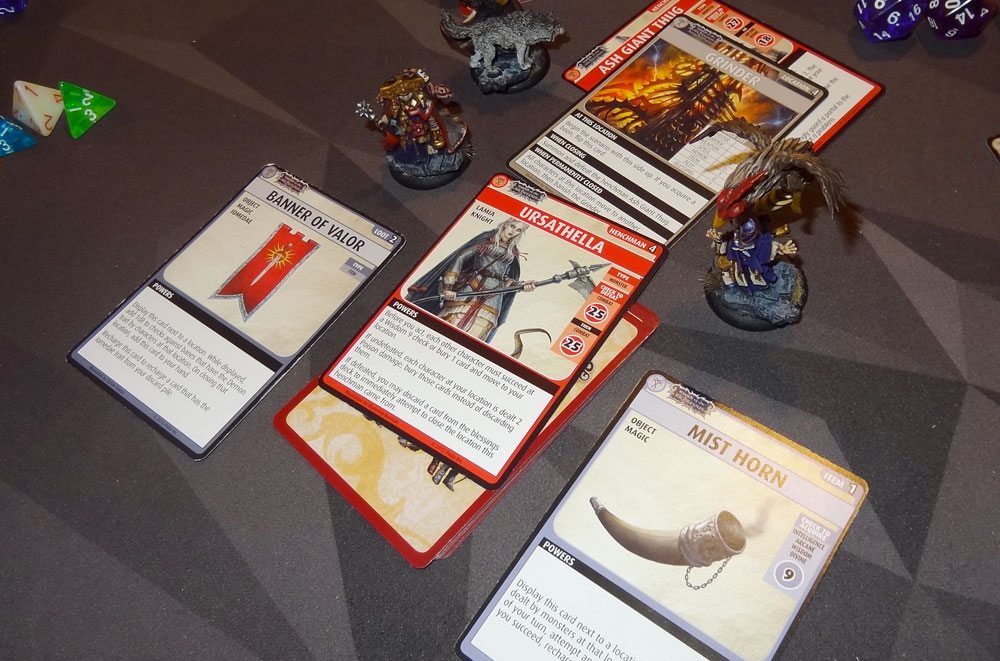
Then Arueshalae explored, and found Ursathella, one of the henchmen. Everyone had to do a Wisdom check, or else bury a card and be moved to the same location. Turns out only Balazar and Adowyn (who were already there) failed their checks. If she were undefeated, then everyone at the location would take 2 Poison damage that would have to be buried. Fortunately, Adowyn and Arueshalae defeated Ursathella (a 2-combat henchman). Ursathella also has another condition: in order to attempt to close the location, you first have to discard the top card of the Blessings deck. Done, and then defeated an Ash Giant Thug to close the location. No more Grinder.

Ekkie, meanwhile, explored the Cavern, and found a Horned Demon. Ouch! First, if you fail a Wisdom 12 check, you shuffle a random card from your hand into the location, forcing you to go look for it later. We didn’t want to risk losing some of Ekkie’s best cards, but she only has a d4 for Wisdom. With many blessings and bonuses, she managed to roll a 14. Whew! The fight was tough, but not as scary as that Wisdom check. And, of course then the Horned Demon ran away.
Next up, Ekkie found Mutasafen, another henchman. This one is harder for spellcasters, but Ekkie doesn’t cast spells. Turns out you can also use Charisma, Diplomacy, or Craft if you want an easier check, but Ekkie isn’t much for talking. After defeating Mustasafen, Ekkie had to spend a mythic charge in order to attempt a close with a Strength check—done and done.
Later, Adowyn used Leryn to examine a location—it was a Blasphemy Demon, whose special power is that if you used a card to peek at him, that card gets buried. Ouch! It’s the first time Adowyn lost the use of Leryn for a game. Demon defeated, but (again) it moved to a new location.
Balazar ran into the Baleful Shadows barrier, failed his Wisdom check, and everyone got to encounter a Wight. Turns out Wights aren’t so bad once you’ve leveled up, but the barrier got shuffled back into the deck. He explored again, and it was… the Baleful Shadows again. Sigh.
By this time several of us were feeling a bit low on health so Adowyn put the Pillar of Life at the Guardpost, and we took turns getting some healing.
Enora closed out the Laboratory (it took a long time to find that Ash Giant Thug), and Adowyn cornered another Ash Giant Thug at the Guardpost and closed it out. Now it was time to start on the Abyssal locations. Balazar found an Ash Giant Thug at the Befouled Altar and closed it (after a regrettable incident where we found Jesker Helton, put it on top of the deck for Balazar to go acquire, and then a Giant Fly at another location forced that location to be reshuffled). We also closed out the Abyssal River.
At this point, it was down to the Molten Pool, a location where most of our monsters had run. We had managed to defeat a few of them, and then Arueshalae encountered the Umbral Dragon—not a henchman or villain, but still really powerful. First, it requires an Arcane/Divine 14 check or you may not play attack spells against it. Also, you choose a random occupied location and everyone there must do a Constitution/Fortitude 11 check, or bury their role card. Yikes! On top of that, it takes two Combat 24 checks to defeat, and if undefeated, it shows up again. We were terrified—Arueshalae wisely used her evade ability and ran away.
Unfortunately, now we were down to the last turn of the Blessings deck. We knew that the last three cards were the Umbral Dragon, a Toad Demon (who had escaped there), and the villain. Balazar had 2 chances to explore (assuming he didn’t take too much damage). First up: the Umbral Dragon. ARGH. We spent almost everything just to survive it, saving a blessing to explore again: it’s the Heart of the Fane, the villain! In this case, not a monster, but a barrier.
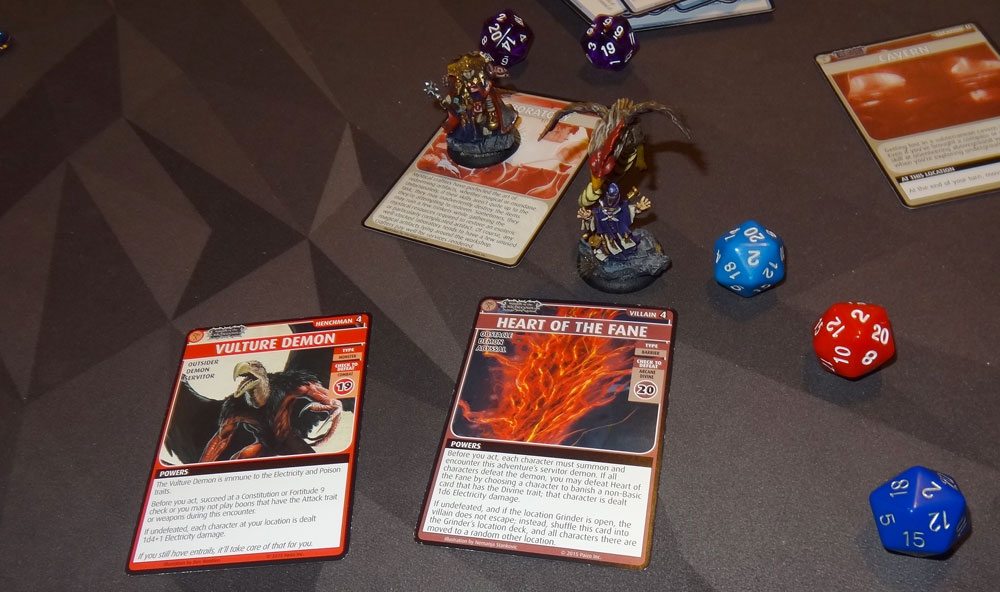
First, everyone had to encounter the Vulture Demon—but thanks to Adowyn, most of us were able to evade. (If you defeat all the Vulture Demons, you can banish a non-basic Divine card to defeat instead of a check.) Balazar tried to fight it just to get an extra monster in his hand, but to no avail. The check to defeat is Arcane/Divine 20: Balazar had 3 dice (using 2 blessings), and spent all 3 remaining mythic charges to make them d20s. Final result: 24. Whew!
We do have to call this a win with an asterisk, though, because when it was all over, we realized that we had never summoned Minagho as per the scenario rules. There weren’t too many times that it would have happened (I think two or three), and two of our characters can either evade or help others evade, so I think we would have been okay, but technically we got that one wrong. Oh, well. It was hard enough that we’re just chalking it up to a victory and moving on.
Our reward: everyone got a skill feat, and we picked up the Talisman of True Faith, a magical item that can allow you to ignore the Abyssal trait on a location, add a blessing’s traits to the talisman, or copy the top card of the blessings deck.

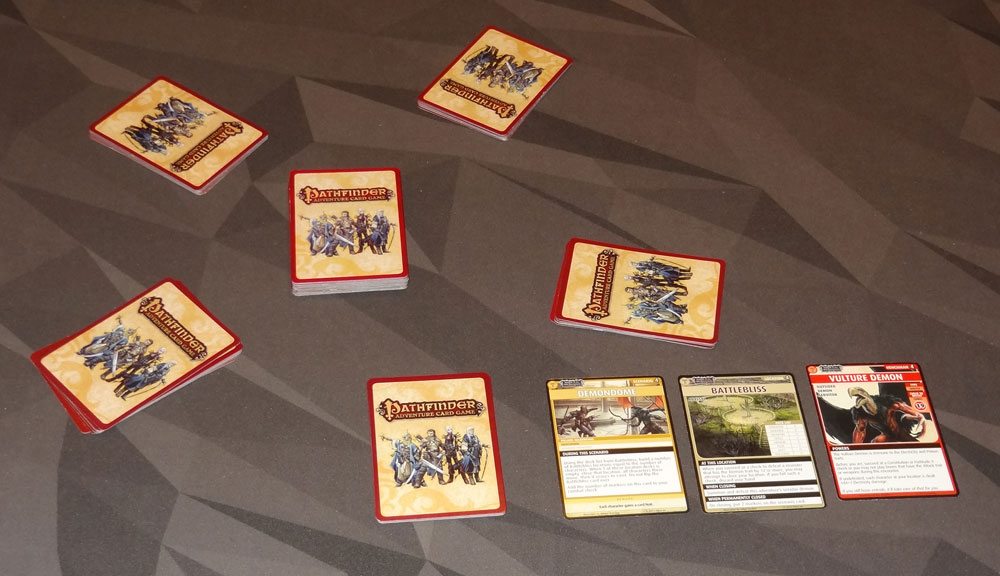
Scenario 2: Demondome
This one’s a different one: we’re entering a gladiatorial competition—there are just several copies of the Battlebliss location, one per player—each is filled with monsters, armor, weapons, and a spell. There’s one villain, and the henchmen are just more random monsters. The goal is to find and defeat Gelderfang. To close a Battlebliss location, you must either empty it entirely or defeat a Demon by at least 12 or more and then defeat a Vulture Demon. Let’s get ready to rumble…
Despite the fact that this was one of the atypical scenarios, we didn’t find it difficult, beating it in record time, thanks to Ekkie. Her powers, coupled with the particulars of the Demondome scenario, made for particularly quick work. Whenever Ekkie discards a card, she may draw another—it burns through her life, but it also means that if she draws a blessing or an ally, she can explore again. Demondome’s scenario includes the rule that when a location is empty, it is closed and all characters there move.
First, Balazar was able to close one location: he found a couple of monsters, including a Filth Demon, which he overkilled, allowing him to fight the Vulture Demon and close the location. Then it was Ekkie’s turn. She plowed through three locations on her first turn. She kept finding demons to fight, which she was easily able to defeat. The Vulture Demon is a little harder simply because you have to pass a Constitution/Fortitude check if you want to use weapons or attack spells—making them perfect for Balazar, who uses neither. Fortunately, Ekkie is pretty powerful even without a weapon. She’d close a location, move to another, and then burn her way through that one. By the time she ended her turn, she’d probably used about half of her life, but we had closed 4 of the 5 Battlebliss locations.
It turned out the villain, Gelderfang, was hiding in the last location. Surprise! The first time you encounter him, he runs off to a new location, the Rapture of Rupture. Also, when you encounter him, everyone at your location has to pass a Combat 25 check or be dealt damage. Then you have either a Combat 27 or an Acrobatics/Diplomacy 13 check to defeat him. So he’s a lot easier to dodge or charm than he is to fight.

We left one person to temporarily close the last Battlebliss location and focused on exploring the Rapture of Rupture. Thanks to Enora’s new ability to peek at the top of her location, we knew when Gelderfang was coming, too, and got set up for that fight. By Ekkie’s second turn of the game, we had defeated the scenario. Bonus: Early in the scenario, Enora managed to get the Black Axe weapon. She needed to roll a 10 on a d6 and a d4. We figured, hey, it looks cool, but not enough to spend a lot of resources on it. But then she rolled a 10. Score! That went to Ekkie. At the end of the scenario, everyone got a card feat, allowing us to increase our decks.
Since that scenario went by so quickly, we decided to keep going…
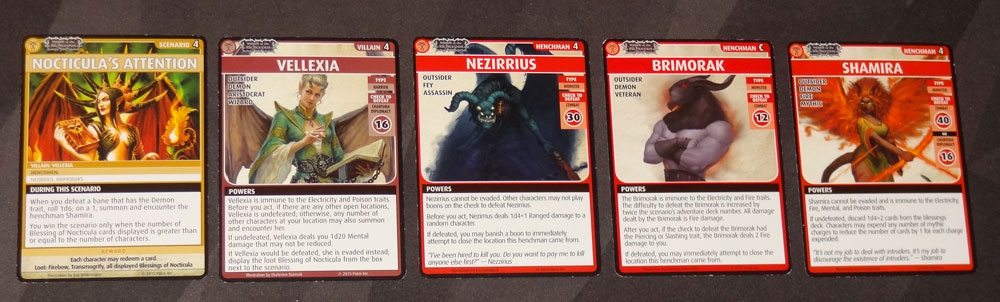
Scenario 3: Nocticula’s Attention
Our goal in this scenario is to get the attention of Nocticula—a potential ally against some of the other forces. So we head into the abyss and stir up some trouble.
The rules for this scenario include the chance of summoning and encountering Shamira, a demon henchman, after you defeat a demonic bane. Shamira is a crazy-difficult Combat 40, but if you have Charisma or Diplomacy you can charm your way out of it with only a 16. But most of our party isn’t so great at that. There are a bunch of Brimorak henchmen—we’ve seen them many times before—and one special henchman, Nezirrius the outsider assassin. He’s a Combat 30, but what makes him particularly scary is that other characters may not play any boons for you. Yikes!
Finally, in order to defeat the villain, Vellexia, you must have gained enough of Nocticula’s blessings—essentially, you have to continue defeating Vellexia again and again in order to gain those blessings. Also, she’s undefeated unless all other locations are closed. But if you do trap her, any number of characters at that location may attempt to defeat her (and earn Nocticula’s blessings). The downside: she’s a Charisma/Diplomacy 16 only, and has no Combat check. So you can’t punch your way through this one.
Adowyn started us off at the Marketplace, finding a Helm of Valkyrie and then encountering a Brimorak. Well, location closed, but so much for picking up some boons at the Marketplace. Enora and Balazar went to the Forsaken Cloister in search of spells. Enora got a couple, but Balazar found Vellexia. Unfortunately, since we were only able to temp close two of the locations, Vellexia was undefeated. And, if undefeated, she deals 1d20 Mental damage that may not be reduced. Whoops. Balazar rolled a 17. So much for that hand of cards.
Balazar and Ekkie managed to get the Forsaken Cloister closed, and then Ekkie went to the Harem and found another Brimorak—no big deal. We defeated a Demonic Horde barrier (those are always ugly) and then Enora closed the Rapture of Rupture, where she found another Brimorak and then Shamira. Fortunately, we didn’t have to summon Shamira too often.

At the Armory, Arueshalae encountered Nezirrius. Before she acted, Nezirrius did some ranged damage to a random character: Balazar. Who then proceeded to roll the maximum amount of damage he could take. Ugh. But fortunately, Arueshalae did manage to defeat Nezirrius single-handedly and closed out the location, and found that Vellexia had fled to that location.
We were able to close one more location, the Locust Shrine, and then lined up to fight Vellexia in the last few rounds we had left. We needed to defeat her at least 5 times to collect enough Blessings of Nocticula to win the scenario. It was a little tricky for some of us, but we had enough turns left to win. It was fairly close, though.

Our reward for this scenario: each character could redeem a card (though we didn’t have a lot to redeem) and we got a couple of loot cards: the Firebow (weapon), Transmogrify (spell), and all of the Blessings of Nocticula that we were able to display. The Firebow is pretty powerful: Strength + Dexterity/Ranged + 4, and can be discarded for an additional 2d6. It also can add a 1d6+2 to somebody else’s combat. Transmogrify is an attack spell: you display it next to a monster, and all checks to defeat are decreased by your Arcane/Divine + 1d6. Finally, the Blessing of Nocticula is a corrupted blessing—it can add 2 dice plus the adventure deck number to any check, but if the top card of the blessings discard pile is not corrupted, then the blessing is removed from the game entirely.
Due to summer break, our Pathfinder group is on hiatus for a little bit, so the rest of Deck 4 will have to wait until later in the summer. Stay tuned!
Update: We finished off Deck 4—read the rest here!


