Virtual Reality is coming, and I’m super excited.
More accurately, virtual reality is here, but not for me yet. Following on the heels of my VR experiences at PAX Prime last year, the idea of VR wormed its way deeper and deeper into my brain. Then one morning I found myself sitting on the Oculus Rift pre-order page, and suddenly, boom, I was an early adopter. Given how orders of Oculus Rift slipped due to a component shortage, and that I failed to order in the first few minutes, I’m not quite as early an adopter as I would have liked. On the other hand, that’s left me with time to prepare for the headset’s demands and build a new PC. If you’re impatient for pics, you can skip to the build.
From all the reading I’ve done, both the Oculus Rift and HTC Vive are very well-developed pieces of technology for first generation consumer products. Nevertheless, they are both butting up against the limits of the hardware required to drive them; VR pushes a lot of pixels. To avoid VR sickness (an actual thing), the general industry consensus is that 90 frames per second are required, but that’s per eye, and skipped frames are not acceptable. Given that to this point 60 frames per second for a single screen was generally acceptable, VR is going to require more than double the power of an adequate gaming rig. Take a look at the official minimum specs for the Oculus Rift:
- NVIDIA GTX 970 / AMD 290 equivalent or greater
- Intel i5-4590 equivalent or greater
- 8GB+ RAM
- HDMI 1.3
- 2 USB 3.0 ports
- Windows 7 SP1 or newer
It’s worth noting that the HTC Vive’s requirements are more or less the same, with less emphasis on the USB ports, only 4 GB of RAM, and video requirements of HDMI 1.4 or DisplayPort 1.2. For the most part, if you build an Oculus Rift system, it should work for the Vive as well.
Clearly, this isn’t going to be a cheap PC, and is one of the biggest criticisms of virtual reality at the moment. Not only are the headsets themselves expensive, but they require an expensive computer. Having done my research, I did the only sensible thing I could think of.

I ordered an HTC Vive.
Now look: the hype train was very powerful, and I was directly in its path. In my defense, I realized this was not a reasonable choice to make for my family and I needed some way to pay for it. After a short bout of soul-searching, I decided it was time to sell my Magic: The Gathering collection. I’d been playing Magic since 1993, having had a number of up- and down-swings over the years, with some particularly heavy collecting and playing on either side of Ravnica. But after we had kids there was less time for Magic, and the cards have been languishing in binders, being carted from house to house as we moved across the country. I experienced some sadness as I went through my collection to organize it for sale, seeing old “friends” and remembering gaming weekends fondly, but it was time for them to go. I’ll skip the details of how to rid yourself of a Magic collection, except to say that my experience with both my friendly local gaming store and CoolStuffInc were very positive and I would recommend investigating both routes if you’re thinking of clearing house too.

Component Choice
In addition to playing VR until my eyes bleed, I want to share my experiences with GeekDad readers, meaning my system will need to be sufficiently powerful to record or stream video while playing the game. With that, here’s a list of the components I selected:
- Power: EVGA 220-G@-0850-XR 80 Plus Gold 850W
- MB: Gigabyte GA-Z170X Gaming 7
- CPU: Intel Core i7-6700K
- GPU: EVGA GTX 980 Ti
- RAM: 2×16 GB g.Skills (2666)
- SSD: Samsung 850 EVO 1TB (OS + Games)
- HD: WD Blue 1TB (Media Drive)
- Case: Rosewill Blackhawk Gaming ATX Mid Tower
- CPU Fan: Noctua NH-U12S CPU Cooler
- Extra Ports: Inateck PCI-E to USB 3.0 5-Port PCI Express Card (Extra USB ports for Oculus)
- Optical: None, installed Windows 10 from USB
I grabbed almost all of it from Newegg, though I found the shipping speed was more favorable for getting the Blackhawk tower and Noctua fan from Amazon. Here are my thoughts on a few of the components:
- EVGA GTX 980 Ti. This is the bulk of the cost of the system. If you want to save some money, you can drop down to the recommended minimum Oculus specs, and according to most reports I’m reading, you should be fine. This is a $300 difference! Once at the GTX 970 tier (see the GPU hierarchy on Tom’s Hardware) you should seriously consider the Radeon R9 390 as it looks like you get double the RAM for equivalent price.
- Noctua NH-U12S. I’ve never had a fan this amazing. Between this and the fans that came with the Rosewill Blackhawk Gaming tower, this system is absolutely whisper quiet, even under load. The fan is gigantic, but I can’t recommend it enough.
- Inateck PCI-E USB 3.0 5-Port Card. All USB 3.0 ports are equal, but some are more equal than others. In addition to needing a number of ports, Oculus has found some USB controllers are not perfectly meeting the specification and will not properly support the Rift. Without being able to confirm my computer’s compatibility before I built it (using the Rift compatibility tool), I went ahead and threw in the extra five ports because it was under $30 and, hey, you can never have too many USB ports, right?
In addition to going for a more reasonable video card, you can cut down the cost of this build with a cheaper motherboard or CPU, maybe shaving another $150 off the price. You can also cut out the SSD entirely, but once you’ve gotten used to the faster boot speeds it’s hard to go back. If you’re in no rush for VR, we’re on the verge of a new generation of video cards, meaning you can choose your performance level now and hopefully realize significant savings in a few months. You can also save some cash by building the system yourself if you’re comfortable doing so; I went that route for the first time with this system and it was a blast!
With that, let’s get on to the build! If even this is too much reading, jump to the end to see it all in a 44-second video.
Virtual Reality PC Build

This was the neatest this room looked for quite some time once I started opening boxes. The Dell monitor wasn’t specifically part of this build, but since my old PC is still capable of gaming, it got moved on to be my kids’ PC, and so needed a monitor. I suggested just plugging the DisplayPort cable into their eyes, but I was vetoed.

I’m really impressed with the Rosewill Blackhawk Gaming Tower. It’s spacious, has many access holes to move cables through, and I was able to easily remove drive cages from the bottom right rack (which you can do to fit long video cards or just to improve airflow).
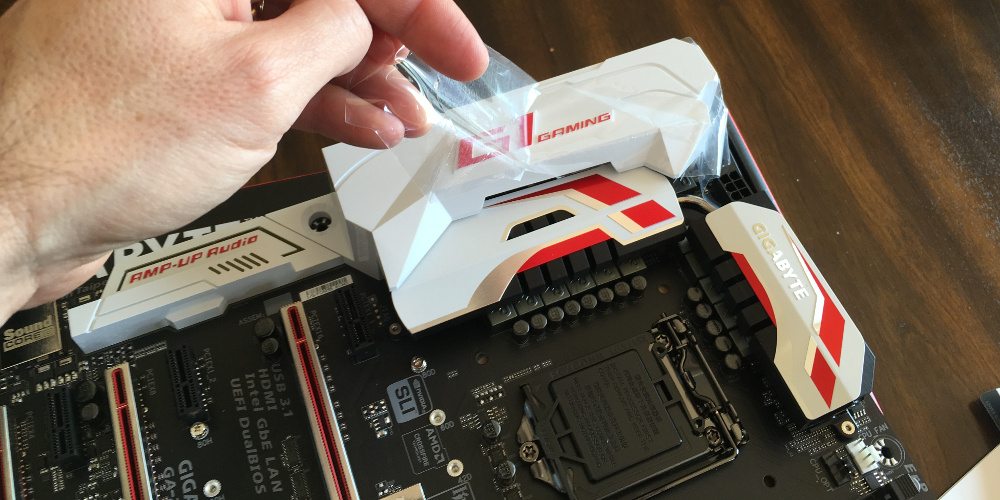
Removing plastic film: the best part of any electronics purchase. Just don’t remove it from your friend’s equipment. I actually found the white/red branding a bit garish. But I also don’t play games while staring into my case, so it’s not a factor for me.

Look at the size of that fan! It would later prove to be an issue when I put the front cover on the case; the case cover intake fan interfered and I had to move it to one of the drive bays. This was still totally worth it as the CPU fan moves a lot of heat with minimal sound.

While I have replaced individual PC components in the past, I had never performed a complete build from scratch. I watched a number of how-to videos in preparation and highly recommend that approach if you’re planning on building a system for the first time. Of note, this Newegg video had some useful tips for me, such as assembling primary components outside of the case to determine everything is working before proceeding to working in a cramped space, which is what I’m doing here on the motherboard’s box.
Note the dual seven-segment displays on the corner of the Gigabyte Gaming 7; they’re a great tool for diagnosing boot problems. The power button was also a welcome feature of the board as I didn’t have to connect the motherboard’s pins to the on/off switch to test it out.
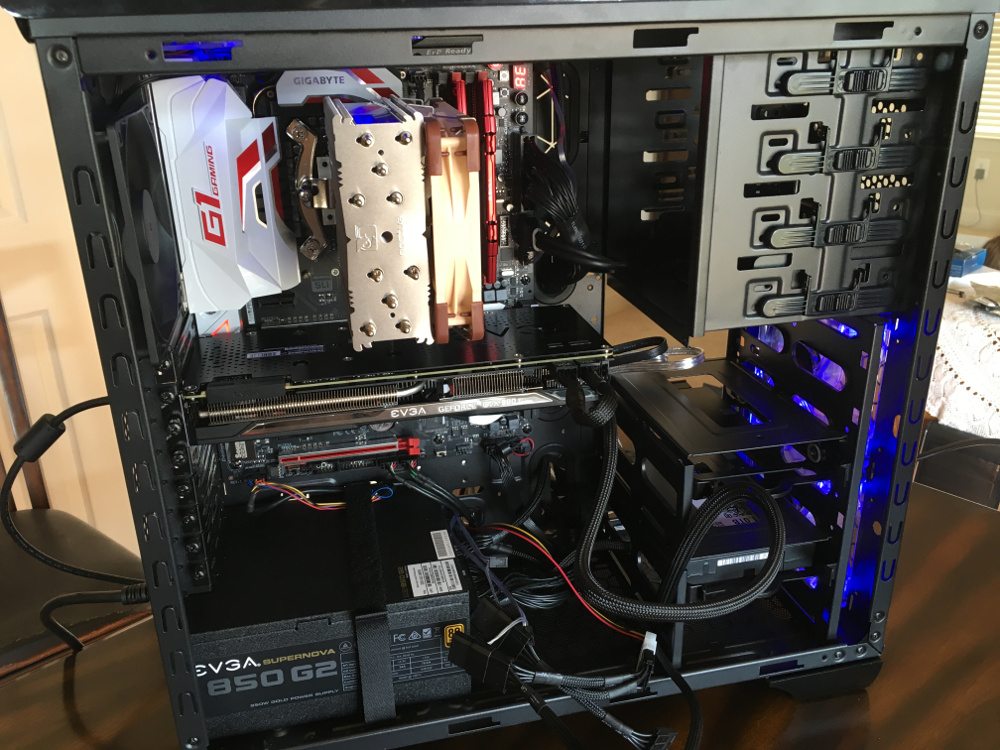
Once I knew the components were working I was able to put the motherboard into the case with confidence. Here, I’ve removed the top drive bay to make the video card installation easier, but it could have remained without an issue if I had needed the space for drives. From this point out, 80% of the work is cable routing. Fortunately, the EVGA power supply was modular, meaning I could install only the power connections needed for my specific components, minimizing the mess in the snake pit.
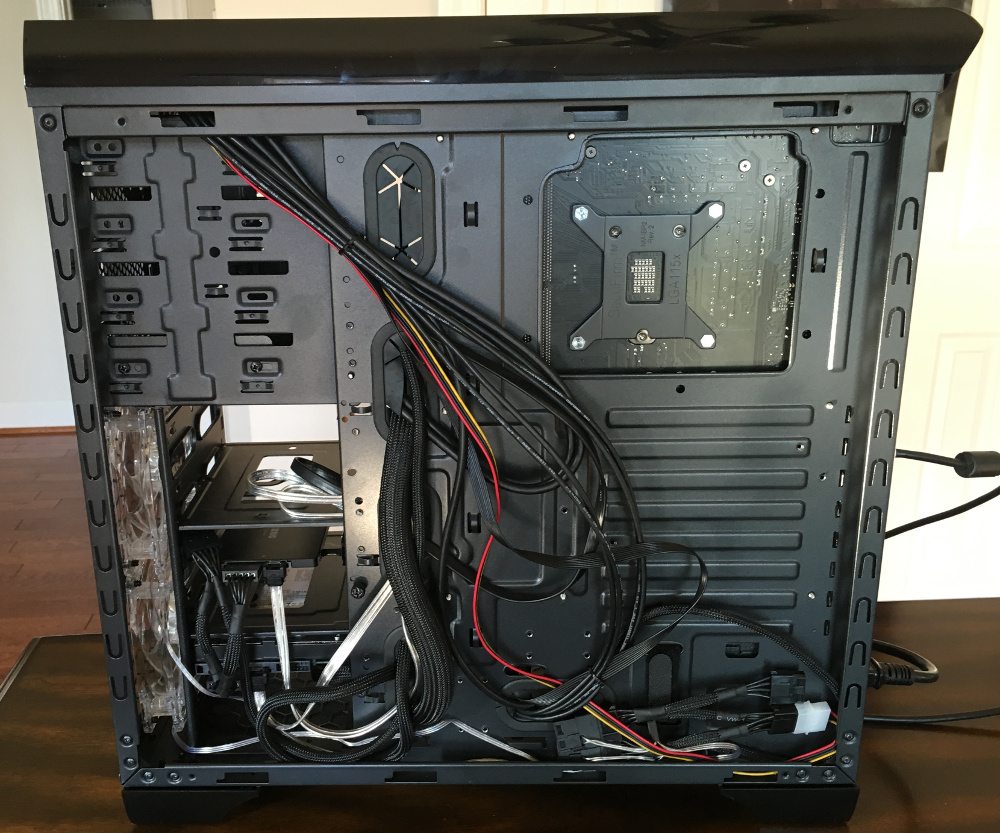
The back of the case shows my less-than-stellar work with cable routing. I suspect more professional results are obtainable; I was just happy to be able to close the lid. I did make sure to leave the back of the CPU’s mount point clear for cooling. Now let’s put that panel on and never speak of it again.
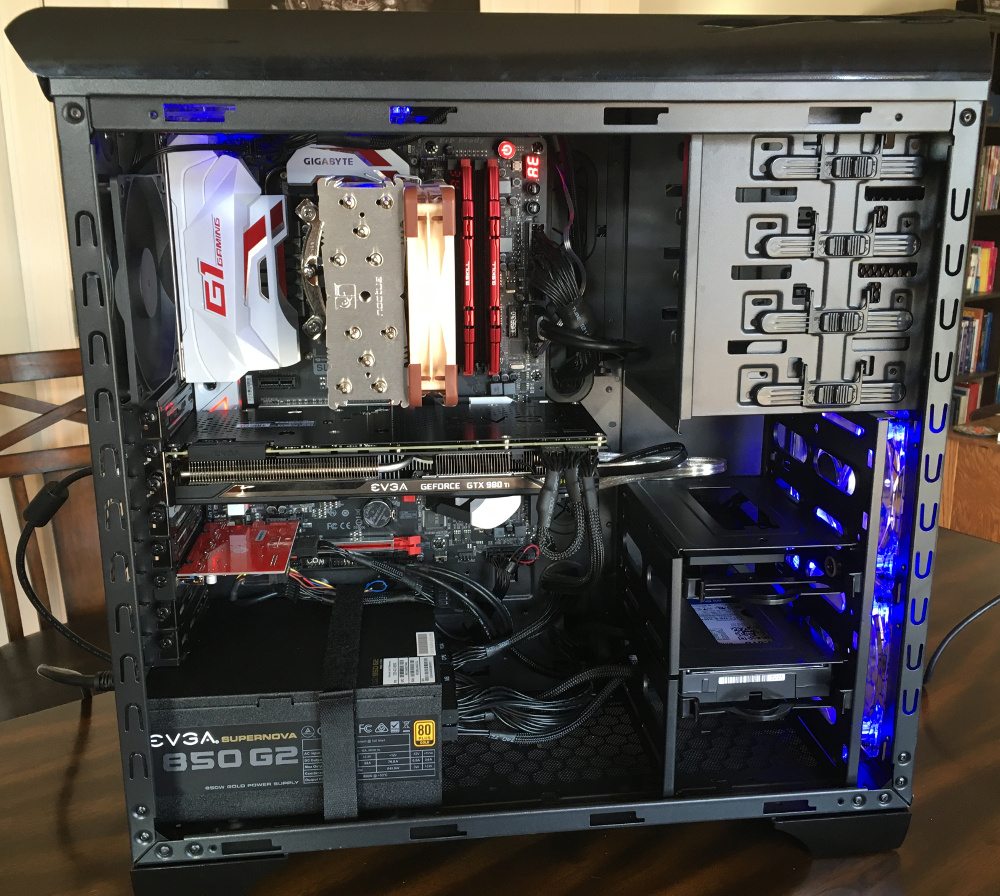
It may not look that different from earlier, but getting the computer looking this neat consumed another two hours of tinkering, zip ties, pauses for coffee, pondering, backtracking, tears, introspection, and acceptance of a higher power supply. The final layout has a lot of space for air movement. The bays at the top right have no drives at all (I didn’t install an optical drive in this PC); instead, I moved the case door’s 120mm fan there to help move air across the CPU. Note the GTX 980 Ti logo is illuminated; you can configure how it pulses in the NVIDIA GeForce Experience app, even to the beat of music your system is playing. This would be really cool were I not intending to use this PC in a way that mostly covers my eyes in a headset most of the time, but I’m sure the spiders under my desk will enjoy the show.

Speaking of lighting, though, this was a really nice touch: the Gigabyte motherboard has a backlit panel where the cable connections are made. No more fumbling around in the dark under your desk trying to determine the orientation of that USB cable; you can spot it pretty clearly with this feature. You can even change its color in the BIOS if that’s your thing.
Benchmarks and Evaluation
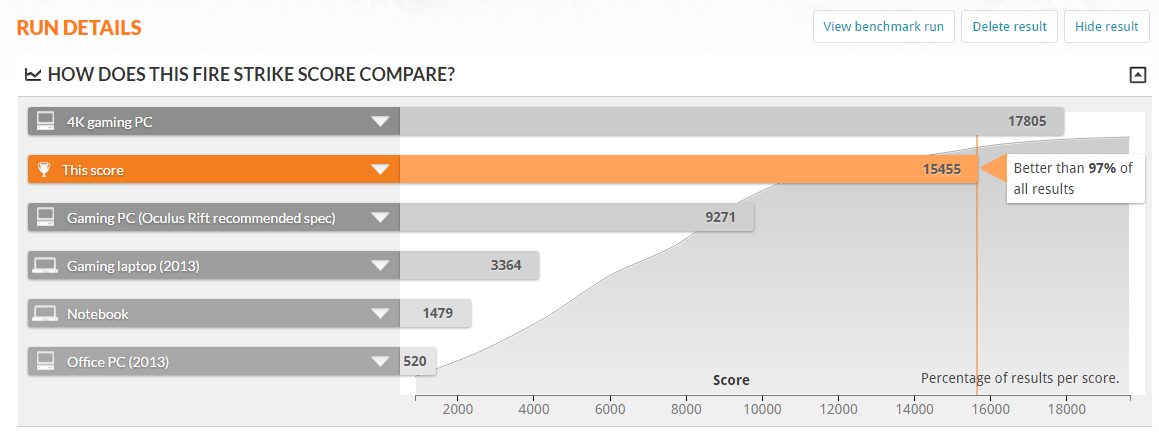
With the PC built, it was time to put it through its paces. 3DMark is helpfully available with a demo version on Steam. You can’t customize your run parameters in the demo version, but it’s more than capable of giving you results to compare a PC before and after an upgrade, or to see where your rig fits in the general community. Additionally, I ran both the Oculus readiness test and HTC Vive’s readiness test, which is a bit more involved than Oculus’ as it actually measures your system’s 3D performance for VR. Click any of the below for details, but I think the best result was the achievement on Fire Strike, “It’s over 9000!!!”


After a month of usage, I am exceptionally pleased with this PC’s performance. I’ve never owned a system this close to bleeding edge performance. I ran it through some heat tests, such as Prime95, and didn’t encounter any issues. That’s one of the things I like about chips you can overclock; they have sufficient spare performance to perform well even when stressed. I was also very pleasantly surprised by the Sound Blaster audio. I’ve gotten very used to onboard audio; long gone are the days where I would buy a separate sound card for my PC. Given that, I expected that the Sound Blaster solution built into this board was mostly for bragging rights. I was then shocked to hear an entirely new range of sounds in my games once I got playing, using the same headset from my previous rig. You can actually go much further with this motherboard and replace the op-amp if that’s your thing, but it sounds so good to me I can’t imagine needing more.
The only negative I experienced with the build was with the motherboard’s Killer Ethernet controller. As a gaming-focused board, Gigabyte opted to include the Killer E2400 network interface. While it’s touted to reduce ping times to improve your gaming, I instead found its drivers had a wicked memory leak, eating up all 32 GB of my RAM when I set a number of games to download overnight. Fortunately, this “feature” is redundant in that there is a highly reliable second network interface from Intel on board. I disabled the Killer interface and haven’t had an issue since. As ping times are far more likely to be affected by other devices on my home network, including video streaming, optimizing the traffic out of my PC wasn’t likely to result in significant gains anyway.
TL;DR Where’s the Video?
Building the PC took me about four hours, but you can have all the same fun in 44 seconds. Enjoy! If you have any questions on the build, drop them in the comments or hit me up on Twitter. See you in the metaverse!


When do you expect to receive your Vive? I built a VERY similar system a while back (though I opted for two GTX 970s in SLI, I think the 980 Ti was either not out yet or too cost prohibitive for me, and I read that two 970s > a single 980). When the VR system requirements were published, I was happy to see my system meets them (which was total coincidence, and not at all the result of sound planning). In any event, I’m VERY interested to hear your impressions on VR. I’m somewhat skeptical myself — it’s a combination of being prone to motion sickness, concern about having to stand up to play games, and just lots of questions about how it will work. By the way, I think your cable management was a great success! I have a similar case and mine’s not as clean looking from the front — I’m thinking I need to give it another go if I ever have the downtime. Who cares what the backside looks like!!!
Crazily, I received it *yesterday*. Setup took multiple attempts (there’s a lot of nuance to getting it “just right”) but It’s set up now and is completely slick; I have not noticed any dropped frames. I had two brief moments where it felt like, maybe it was a touch of motion sickness, but then they passed and I haven’t felt them since. I’m been motion sick before from first person shooters, so it wasn’t inconceivable that I could feel ill. I think that having control over the motion makes a big difference.
Check back on GeekDad for streaming info, but I plan to stream on Twitch, so you can ask me questions there. https://www.twitch.tv/geekdads/
Thanks for the compliments about the case! Hope to see you in a VR meetup.
Watch out for your PC builds, I got a bad first PC Build, I had to turn to experts in order to find the best one for my needs.
https://goo.gl/ZphNpS
Hey there!
I’ve got almost the exact same build as you and it runs pretty well but I get some hiccups when loading steam vr to play on the Vive I was wondering if you get the same thing? Like if I load The Lab, it runs smoothly except for some dropped frames during the loading, also the mouse will stop moving if I’m messing with it. I think its some kind of usb issue. I’ve tried different combinations and also the Inateck card. I’ve posted a screen grab that shows the spikes that cause the frame drops and am really interested if you are experiencing the same thing. And if so, how you fixed it! Any help is appreciated!
cheers
Seth
There were a ton of VR setups at ComicCon this year, and I was quite surprised with how in-depth they were. While I did not get to try all of them, I did try quite a few and I’m amazed with how quickly this technology has come around.
Hi Michael,
Thanks for the article.
I would like to know how do you use your soundblaster with HTC Vive.
Firstly, what is your soundblaster model? Z?
I presume that you force the soundblaster to process the gaming sounds (and effects you could use, like SBX PRO Studio, to give virtual surround to your headphones – especially good in non-vr games, like skyrim, that hasn´t directional audio). Then, using the NVIDIA HDMI OUT you passthrough it to VIVE HDMI IN.It is correct? Does it work?
game sounds + SBX surround and Equalizations PROCESSED by soundblaster —> Nvidia graphic card HDMI OUT (using NVIDIA HD audio codec) —-> VIVE HDMI IN —> <—– plug your headphones directly in HMD Vive. Correct?
There is some sort of quality decreasing resultant from that conversion? In other words, the HMD Vive audio codec downscales the soundblaster improvements and effects send via NVIDIA HDMI out?
It is a very, very complex question. Seems that, unfortunately, 99% Vive users rely on the crappy onboard audio from their mobos. Pity.
Thank you!
Excellent post. Iused to be checking continuously this
blog and I am inspired! Very helpful info specially the ultimate phase :
) I handle such info much. I used to be looking for this particular information for a very lonmg
time. Thanks and best of luck.
A Nice article
Its such as you read my mind! You seem to grasp a lot about this, sch as
you wrote the e-book in it or something. I think that you
simply could do with some percent to power the message home a bit, however other
than that, this is excellent blog. A great read. I will definitely be back.