
Want a custom t-shirt for a special event? Why not make your own?
This weekend we celebrated my son’s birthday. In all, eleven boys came over to shoot some hoops, ride Razor scooters on the driveway, play Magic, eat pizza and cake, whack pillows at each other, play Ghost in the Graveyard after dark, watch The Truman Show, catch a few z’s, then eat waffles before heading home at ten o’clock on Mother’s Day.
Birthday parties are supposed to have themes, right? I like themes. With a theme, I know what to put on a cake. When my eldest son turned twelve (or maybe it was eleven), he had a Hunger Games party. We met in the park and the kids each got a satchel with a juice box, granola bar, foam Chinese Ninja stars (they don’t get real weapons, of course), and Hunger Games pins. They ran around the park playing Hunger Games (a glorified version of tag they’d been playing during recess until some kid used it as an excuse to bully someone else). Or when my youngest turned nine and had a Sharknado party, where I served shark gummies and Bugles. Basically, their parties are an excuse for a bunch of kids to run amok. Plus cake.
But anyhow, for this party, I decided to make t-shirts for all the kids. One design, four different colored shirts (we originally planned to divide the kids into teams for activities, but that required way too much coordination and they were much happier just playing). The process was really rather simple, and didn’t take a ton of time, so I figured I’d share it here. Special thanks to my friend Sam, who generously shared her expertise and fielded my questions along the way.
Supplies
- design
- scissors / blade
- cutting mat
- T-shirts (duh) – on sale at Michael’s for 3/$9 or $10
- Fabric Paint (~$10)
- Screen printing frame with screen (~$18 for 10×14)
- Screen printing Fabric Squeegee (~$10-15)
- Contact paper
- cardboard
- foam sponge brush
- thin paintbrush
- washrag
Prep
Standard warnings: change into clothes that you don’t mind getting paint on. Work in a well-lit, well-ventilated area. Make sure you have all your supplies ready before you begin. Work near a sink. Clean up spills as they happen or you’re bound to step in paint and create an even bigger mess. Cover work surfaces. Tend to your kids before you start (or make sure someone else is around to tend to them) or they’ll interrupt you. Determine where you’re going to hang up your shirts to dry so that they’re undisturbed overnight (I don’t know if it really takes that long to dry; check your paint for exact times, but if you’re working ahead, just give yourself that time to be safe)
Designing
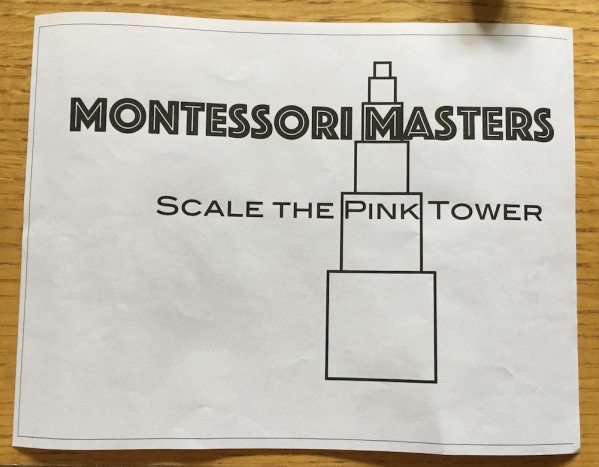
Start by coming up with a design. I came up with a number of different ideas, some lame and some not as lame, and created simple mockups in a Keynote presentation. I showed the designs to my kid and let him decide which one he liked.
- Printed out the chosen design (scaled to fit the entire sheet of paper)
- Cut a sheet of contact paper to be larger than the dimensions of your screen printing screen
- Lay a sheet of contact paper overtop the design (paper side up) and trace the design

- Cut out the design. Note: everything you cut out will be painted.
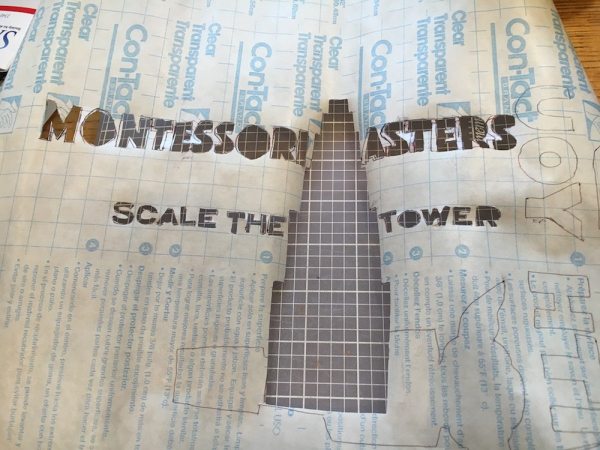

- Carefully peel off the backing and attach the contact paper to the bottom of the screen frame. Look at the image through the front of the frame; it should look like you want the shirt to look (not backwards, lined up properly).


Printing
Repeat these steps for as many shirts as you want to make.
- Stick the cardboard frame inside the shirt (to prevent the paint from soaking through and making the front stick to the back. Not that that’s ever happened to me. Nope. Never.)
- Lay the screen atop the shirt. Top to bottom: screen, contact paper, tshirt.

- Use the foam brush to scoop paint onto the screen, onto those areas that have been cut out

- Drag the squeegee across the screen several times to press the paint onto the shirt. Do this until the cutout areas are thoroughly and evenly coated with paint.


Note the dark spots, where paint isn’t thoroughly coating 
- Set aside the squeegee. Carefully lift the screen and set it aside.
- Pull the cardboard out of the shirt and set it aside. Set the shirt to dry.
- Wipe any residual paint off the cardboard, and observe the back of the screen to ensure no stray paint spread onto the contact paper. If so, wipe it off before printing another shirt.

Particulars
I took my time cutting out the design, switching between using scissors and a blade. The prep time thus depends on the intricacy of the design (and how long it takes to decide what you want your shirt to look like). The actual printing time, however, took less than an hour. Probably closer to thirty-five minutes (not sure exactly; I wasn’t checking a clock. And I did take extra stops to clean my hands and take pictures along the way). It also includes washing everything when I was done.
I know it’s possible to use this technique to print with multiple colors. Just let the paint dry thoroughly before starting with a second color. But as I’ve never tried it (worried about not lining up the images properly) I’m not discussing it here. Maybe next time I’ll actually start this project more than three days ahead and give it a try.
The screen looks black because I’ve used it before for another t-shirt. And no, no black paint transferred onto the design. I have plenty of paint left over, and because I didn’t transfer the image onto the screen in the traditional heat-transfer way (which I’m not entirely sure how to do), I can reuse the screen, which makes this method rather affordable.
As far as longevity, it’s pretty darn good. Shirts I made a few years back still look as good as new (unlike the iron-on designed ones). It’s more affordable than ordering custom-made t-shirts online, and doesn’t take very long.
If you’re just planning on making one t-shirt, I would suggest using Freezer Paper, cutting out the design as indicated above (ensuring the image looks like you want before painting), then ironing it onto the one shirt before painting, drying, then removing the freezer paper. The steps above may also work, but may be overkill considering the time required for cleaning up the screen and supplies.


This is such a clever idea for a kid’s party! I’m glad that all of the supplies can be found at a local craft or art supply store. I’ve seen the screens before but never thought to pick one up. This is a project I’ll definitely have to try. Thank you!
Very nice guide, thank you very much for the tips! I recently started learning about designing t-shirts and I found this awesome guide: http://www.coreldraw.com/en/pages/sell-t-shirts/ that helped me learn step by step, but I am a complete newbie, and I could use some tips and inspiration, and your guide helped a lot with that, thank you! 🙂
Hi Nivi,
Thank you for your great article.
But the problem I came up with always while planning for screen printing, actually I was planning for designing and producing t-shirts.
But always, I don’t get the accurate design on my shirts. I tried everything, avoided all the possible mistakes. But, failed to get the exact outcome.
What’s your suggestion? What are the mistakes may be I’m doing do you think?
Thank you for taking time to reply.