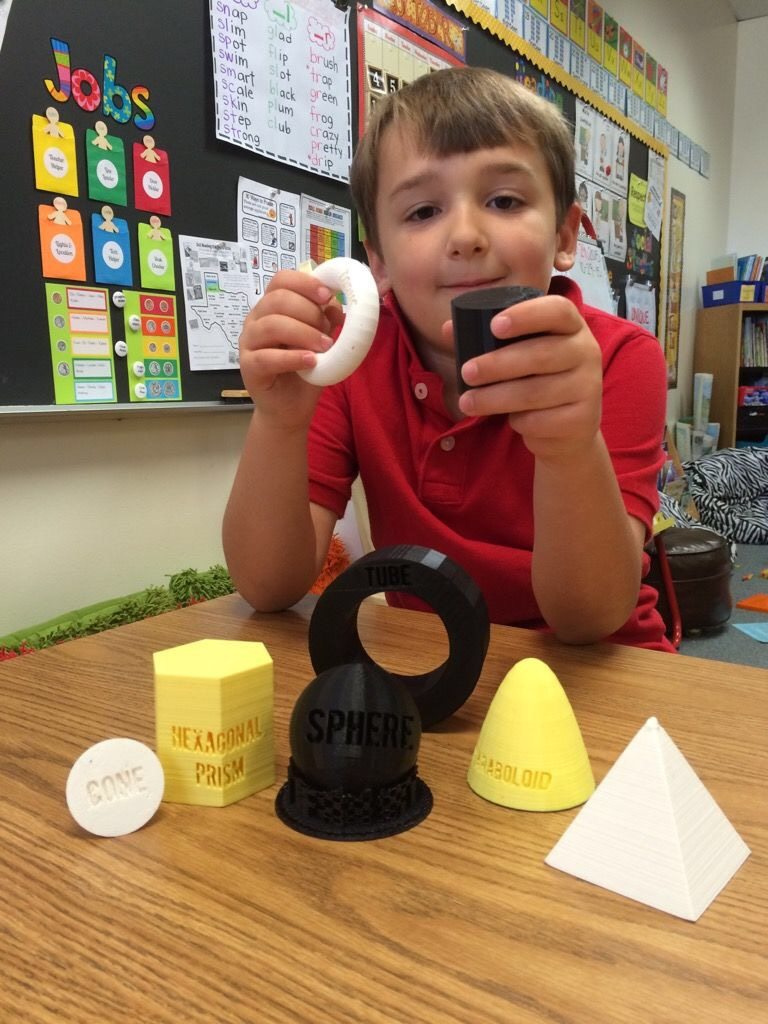
My 6-year-old’s first grade teacher gave all the parents a flier during orientation: “This year we will continue to identify shapes and polygons, such as a parallelogram and trapezoid, as well as some of the more common 3D shapes.” My 3D printer and I could definitely crank up the geek factor for this one!
Saturday Morning Geometry
Since I’m a big fan of finding ways to use our 3D printer to enhance his education, the wheels started turning in my brain. Sometimes learning at home doesn’t have to be complicated – just accessible – and this certainly fit the bill. After breakfast on Saturday morning we fired up the computer in the garage and looked at his list: cube, cylinder, cone, pyramid, sphere… all of these are native shapes in a popular (and very easy to use) platform called TinkerCAD.

I already had an account on Tinkercad.com, so once we were there we created a new object, pulled in a native shape, and imprinted custom text in the side of it. We did a different one each day that week. He loved waking up and finding the 3D printed shape he created on the screen the night before, waiting for him next to his lunch bag (or sometimes still stuck on the build plate of our Gigabot). For those without a 3D printer in their garage (yes, being a founder/advisor for re:3D has its privileges), publicly available 3D printers are now popping up in libraries and schools everywhere, as well as becoming much more affordable for purchase.
How to make 3D shapes with TinkerCAD
In a little more detail, here is the process for creating custom 3D shapes for your child to bring to school:
1. Login to TinkerCAD.com and drag a new shape from the sidebar.
2. Also drag from the sidebar a custom text shape.
3. Make this text a “hole” rather than a color, and replace the text with the name of the shape.
4. Combine the two objects.
5. Export as an .STL for 3D printing.
6. Follow your 3D printer’s instructions for sizing, slicing, and printing the shape.
For a lot more detail, I’ve created a video tutorial which sizes up the process of making 3D shapes in about 3 minutes. You’re also free to check out and download the end result of my tutorial if you’d like.
And that’s it! Interactive fun in the classroom, with hints of advanced technologies for him (and his teacher) to ask even more questions about!