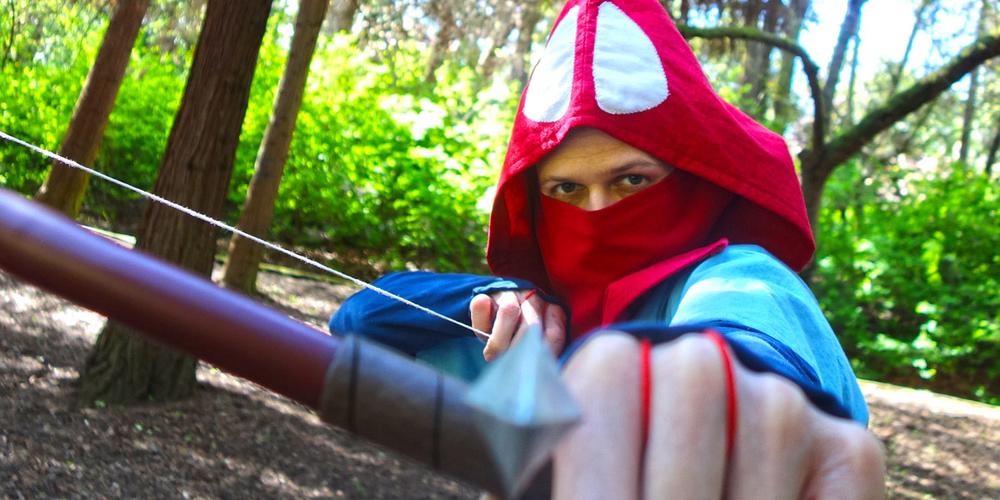
 I completed the version 1.0 of my Prince Ashitaka (from Princess Mononoke) cosplay just in time for Emerald City Comicon. I discussed it as several previous work-in-progress posts (here and here). Now that I’ve revealed the finished cosplay at ECCC, I’m sharing all of the final build details, some lessons learned, and what I have planned for Ashitaka 2.0!
As a quick refresher, I’ve been cosplaying for a couple of years, but all of my previous cosplay consisted of pretty minimal building–found items, modifying store bought props, etc.–and this year I wanted to scratch build everything. I’ve learned to sew, work with wood, work with clay, make molds and cast props, design and 3D print parts, along with getting more experience in areas I’d previously tried my hand at.
Sleeves
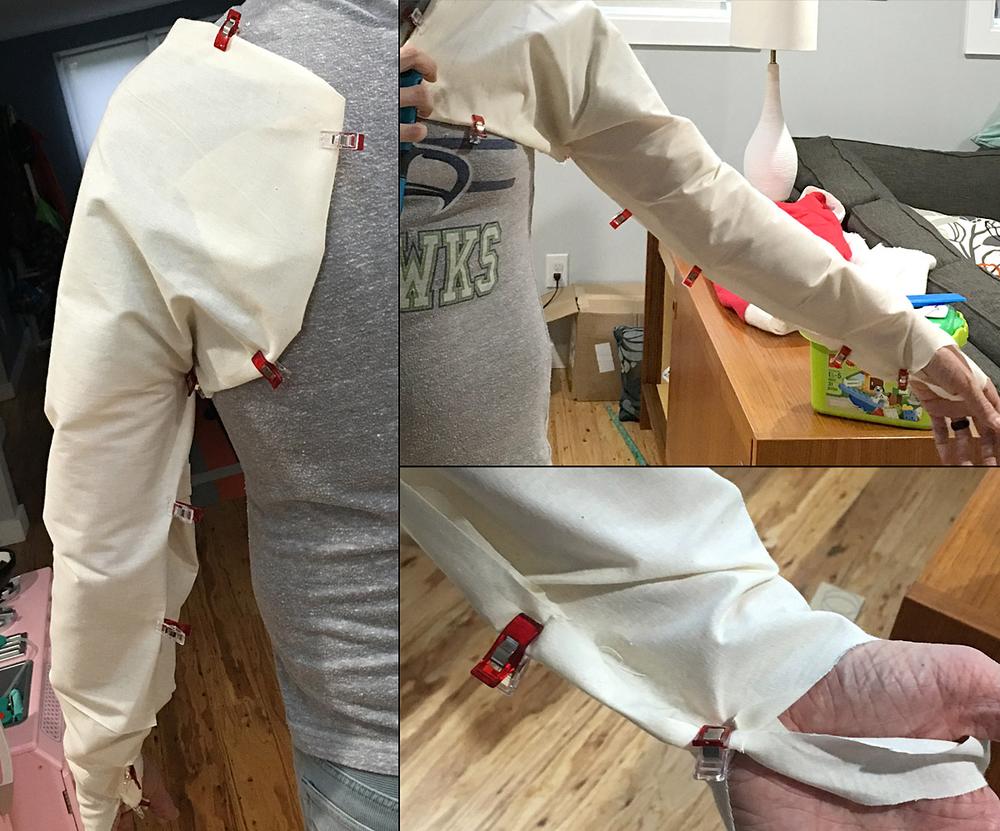
As with all of the other pieces of clothing for this costume, step one was to make a really rough prototype. I basically laid my arm on a piece of fabric and traced the basic shape. I cut it out and used my awesome wonder clips to clip it on to get the right fit. My wife assisted in trimming off excess fabric where needed.

Step two was then sewing the prototype sleeves and trying them on. Another round of nips and tucks were made to ensure a good fit.

Then, a real pattern was made. (Yes, this method uses a LOT of muslin.) Once I was happy with the pattern, I pinned it down and cut it from my fabric. This is always the scariest part for me because I attempt to order just enough fabric. If I make too many mistakes, I won’t have enough to finish!
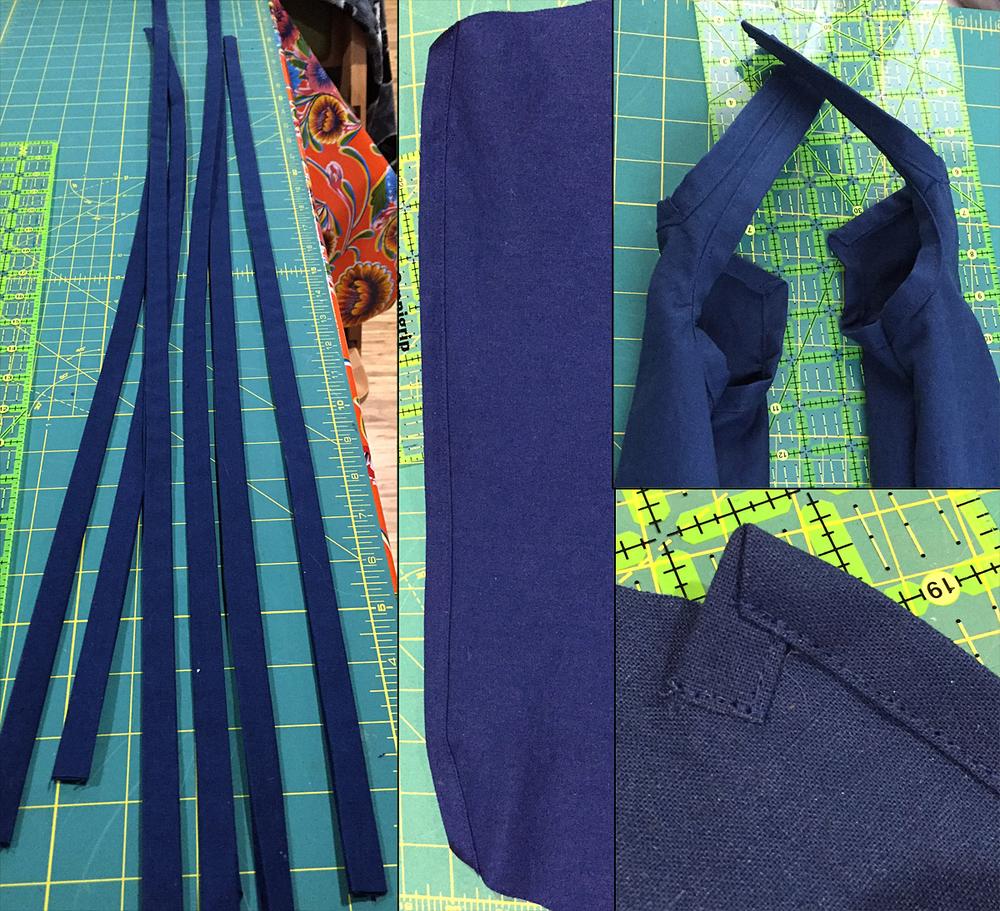
With the fabric all cut out, I again used my wonder clips to dry fit it and make sure it still fit properly. Then I started on the hardest part of the sleeves–the finish work. I cut several long strips from my remaining fabric and, employing a Clover bias tape maker, I made enough bias tape to trim out the edges of the sleeves and to make ties for tying the sleeves together. Until I started on these, I thought mitering was only something I’d ever do when putting up trim in the house. I watched too many videos on mitering bias tape for quilting to get miters on all of my corners (both inside and outside ones) around the arm holes, wrist guards, and thumb holes. It was hard work, but it definitely paid off. I am happiest with the sleeves of all the pieces of clothing I made.
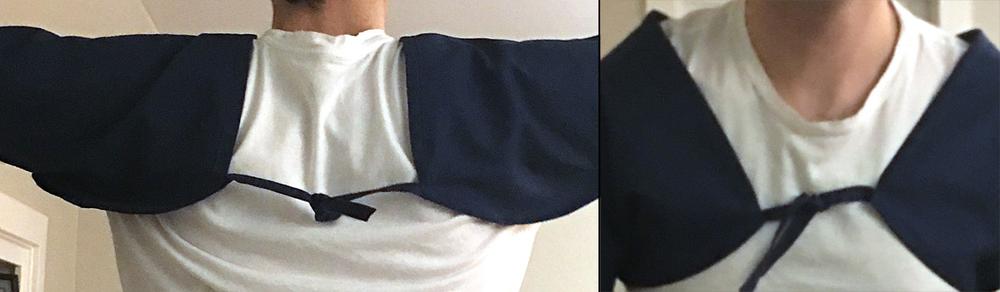
The sleeves tie in the front and back. I discovered that if I tied the back together first, I could then pull the sleeves on and tie the front myself.
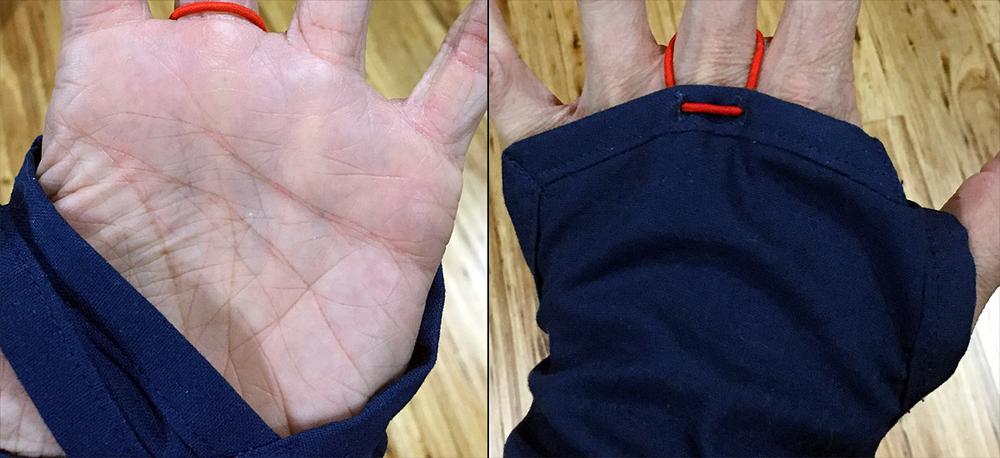
And the final touch on the sleeves was the finger loops. This piece is critical not only to the look, but to making sure the sleeves and hand pieces stay in place. I spent a lot of time and trial and error figuring out the best way to get a loop of elastic onto these, but they turned out really well. To make sure my trim didn’t tear, I made two button holes with an empty button holer on my sewing machine.
Crystal Dagger

Finishing the dagger involved some hemp rope, white glue, craft foam, a paint pen, and a whole lot of patience. I wrapped a length of rope around the hilt of the dagger and then glued down the backside. I needed it to look wrapped but without worry of it unraveling after wear. I then cut two strips of craft foam and hand painted the little arrows with a paint pen. I considered several ways I could stencil it but decided to go for a more organic look and just do it by hand. I’m genuinely happy with the way the dagger came out. I am considering making a mold of it (sans rope) and casting it with a more translucent resin, though. Any interest in a cast crystal dagger?
Sword and Sheath

I decided to go ahead and use my Dremel rotary tool with the cutting bit on it to rough cut the blade out of my board. Since I knew I’d be heavily sanding the edges to get the bevel anyway, it didn’t need to be perfect. I was actually pleasantly surprised by how nice an edge I was able to get with just my Dremel though.
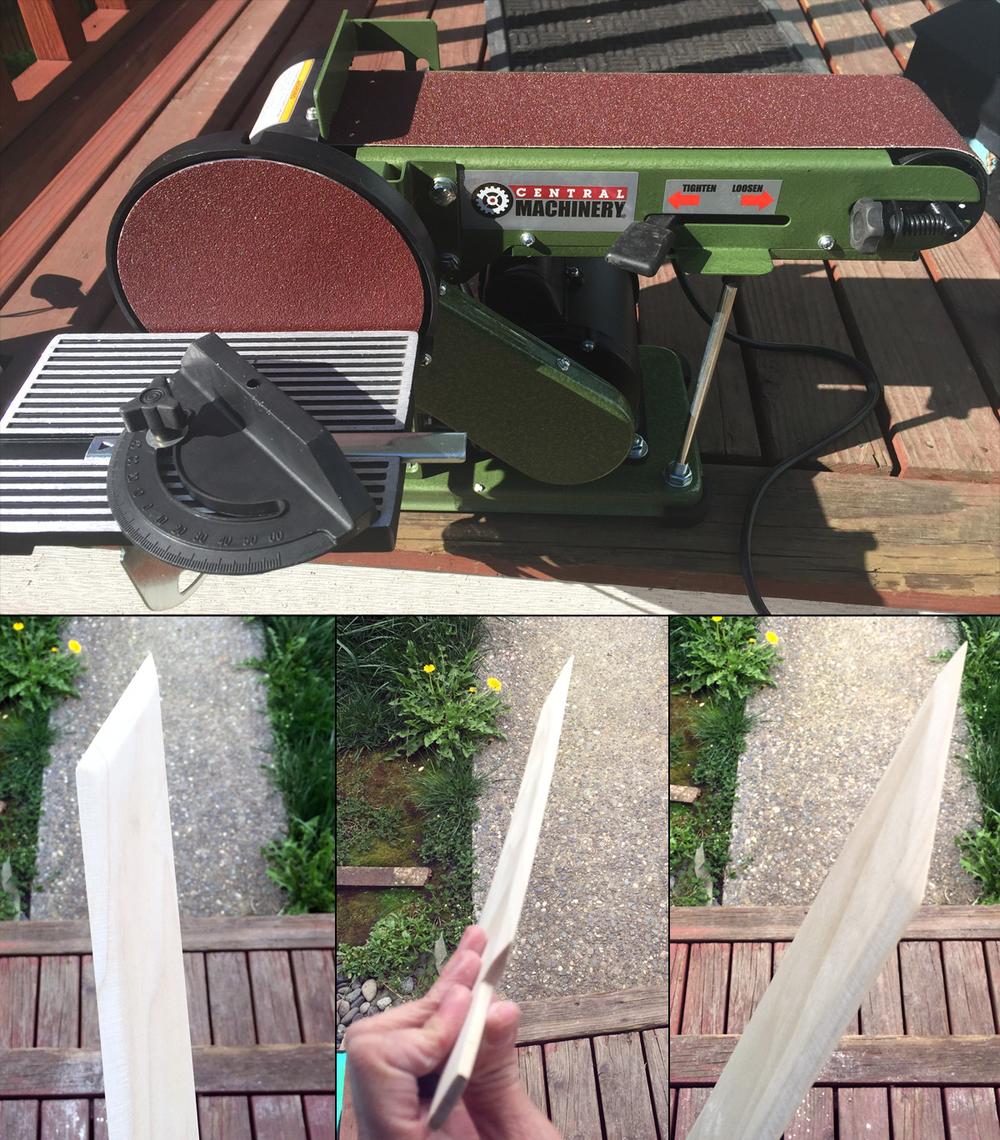
I decided to pony up and purchase my first cosplay power tool–a belt sander! A belt sander is highly recommended even for foamsmithing, and I can say that for the sword alone, I probably saved myself hours of hand sanding (which was my original plan). In about five or ten minutes, I had sanded my blade edge to exactly where I needed it using the belt sander. Thank you, Harbor Freight, for having an amazing sale right when I needed it most! I then employed some hand-held files to finish off the bottom edge and the tongue.
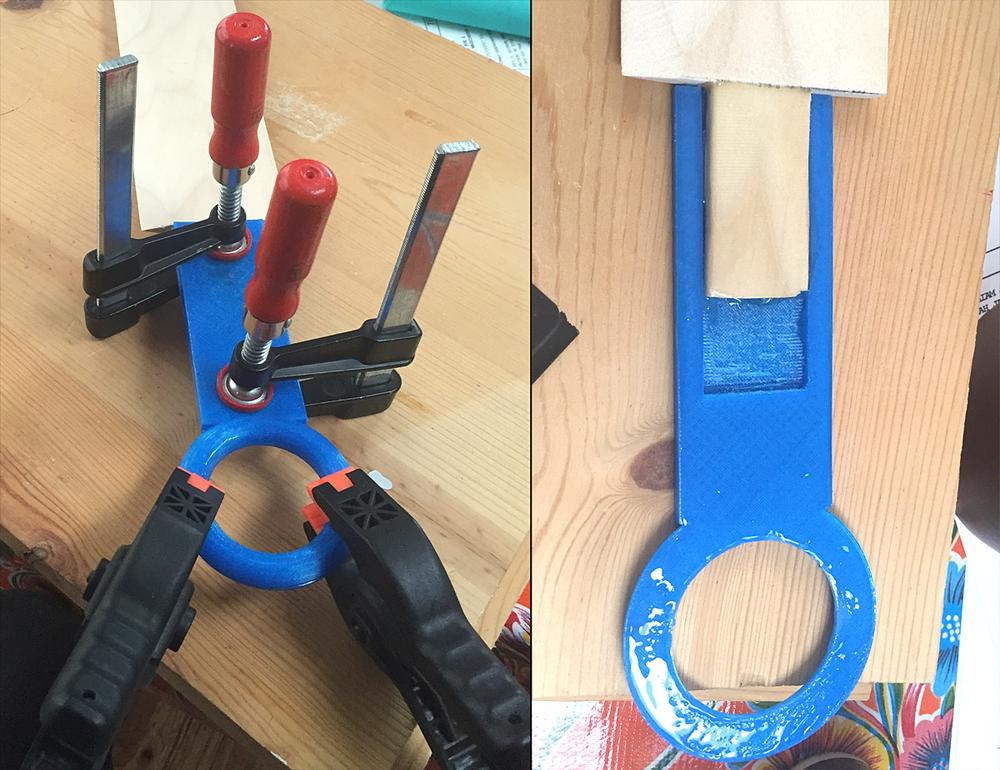
Once the blade was cut and beveled, it was time to add the hilt before getting into painting. After a quick refresher, I designed the hilt in Autodesk’s 123D Design and printed it out on my Dremel 3D Idea Builder. I used a standard five-minute epoxy to glue the hilt pieces to the tongue of my blade and to each other. I clamped it all together really well and let it sit overnight–you really can’t ever let anything dry too much.

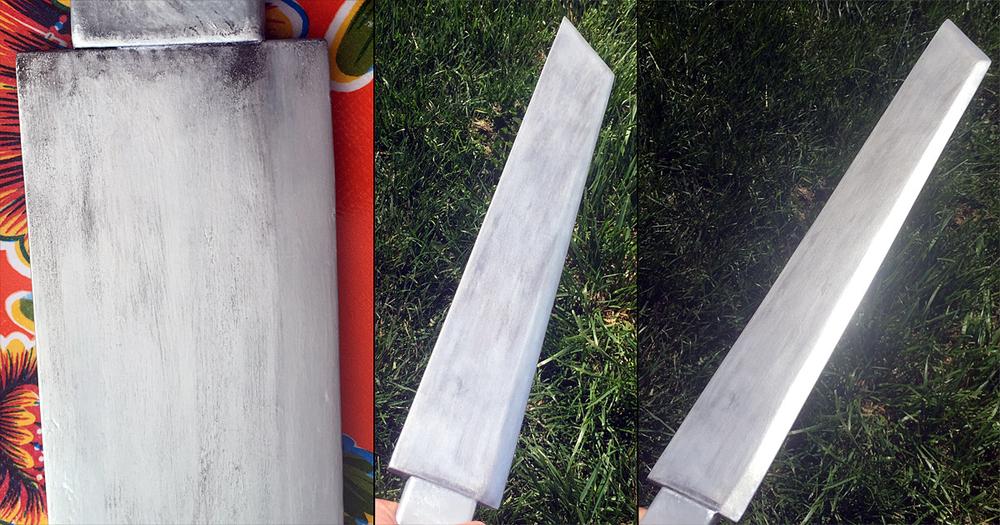
With the sword all assembled, I began the very repetitive and painstaking process of sanding and painting and sanding. To get wood to look like metal, you must get rid of even the tiniest bit of wood grain. I used Rust-oleum Filler Primer for all of my base coats. This stuff is like magic–you spray it on and not only does it prime your piece, but it actually fills in small gaps. Once the paint was dry, I wet sanded it with 220 grit sandpaper. Wet sanding is the way to go, by the way–less mess and a better finish. Once it was dry from my sanding, I sprayed another coat and repeated the process about seven or eight times. Not only did this get rid of my wood grain and give it a nice finish, but it performed the same way for my 3D-printed hilt, making it look and feel completely smooth.
I used two whole cans for the sword and hilt. Depending on your piece and desired finish you may not need to be as obsessive about it as I was, but I learned you can never sand too much from my buddy Eric Jones at CoreGeek Cosplay (seriously, he loves to sand). Once I was happy with my base finish, I sprayed a couple of coats of metallic paint–silver for the blade and gold for the ring on the hilt.

Although metallic spray paint provides an adequate metal look, the best way to achieve a realistic metallic finish is with metal! Both DecoArt and Rub’n Buff make metallic waxes. These wax pastes contain a little bit of metallic content and can be rubbed on to almost any surface and then buffed to a metallic sheen. I used the DecoArt Silver Spark Metallic Lustre Wax (recommended to me by Melodywise Cosplay) for the blade and the Gold Leaf from this nifty Rub ‘n Buff sampler pack for the hilt ring. I tried applying it several ways–with my finger with gloves on, with a rag, and with a bare finger. The bare finger method seemed to work best but on a piece as big as this, my hands were a mess by the end!
So with my sword looking all shiny and metallic, I needed to weather it to make it look more realistic. I utilized a combination of the ebony Rub’n Buff and the acrylic paint technique from Bill Doran’s new book (Foamsmith 2: How to Forge Foam Weapons–yes, his techniques apply to materials other than just foam).

The last, and possibly most important, part of the sword (important only because it’s the most visible part when wearing the costume) was the hilt wrap. I originally planned to use craft foam like I did on the bow grip, but I didn’t like the way it looked on the sword. I then had the idea to use fabric instead. I did a quick test by wrapping a folded piece of fabric around the hilt and loved how it looked. I used one of our Clover bias tape makers to make a long strip and then sewed it down. Unfortunately, when I attempted to wrap it (the first photo above), it did a lot of weird bunching things because I was overlapping each turn. When I tried just making each turn butt up against the previous, it looked much better, but my strip was much too wide for that. I ended up ripping the seam out of the entire strip (it was about three feet long), cutting it down, and making a much thinner strip. I glued the strip down as I went so it would align as perfectly as possible and not move. Although Ashitaka’s hilt wrap doesn’t go around the ring, I liked the way it looked while providing a nice finish to the wrap.

And here is the finished sword. I consider this my first finished prop weapon, and I am extremely happy with how it came out. I’m thinking about the possibility of molding and casting this as well. Higher, further, faster, more.
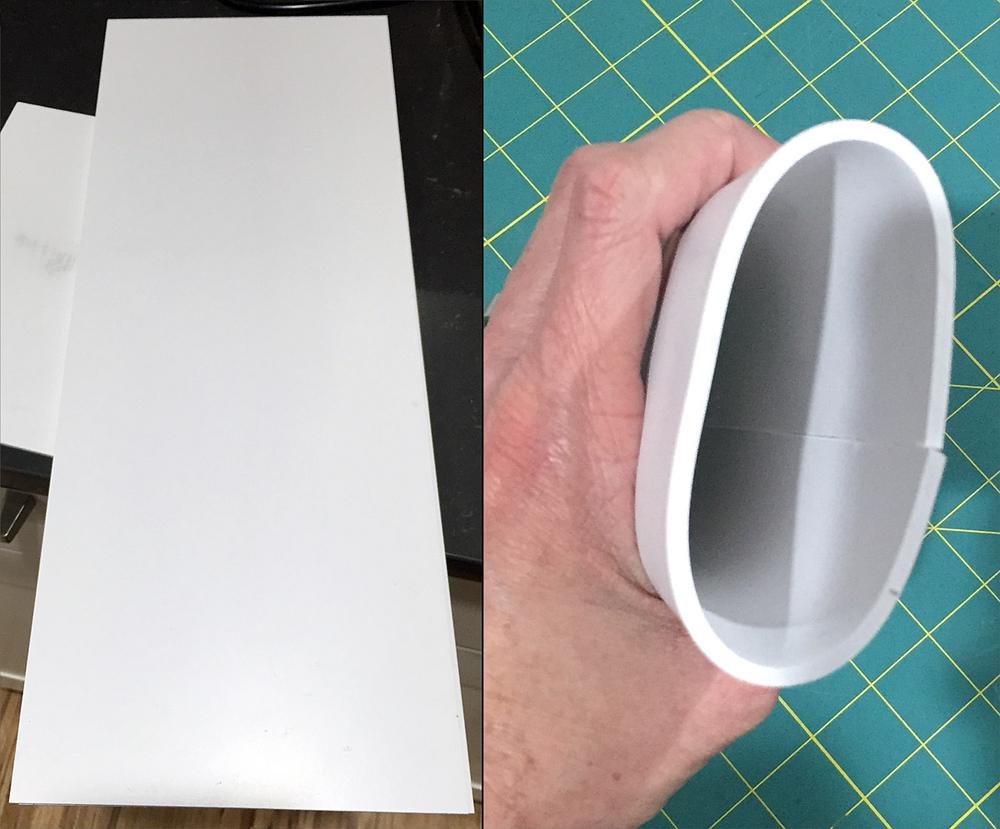
No sword is complete without a sheath to carry it in. I racked my brain for a long time trying to think of what to make the sword sheath out of. Thankfully, when I attended Wizard World Portland, I attended a great panel about making armor utilizing PVC foam board. I headed to the local plastic shop and grabbed myself a couple of sheets of it. After some trial and error and watching a lot of online videos, I finally wrangled the board into my desired shape. For working with a big sheet like this, instead of trying to use the heat gun, I placed the whole thing into the oven–220° F for five minutes. It makes the board very pliable but very hot, so make sure you are wearing decently thick gloves. For every five minutes in the oven, you only get about 30 seconds of working time until the board cools enough to be stiff again. It took me many hours, but I was very happy with the end result.

I then wanted to give the sheath a real leather look instead of just painting directly onto the PVC. I took a sheet of my faux suede and made a big fold-over seam along one edge and a nice finished seam on the other edge. I also sewed a lip of faux sherpa fur to the top side to hold into the sheath to keep my sword from scuffing. I slid the big fold-over seam into the slit between the two edges of the PVC, which kept the fabric in place snugly. I then sprayed the PVC with spray adhesive and pulled the fabric taut around the entire PVC sheath. I cut a hunk of 6 mm foam to fit into the base of the sheath, which served two purposes–it held down the loose bottom edge of the fabric and provided a nice cushion for my sword tip inside the sheath. I then covered it and the bottom of the sheath with 2mm craft foam. I also coated the fabric in a layer of Elmer’s Paper Maché Art Paste. This gave the fabric a little extra stiffness and protection without modifying the look much.

To finish the craft foam cap, I filled in the gap on the backside with some Kwik Seal. This stuff is great for filling gaps and errors in foam. I then painted the cap with PlastiDip to seal the foam. Then I hit it with a few coats of the aforementioned Filler Primer to make it as smooth as possible.

To finish it off, I painted the cap with a nice orange/rust spray paint. Lastly, I sewed a couple of loops into a length of braided cotton rope and glued it down to the sheath. The sword fit perfectly and the sheath looked great while carrying my sword safely.
Quiver, Arrows, and Bow
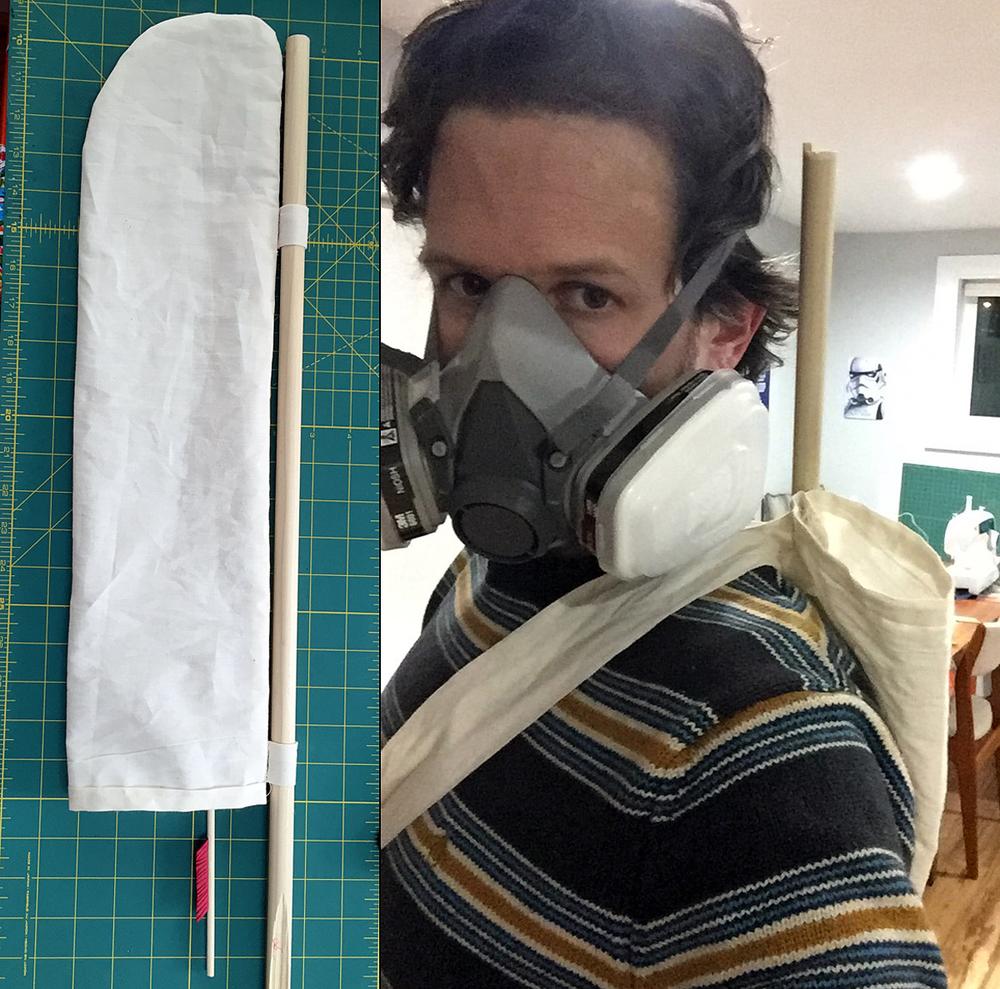
Apologies again for not having more in-progress photos, but sometimes when you’re on a roll, it’s easy to forget and stop for photo ops. And, yes, I am wearing my respirator. It’s probably the most important tool you should own if you’re doing painting, foamsmithing, and woodworking like this. I had it on because I was multitasking and sanding and painting something at the same time. Once again, I started with a muslin prototype to test out the overall fit and shape. I even did a test fit for the backing rod to get them just snug enough but not too snug, and then also did a test strap.
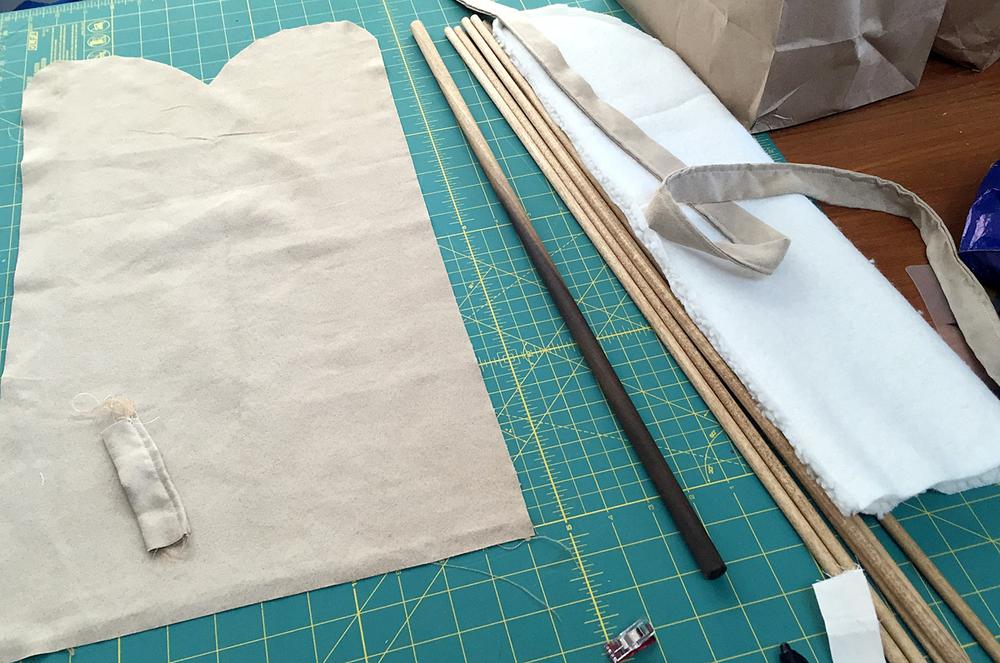
Once I was happy with that, I cut the pieces out of my final fabric. In addition to using a faux suede for the outside layer, I also used some leftover faux sherpa fur from my shoes to line the inside of the quiver. We never see the inside of the quiver in the movie, but I felt this added some realism to the quiver while also keeping my arrows from getting too banged around.

The trickiest thing about Ashitaka’s quiver is that it goes from hip quiver to back quiver throughout the movie, but how it’s rendered and held on in each of those positions is fairly inconsistent. It took a little bit of designing before I figured out how I could build the quiver and attach the strap to not only serve both purposes but to be relatively easy to do the conversion while walking around a convention. The strap is permanently attached at the top loop and by wrapping the strap around the bottom of the backing rod, it quickly converts to a back quiver. The bottom loop prevents the strap from slipping up.
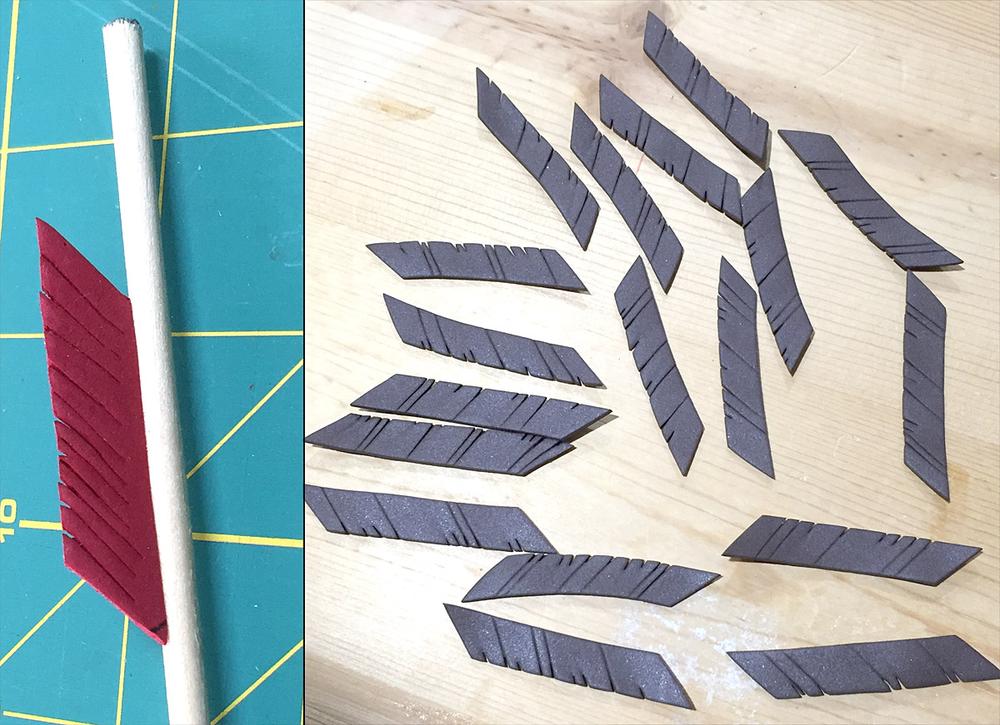
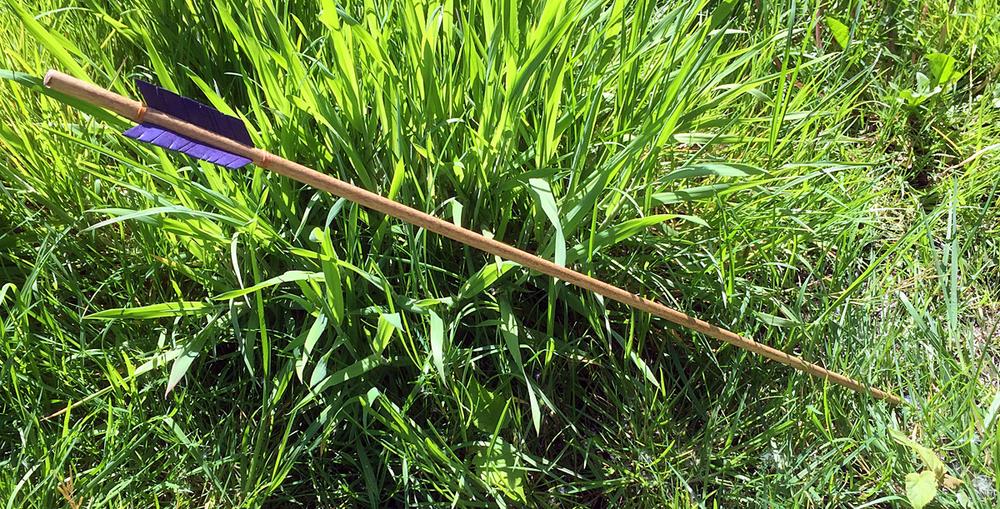
I decided to hand-make the feathers for my arrows out of 2mm craft foam. My first attempt at cutting realistic feathers was okay, but I wasn’t happy with it so I started over and tried to make the cuts more organic looking. I alternated the scoring on each side of the feather, only cutting all the way through at the very tip of each score. I then hit the feathers with my heat gun. Using a heat gun on scored foam will cause the lines to pop, which, in this case, gave it that split feather look along the top.

At the same time, I cut the dowels for the arrows and stained them to make them look more natural. I then used my Barge cement to glue the feathers to the shafts. Once they were dry, I cut pieces of excess kite string and, using white glue, wrapped and glued them down to the shafts above and below the feathers. I then mixed up some purplish paint (I don’t know where purple feathers come from, but that’s what color they are in the movie) and painted the feathers. Once I had a good coat of purple on each one, I then added some white paint to lighten it a little and then brushed on some highlights to make them look more realistic.
If you want to know more about how I made the arrowheads, they were my first foray into mold making and casting so I wrote an entire article just on that. Thank you, Smooth-On!

So my first bow attempt, made of wooden dowels, was a failure. I tried to bend it, not even very much, and it broke in two. After doing some research online, I decided to instead try a length of bamboo. While it worked much better than the dowel, it still snapped before bending enough to get a string on it. After doing a lot of research into homemade bows, I opted to try out using a piece of PVC pipe.

The trickiest part of using a pipe was that I wanted the ends to taper like Ashitaka’s because it’s supposed to look like it’s made from a piece of wood. I cut a triangle-shaped piece from each end of the pipe. Then, using my heat gun, melted the plastic enough to be pliable and folded it over until it had a tapered, hewn look. Any time you are heating a plastic material, you should be wearing a respirator and have plenty of ventilation as it will off-gas. Though not pictured, once I had the ends as close to perfect as possible, I puttied and sanded it down to eliminate any gaps.

For con safety and because I didn’t need it to have any significant draw weight, I also heated and bent the entire length of the pipe so that there is just enough give in the bow that I can pull the string and have it look realistic.

Apologies again for not having more intermediate steps but after I had the PVC shaped, I gave the entire thing a light sanding for better paint adherence, primed it, and then coated it with a matte spray paint that was the color I wanted. I then cut a strip of 2mm craft foam and glued it to the bow with Barge to make the grip. Once it was glued down, I hit it with the heat gun to give it a more worn leather look. Again, using the technique I learned from Bill Doran’s prop-making book, I weathered the bow and grip to make it look a bit more realistic (this photo is from before I did the weathering). I then coated the whole thing with a matte clear coat to help protect it from scuffs and dings.
And of course, despite the bow not being intended to shoot an arrow, I had to at least try it. My wimpy bow combined with really heavy arrows (I made the arrowheads very chunky and stylized) was still able to reach about 25 feet! And the arrow stuck the landing!
Pouch
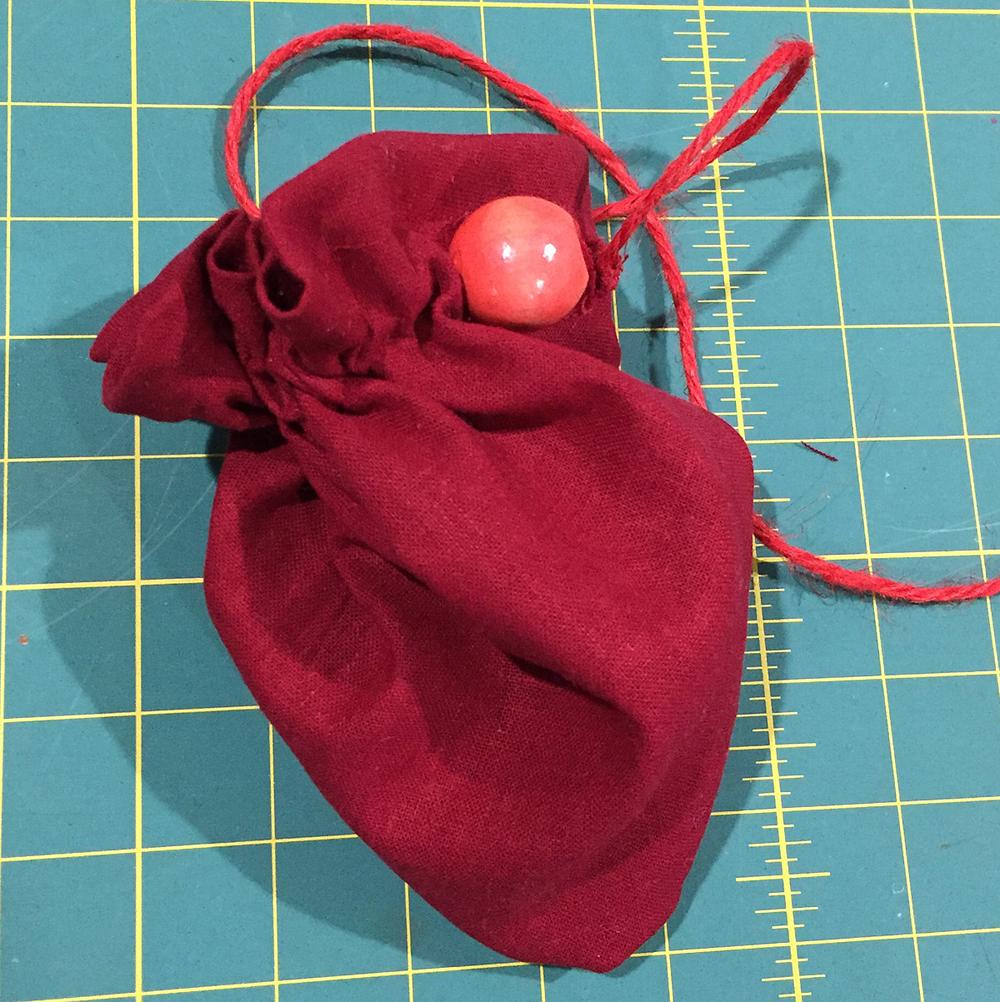
Ashitaka’s signature red pouch was one of the easiest parts of the costume. I apologize for not having any work-in-progress pictures but I essentially took a square of leftover fabric, hemmed all the edges into an octagon shape, made a couple of buttonholes to reinforce where the rope would feed through and hang, fed a length of red hemp rope through the holes, and then glued on a wooden bead. It was the perfect way to carry my driver’s license, a credit card, some cash, my cellphone, and my house keys while blending in perfectly with the cosplay.
Raincoat

Ashitaka has a raincoat that is very reminiscent of some very old Japanese, bamboo-thatch raincoats I found while doing some online research. I did a little research and found a roll of bamboo thatch used primarily for tiki-style decor. Cut in half and then reassembled, it was the perfect dimensions to make my own raincoat. Cutting the thatch and ensuring it didn’t fall apart was tricky, but not quite as difficult as I’d expected. I used some raffia ribbon to tie off all the cut ends and to tie the two halves of the roll into a single longer piece. I then shaped the edges to make it taper towards the top. While I was fairly happy with how it turned out, my biggest mistake was not trying it on with the rest of my cosplay as I was making it. Although it fit fine when I was all done, it just didn’t work at all over my cosplay with all of my accessories.
Kodama

And of course the part most people cared about–my son and his kodama cosplay. Due to my own time constraints, my wife made my son’s costume. She used the same pattern she used for his Halloween dinosaur costume minus the tail and horns and put some felt eyes on the hood. Inside the big eyes, I put a handful of googly eyes to get the signature kodama clicking noise when he shook his head. I love the way it turned out and people loved seeing a cute little kodama with Ashitaka.
Emerald City Comicon

Wearing my finished cosplay to ECCC was such a blast. I also wanted to try to commit to the character and his story arc so I actually did a daily progression. I had grown my hair out for many, many months just for this cosplay, but I fell slightly short of being able to actually make myself a bun. With the help of a faux man bun and some gel, I was able to recreate the look from the beginning of the film. So for Thursday, I had my hair up and in a bun and had no curse on my arm, just like at the beginning of the film. Bright and early on Friday morning, I chopped my hair off with a little help from my wife. My hair is naturally pretty wavy as well so, for the first time in my life, we straightened my hair.

For the curse on my arm (and later chest, and neck), I used Mehron Paradise Face and Body Paint plus Mehron barrier spray to fix and seal it. I was pretty happy with the staying power of this stuff even being under my clothes and on my hand, which obviously gets a lot of use. It will wash right off with soap and water though, so there was a lot of doing things with only one hand!


My wife, my son, and I did a little photo shoot before our first day at the con. I added a couple of quick Photoshop effects to a couple of the shots just for fun, but all in all, I’m really happy with how it turned out.
Lessons Learned
Lessons learned for next time:
- Better belt! The belt I made was just fabric, which worked perfectly well for keeping my kimono closed but sucked at carrying the weight of my sword and pouch full of stuff.
- Hood opening. While the hood worked fine, it was the first piece I made and after spending a lot more time with reference photos, I realized the hood opening wasn’t the right shape. I’ll need to fix that.
- Secure the hood. I hadn’t thought of this beforehand as I’d only tried on my costume in the house, but when I stepped outside or tried to run or cross a street, basically anything that caused a slight air disturbance, my hood threatened to fly away.
- Shorten the bow. I was very careful to make everything to the right scale as best I could from multiple references, but because I’m much taller than Ashitaka, this ended up meaning my bow was just too damn big to carry around a crowded convention without constantly bumping people with it.
- Tighter leggings. Although I made elastic straps for the top of my leggings, my initial attempt at making straps for my ankles failed. I couldn’t make them tight enough to hold down the leggings but also big enough to get over my foot. I was trying to avoid using snaps or velcro or anything that would not be realistic for the character but it meant that my leggings would creep up a little throughout the day and look bunchy. I’ll definitely need to solve this before next time.
- Embrace the character. This is probably the biggest lesson I learned. Part of my failure here was due to some of the above mentioned costume failures I need to fix, but also partly due to my normally shy and introverted nature. Now that I’ve spent several days dressed as Ashitaka, I think next time I’ll focus more on being Ashitaka.
Ashitaka 2.0
So in addition to fixing the above mentioned things, here are a handful of things I didn’t do in version 1.0 that I want to do before my next con.
- Fur pants. For a large part of the beginning of the movie, Ashitaka is wearing fur riding pants. I painstakingly agonized over and chose fur for making these but just ran out of time to make them before ECCC.
- Rain coat. Since my first attempt at the rain coat failed, I want to get it done for the next convention.
- Bow breakdown. Since I’m planning to remake the bow smaller, I want to also make it break down into two pieces. Since my next con likely won’t be local, this is going to be critical for me to travel with the bow anyway.
- Special Effects. This is the lowest on my list of priorities, but, assuming I can get everything else done, I do want to try my hand at some special effects. I have a couple of different ideas at how I can create a real life version of the glowing “worms” on Ashitaka’s arm, but I’ve never worked with electronics and LEDs so this will be quite the adventure when I get to it (and you’ll get to read all about it).
Cosplanner Summary
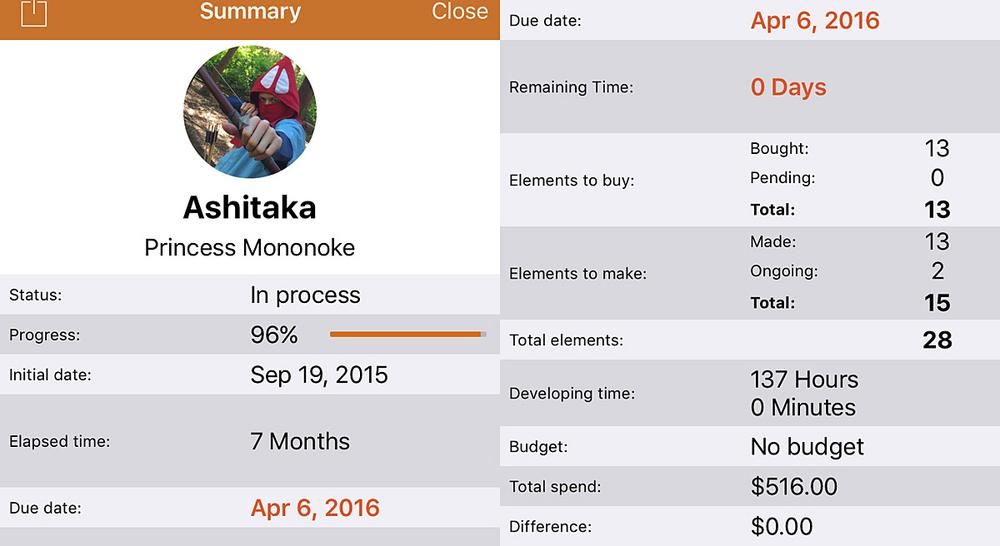
I previously wrote about Cosplanner, the app that helps you plan and manage your cosplay. One of the features of the app is a summary page. Above is the summary of Ashitaka as of ECCC. Obviously with the changes and additions both my time and expenses will go up a little bit more. It’s hard to imagine I spent 137 hours and $500 building this costume, but it was worth every second and penny.
I hope you’ve enjoyed reading about my journey with this cosplay and maybe picked up a trick or two along the way. This was truly a labor of love for me, and I was thrilled at the end result despite some of the things I’m not totally content with. I think if I thought it was all perfect, I’d not be cut out to be a cosplayer! I’d love to see and hear about your own adventures in cosplay. I’m going to try to wear this to SDCC, DragonCon, Rose City, and GeekGirlCon, so if you’re going to do any Princess Mononoke cosplay at any of these cons, let me know. I love taking photos with and meeting other cosplayers!


This is fantastic! How did you make the shoes? Did you make a cover to put over shoes or did you actually make shoes?
Thanks! I actually made them! I basically made slip on cloth shoes and then bought some thin rubber soles that I glued and stitched onto the bottom.
actually if you dont mid do you still have the patter for the sleeves and hood? I have been searching everywhere.
I have as well it would be vary appreciated if you could send the specs for the sleeve pattern