 My son, who is a huge Star Wars fan, recently turned three. His birthday party was, of course, Star Wars-themed and we wanted an appropriate piñata for the kids. We didn’t like any commercial ones we looked at so decided to make our own.
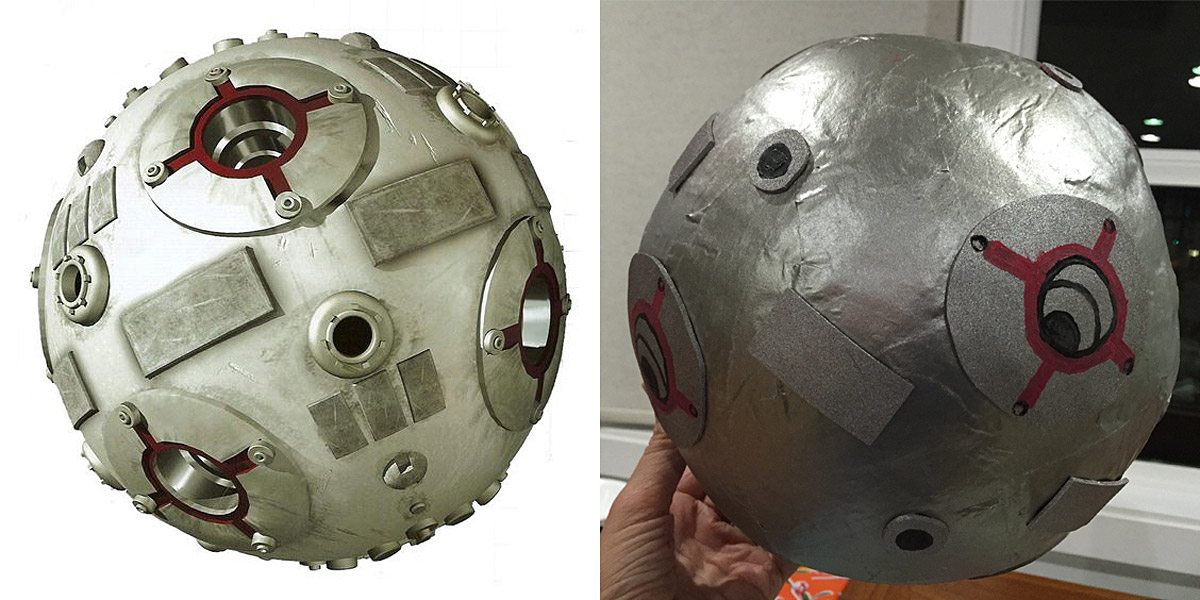
We started out with the intention of making a Death Star piñata, but decided beating the Death Star with a stick made little sense. However, fighting a training droid with a lightsaber (a la Luke Skywalker in A New Hope) would be perfect!
If you have never made a piñata, especially a spherical one, it’s actually really easy and relatively cheap too!
Supplies needed:
- One Cheap beach ball
- Elmer’s Paper Maché Art Paste
- Some newspaper (I grabbed a free local paper)
- Optional: Some craft foam for the raised details (You’ll use very little but I have a stack of this stuff because it comes in handy ALL the time.)
- Metallic Paint (I like Rust-oleum Universal Spray Paint & Primer in one)
- Some markers or paint pens for the detail work (I have a huge array of Sharpie markers I break out for almost all of my crafts.)
- Some string or twine for hanging the piñata
- A paperclip
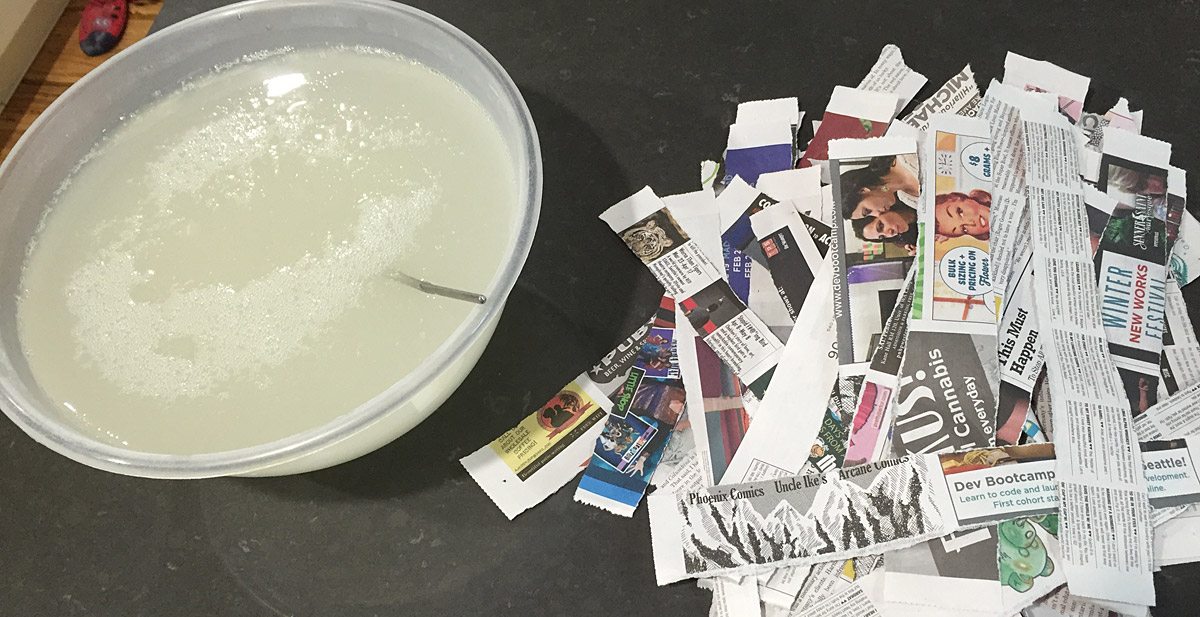
First, you’ll want to rip your newspaper into strips. I made mine about an inch or so wide. Then mix up your art paste in a bowl. I highly recommend something with a lid. Ours has kept for almost a month now and been used on several projects. You won’t use much for this little piñata so think about other projects you might also want to use it for! Lastly, blow up your beach ball, and you’re ready to start.
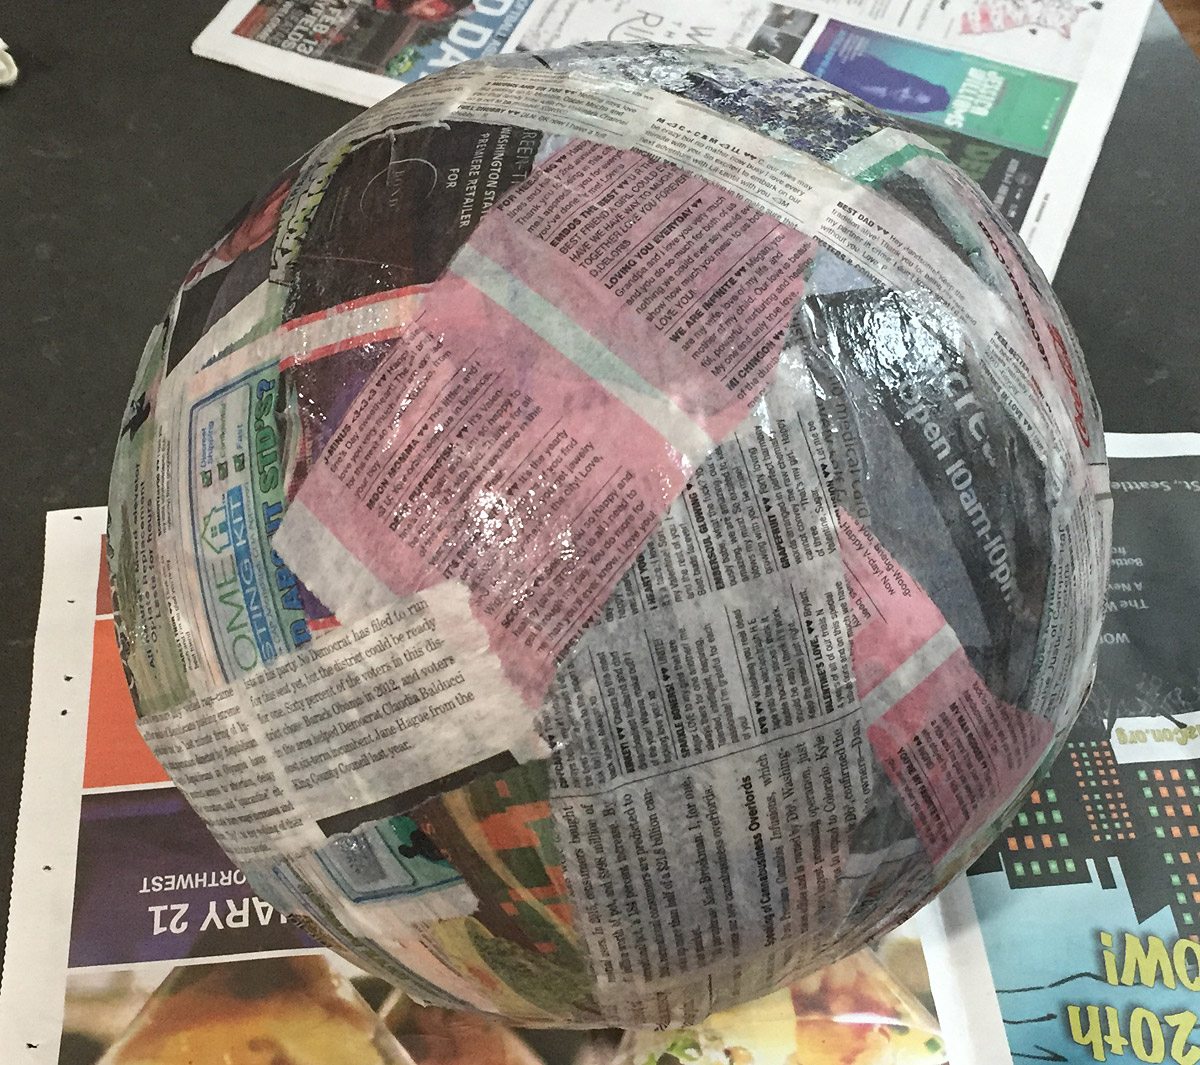
If you’ve never done paper maché, it’s really easy, but you will get messy. You want to rub some of the paste on the ball, stick a strip of newspaper to it and make sure it’s nice and saturated. Then just continue doing that, laying strips side by side and all around the ball until you have a nice single-layer of goopy newspaper strips stuck to your ball. Then, let it dry. You’ll want to do a couple of layers, overlapping in alternating directions to add strength to the form.
One thing to keep in mind is that the more layers you do, the sturdier the piñata will be. Depending on the age and strength of kids whacking it and the weight of the goodies you’re putting into it, you’ll want to adjust the number of layers appropriately. I did about three layers myself for a small group of two and three-year-olds.

Once the final layer of paper maché is dry, you will need to cut out the hole for filling piñata. This will also pierce the beach ball inside. Once you have your hole, pull the beach ball carcass out. Now you’re ready for painting or adding the raised details. I initially had planned to just draw all the details on the flat ball, but we decided to make it a little more realistic by cutting out some of the raised details from craft foam and gluing those on. Once that is done, spray the entire thing with your metallic paint. Once that is dry, you’re ready for the finer detail work with your pens.

The last thing you’ll want to do is to install a hanger. After a little trial and error with various methods, I ended up just using a large paperclip. I straightened it out, bent two small hooks at the ends, and punched it through the top of the piñata on either side of the opening. I then tied my string to the paperclip, poked a hole in my “lid,” and fed it through. It didn’t make a perfect seal but, since it was on the very top of the piñata, it wasn’t very visible anyway (from the kid’s vantage point, at least).

Once the piñata was all done, we filled it with a combination of candy (Dum Dums), healthy snacks (raisins), and toys–a combination of some smaller things like Star Wars tattoos and rings and one nicer toy (Galactic Heroes) for each kid. We opted for these really nice Star Wars goodie bags for the kids to collect their loot in. They are harder plastic and really durable (my son still has two that he uses for toting his toys everywhere we go).

Because the kids were all under four years old, we didn’t blindfold them (according to Disneyland you have to be four or older to start your Jedi training anyway). We just handed them an old plastic lightsaber and let them go to town. As I mentioned, I did about three layers of paper maché and every kid got to take two turns of two swings each before we even had a decent crack in it. Then we let Reina, who turned out to be our surprise slugger, finish it off with a couple of good final cracks (the lightsaber gave out a bit before the piñata did). The kids spent the rest of the party eating raisins and putting on tattoos until it was cake time. Not a bad result at all.

While the piñata wasn’t quite as elaborate as the punch out robot I made for last year’s party, all of the kids had a blast. I think the fact that all of the kids were older and everyone knew what a lightsaber was helped quite a lot too. I love living in an age when all two- and three-year-olds know Star Wars this well! If you make (or have already made) your own Star Wars-themed piñata, share it with us!


