In last week’s GeekDad Paints I eased myself into the morass of unpainted minis in Imperial Assault with the decidedly monochrome Royal Guards. I went for a bit more of a challenge this week and tackled the Imperial Officers, a mini that has skin tones and the most dreaded of all painting details: eyeballs.
I started off with a base coat of Army Painter Uniform Gray. Yes, I know the minis are already gray, but Army Painter paints are made to work best when used in conjunction with one another. That base spray of gray gives subsequent layers something to grab onto.
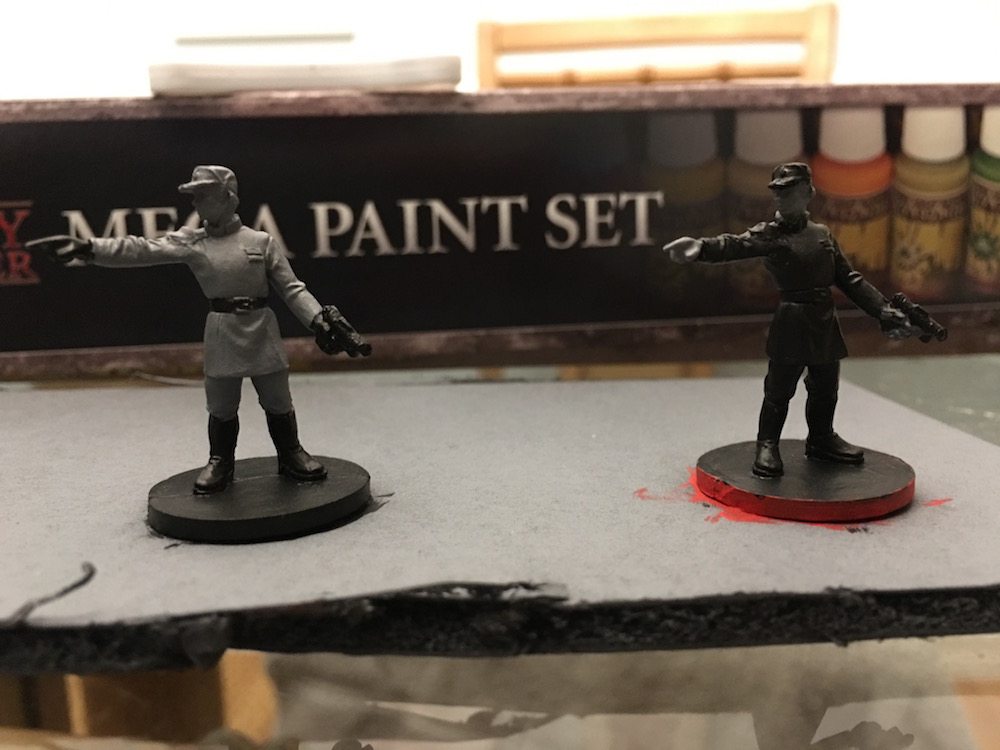
And here’s where I got ahead of myself a bit. Sorry there aren’t pics of the totally unpainted figures, but while I was finishing the bases for the Royal Guards, I found myself with a lot of black paint meted out. Waste not, want not–and I knew I wanted to paint the Elite unit all black, so there you go.
Then it was time to turn my attention to the remaining officers. I wasn’t sure how the various grays in the box would look on the minis, so I grabbed Ash Gray and Wolf Gray and painted one mini each. And wasn’t blown away by either–the Ash Gray was too light for what I had in mind (even mixed with a bit of green) and the Wolf Gray was way too blue (but will be perfect for my next figures…)

So I grabbed a bottle of Uniform Gray and mixed in a drop of Angel Green; it ended up being exactly the shade I was looking for, a nice dark gray-olive tone!
After touching up blacks that I missed, it was a matter of getting skin tone on figs. But which to choose? Barbarian Flesh or Tanned Flesh? The one in the middle has Tanned Flesh. I think I prefer Barbarian for my pasty Imperials. I also did the hair peeking out from their hats with a bit of Fur Brown mixed with a drop of yellow (a 2-1 mix).
The pips were easier than I expected, the Insane brush has a great point for this kind of work. Then I dry-brushed the guns a bit and took a few deep breaths before I tackled the eyes. I used the black > white > color > pupil method. Hit the eye area with all black (which is hard for these guys as the eyeball is not well-defined). You then lightly brush the same area with white, almost like dry-brushing. Then do the same with a bit of color (I used some of that Wolf Gray I still had on my palette), but don’t load your brush as much. Then poke a pupil in there with a dot of black. That last part didn’t work out quite as well for me, and my Officers looked a little more like PTSD sufferers than I intended (But why wouldn’t they be with Vader walking around choking all their co-workers?)
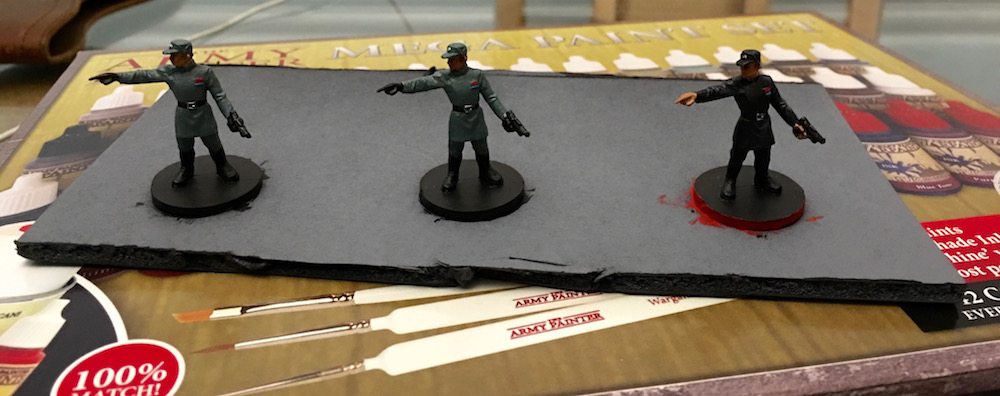
I touched up the overpaint with some more Barbarian Flesh and it was time for The Dip.

The results were not impressive at all on the all-black Officer. I’ll have to remember that for Vader and the Probe Droids (which, incidentally, sounds like an awesome band name). And while I loved how it shaded on the all-red Royal Guards, here it just made the olive green officers look… dirty.
Then disappointment number two hit. I went to de-shine them a couple of days later and noticed the dark black took on a fuzzier white layer with every spray–the dreaded “Frosting!” That’s what I get for not checking the humidity before I sprayed (a mere 94% that morning).

Luckily, it was easily fixed with a bit of fresh black on the boots, gloves, and belt (since the Quickshade didn’t really do anything for the black parts anyway). As for the elite Officer’s uniform, I decided I liked the effect; it made it look more cloth-like.
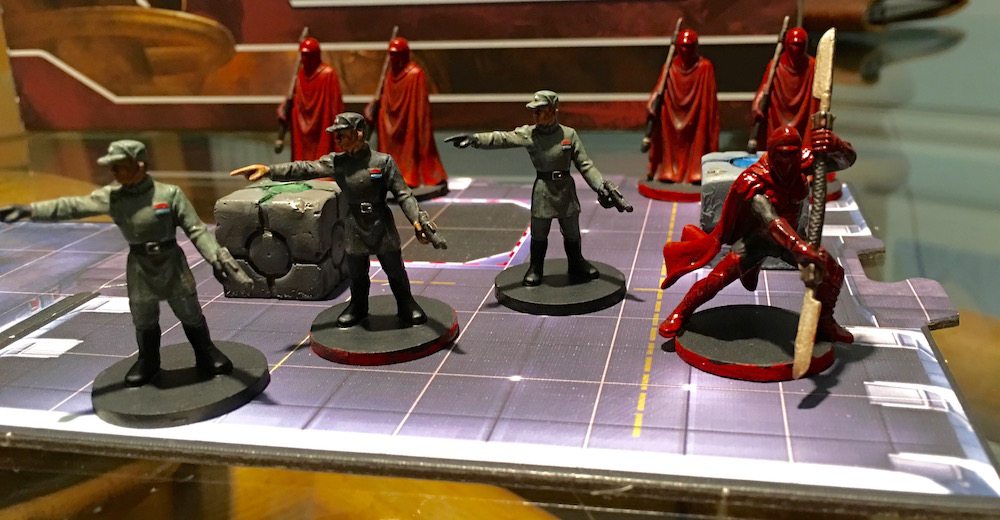
In the end, I was pretty happy with how these guys turned out. Though I think I might have been a bit more satisfied if I’d gone with a spot-wash rather than dipping the whole figure. Maybe I’ll try that next week with the Rebel Troopers!
Thanks to Army Painter and Combatzone Scenery for supplying me with paints and scenery sets for this project.


Great work, thanks for sharing. Need to learn to do this as my game collection is gaining miniatures by the month it seems
Could you update with some closeup photos of the eyeballs and focus the photos on maybe just one officer? I’d love to see surface details if you have the time.
..or you could just buy the old Wiz Kids minis already painted.