
Note: There are very minor spoilers for Paizo’s ‘Crypt of the Everflame’ adventure in this post.
For a collection of images of the final product check out my ‘Crypt of the Everflame’ Flickr album.
Crypt of the Everflame, written by Jason Bulmahn, would be my children’s first long-running fantasy roleplaying game and I wanted it to end with a bang. Also playing were my wife, cousin, and his kids. While I’ve clocked countless hours in the far-past with my cousin playing AD&D, Car Wars, Star Frontiers, Mechwarrior, and many other games, it was also his kids’ first experience as well as my wife’s. The module was Paizo’s Crypt of the Everflame and I decided to create 3D terrain for the final encounter in the crypt.
Fortunately I had been to two of Sean K Reynolds’ terrain-making sessions at PaizoCon 2012. One session was focused on using foam for terrain making and the other was on casting castle and dungeon bits using Hirst Arts molds. Hirst makes detailed molds that can be used for specific builds, or for making Dwarven Forge-type reusable pieces.
The process is pretty simple and to help, Hirst Arts has a great deal of information on the site including casting instructions, building instructions, and painting instructions.
In this and my next two posts on GeekDad I will:
- Describe how to cast bricks and create structures with Hirst Arts Molds
- Show how to create your own molds for custom pieces or to speed up the casting process by (legally) copying Hirst Arts molds.
- Show how I used this process to make modular dungeon tiles, similar to Dwarven Forge.

My material list for these projects included:
Basic Building project
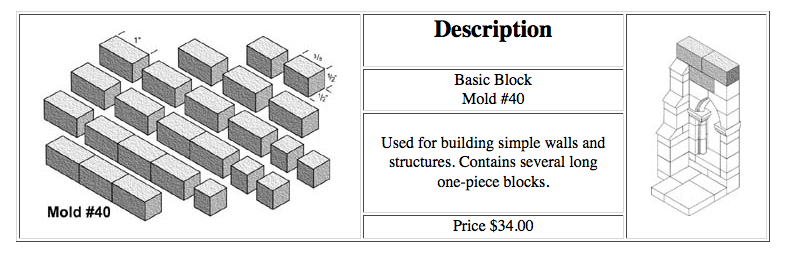
- Hirst Arts – Basic Block – Mold #40
- Hirst Arts – Gothic Additional Accessories – Mold #44
- Hirst Arts – Gothic Dungeon Builder – Mold #45
- Hirst Arts – Fieldstone Wall – Mold #70
- Hirst Arts – Cracked Floor Tiles – Mold #203
- Merlin’s Magic Hobby Stone – I bought the 50lb. box – Shop around, shipping kills you on this one. (This link is grey stone, I used white)
- Black and White latex house paint and Hirst Arts Painting Instructions
- Aleene’s Original Tacky Glue
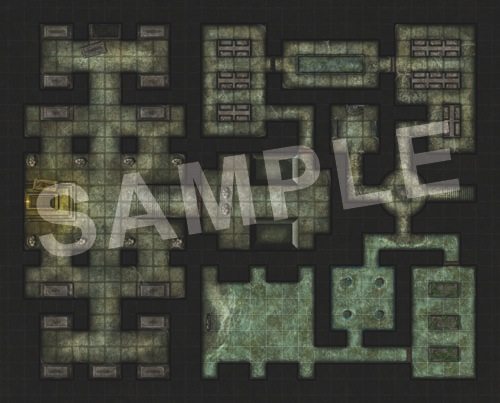
- Crypt of the Everflame Module and map – for a template
- Plastic cups and spoons – For mixing
- Four-inch putty knife
- Cork Tiles – To use as a base
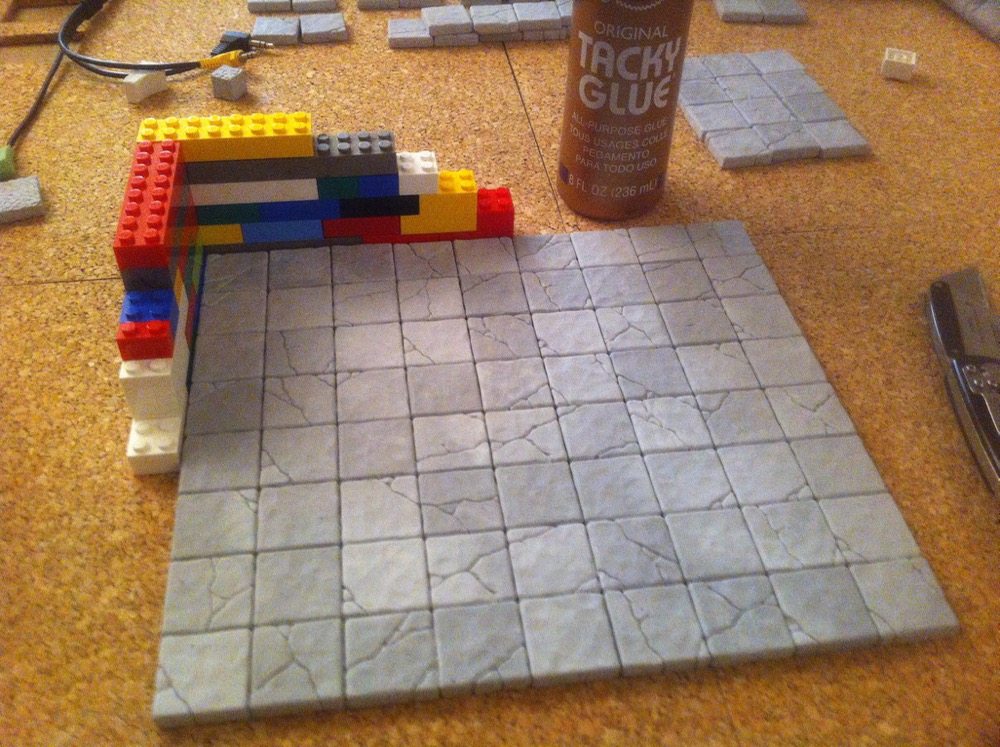
- LEGO blocks – For creating supports and 90-degree corners
- Utility Knife – To cut the cork tile
The Tapestry
- Ornate toothpicks
- Tacky putty
- Printed image
- Brown paint
For Casting Your Own Bricks – as covered in the next post
- Mold Max 30 – This is the material you pour to make a mold
- Green Stuff – For sculpting
- Super Sculpey – Also used for sculpting
- Chemical-resistant gloves and eye protection
- Scale – To mix the Mold Max 30 by weight
Hirst Arts has many more molds, including different dungeon styles, taverns, caverns, and even sci-fi themed tiles. I picked the molds above as I thought they’d best represent Kassen’s Tomb from Crypt of the Everflame.
Casting the bricks
Casting is really the easy part, but takes a long time. There are excellent instructions on the Hirst Arts page.
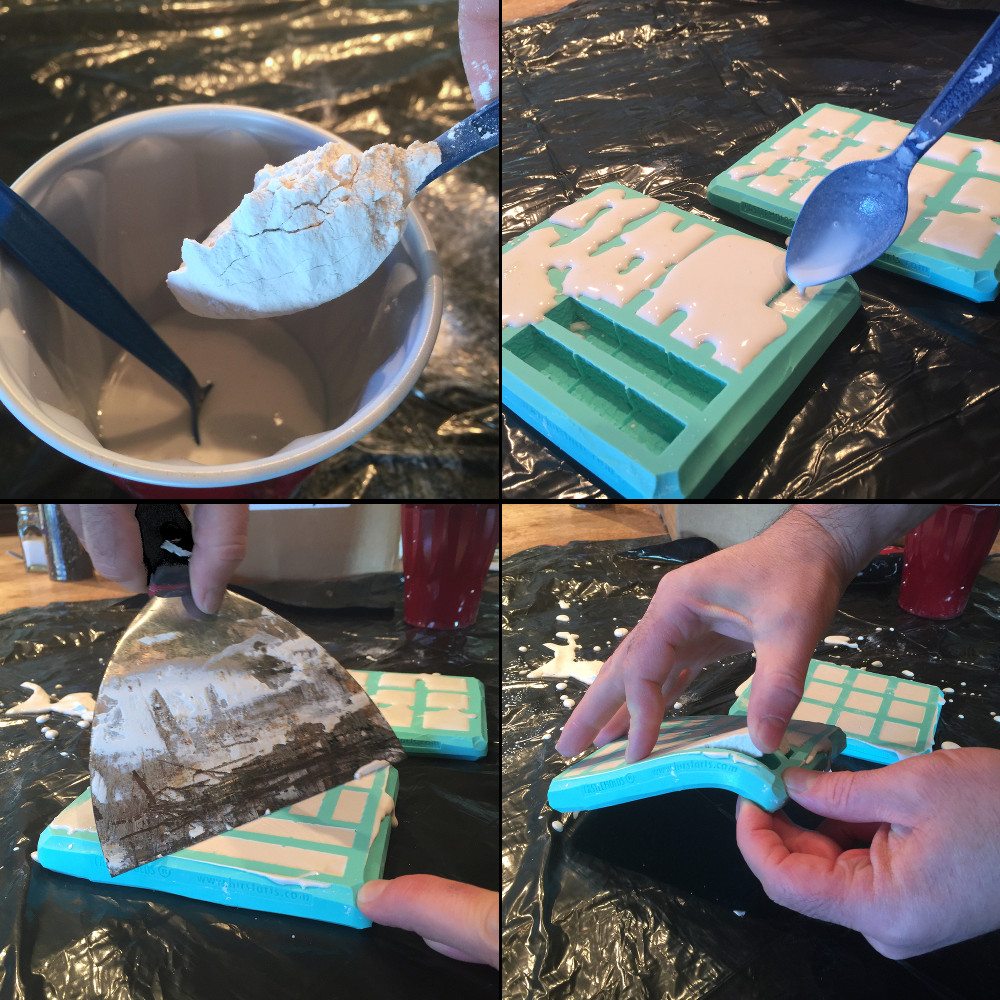
Step 1: In plastic cups with plastic spoons I mixed the Merlin’s Magic Hobby Stone with water until it was pancake batter consistency. There are precise measurements on the Hirst Arts site, but after a few times of measuring it out, you learn to do it by sight.
Step 2: This is then poured into the molds until the fluid is slightly rounded over the edge. At this point you are supposed to release any bubbles by vibrating the mixture by pounding on on the table for instance. I never did this though as when I was doing this it was usually late at night and I didn’t want to wake people. I got bubbles; it was fine.
Step 3: Once it has hardened to the “consistency of toothpaste” use a four-inch spatula to scrape off excess hobby stone. This results in a smooth and flat surface for the bottom of the brick.
Step 4: Then, let sit until hard, 20-25 minutes. Peel them out of the mold, clean the mold and start over. Repeat ad nauseum.
This process is covered in detail in the Hirst Arts casting instructions.
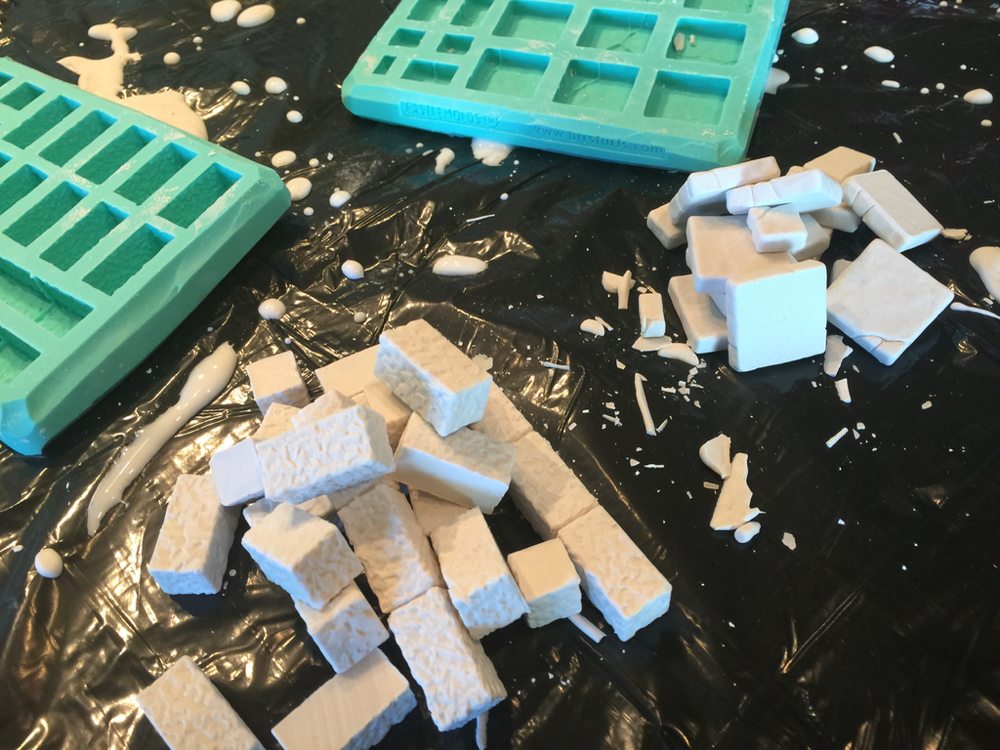
I ended up with piles of bricks. Sadly, for this design I mainly needed the longer wall pieces, of which there were just a couple in the Basic Block Mold #40. This would take forever casting one at a time. To speed this process up you can create your own molds of specific pieces. I’ll describe this process, which is allowed by the Hirst Arts legal statement, in the next post in this series.
Building
Once I had a good supply of stones I did a quite a bit of mocking up the design. Using a scale of 1″ on the board equals 5′ in-game per standard Pathfiinder/D&D scale, I first laid out the floor to match the Crypt of the Everflame map which conveniently is the GameMastery Flip-Map: Dungeon from Paizo.


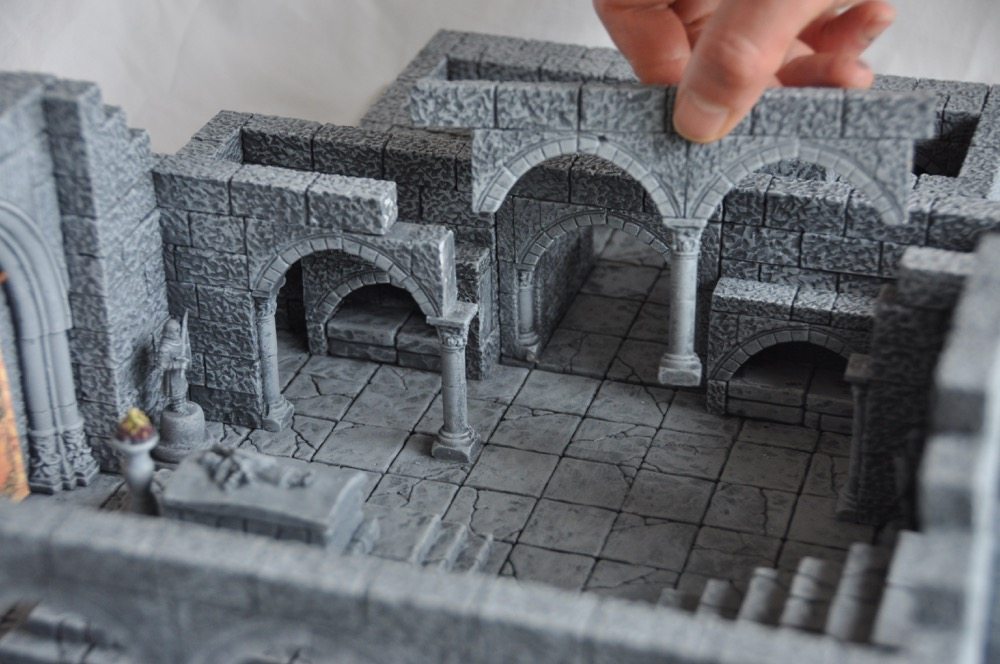
After I had placed loose pieces to get a feel for how the crypt would go together I started the gluing process. I glued the floor tiles to cork tiles to hold it all together. You can see in the photo below how I used LEGO jigs to maintain 90 degree corners as well as keep walls ascending without leaning. This is just one of the many useful tricks from the Hirst Arts building instructions.
Painting
Painting was a breeze. Hirst Arts painting instructions basically say to buy some black and some white latex house paint. He provides instructions to mix dark grey, medium grey, and light grey. First you apply a thick layer of dark, then dry-brush a layer of medium, and end with dry-brushing a very light coat of the light grey. This process was quick and easy.
Finishing touches
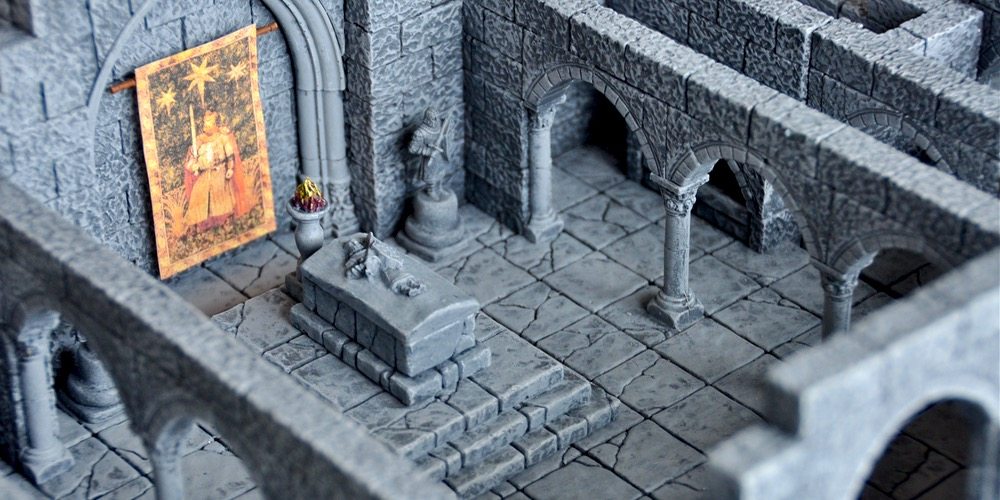
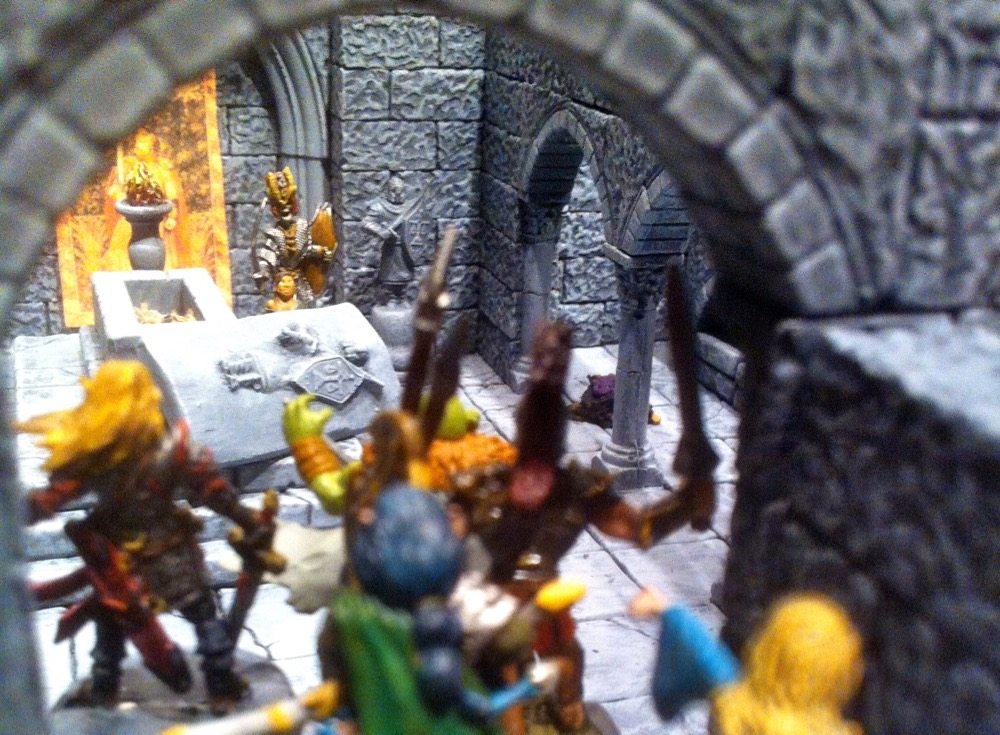
The prior instructions cover the basic crypt. Some final touches though included a tapestry, and statues of of the entombed Kessen as well as a matching relief carving of Kessen on his sarcophagus.
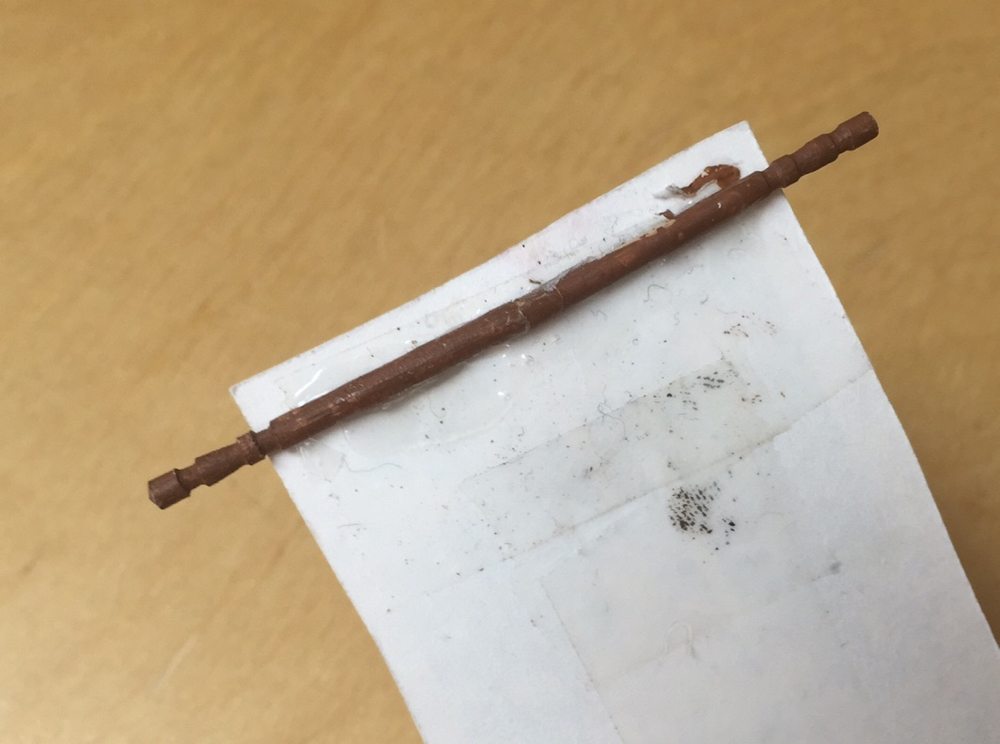
I will cover the statues and the sarcophagus lid in my next post, but the tapestry was a pretty easy one. The tapestry consisted of an image printed from the web (no idea where, sorry!), two ornate toothpicks, and tacky putty. I cut the two toothpicks so I could have one pole with the two ornate sides visible and then painted them brown. I glued the tooth picks to the paper, and then tacky-puttied the whole thing to the wall.

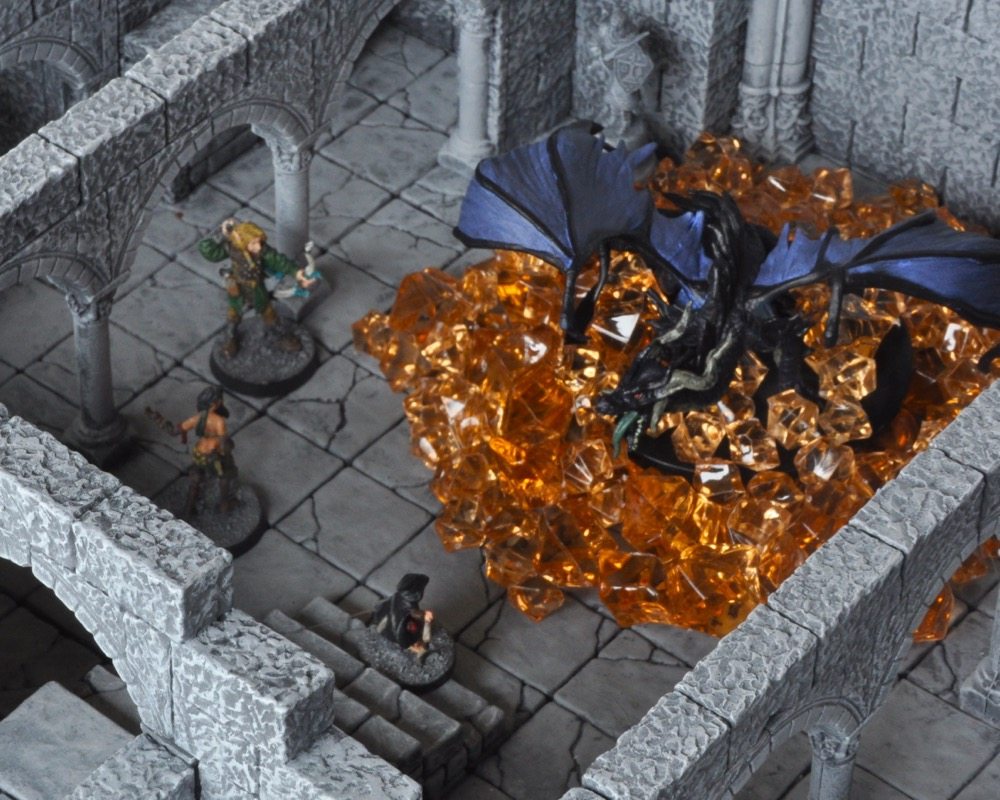
Finished Product
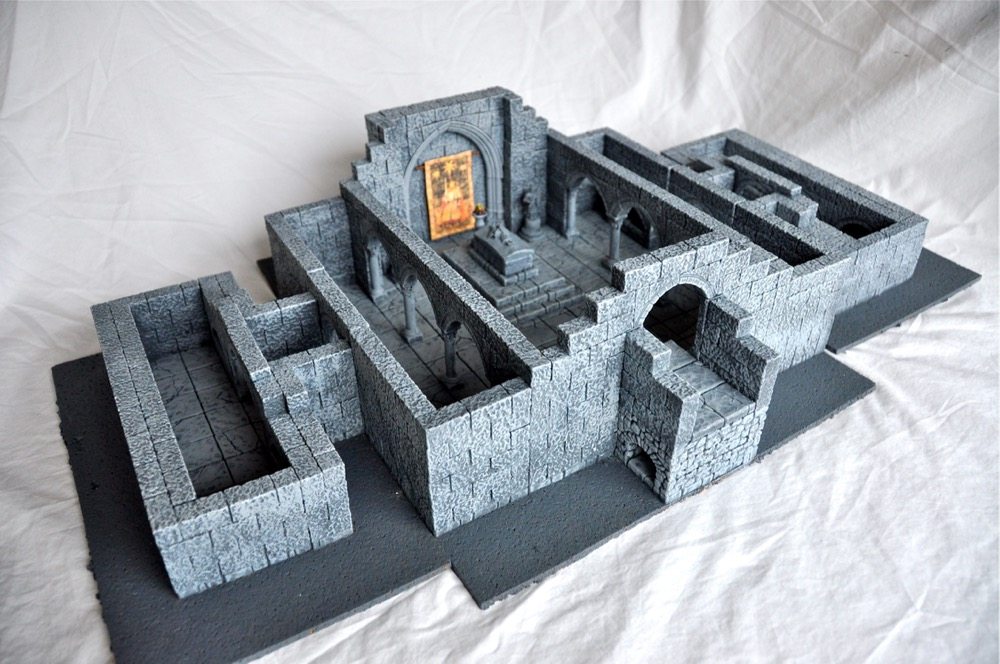

In the above image you can see many of the components are removable, allowing for different uses. The sides could be removed and hallways could instead be attached. The raised area and sarcophagus can be removed to make a large chamber. And the banner was hung with tacky-putty so it’s also removable.
As with any encounter, there’s always the possibility that some character will get lucky and one-shot the baddies, so I spent some time coming up with alternative additional enemies as well as some powers for the big-bad that would allow him to survive a little longer. I didn’t want all this work to be played through in just a few minutes! One of my surprises was that there would be a partial collapse of the room due to some of the evil-magics at work. I had created one of the archways to be interchangeable with a broken version.

Game day was a joy for everyone. I had the pleasure of revealing not only the dungeon’s big-bad, but also this terrain I had been developing off-and-on for months, and the players got to end with an epic battle on a cool battlefield. Will I do this for every final encounter? No, usually my projected maps will do, but maybe at the end of a multi-module campaign I will consider a good 3D model. Creating Karzoug’s chamber from the final scene of Rise of the Runelords would be epic! Something I have noticed when using 3D Terrain over a 2D map is that the players start to consider their action in 3D space much more, as opposed to pulling a Kahn.

The process is time-consuming, but not too difficult, and if you don’t want to design your own creation there are plenty of ideas on the Hirst Arts site. Also, it’s not a big leap to use this technique to make your own Dwarven Forge type pieces for a fraction of what Dwarven Forge costs. In my next two posts I’ll first explain how to mold your own pieces, and then how to use Hirst Arts to make Dwarven Forge-esque modular dungeon tiles.
Part 1: Creating Dungeons With Hirst Arts Molds | Part 2: Creating Custom Molds | Part 3: Making Modular Pieces


Wow. Just wow. Thank you so much for this article! Looking forward to the next in the series.
I’ve worked with the Hirst Arts molds before. They are amazing, but so very time consuming. If I’d had a more regular gaming group (other than my online one), I probably would have stuck with them.
I think one important thing is to make your own molds of your key pieces so you can speed up the casting process, that’s really the big time-sink… waiting for pieces to be done. I detail this in post 2 in this series. Also, making the pieces as reusable as possible to get the most bang for your buck/time helps. Yes, it’s definitely time consuming!
Ryan that looks amazing
That looks great. Do you recall how many pours of mold #40 it took to get all of the pieces?
Sorry, I just saw this comment. No, no idea how many pours. Also, I made a copy mold, so I sped up creation of the main pieces. (I talk about making my own mold in part 2)