 Note: There are very minor spoilers for Paizo’s ‘Crypt of the Everflame’ and TSR’s ‘Tomb of Horrors’ in this post.
Did you miss out on the last three glorious Dwarven Forge Kickstarters? Was your Geek Chic Sultan table just delivered and you can no longer afford to buy Dwarven Forge in enough quantity to fill the table’s gaming space to look like the Geek Chic floor model? Well, Hirst Arts molds, and a great deal of work, may be the solution you’re looking for!
Don’t get me wrong, Dwarven Forge has raised over six million dollars in three successful Kickstarters and is awesome. I only participated in the Dwarven Forge caverns Kickstarter and the pieces I received were phenomenal. All of these Kickstarters provided materials made of Dwarvenite, “… a proprietary, nearly indestructible compound that feels great in the hand and captures exceptional detail.” Flexible in their layout and durable, the pieces are a great addition for tabletop gaming. The pieces are intended for 28mm-30mm figures where on the battlegrid 1″ equals 5′ in-game. For anyone who can afford it, I would highly recommend any of the Dwarven Forge systems.
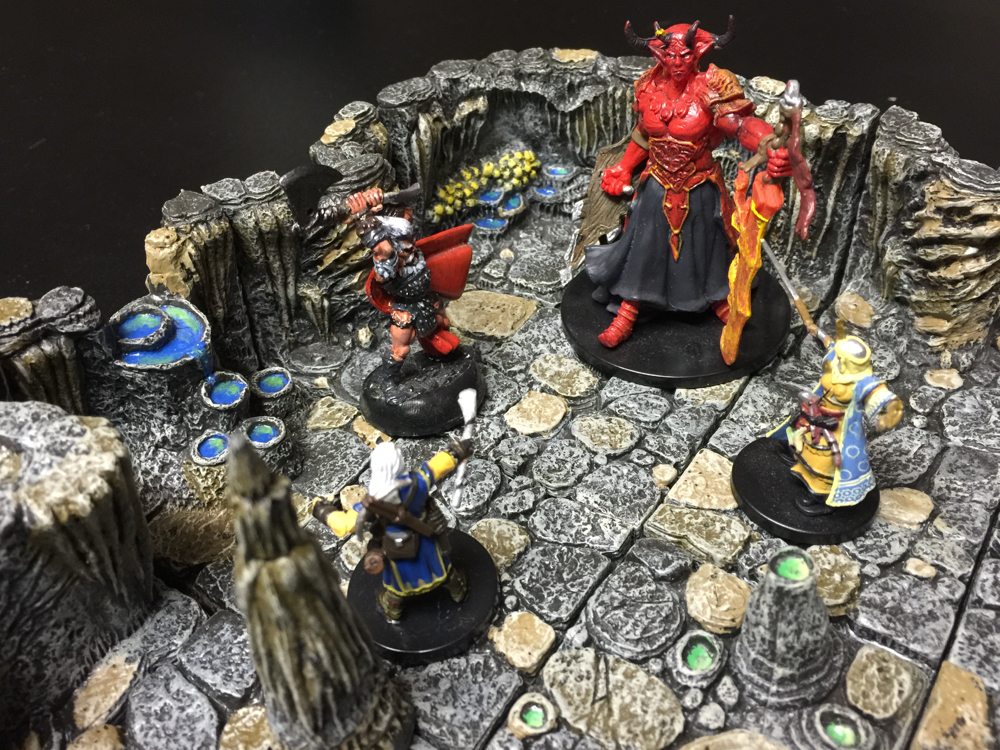
However, while I looked at my meager set of Dwarven Forge Cavern pieces and the limited caverns I could create, I wished I had more. I wanted enough pieces to build some interesting terrain both for gaming and for my ten and twelve year-olds to enjoy setting up dungeons for play. I already had some Hirst Arts molds and experience using them from the Crypt of the Everflame project discussed in part one of this three post series. With this experience and a desire to make my own modular dungeon pieces, I began looking into how I could make something similar to the modular Dwarven Forge dungeon tiles using Hirst Arts molds.
At first I was just going to replicate the Dwarven Forge dungeon tiles as closely as I could, but I noticed a disadvantage of Dwarven Forge. At 28mm figure scale where each square equals 5′, each Dwarven Forge floor piece has 7.5′ of floor exposed. With these pieces you could only create 7.5′, 15′, and, of course, wider corridors. There is no easy way with the standard Dwarven Forge pieces to make either 5′ or 10′ corridors, the staple of pre-generated adventures.

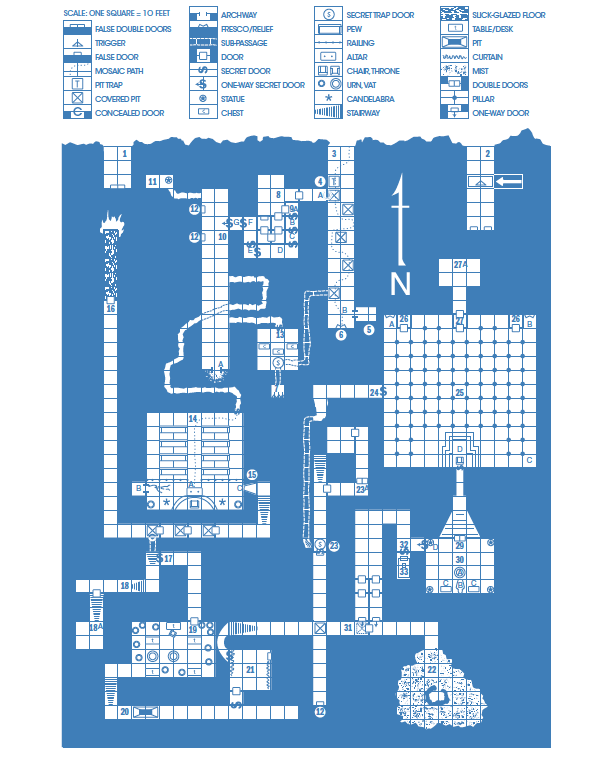
While Dwarven Forge would be awesome if you designed your labyrinths from scratch and with Dwarven Forge in mind, they would be poor at recreating most pre-generated dungeons without making significant modifications to every map.
For my project I wanted as few different types of pieces as possible and I wanted to handle most any chamber or corridor configuration such as a three- or four-way intersections at both 5′ and 10′ width. In addition my goal was to be compatible with the Dwarven Forge pieces so that I could use what I had already purchased as well as any additional Dwarven Forge product I obtained in the future.
After a few sketches and using loose pieces to mock-up designs I came up with a reasonable set of pieces that could handle most any situation. The main difference in my design from the Dwarven Forge tiles is that I only have a 5′ section of floor exposed as opposed to Dwarven Forge’s 7.5′. My tiles are mounted on cork tiles which provided an end product where the floor is at the same height as a Dwarven Forge piece.

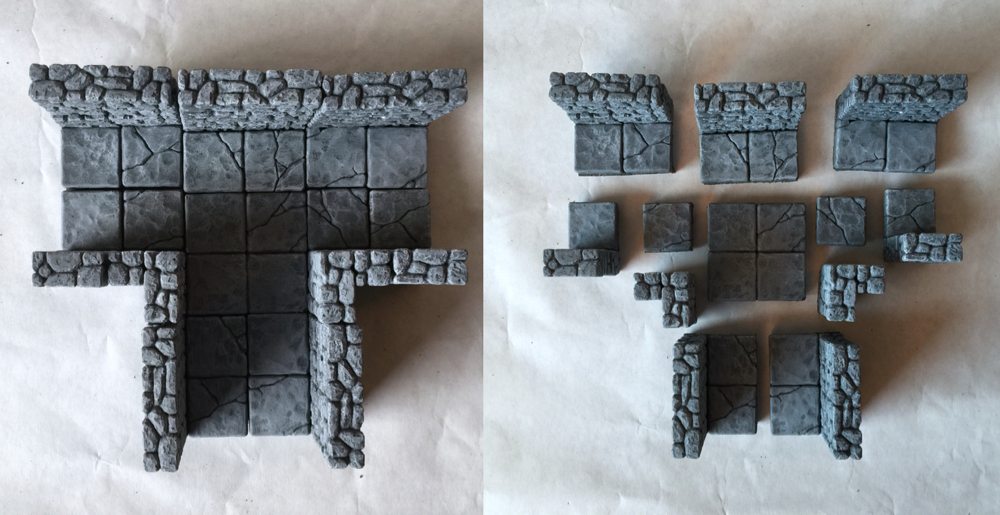
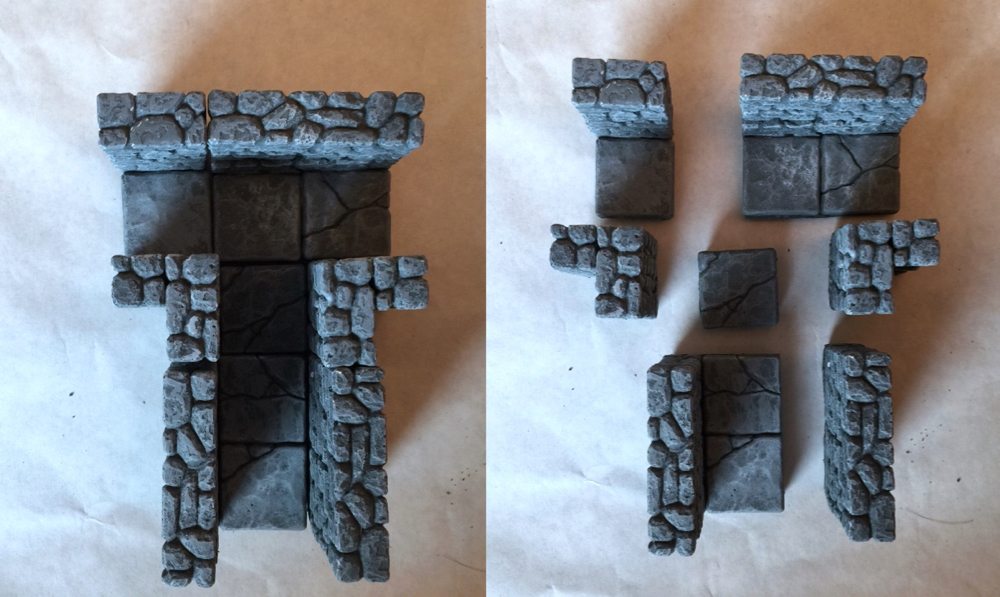

Given my basic design I started the long process of casting hundreds of Hirst Arts pieces. But first, let’s make sure we have all the required supplies. All of the materials I needed for this project are nearly identical to my first post in this series.
- Hirst Arts – Fieldstone Wall Mold #70
- Hirst Arts – Cracked Floor Tiles – Mold 203
- Common Inn Accessories Mold #58 – This was not in the first post. Not necessary for the actual modular pieces, but provides great dungeon dressing. You will want doors though, and this mold has some
- Cavern Accessory Mold #85 – Also not necessary, but some great dungeon dressing
- Merlin’s Magic Hobby Stone – I bought the 50lb. box – Shop around, shipping kills you on this one. This link is grey. I had white.
- Black and White latex house paint and Hirst Arts Painting Instructions
- Aleene’s Original Tacky Glue
- Plastic cups and spoons – For mixing
- Four inch putty knife
- Cork Tiles – to use as a base
- LEGO blocks – for creating supports and 90 degree corners
- Utility knife – to cut the cork tile
Using the same techniques from my Dungeon Casting Part 1: Creating Dungeons With Hirst Arts Molds post, I created hundreds of bricks to work with. I created my own molds as described in my second post in this series to more quickly replicate the main pieces I needed. What I mainly needed for the modular design were the two-inch wall pieces from Hirst Arts: Fieldstone Wall Mold #70, and more floor pieces, so using custom molds to quickly generate more pieces at once was a must. After I had a good supply of bricks, I began creating my reusable dungeon modules while constantly also casting more stone.


Once I had all my tiles created, I started the painting process as described in the Hirst Arts painting instructions. Basically a thick coat of dark grey, then dry-brush medium grey, and last a very light dry-brushing of light grey. Hirst Arts recommends buying a can of flat black and a can of flat white latex house paint and mixing the three shades of grey from that.

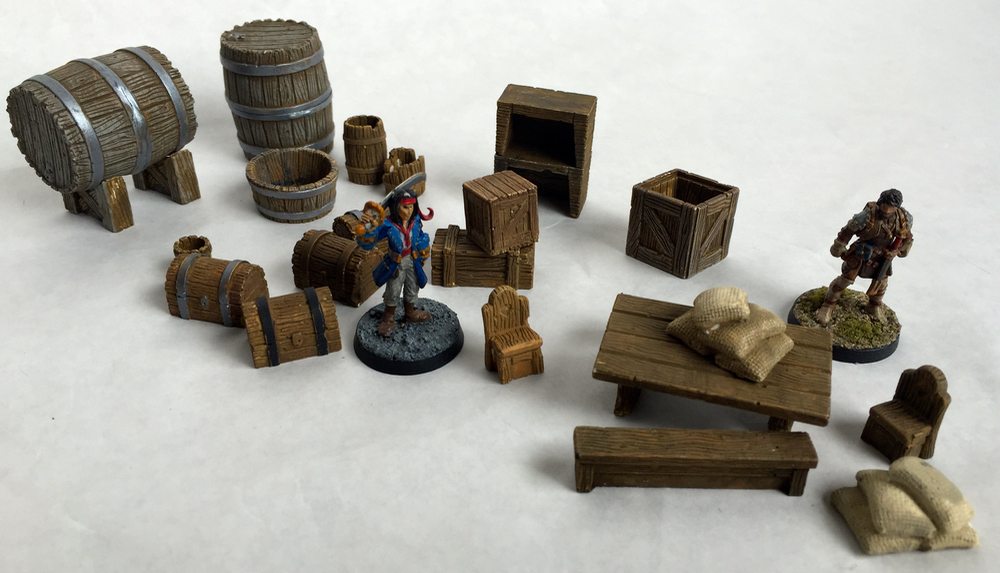
As an added touch I used the Hirst Arts: Common Inn Accessories Mold #58 and Cavern Accessory Mold #85 for some dungeon dressing. They provide doors, barrels, chests, sacks, chairs, tables, and much more.
At last my project is done! The pieces work great when mixed with the Dwarven Forge cavern pieces. In the center you can see an attempt at a water feature. When I get that process down I’ll write about it, but my results were poor in my last-seconds-before Christmas rush to finish the project.

Dwarven Forge pieces are essentially indestructible. So how do the Hirst Arts pieces hold up? Mine have withstood a year of use, mainly with my kids playing with them outside of gaming. I have had maybe two pieces break, but the breaks were at a glued seam where I could just glue them back together with Aleene’s.
I wanted to see if my modular design was really as flexible as I hoped. As a test I used my pieces to build the entire first floor of Pathfinder’s Crypt of the Everflame dungeon. This is also one side of the GameMastery Flip-Map: Dungeon from Paizo. I knew I didn’t have enough pieces to build the whole thing at once, so I built it in sections. My goal was to determine if my limited selection of pieces in this design could handle all the variations in a real-world map.

The tiles were able to recreate most everything near-exactly from the map. You can see here that I was not able to do the round inner room, but I do have a Hirst Arts mold for a tower with curved bricks, so I could make that in a couple of hours. Floor two of the map was similar. So I’d say my modular design, given my goal of matching roleplaying game pre-generated maps, was a complete success!
Now I just need a Geek Chic table to put them all in. Perhaps that’s another project.
Part 1: Creating Dungeons With Hirst Arts Molds | Part 2: Creating Custom Molds | Part 3: Making Modular Pieces

Nice work ive been struggling with a great method at versatile modular dungeon tiles, i have an extensive collection of hirst arts and my own molds ive replicated over time while in the hobby. My issue has been with the older dnd material there maps and the very skinny walls in between some rooms.
Yes, those old maps sometimes had a wall running right down the line between two squares, taking up NO portion of the two squares.
Maybe either printed card stock that could slide down between some floor tiles, or a very thin wall piece, with card a card stock fin on the bottom to slide between floor tiles (but then you lose some floor space, that the map did not lose.
The old-school map above has this issue.
The modern Paizo map does not have this problem.
Wow! Thank you so much for this post. I just got into this hobby and I wanna purchase the Dwarven Forge cavern set plus one of the Cavern pledge goals together and expand from there using Hirstarts! Your setup looks great. I cant wait to get my hands on these hirstarts tile and wall molds and start casting. I will use your page as reference and inspiration for my project! Thanks again, best wishes Oliver
Thanks for reading, and glad my post is useful to you! Hirst Arts also has cavern molds, so you can add to the cavern that way as well. I do love the Dwarven Forge I have (you can see in the other linked posts), and if I was made out of money I’d be happy to dump a lot of it there. On the other hand… having the time to do a ton more Hirst Arts would be just as great. I have on hand another 50# box of dental plaster waiting to be used!
Again, thanks for reading, and please post a link to your work when you get some created!