
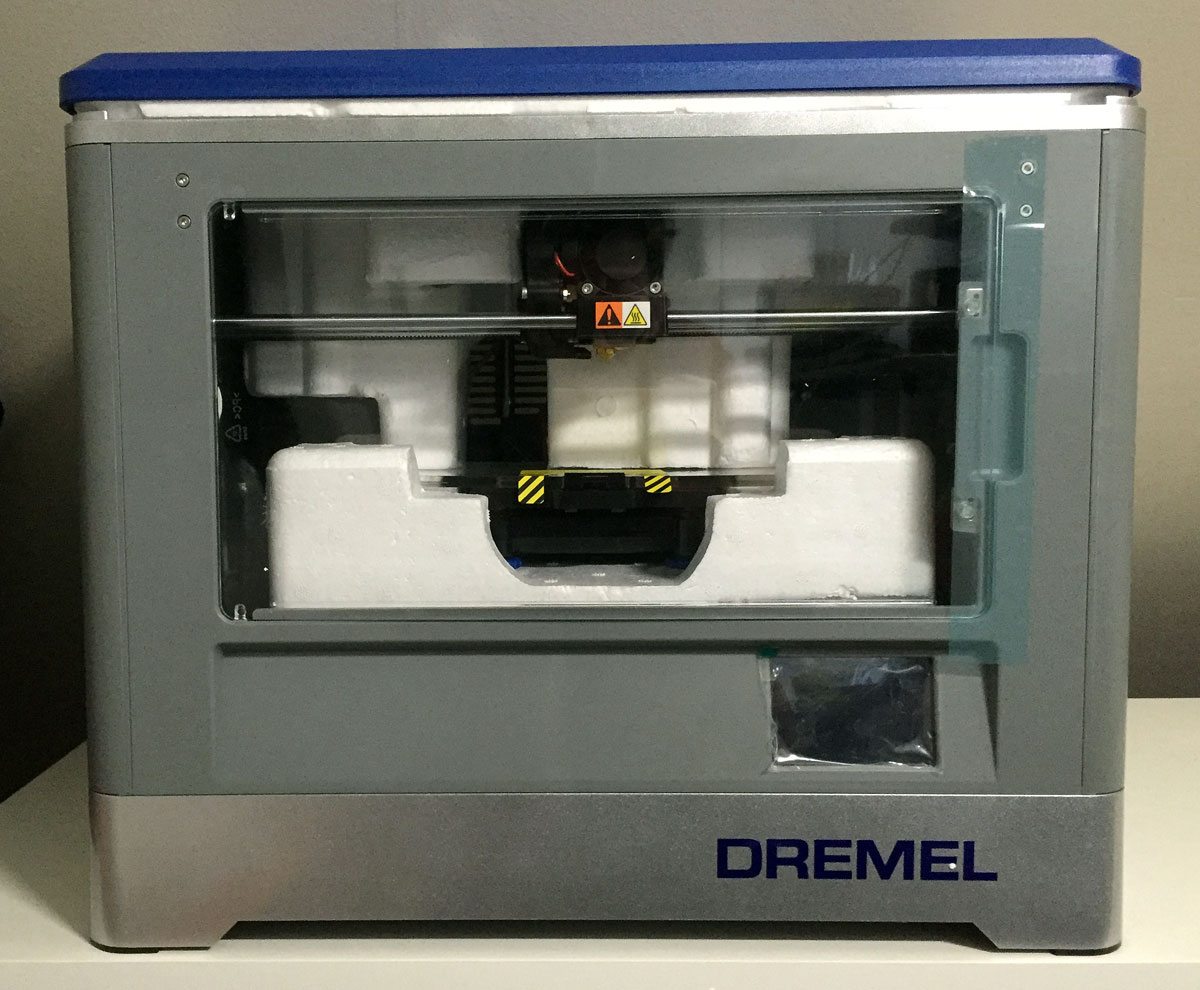
 The Dremel 3D Idea Builder Printer promises to be a simple to use, cost-effective 3D printing solution for users of all skill levels.
Like many people, I’ve drooled over 3D printing since I first learned about it many years ago. However, complexity of printers and components, stories of difficulty of setup and configuration, and, most of all, price, kept me out of the wonderful world of 3D printing. When Dremel offered to send me a review unit, I could barely contain my joy.
 The Dremel 3D Idea Builder 3D is listed at $999 and includes a single 0.5 kg spool of filament (that’s the plastic used for printing) and is all you need to start your journey into the world of 3D printing. Upon opening the box, I first noticed this cool “Ode to Makers” printed inside. I’m a sucker for this sort of thing, but I think it does show that Dremel is aware of their user bases, knows their needs and wants, and aims to deliver them.
 I quickly pulled the printer out of the box and started unwrapping it. Because a 3D printer is indeed a precision machine, it was no surprise that the printer was very carefully packed with multiple layers of styrofoam to keep its parts from moving around in shipping.
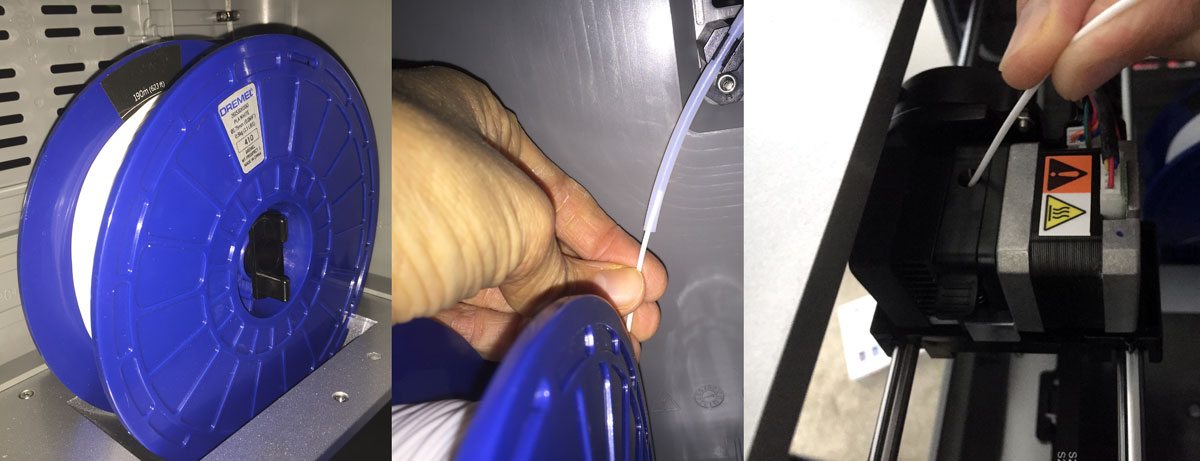 After getting everything opened, I whipped out the Quick Start Guide and got busy. The first thing you’ll do is load your filament spool–lock the spool in place, feed the filament through the tube, and stick it into the print head–that’s it! I then fired up the warm up process and in just a couple of minutes I was ready to move on to Step 2.
 The only other step you need to take before you can begin printing, is to level the print bed. The onscreen interface walks you through levelling the sides and back of the print bed using thumbscrews and a little level sheet. Dremel recommends levelling the print bed before every print, and it’s such a quick and easy process, I don’t see why you wouldn’t take a few extra seconds to help ensure a successful print.
 With the unboxing and setup all done in under ten minutes, I decided to jump right in to printing with one of the pre-loaded models. Of all the included models, the Tyrannosaurus Rex head looked like it would appeal to my son the most, so I selected it and hit “Build.” The display shows you an estimate of time remaining, percent complete, print time so far, and the extruder temperature (if it isn’t already warmed to the right temperature.) After a minute or two of warm-up, the print started, and a little over an hour later, I had my first 3D printed object! My son wanted it to be pink, so I broke out a pink Sharpie and quickly colored it pink.
The Idea Builder got an immediate A+ for out of the box ease of use. I didn’t have to worry about any sort of configuring, calibrating, or wasted test pieces that I’ve heard about with other 3D printers. However, I wanted to make sure and put the printer through its paces so I turned to the maker community to find some models to print.
Most 3D models out in the world are in .stl format. These are essentially CAD files that can be used to create the files your printer actually needs. Dremel has teamed up with Autodesk to make even this part extremely simple. The Dremel 3D software can be downloaded from their site, but it also comes on the included SD card. I quickly installed the software onto my computer then, popped over to Thingiverse.
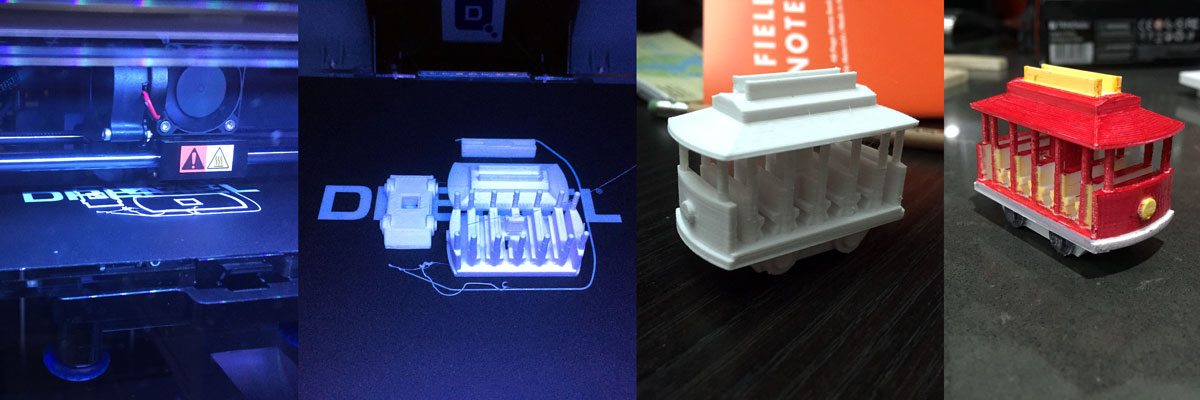 I browsed around until I found a Daniel Tiger Trolley model. My son loves Daniel Tiger’s Neighborhood, and I knew he’d love this trolley. I downloaded the .stl file and loaded it into the Dremel 3D software. This software is pretty basic and allows for simple operations on a model like re-positioning and scaling, but not much else. That was totally fine of course because I wanted to print it as is. The print came out perfectly again, and, with just a few minutes with my Sharpies, I had a full-color Trolley. My son has been inseparable from his dinosaur head and Trolley since I made them. And the best part about having a 3D printer? One of his friends saw the Trolley, and I just fired up the printer and hit go to make another one (in about an hour).
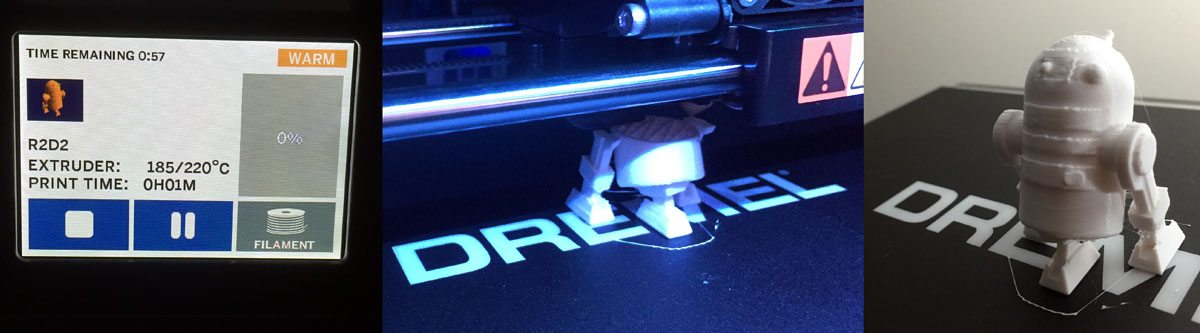 Completely satisfied with the Dremel 3D Idea Builder’s performance on simpler models, I decided to up the ante and downloaded a R2D2 model. Although it printed fairly well, it didn’t have a lot of supports built-in and so it didn’t work out as well as I’d hoped on the backside. This was really the only limitation I hit with the out of the box software and solution.
Fortunately, Autodesk makes 123D Design, a free 3D CAD software that integrates seamlessly with Dremel 3D (as it should since Autodesk makes them both. 123D Design gives you the ability to do anything you want to existing models as well as build your own. Since I didn’t need to do much with R2, all I did was load the .stl into 123D Design, hit Print. That fires up 123 Meshmixer which will automatically add supports to your models and let you do some tweaking before sending it to your printer (via USB or SD card) in the appropriate file format it needs.
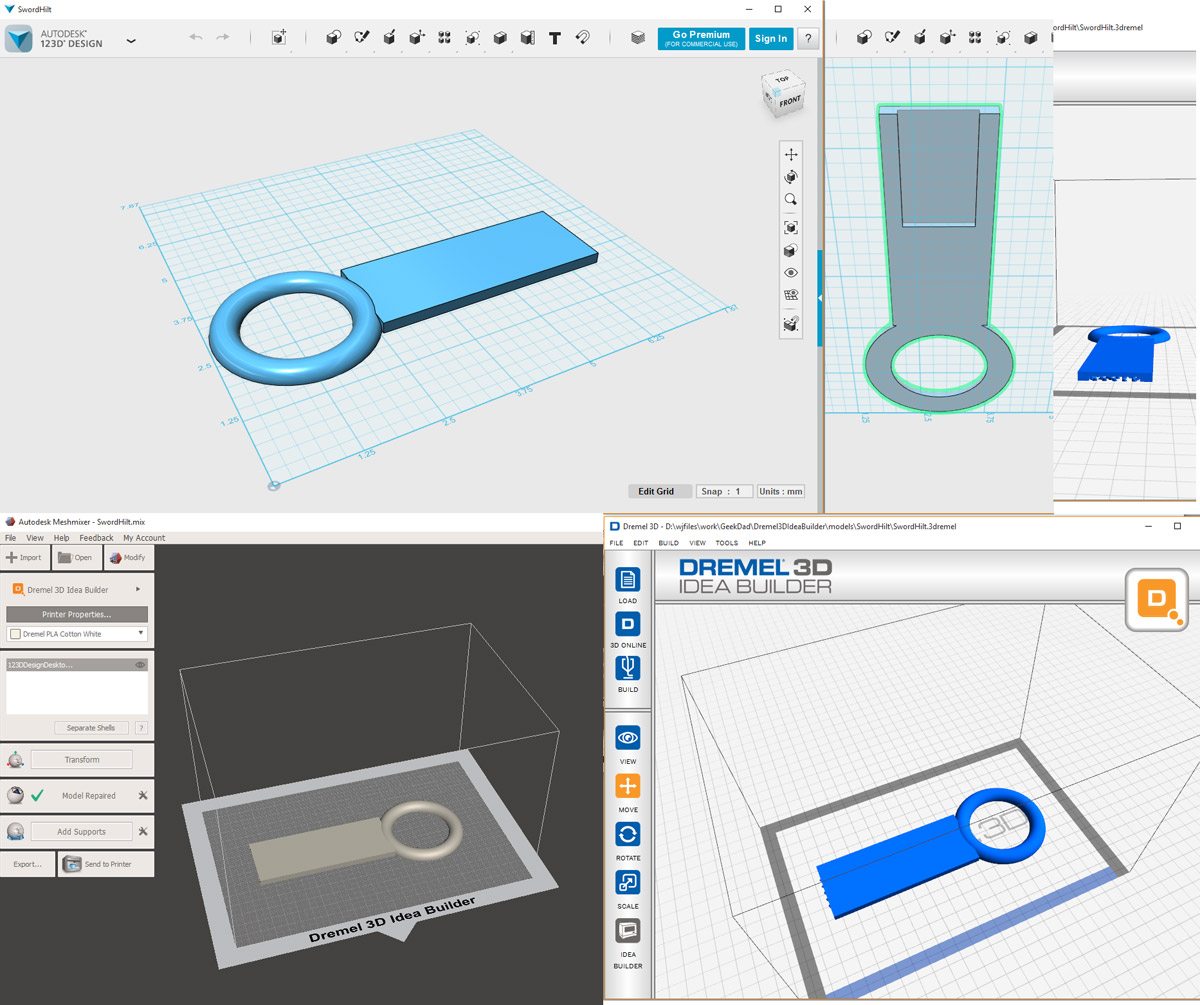 For my final test, I wanted to build and print my own model. As you may have read, I am currently working on my big cosplay for Emerald City Comic Con, and it requires a sword. I was originally planning on making the entire thing out of wood but was concerned with how I was going to make the hilt–Dremel 3D Idea Builder to the rescue! I used 123D Design to build the model, and, thanks to the great Prop: 3D videos from my friend and master prop maker and foamsmith Bill Doran of Punished Props, I knew enough to build the model with a channel to accept the end of the wooden blade I’d build later. I sent the model to print, added supports in 123 Meshmixer, and then sent it to Dremel 3D for the printing. I know this sounds like a lot of hand-offs between software, and if I were having to do each one manually, I would agree. The beauty of the integration though is that each one of these hand-offs is automatic.
 I printed off two copies of the hilt and voila! I used a little five-minute epoxy to glue the two pieces together and have an easily built sword hilt for my cosplay! I am already thinking up all of the other cosplay applications of having this printer around. Look for the finished sword in the near future in my cosplay update post.
My final verdict is that the Dremel 3D Idea Builder Printer is an excellent tool for any maker, new or experienced. The effortless setup and fault free printing dramatically increases the value of this printer. I wasted zero filament due to how easy the setup and configuration was and even after all the prints I’ve made, my spool still looks brand new. I’m sure as I start printing more, I’ll burn through it a bit faster, but I am really happy with the lack of waste.
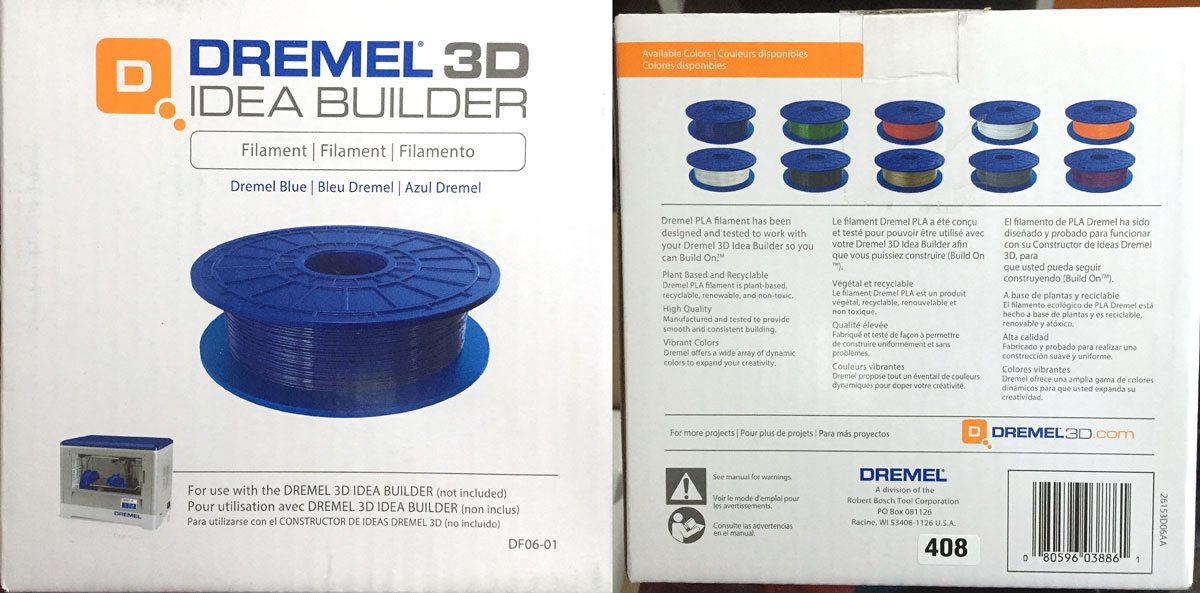 One final note about the filament–Dremel’s printer uses 1.75mm PLA filament. PLA is a plant-based, completely recyclable plastic. It comes in ten different colors and can be purchased for about $30 a spool. While there are other companies that make filament of this size and material, Dremel, of course, does not recommend using them and does not warrant them. I have to admit that this glow-in-the-dark filament is awfully tempting though.


That’s awesome! I’m excited to see your ECCC costume!
Thanks, Britt! Do you guys know what you’re planning for ECCC this year? I’m sure whatever it is will be amazing as always 🙂
what would u say is the optimal settings for dis printer?
I always just used the preset ones when using it as I never had any real issues or need to tweak it!