
Two weeks ago, My 12-year old son came home from school obsessed with the yo-yo. His knowledge base was like an upload from The Matrix. He knew all the intricacies of yo-yo brands, types, tricks, and the most skilled yo-yo practitioners of our day. He was soon scouring Amazon seeking the finest yo-yo that $15 and Amazon Prime could produce. I try not to squelch his obsessions, fleeting as they can be.
Recently, extreme weather forced our family indoors for three days. The weather was no fun and my family started to get cabin fever by day two. Then an idea came to me. Why not use the circumstances for a fast, fun project with the yo-yo on center stage? After a few minutes of pondering, I proposed the idea to the kids: Design and 3D-print a custom yo-yo in under four hours.
I explained my concept:
1. Use 3D modeling software to design a yo-yo
2. Export the design into a standard format for 3D printing
3. Print the design on our homemade 3D printer
I also explained some constraints:
1. We had to use materials we had on-hand
2. We had to use free software for the 3D model
3. We had to marvel at our creation before mom had dinner ready
They didn’t understand two of the steps and were dubious about the constraints. However, my wholehearted pitch convinced them that trying was in all our best interests. So with plan in place and kids on board, we got to work!
Step 1: Gather Materials
I’m a hobbyist maker. Naturally, I have various raw materials on hand that may not be in everyone’s garage. Despite that, I wanted to keep the parts list free of unique and custom hardware. So after rummaging through some boxes we came up with hardware that seemed yo-yo appropriate. As an aside, I have three boys ages 8, 10, and 12. Everything is done in three’s. Everything.

We also took some rough measurements of the parts as well as a store bought yo-yo. We jotted our measurements down for reference during the 3D modeling phase.
Step 2: 3D Design Stations Ready
I decided to use Autodesk 123d Design for our modeling software. It’s free, robust, and very accessible for those just starting with 3D modeling. It also exports directly to the standard 3D printable file format (.stl). We setup 3 workstations and downloaded the software.
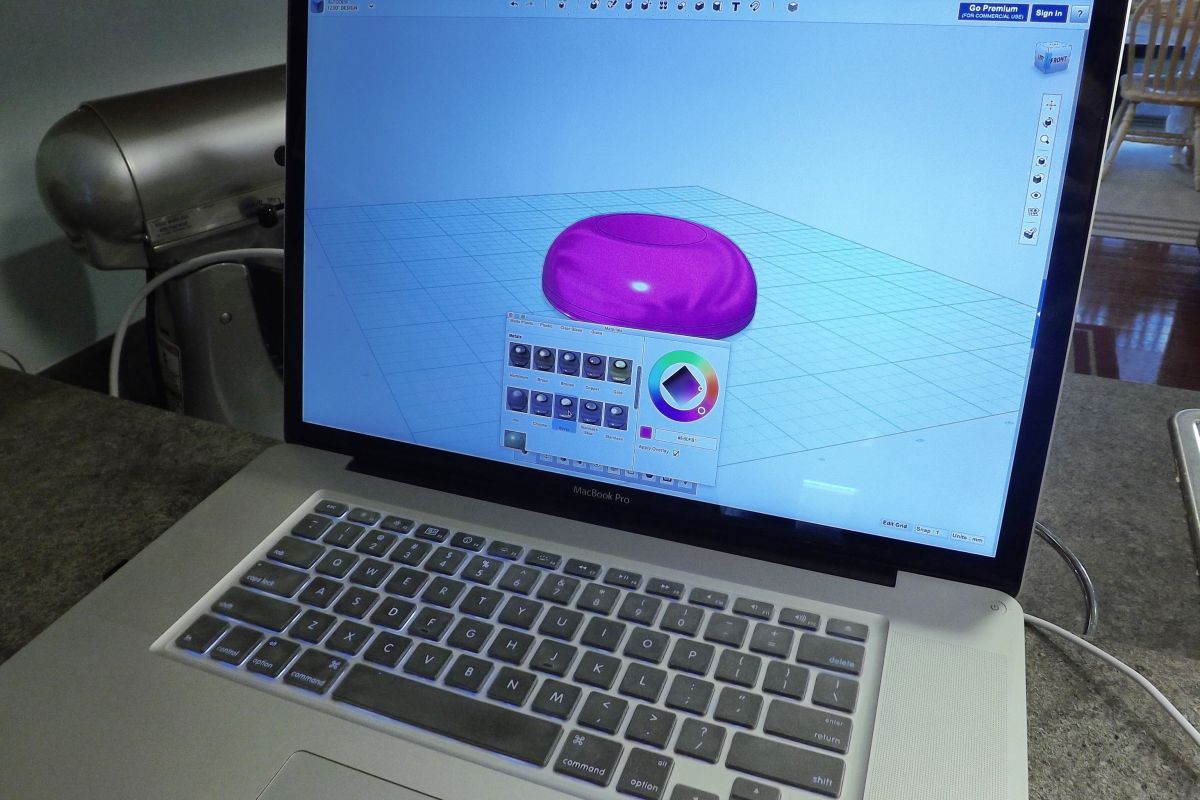
Step 3: Crash Course in 3D Modeling
None of my boys had experience with 3D modeling. I admitted concern about how to teach them simultaneously at an age appropriate level. I took the simplest approach I could think of: start with a cylinder primitive and fillet the edges. In literally a few clicks they had a workable yo-yo model. The fillet operation also allowed them to experiment with various shapes. They really enjoyed it! Here’s an example of one of their designs:
I did help them model recesses for the washer and bearing. Also, we only modeled half of the yo-yo. The main reason was so we would have a flat side for the base of the 3D print. This way we wouldn’t need printed supports to complete the print.
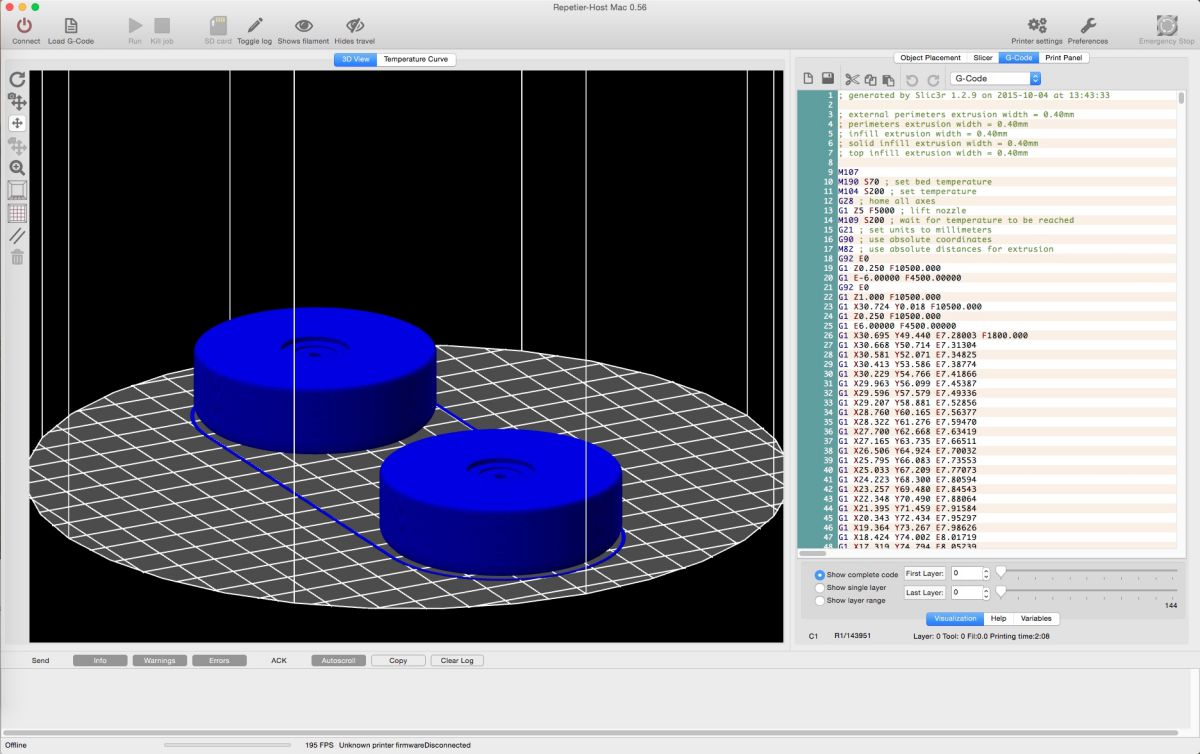
Step 4: To the 3D Printer!
Once they were satisfied with their yo-yo design we exported it to .stl format. From there we opened the file in Repetier, a free, open source 3D printing utility. Repetier allowed us to place the part on a virtual printer plate. We added a copy of the part, arranged them on the virtual plate, then sliced the parts using Repetier’s built-in slicer, Slic3r. Slicing is what generates the code that tells the printer how to print the object.
Step 5: Build, Assess, and Marvel
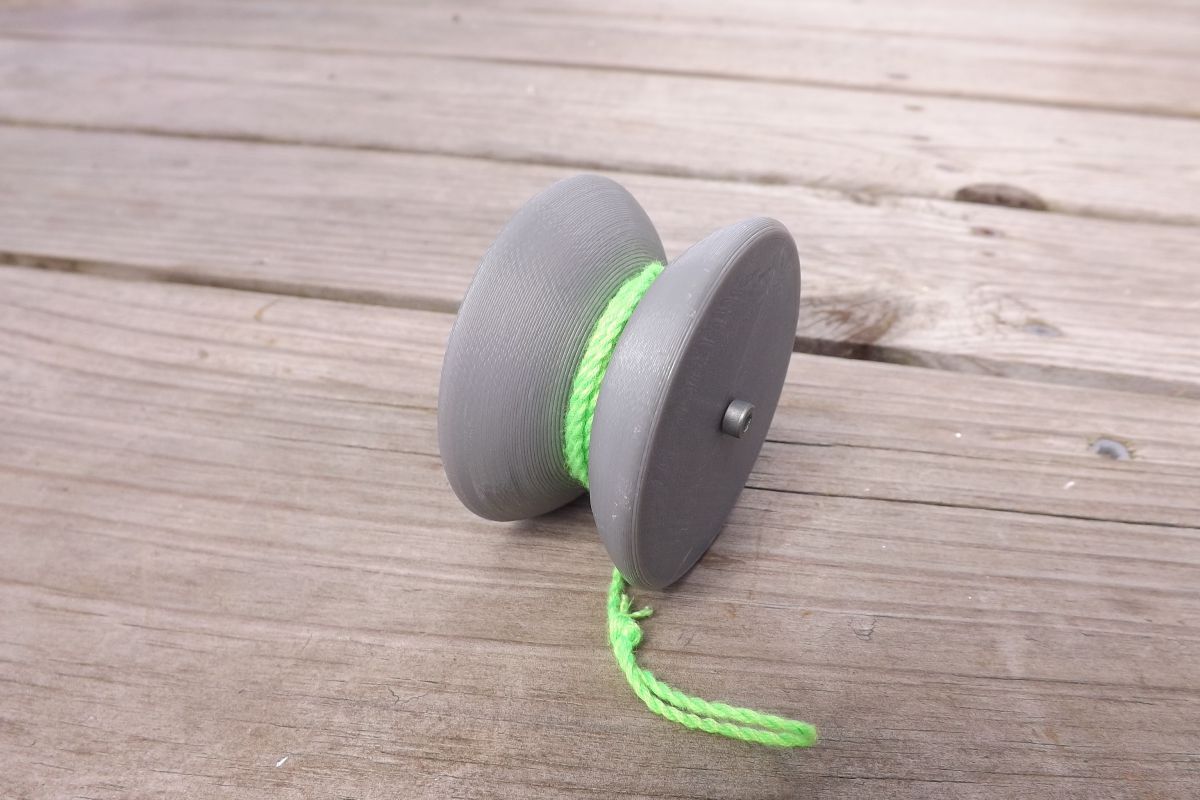
The print took about an hour to complete. Once complete, we popped the parts off of the plate and started the build process. There was nothing particularly complicated about putting the yo-yo together. However, I did have to drill a hole through the center of the lexan rod. This piece acted as a bushing that fit the 3mm screw and bearing nicely.

This is the first completed yo-yo! We completed the project meeting our design constraints and were done before dinner (under four hours total time). The design worked surprisingly well. My 12-year-old, the yo-yo virtuoso, took it for a test run and was amazed at what we accomplished.

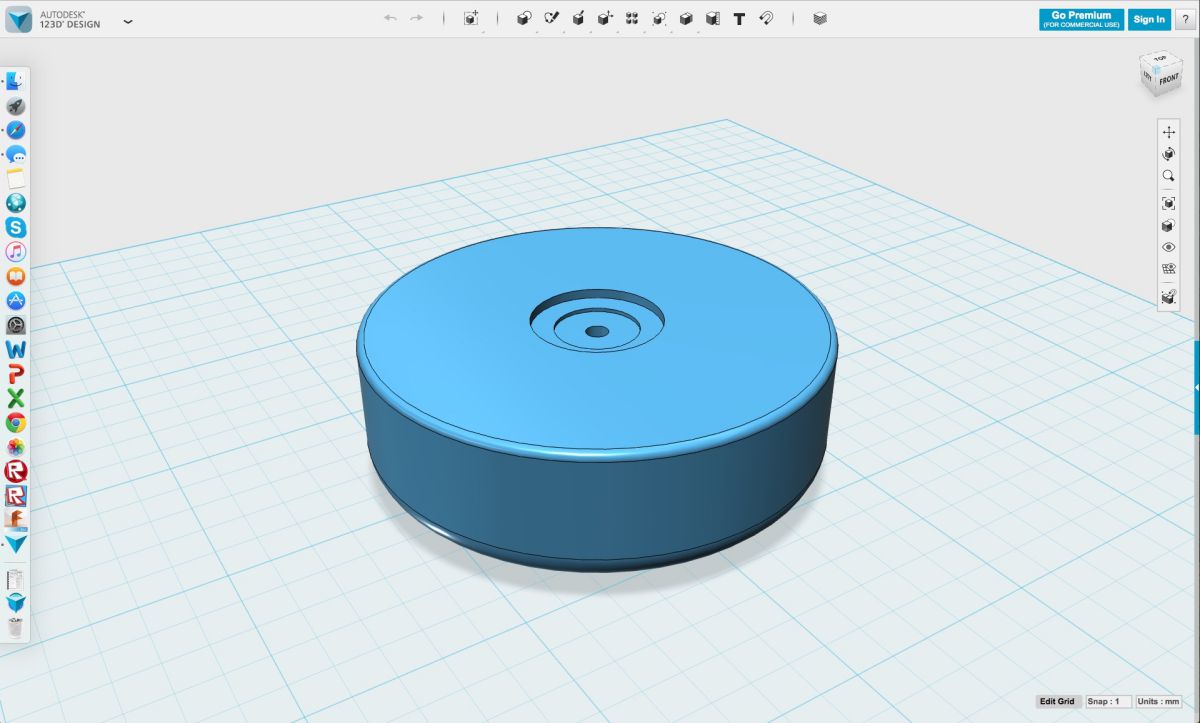
The boys had some great learning: basic 3D design skills, prototyping workflow, and building mechanical assemblies. We also made a fun time out of less than ideal circumstances. The next day, my eldest started up Autodesk 123d Design and came up with an improved yo-yo design:
I’d say the project was a resounding success. +1 dad.
Project design files are free and available to anyone who’d like to use them: Yo-yo 3D print file on Thingiverse


Nice work, Chris… and boys!
Thanks so much James! Great fun.