Yesterday, Ryan Hiller provided some great tips on finding inexpensive mini figurines for gaming that included offerings on Kickstarter and eBay. There’s no doubt that miniatures are useful to our favorite games, especially RPGs, and it’s nice to know there are options out there for those on a limited budget. While I’m all for saving money, I also would like to toss out two more factors for consideration when investing in minis — storage and durability.
Let’s talk about durability first. Whether you’re dealing with plastic or metal figures, you’ve still got to show some care in their handling. I imagine anyone who has collected for any length of time has witnessed some accidental (or intentional) damage to their collection. It might range from a bent sword to a broken base and everything in between. I had a favorite wizard miniature (a metal from Ral Partha) decades ago that I painted as best I could and used in just about any D&D campaign I played. (I favored wizards… still do.) One day a fellow player got too excited in swiping his hand and my wizard went flying off the table. His silver staff with a red jewel on the end was damaged permanently — the staff was found but the small red jewel on the end was not. Even plastic figures aren’t invulnerable to damage — they might be able to handle drops better, but they are just as susceptible to being stepped on or having small detail work bent or ripped off.
Durability is definitely a factor that you should consider if you’re going to invest in a miniature collection. Metal miniatures tend to be a little more expensive than plastic, but with the super-detailed plastic miniatures coming out now, you’re still going to want to protect any investment… no matter the material. And this leads us to our next consideration.
When it comes to collecting mini figurines, storage space is something that’s likely never to decrease. Figures, especially those made of more durable metals, tend to need something for toting them around that prevents figures from knocking against one another. This can range from boxes with individually padded compartments to hobby carrying cases that allow figures to rattle around a little. Minis may be small, but any army of 50 skeletons is still going to take up some shelf or closet space. I’ve seen a mini collection that takes up a small room, with boxes upon boxes stacked (and labeled) on multiple tables and against every wall. Custom boxes for holding miniatures can cost more than the combined value of the figures they hold. You can save some money by buying inexpensive carrying-case boxes with small compartments, but you’re also less likely to toss expensive metal figures into those given how they might rattle around and get damaged. On the really inexpensive side, I’ve seen folks carry plastic miniatures in Ziploc bags, so there’s always that solution. Whatever method you choose, however, the fact is that if your collection grows large enough, you’ll need a place to store them.
The general consensus among most game players who collect miniatures is this — just as you can’t eat just one potato chip, it’s very difficult to own a single miniature once you get started, and I believe it’s even worse for career DMs who often want to present their players with colorful and realistic -ooking opponents and friendlies. Put me in that boat. But as a DM, I really don’t want to spend a lot of money on miniatures, especially miniatures that I might use only once for a special campaign.
Last year, I returned to DMing after a long hiatus, and I didn’t have a large collection of minis to use with my players. Fortunately, I had access to a fellow DM, Chris W., who showed me a fast and easy way to create minis for all the upcoming adventures I would be running during Adventurers League. Below I’m going to show you Chris’ method for creating minis and my own method for creating bases. You’ll see that it’s easy to modify based on the size miniatures you wish to create, and you’ll also see how easy it is to make armies of similar figures quickly. With these, you don’t really have to worry about durability or storage or cost… as you’ll soon see.
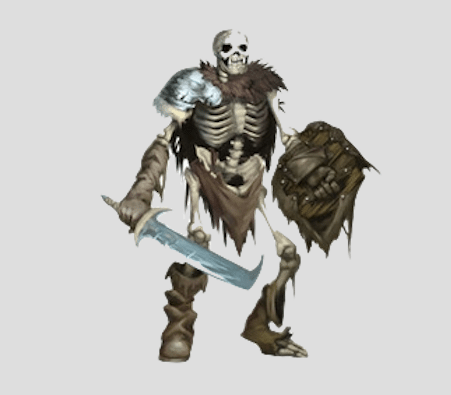
It all starts by grabbing an image from images.google.com, and be sure to type in “D&D” or “Pathfinder” as part of the search term — that will almost guarantee some appropriate artwork. Below you can see what came up with a search for ‘skeleton D&D.’ So many options!

For something like skeletons, I usually end up grabbing a bunch of images so there’s some diversity in look, but here I’m just going to show you how to create one particular skeleton miniature. I’m using a Macbook Air, so I either download the image to my computer or use the screen capture tool (Shift-Command-4) to grab it. I make pairs of each image, one will be the front and one will be the back.
Some images will have nothing in the background — just white. Others may have grass or some sort of shading. You’ll want to remove that if possible. With OS X, it’s easy — I open up the image in Preview and use the toolbox icon (in blue in the image below) and click on the Instant Alpha button (second from left). If you click outside the main image (in this case, the skeleton) and drag the pointer slowly, surrounding areas will be highlighted (red in this instance). Tapping the delete key will delete the selected (red) sections, leaving behind empty space.

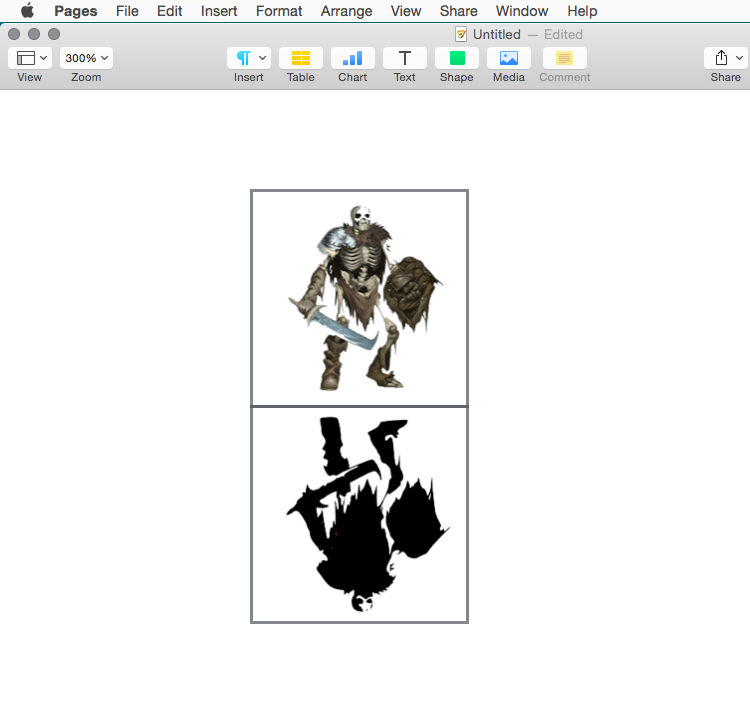
Notice that under the skeleton’s right arm is still white and a little sliver of white can also be seen near the bottom of the shield. You can go as crazy detailed as you like — to remove the white under the arm, I use the Instant Alpha button again but this time I click carefully in the white area and drag the mouse slowly to highlight that little section. I can use the Zoom button and zoom in on the shield to eliminate that little bit of white. When I’m done, I’m left with an image like the one below.
Now, make a copy of your edited image. I’ll call the duplicate ‘Skeleton Back’ and open it up in Preview. This time, however, after clicking on the toolbox icon, I’ll use the Adjust Color button that is just above the skeleton’s head in the image below… it looks like the side of a prism and opens the control panel you see to the right of the skeleton.
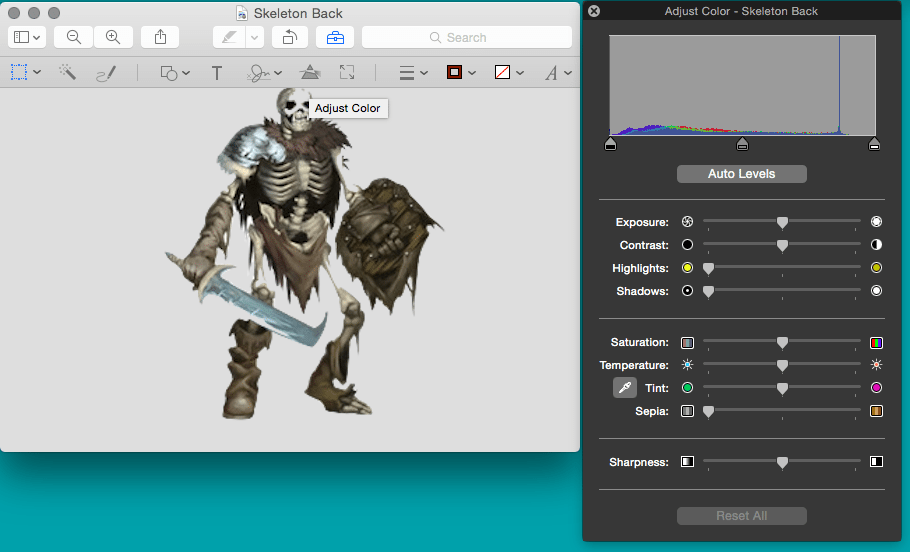
If you’ve removed all the background colors/shading and left behind ONLY the main object, this should go smoothly. At the top of the control panel, you’ll see a graph of the color distribution of the image. Click on the left-most triangle running under the edge of that graph and drag it all the way to the right. You should see the main image turn completely black as shown below. (You might have to play around with the drag bars a bit to get the result you desire.)
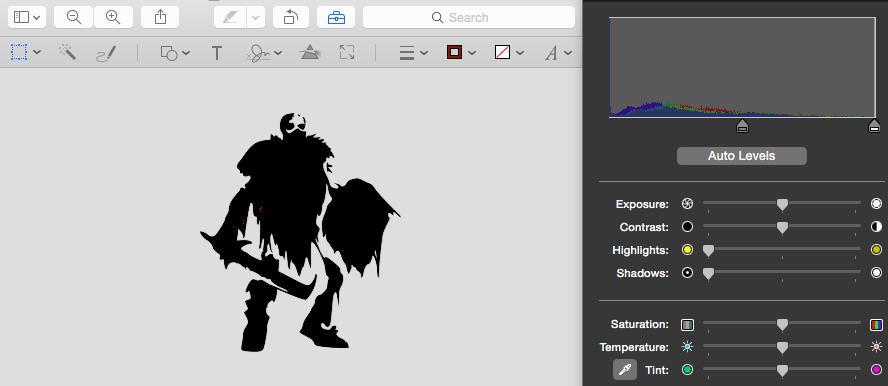
Now I have the front of your figure… and a shadowy version that will be used for the back.
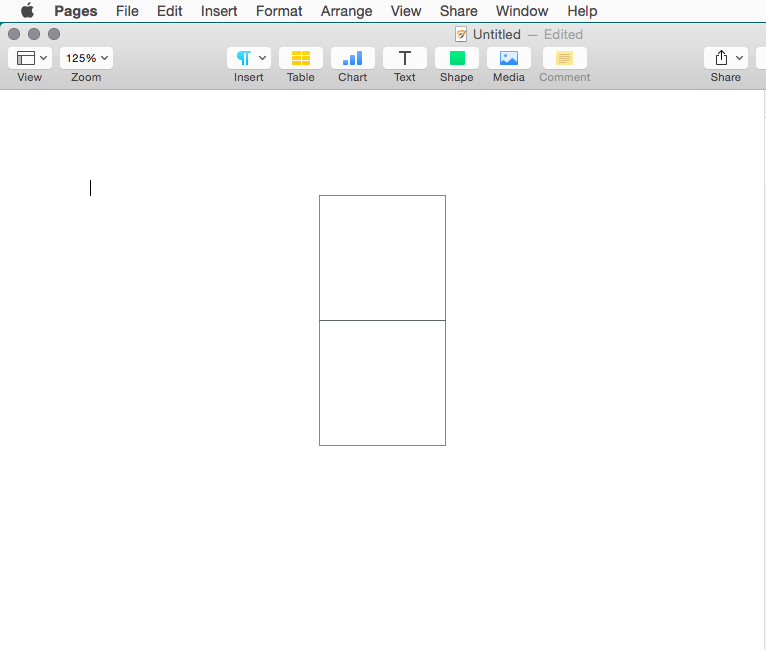
Next, I open up Pages (but feel free to use any application you like that will let you do what you see below) and create a pair of 1″ square boxes that will be dragged and placed to share an edge. You can see this in the image below.
Pages lets me just drag a jpg or other image file onto the workspace and then size it down. I’ve done this with the front image and you can see below that I’ve dragged the back image onto the workspace but not yet resized it.

I next shrink down the back image (using those little white boxes in the corners of the image) and flip it vertically (found in the Arrange menu). I drag it into place and I’ve got the mini completed as shown below. I could easily add a number or name or other bit of text, but I’m going to leave this one blank.
UPDATE: I rushed doing this post and realized I’d already made a mistake — with my minis, I actually orient them so the “legs” or bottom of any image is pointed AWAY from the fold. In these images, the legs of the skeleton are pointed at the fold line — they should be reversed. You’ll understand why in a moment.
Once you’ve got a mini created, drag a selection window around both boxes and both images to select all four elements — click on the Arrange menu again and choose Group to lock the images together so you can drag them around as you wish. You can copy-and-paste all you like, making multiples as shown below.

Print them, cut them out, and fold on the solid line. The fold creates a small upside-down V (tent) so the minis will stand. I go one step further and 3D-print little stands so I can hot glue the two loose ends into a small groove I designed into the stand. If you’ve got access to a 3D printer, here’s a download for my miniature stand — this file will print 15 at a time.

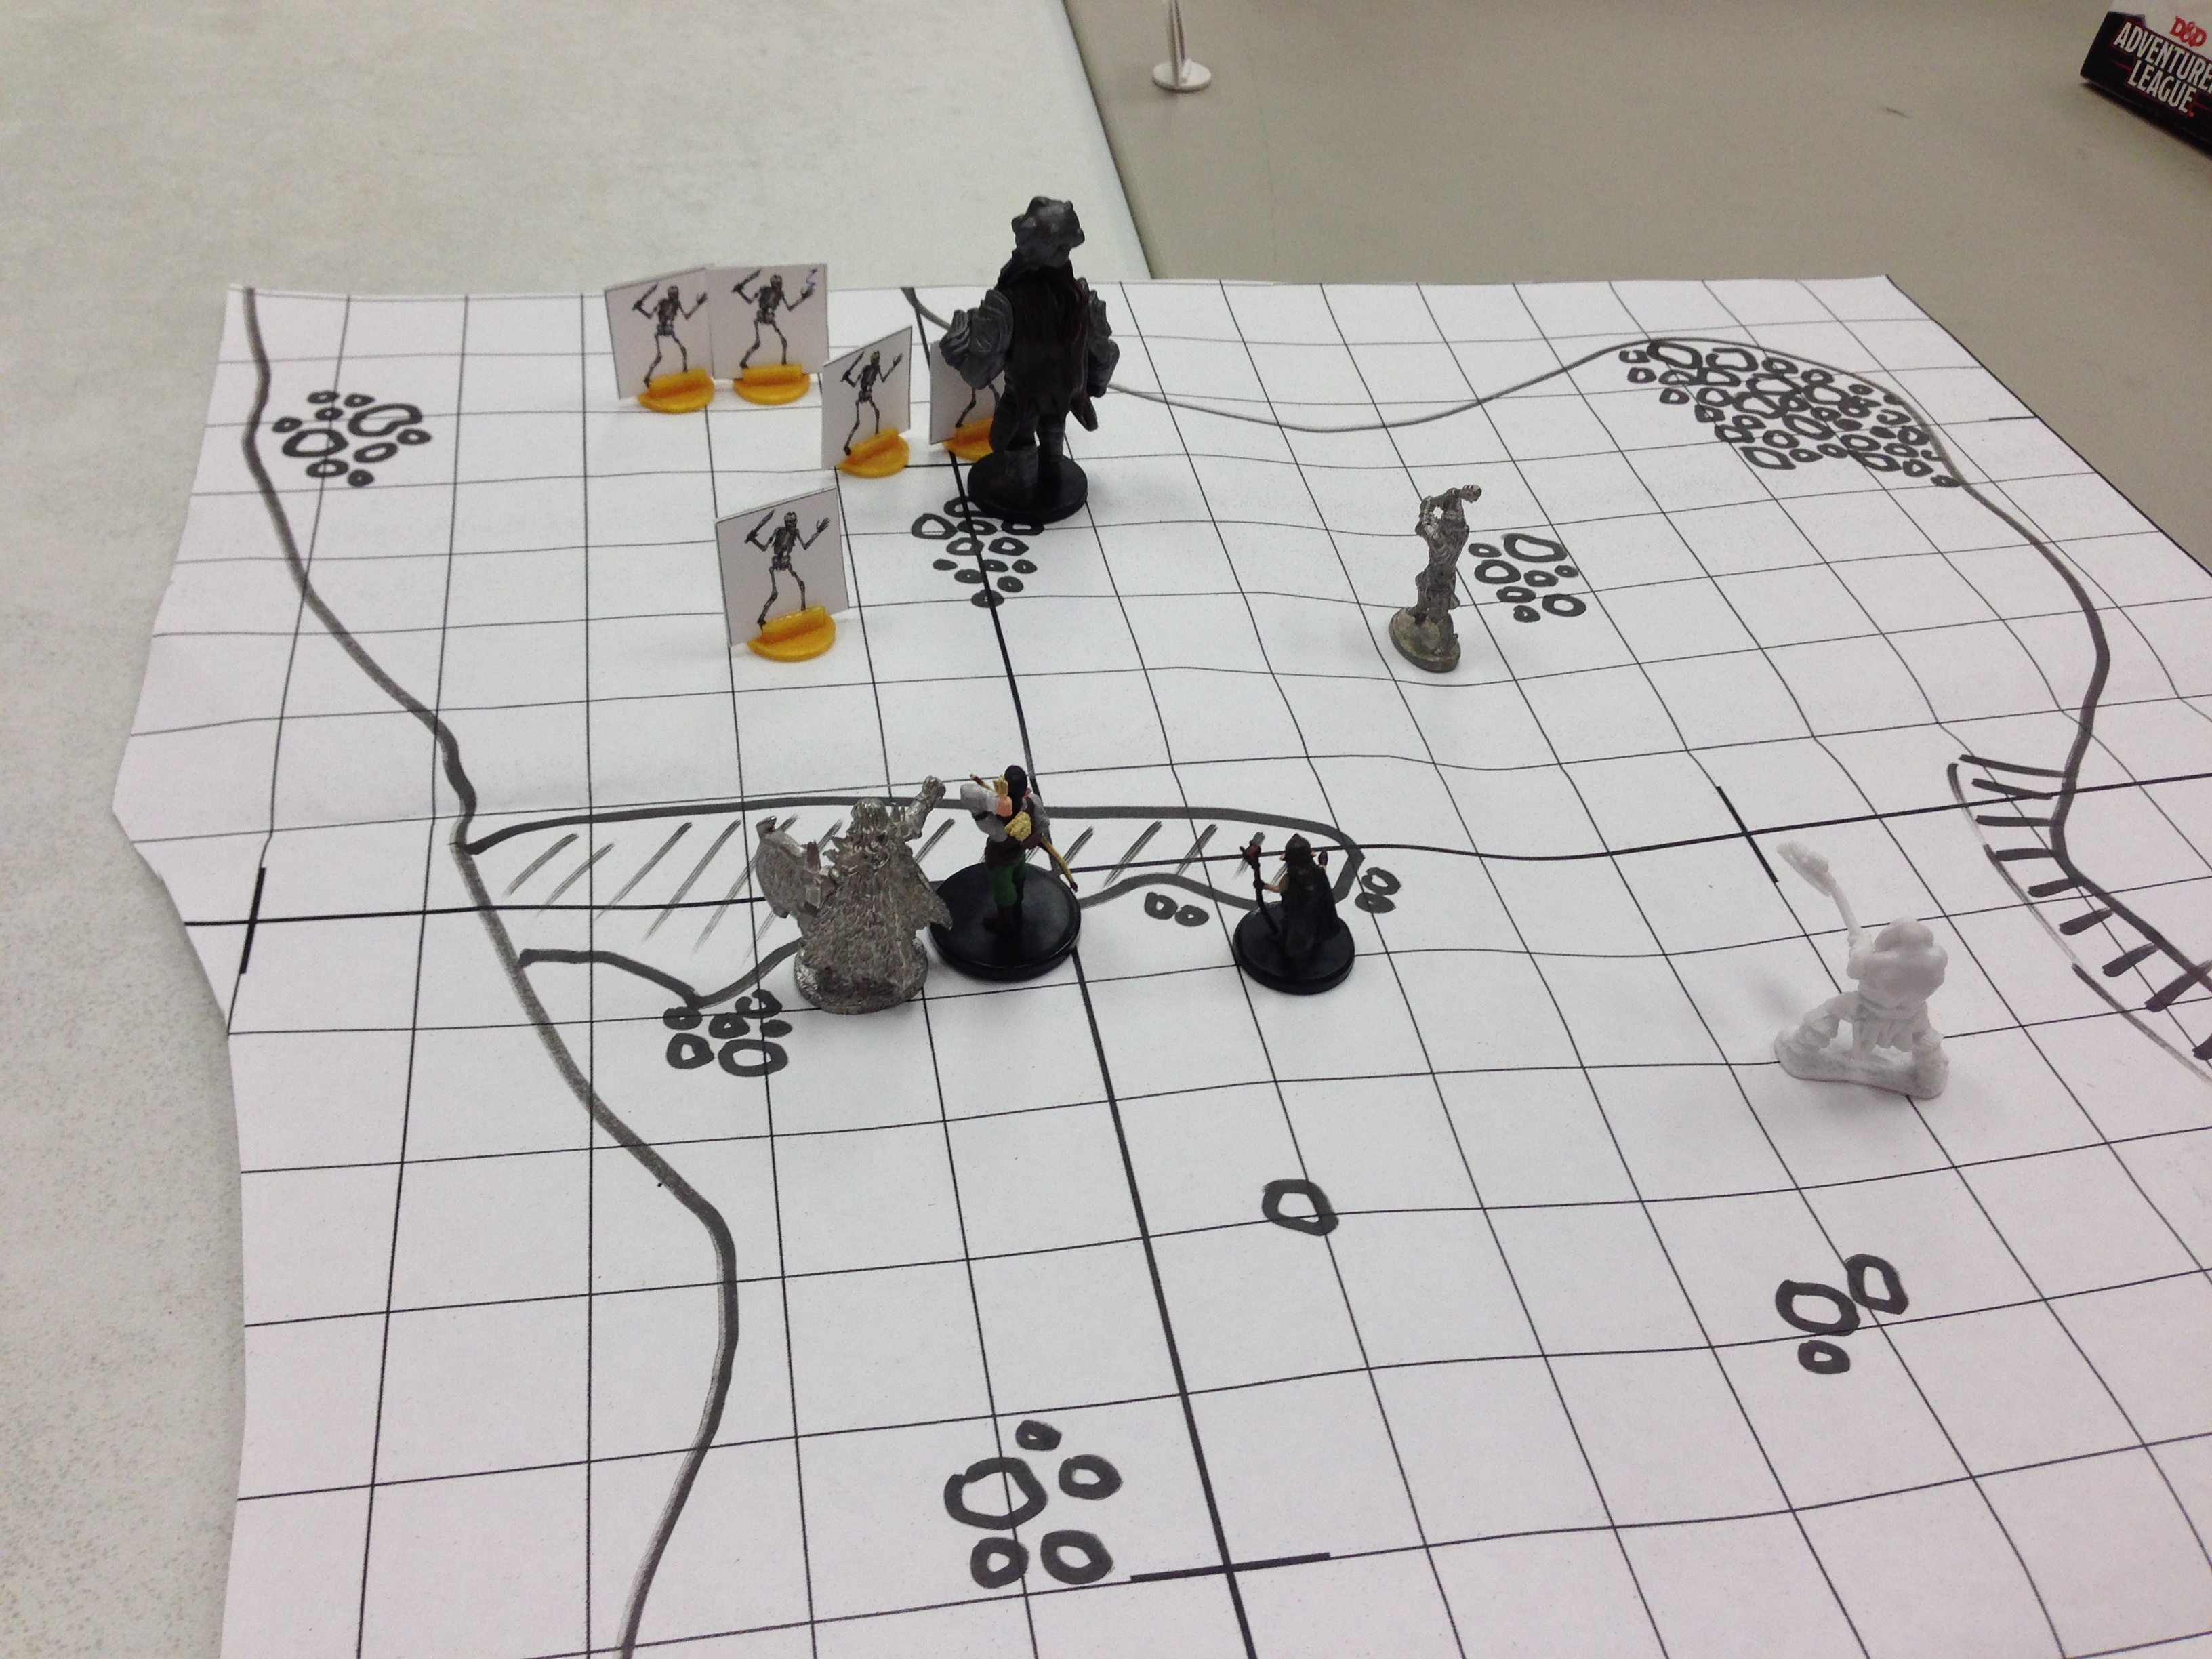
And here are some examples of my miniatures complete with 3D printed stands — you’ll see skeletons, creeping claws, and some bandits. I print out the stands in different colors.
I’ve developed quite a collection of these in less than a year — I’ve got creatures, NPCs, barrels, crates, and all kinds of imagery that I won’t cry over should they get lost or damaged. I often will reward players who defeat an enemy by just giving them the miniature — these things are just too easy to duplicate and the 3D printed stands cost about 5 cents for each batch of 15. They might not look as great as metal or plastic painted minis, but they’re lighter to carry, easy and fast to produce in quantities, and a gallon Ziploc bag holds about 100 or more of them.
Again… they’re not going to win any awards, and they do require a little bit of time to prepare the images (front and back) and get them sized for the small boxes, but once I’ve created them, I save them so I can print them up again at any time. I’ve probably got 20 or 30 full sheets (8.5″ x 11″) with dozens and dozens of creatures and objects — I can easily copy one and then make duplicates if I need a full sheet of kobolds, for example. I’ve even used this for large creatures — the only change is to make the boxes 2″ x 2″ (or even larger) depending on the size of the creature and how the rules specify it takes up space.
I’d like to thank fellow player and DM Chris W. for showing me this great method for creating inexpensive minis. And if you’ve got your own methods for creating minis, I’d LOVE to hear them. Please share in the comments.


I was a cheap Warhammer40k player. I never bought any mini. All my minatire were homemade. Sure i couldnt play with purist player, but with 4-5 friends, it was all right.
The easy way is to make a whole printable pattern (arround 20-30 mini in one printable sheet), bend it in two, with enough place to make a round on the base. Then you glue another solid base (another cardboard round), then you glue a penny for weight. Its really the most cost efficient way to make it stay on the table.
You can also buy some cheap figurines in a dollar store, mix them together, and paint them.
I can post pictures, but i dunno how on a reply 😉
I’ve been making my own Star Wars RPG paperminis, drawing and releasing their pdfs on my blog. Here’s a link to the entire library, all free for download: http://www.hishgraphics.com/blog/pivot/tags.php?tag=paper_minis
Also here’s how I assemble paperminis for my Patreon releases: http://www.hishgraphics.com/blog/pivot/entry.php?id=1330
I always end up using lego minifigs. Inexpensive, durable, customizable, slightly posable, paint them if you want. I think I’m finally over the nightmares of huge hordes of grinning skeleton minifigs now…
Maybe, just maybe, you could throw those “20 or 30 full sheets” into a nice dropbox for us all to share.
Also, mini binder clips are perfect bases for this type miniature. Clip the paper in, remove the handles and use the flat end as the stand.
a site called iheartprintandplay.com produces cartoonized, printable minis in an extremely wide variety. Just thought i’d mention.
Will check it out!
Hi,
I’m also creating paperminis and releasing them as PDFs on Patreon. You could download and print most of them for free at my Patreon page: https://www.patreon.com/hishgraphics
I also draw and release for free paperminis for the Star Wars RPG up on my blog here: http://www.hishgraphics.com/blog/pivot/tags.php?tag=paper_minis
Feel free to download and assemble them!
When I make my paper mini’s I make sure that the width of the mini is to scale (1″, 2″, etc) for the creature. But I also make it about 1.5x taller. So a 1″ width will be 1.5″ tall – which seems to scale well with plastic mini’s if you’ve got them at your table.
If you’re not fortunate enough to have a 3D printer (drool!), and you want something different than binder clips (great suggestion, btw) you can also buy generic paper card stands from numerous sites like http://www.boardsandbits.com.
And James, I am NOT sorry about sending you to the above site. They, like a surprising number of other sites I just discovered, have all sorts of blank materials from screens to boards for making your own games – I can’t WAIT to see what you whip up! 😀
PS – This “Chris W” fellow sounds like a really cool guy. 😉
Rats, while that’s a good site, this is the one with all the stuff a game designer could want!
https://www.thegamecrafter.com/
https://m.youtube.com/watch?v=VWWu9Ny8cW8