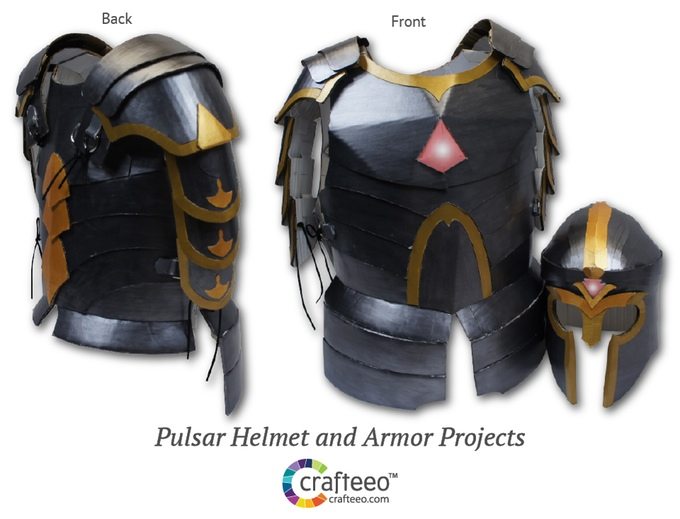
In May, we ran a giveaway for some Crafteeo cardboard armor, and I’m happy to announce that Crafteeo has now launched a Kickstarter campaign with some pretty amazing options.
The reward levels of the Kickstarter campaign include a helmet and armor with a programmable LED light, a round shield, and a longsword. Crafteeo sent a sample of one of the helmets (with the non-programmable light) so I could see how the kits work, and here’s a closer look at the process. Down at the bottom I have a little more about the Pulsar helmet from the campaign, too.

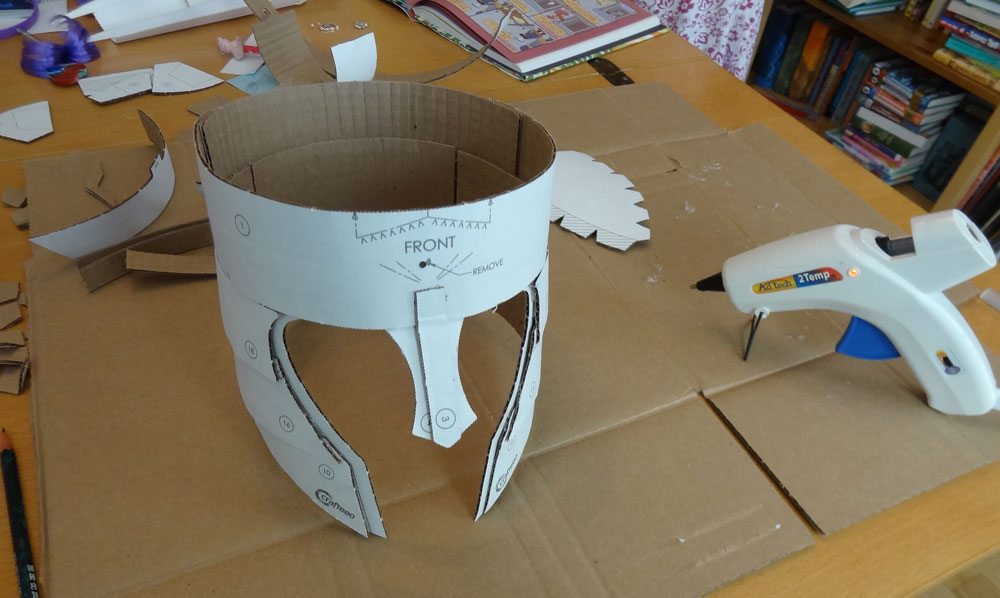
The kits come with a couple sheets of cardboard that is perforated and printed, with numbers on the various pieces. The helmet kit also included a little LED assembly, some plastic pieces that go over the LED, and a small gem. Finally, it included two jars of paint, a metallic blue and silver.

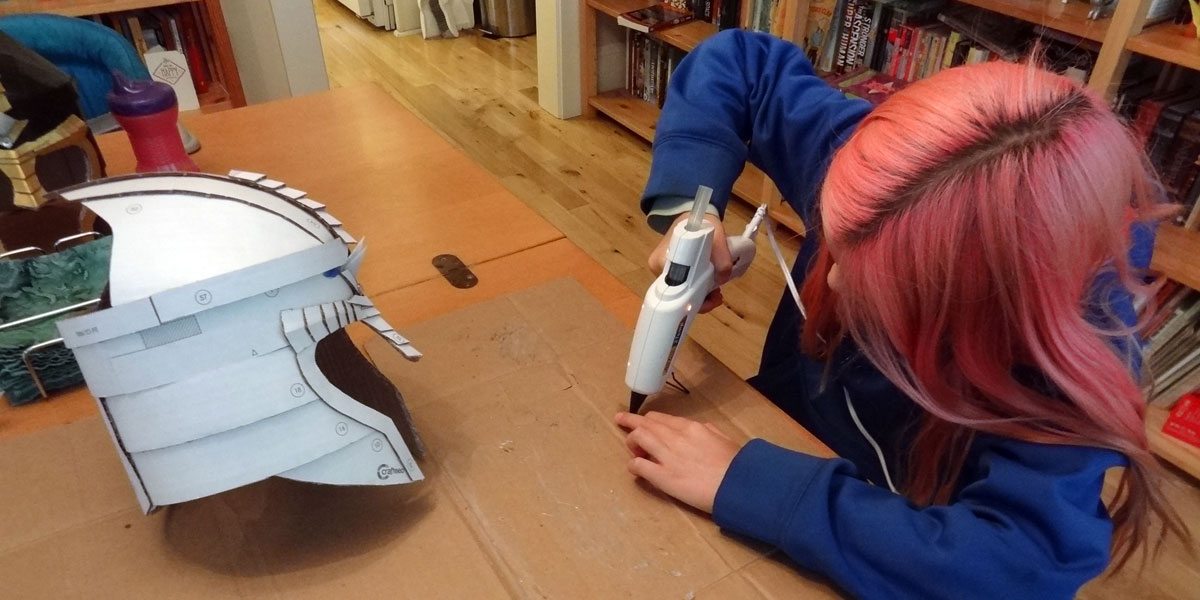
The kits don’t come with printed instructions. Instead, you use the video instructions on the Crafteeo website, which are broken down into smaller steps for each project. First step: cutting out all the pieces. The cardboard is perforated, but it helps to use a craft knife to get them out cleanly and trim off the little nubs. Both of my older daughters helped punch out pieces since there were so many of them.

The website shows how to curl pieces around a pencil to curve them. This took a bit of time, shaping the many bent pieces that form the helmet, but you have to do this before you start assembling things. We did the curling in batches according to the parts you need to assemble.

When we had the first batch of curved pieces ready, we got out the hot glue gun and started assembling. The Crafteeo website has a few tips on how to apply the glue so that you don’t get a lot of glue squishing out along all the edges, and it does take some practice.
My girls helped with some of the gluing but not quite as much–you have to be pretty quick sometimes getting the glue on and getting the piece in place before the glue starts to harden. For some of the curved pieces, if you’re too slow and the glue cools down, it won’t hold in place as well. So my daughters did more of the smaller decorative pieces later rather than the more structural pieces.
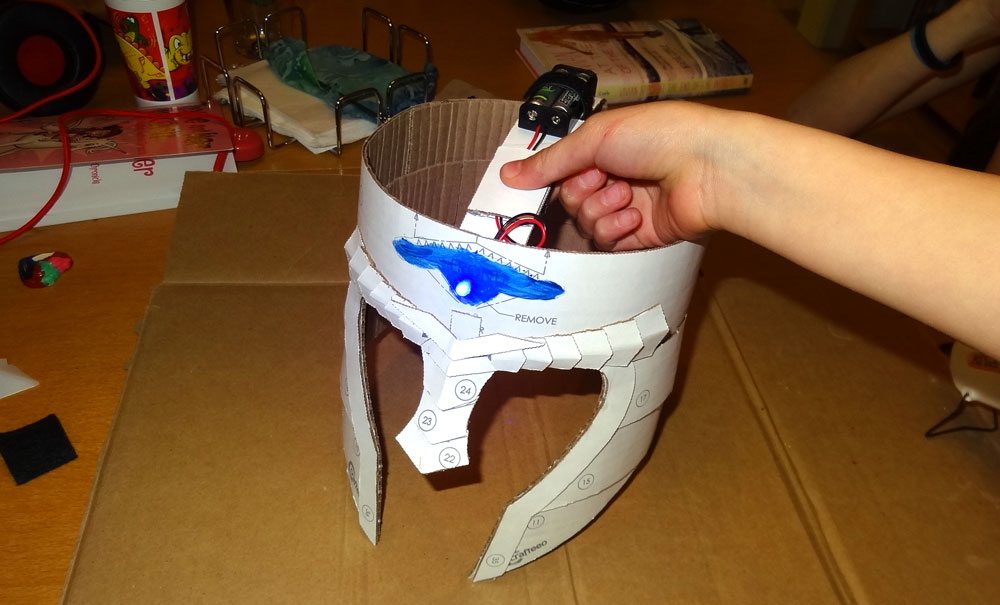
For this helmet, there’s just a simple LED (ours was blue) powered by two batteries. It switches on with a simple push-button that’s mounted on a center strap; when you put the helmet on, the strap and button hits the top of your head and turns on the light. The Pulsar helmet from the Kickstarter campaign will come with an Arduino-compatible microcontroller and an RGB LED, so you can program the light–no soldering required!
Once we got the LED in place, there was still some more assembly required, particularly adding on all the little decorative pieces.
To finish off the helmet assembly, you apply hot glue on the exposed edges of the cardboard and smooth it out. It helps to hold everything together and cover up the rough spots.

The paint is pretty nice, though the silver paint needed a few extra coats–you could still see the printed numbers through the paint at first. The helmet has a very cool metallic sheen when you’re done.

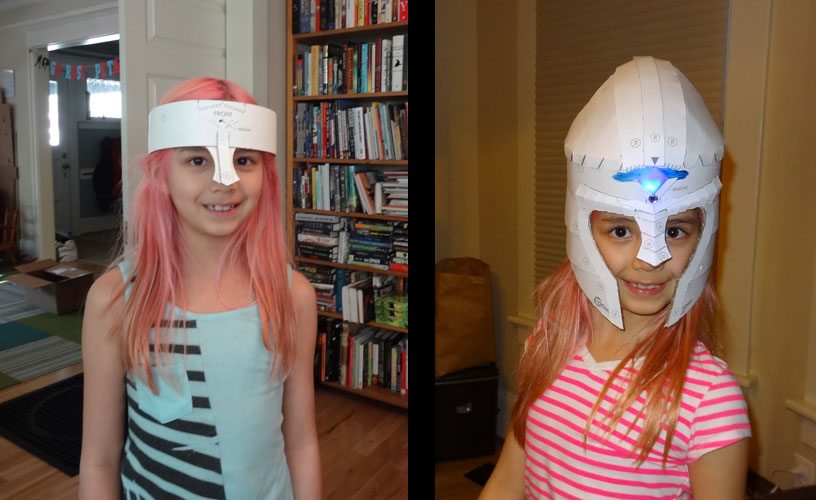
The entire assembly took us several days, since we worked on it mostly when the toddler was napping to keep her out of the hot glue and sharp knives. I think the longest part was getting all the pieces punched out and trimmed down, because that part is less exciting. Once you start gluing it together, it’s a lot of fun to see the helmet taking shape.
I love making stuff out of cardboard. While I think it’s ideal to make cool things out of my own scrap cardboard, Crafteeo sets are definitely at a level above what I would typically construct, and the addition of electronic components is a cool touch. Of course, if you’ve got a lot of cardboard anyway, you can always order the patterns from Crafteeo instead of the kits and cut out your own cardboard.
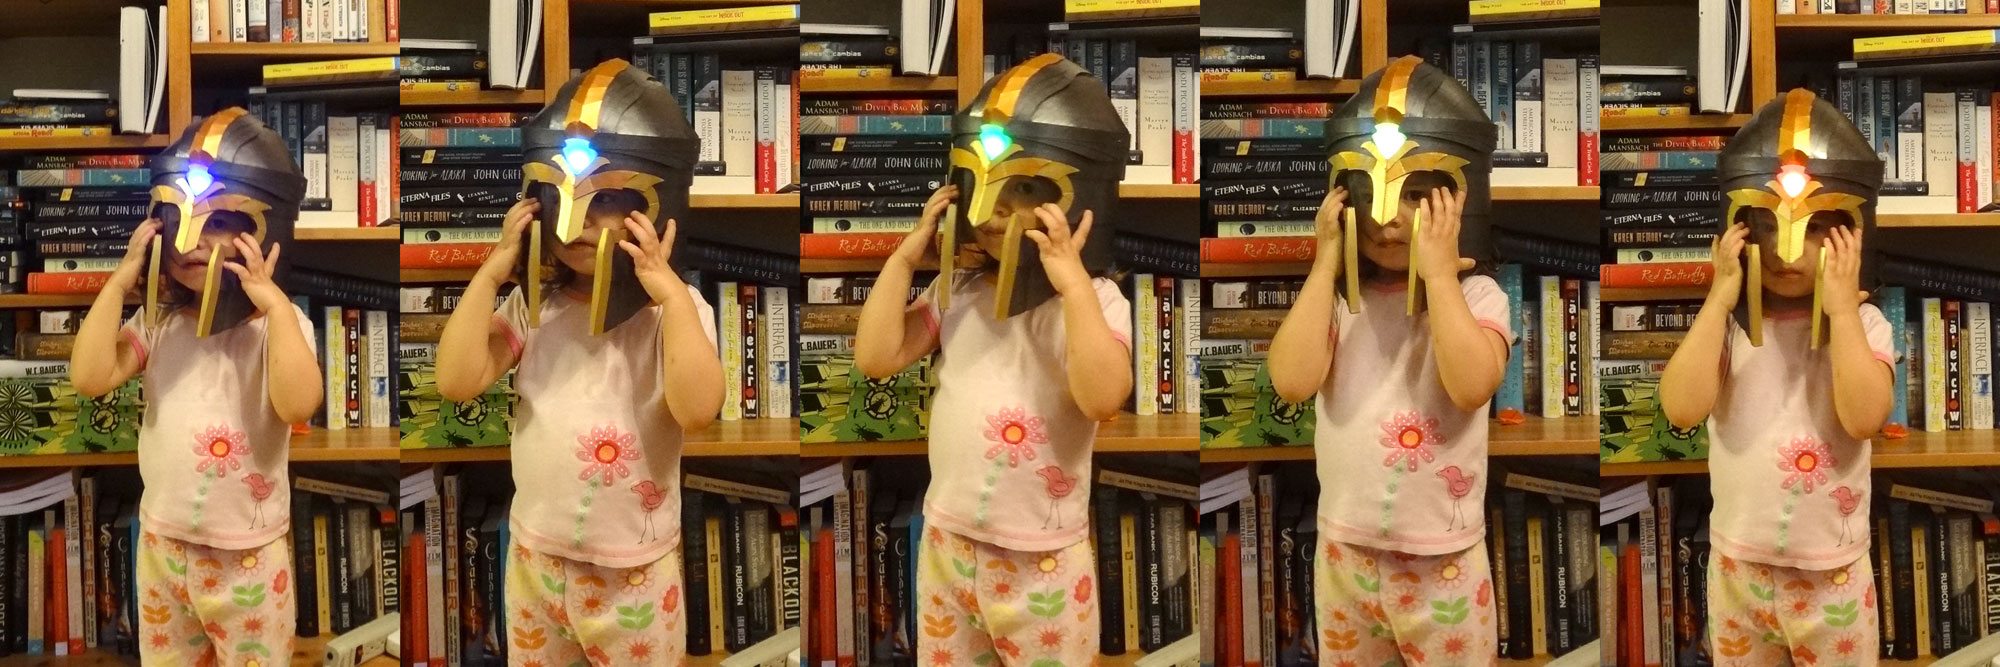
The helmet included in the Kickstarter campaign is the Pulsar helmet. Designer How-Lun Chen sent me a sample that he assembled himself so I could take a look. It has a slightly different shape, but the biggest difference is inside: it uses an Arduino-compatible microcontroller, mounted on the top near the back, and also has a small light sensor on the front of the helmet just above the gem. It’s currently programmed so that the light will activate when ambient light gets dim: the gem slowly cycles through the various different colors. When ambient light levels are higher, the gem flickers through all the colors quickly and then turns off.

You can program the lights yourself, too, and there’s a switch inside so you can turn off the helmet completely when it’s not in use.
Check out the Crafteeo Kickstarter and the reward levels available. If you’ve got kids who love make-believe, this is a really fun project to work on together.


Awesome teamwork! Looks very cool.
Fantastic job on that Helmet. You and your daughters are true makers! Helmet looks stunning and the details you provided are so helpful!