I know I’m not the only one who has very fond memories of making things out of Shrinky Dinks as a kid. I recall only the pre-patterned pieces, though, themed for whatever was big at the time. There were so many. Peanuts, Garfield, Smurfs, even Mork & Mindy and Buck Rogers. It wasn’t until I was an adult that I found plain sheets of the shrink plastic–even though they did exist when I was kid–but I was at a loss for what to draw on them. I needed ideas for projects. Still do.
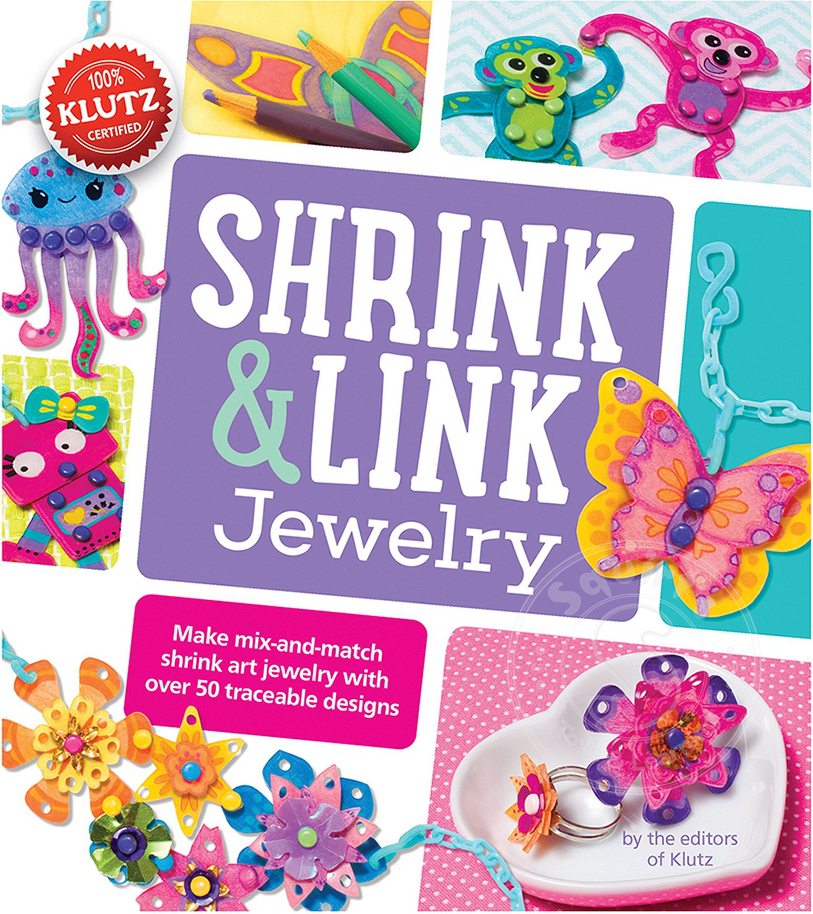
Klutz’s Shrink & Link Jewelry kit comes with complete instructions for making wearable art using sheets of plain shrinkable plastic. In addition to the shrinkable plastic and various accessories, the book is filled with ideas for how to use it all. A great family activity, I suggest to parents to read the instructions all the way through before sitting down to do this project with your kids. Pay special attention to the baking instructions.
The book includes a large number of patterns to trace and color, along with alternate background patterns for decorating sections. Kids (and parents) can make necklaces, rings, frames, lockets, floating pieces, charms, and whatever their imagination can create. Since you’re starting with blank pieces of plastic, you can either trace patterns in the book or create your own designs. The book includes patterns for robots, flowers, butterflies, monkeys, sea creatures, foxes, owls, mermaids, and more. The patterns are scattered throughout the book, so spend some time perusing them while you read the instructions.
The set comes with five sheets of shrink plastic, a cardboard baking sheet, sequins, a ring blank, S-hooks, an 18-inch plastic necklace chain, brads, and a shaping tool. You’ll need to provide a few things, such as an oven, oven mitts, art supplies such as markers and colored pencils, a cookie sheet, etc.
I knew this was the perfect project to do with my kids, because everyone could create their own jewelry to match their liking. Rory even joined in on the fun.
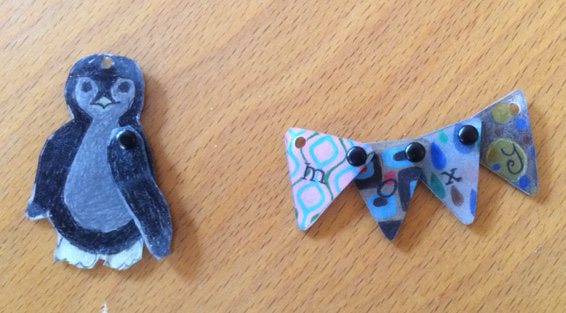
We all sat down and traced our choice of item. Rory made a fox, my daughter made an owl, my son made a penguin (for me), and I made a pennant banner. We painstakingly colored them in, cut them out, and waited for our turn with the oven. Since the kit recommends baking similarly sized things together because of baking time variation, we sorted everything by size.
Rory went first, and his pieces took forever to start shrinking. I think preheating the cookie sheet would have helped. We left them in until they had curled up, formed a dimple, and then settled back more flat. We took them out, immediately pressed them with the bottom of a glass to make sure they were as flat as possible, and then did the next batch. Subsequent batches went much more quickly. The long, thin pieces, such as the penguin’s arm, curled up quite a bit, but even those pieces settled down without problems.
If you’ve never played with shrinkable plastic sheets, definitely put it on your “Fun With the Family” list. Anyone old enough to use a pencil can participate, and grandparents might have some unexpected ideas as well. Be sure to gather around the oven while the pieces bake, since watching them shrink is really cool. Then when they are done, seeing your creations shrunk down in a much smaller, sturdier, and more useful format is exciting.
Shrink & Link Jewelry is a great activity to do with your kids, or older kids can do it on their own, once they are cleared to use the oven. Once the plastic sheets are used up, buy more sheets and make more jewelry!
Note: I received a copy of this book for review purposes.

I have two tips:
If you buy baked goods in the grocery store, they often come in clamshell packages made from #6 recyclable plastic. Cut out the flat parts and lightly sand one side to rough it up so the ink or paint sticks to it, and voila! you have shrinky dink sheets for free.
We have an old toaster oven, which you may be able to get at a thrift shop. We find this perfect for baking our shrinky dinks; it reaches the preferred temperature quicker and it uses less power.
Great ideas!
A heat gun, and a sillacone mat work waay better then a oven just use a wooden chopstick or something to hold them down so they don’t blow away