My fellow geek dads, friends, and family members know I am a scanner geek, through and through. This is a technology that continues to evolve and offer up more features to both home and office users. Armed with a personal scanner, you can get organized, reduce your clutter, and become more efficient.
I’ve got two scanners in my office, but they’re in no way portable. There are a number of smaller scanners out there that have a small footprint and are extremely light (in weight), but the one that’s been stowed in my truck and pretty much goes everywhere I go these days is the Doxie Go Wi-Fi. I’ve reviewed the Doxie Go in the past for GeekDad, but this new version has some improvements and now satisfies one of my biggest demands for a portable scanner — I don’t always have my laptop with me, but I almost always have my iPhone and/or iPad, and they both work great with the Doxie Go Wi-Fi and the matching iOS app.
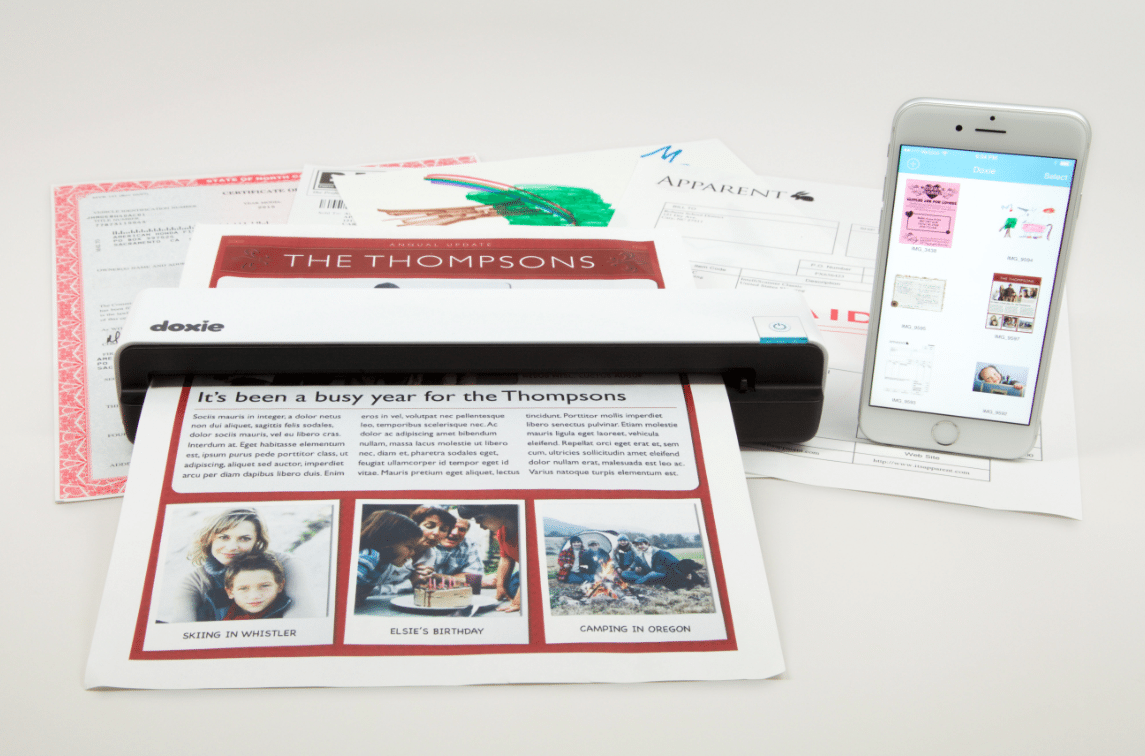
Before I get to the actual workings of the scanner, let me tell you what comes in the box. You get the scanner, obviously, but inside are a USB cable (for downloading the scans stored on the internal memory if you choose to not use the Wi-Fi option), power charger (with a few worldwide adapter plugs), a photo sleeve (although it’s not required but does work to protect old/fragile photos), a calibration sheet, and a cleaning tool. (Don’t lose that calibration sheet — you’ll likely only need it once, but I imagine if there’s ever a firmware update it might be needed again.) The cleaning tool is useful and recommended as you’d be surprised at how much dust and paper-debris ends up on the rollers after you scan a few hundred pages.
The Doxie Go Wi-Fi uses internal memory to store scans, and it has a rechargeable battery so you really can take the scanner with you. The dimensions of the scanner are 10.5 x 1.7 x 2.2″ (26.7 cm x 4.35 cm x 5.6 cm) and it weighs 15.3 oz (433g). The bottle of water I typically carry around weighs more and takes more space.
The scanner can scan at both 300DPI and 600DPI, but keep in mind that the higher resolution will use up the battery a little faster. (But not that much faster.) The specs state you can get about 300 pages at 300DPI scanned on one charge. I’ve not yet reached that point, but after about 80 scans or so, the power light is still solid and not flashing to indicate a low battery.
Note: To switch back and forth between 300DPI to 600DPI, you simply tap the power button quickly. The light changes from green (300DPI) to orange (600DPI) and vice-versa.
Software for using the Doxie Go Wi-Fi is available for Windows and PC — I’m not really going to go into much detail on that software because… honestly… it’s not all that difficult to download, install, and figure out how to use. For me, the real power lies in the portability of the scanner and how it can be used in conjunction with an iPhone and/or iPad to manage and organize scans. It also helps if you have Evernote or Dropbox installed on your iPhone or iPad, but it’s not required. That said, I’m a huge Evernote and Dropbox user (I try to stay as paperless as possible, and I scan just about everything and send it either into Evernote or Dropbox), so once again this little scanner manages to fill that very specific need of mine to have a scanner handy and available when I’m not at home.
The Doxie Go Wi-Fi is a single-sheet document scanner, so just understand that you can’t cram a pile of 10 or 50 sheets into the back of it. You start by inserting a sheet (face up) as far left as possible. If you’re scanning front and back of a page, just take the scanned page out of the back, flip it over, and insert it. The software will allow you to organize your scans and apply a virtual “staple” to hold documents that go together. It’s pretty cool.
So, let’s take a look at scanning something. Before I do that, however, I need to link my scanner to my iPhone. (The steps are identical for the iPad.) When you first open the iOS app, you’ll see a button that asks you to Setup New Doxie. Tap that button.

You’ll be told (and shown with some simple graphics) how to turn on the Doxie and go into the Wi-Fi options in Settings (on your phone or tablet) to select the Doxie Go Wi-Fi scanner. It was almost too simple to mention here, but there you go.
Now it’s time to scan. Remember, the scanner saves all scans to internal memory, so while scanning there’s no real need to have your iPhone or iPad on or even nearby. But once you’re ready to view scans or organize them (such as sending them on their way to Dropbox, for example), the iOS app can save you the trouble of powering up a laptop or desktop computer.
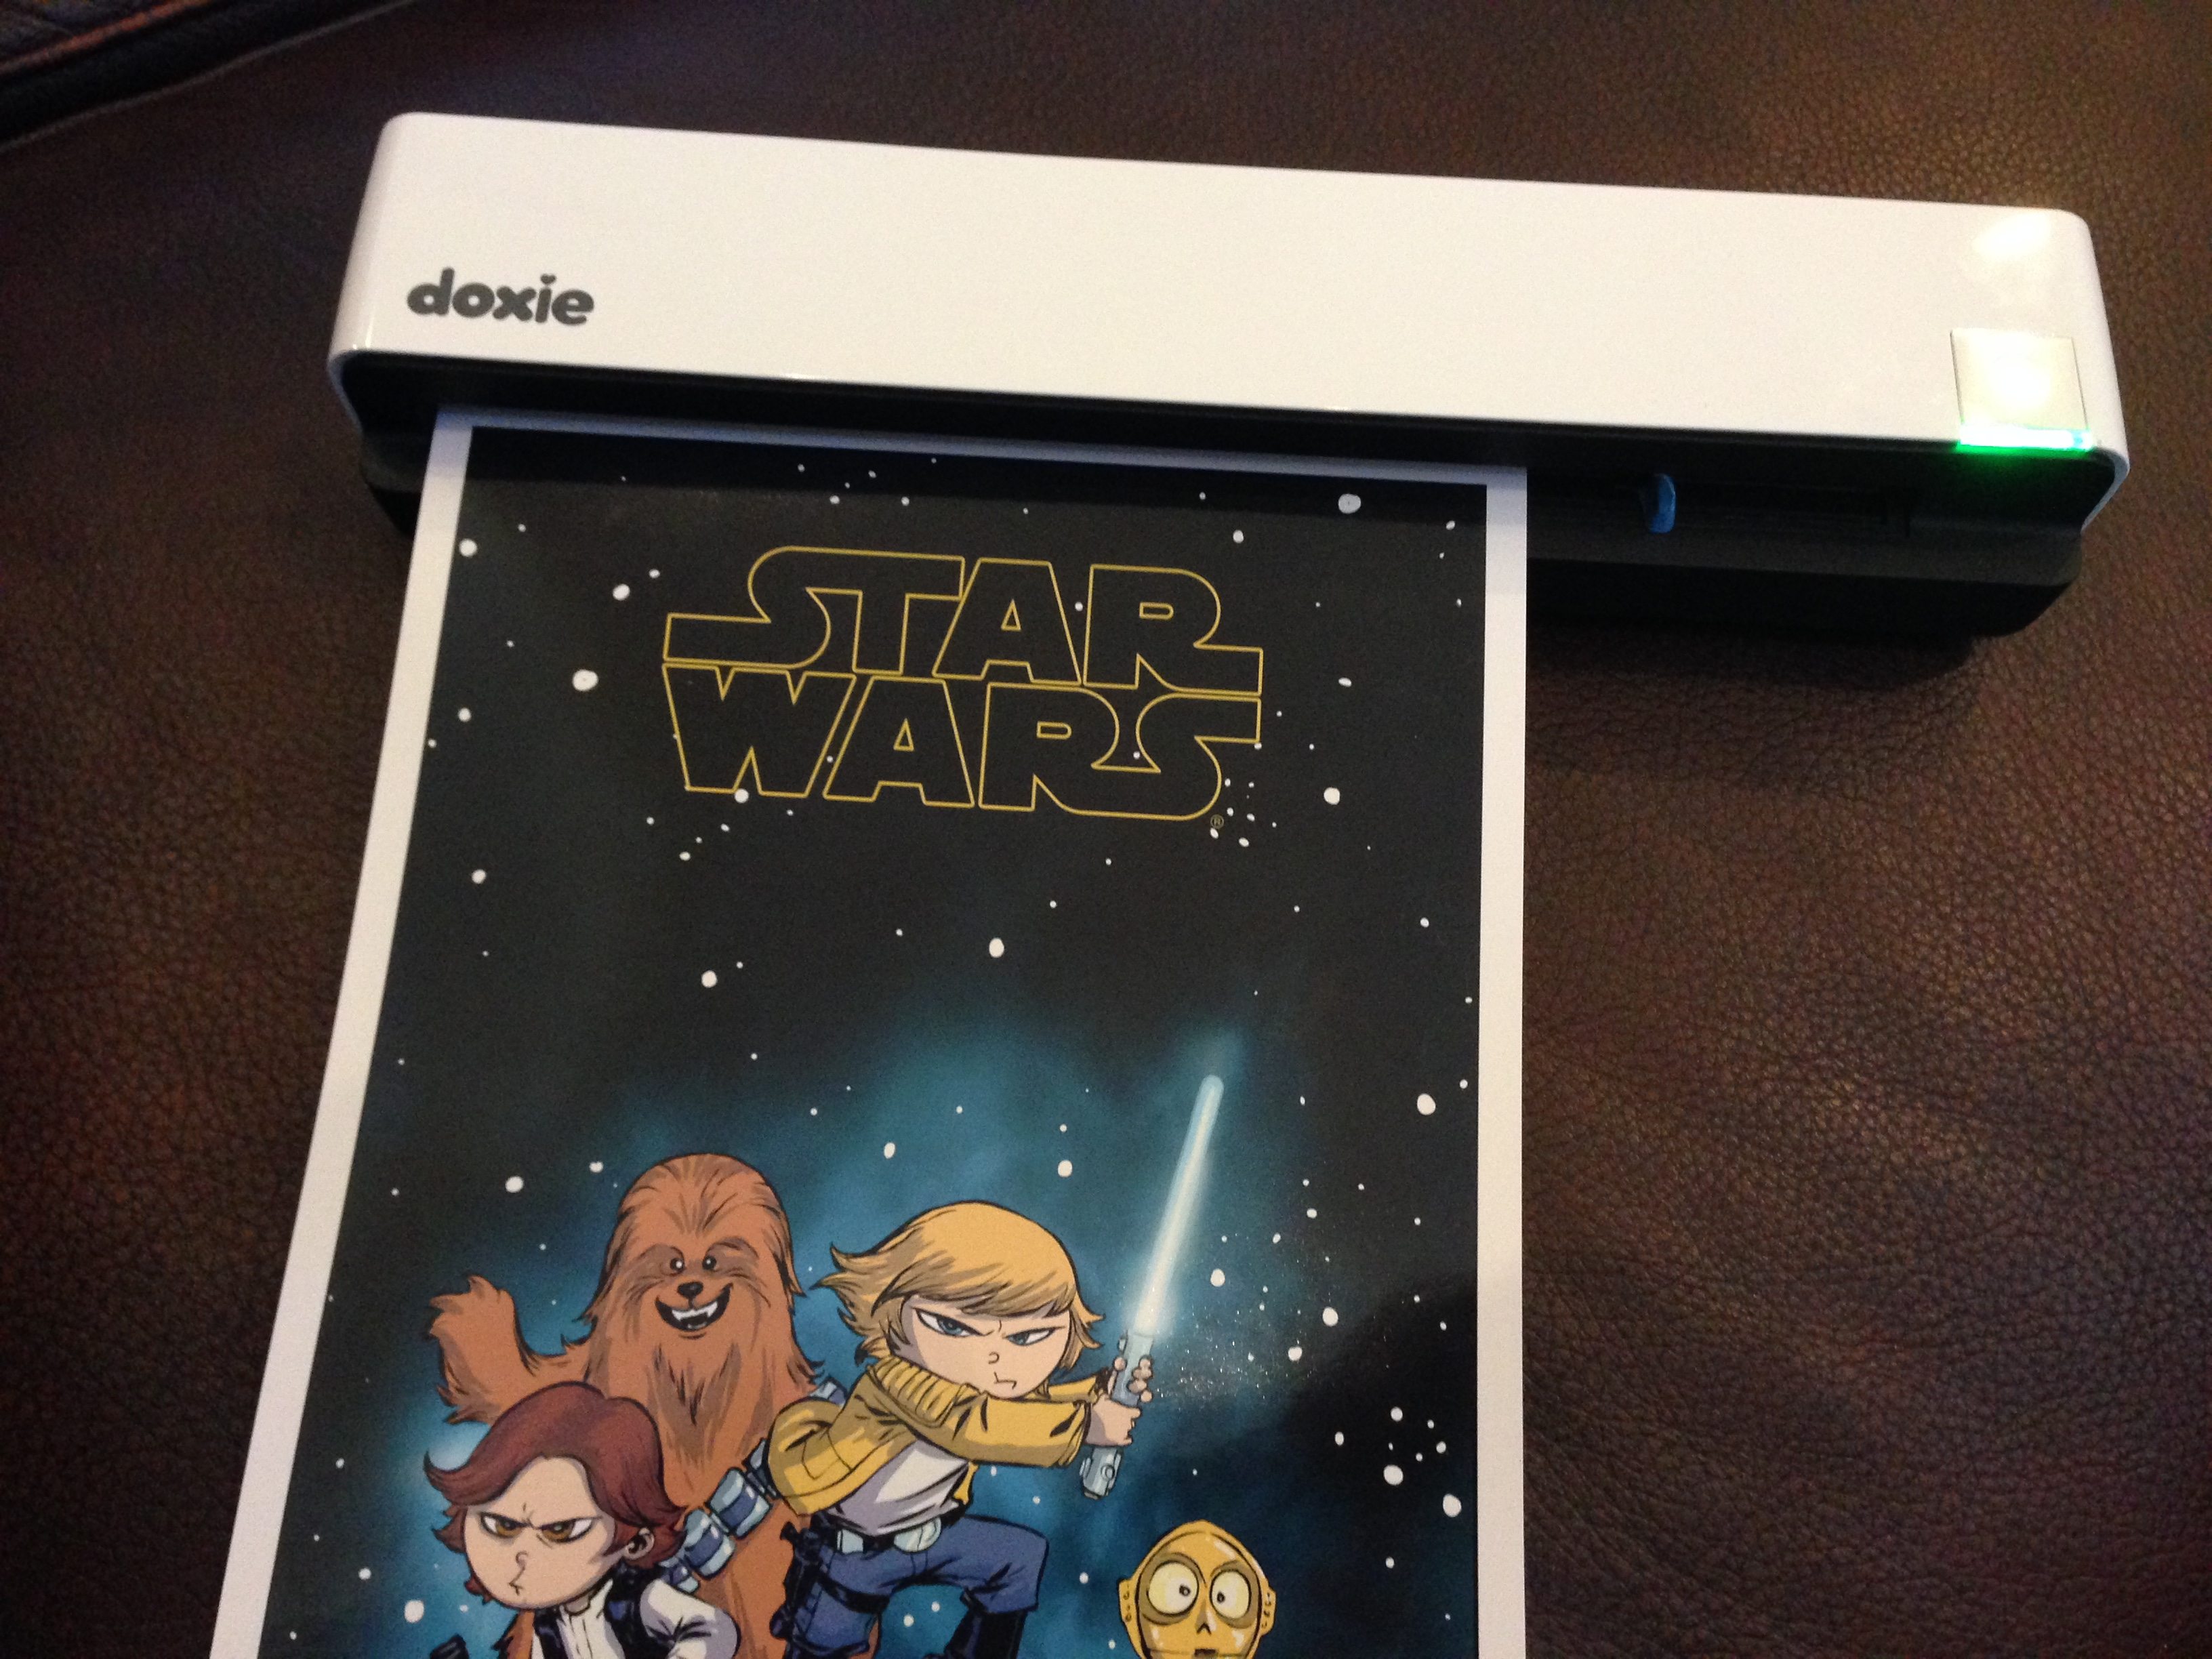
In goes the document and out it comes on the rear of the scanner. I scan business cards, flyers, brochures, my own handwritten notes, and much more. (Later, I’ll organize this stuff by sending it to Evernote or Dropbox or both.)
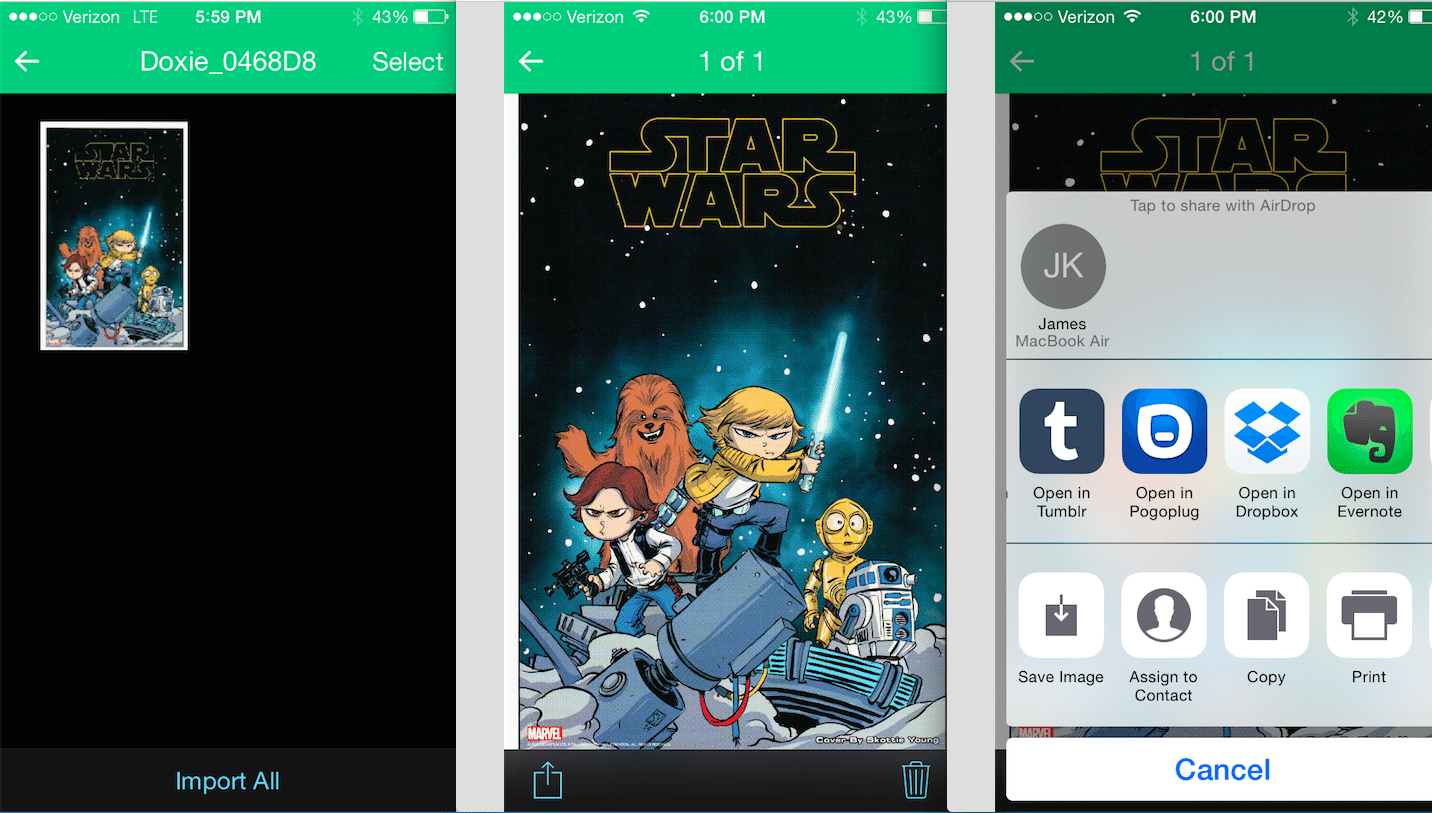
After I’m done scanning, I turn on my iPhone. (And the iPad app works the same, just with a larger screen.) Once it’s connected to the Doxie Go Wi-Fi, I’m in business. (The Doxie Go basically sets up its own Wi-Fi network so you can connect to it.) The first step is to view what’s been scanned. Tap a thumbnail (left image below) of your scan to view it enlarged (middle image below) and then tap the Share icon (lower left corner, center image) — this gives you the option to save as a JPEG or PDF and then you select where to export it — Dropbox and Evernote can be seen in the image on the far right below. (You can also save to Photos, print it with an AirPrint device, or export it to other apps that can open JPEG or PDFs.)
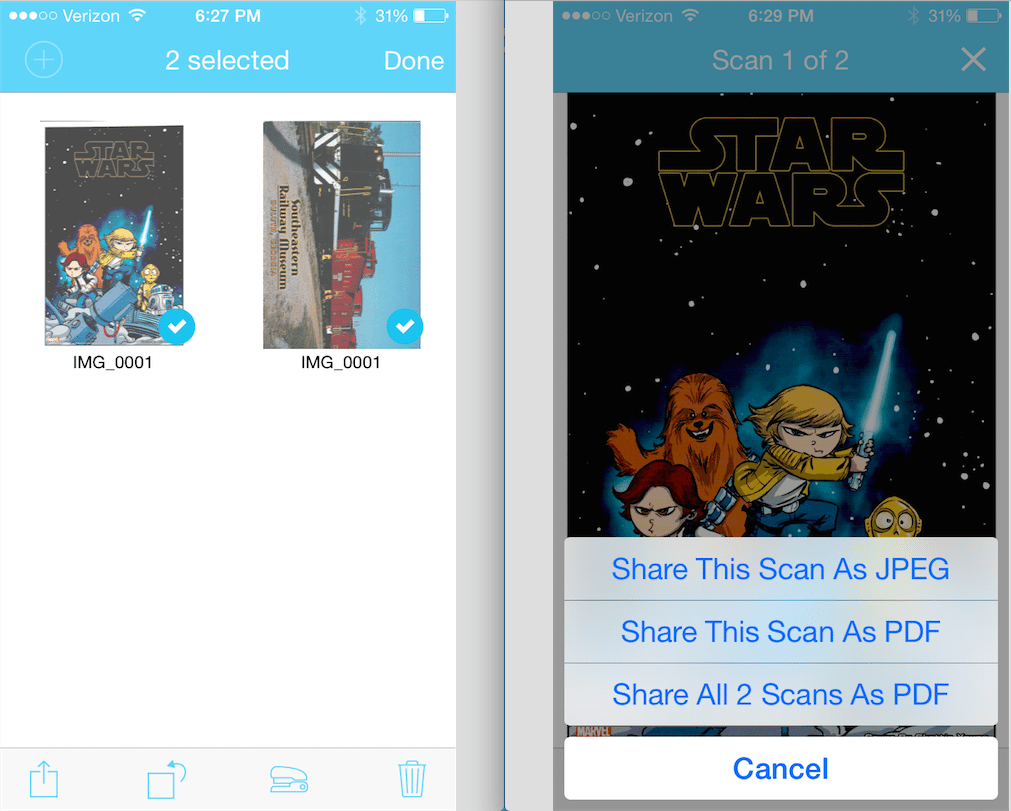
If you click the Import (or Import All) button after selecting one or more scans, this will import a copy to the Doxie app and then delete the images from the Doxie scanner, freeing up memory. (This delete feature can be disabled, leaving a copy on both Doxie and your phone/tablet.) Once you’ve imported into the Doxie app, you can use a few additional features offered by the app — Rotate, a Contrast boost, Delete, and Share button. If you select multiple scans (as shown in the image below), you can use the Stapler icon (left image below, 2nd icon from right) to link the two images into a single image file — use the Share button to send each image individually as a JPEG or PDF or you can send both scans together as a single PDF (no JPEG option).
With the iPhone or iPad, there is no bulk uploading to Evernote or Dropbox (except for stapled scans), so if you anticipate scanning 50 or 100 or more scans, you’ll probably want to connect your Doxie Go Wi-Fi to a PC or Mac and use bulk copying/moving tools for faster management.
I know it might seem strange to keep a scanner in my truck, but by leaving it in my vehicle, I have made it easier to stay true to my 99% paperless office. When I need to scan something out-and-about, I just do it. And with my iPhone (and sometimes my iPad), I can not only grab a scan, but I can email it, edit it, post it online, etc… no need to wait until I get back to my office. You can be certain that this thing will be going with me to Maker Faire and other events where cards, brochures, flyers, and lots of handouts are the norm.
The Doxie Go Wi-Fi is available now. I’d like to thank Paul with Apparent for providing a test unit.


I’ve had an original Doxie sat on my desk at work for ages now, it’s great. The downside was always portability and I kept taking in paperwork from home/elsewhere to scan.
Didn’t realise they’d released a wireless version, looks like the upgrade I would need to actually become genuinely paperless.
Not sure if it’s the same on iOS but on the Mac app there’s a Share to GDrive option that I use to keep all our paperwork.
Hi, Tim.
I don’t use GDrive, but my best guess is that if the GDrive app is installed on your iPhone or iPad, then it’ll be available as a destination option when you click the Share button while viewing a scanned image. The Doxie iOS app appears to just call the standard API that pulls up any apps that are installed that can import JPEG or PDF files, and I’m sure GDrive app falls in that group.
I think the Doxie software is the BEST scanner software on the market. That being said, the Evernote Scannable app (for me) has made a non paper-tray scanner like Doxie almost obsolete.
I go back and forth on scanner apps. I’ve tried a few (including the Evernote version) and they either work or they don’t. Some don’t do so great at performing a proper alignment and others really stink at OCR. I don’t like trying to frame a document with my phone, but with an iPad it’s not a problem. There are still benefits to a feed mechanism for accurate scans.
Yes, I am late to this discussion. The 2017 Evernote Scannable app is an amazing smartphone and tablet scanning software. So much so I do not intend on purchasing a portable scanner.
The other day on location we needed to scan ten sheets of contracts to be sent to the lawyer. On my iPhone launched Scannable scanned the sheets, e-mailed them, saved them to Evernote. The person watching me was astonished at the quality, ease of use, and speed. On misaligned scans Scannable straightened them. At the office is a ScanSnap S1300 (outstanding scanner) now not used. Often it is faster to scan with the smartphone than to be handed the papers, go to the computer where the scanner is, insert the paper, then scan.
Does this work good for pictures? I would be using it primarily for pictures and receipts.
Hi, Sarah. I have used it to scan photos at the higher resolution and they turned out great.