Over the last few weeks I’ve had a chance to sit down with the new 5e Dungeon Master’s Guide (DMG), the latest book release for the new 5e Dungeons & Dragons and, in my opinion, a grand-slam for Wizards of the Coast. Along with the 5e Player’s Handbook (PH) and the 5e Monster Manual (MM), players (that includes Dungeon Masters, or DMs) now have access to everything they need to host and play some legendary adventures of their own.
After reading the entire DMG, I felt a strong urge to try an experiment with the new books. I would create a stand-alone adventure for level 1-3 characters using as many of the tables found in the DMG as possible. The DMG comes with an assortment of random generation tables created for just this purpose — roll a die, consult the chart, and record the result. I wanted to not only create a truly random adventure, but also see just what kind of time was involved. I certainly didn’t expect the process to take 30 minutes or less, but I also was hoping it wouldn’t take the dozens of hours I remembered spending crafting adventures as DM so many years ago during my Advanced Dungeons & Dragons (AD&D) days. I’m happy to report back that it IS amazingly easy (and fun!) to pull an adventure together using the resources found in the DMG (and the PH and MM, here and there).
If you haven’t yet read the two previous parts of this article series, here’s a link to Part I and another link to Part II. You don’t have to have read them, but some of the discussions found here in Part III will refer back to decisions or rolls made in those earlier posts. (The conclusion to this series will be Part IV that will offer the entire adventure, complete with room descriptions, text to read aloud to the players, and more.) Also, readers of Parts I and II will find some tweaks to parts of the adventure here — after going back and doing clean-up and some rethinking of things, there are a small number of changes I feel improved things a bit. That’s the best part about being a DM and designing an adventure… change doesn’t require permission!
One final warning — if you’re a player and are thinking you might like your DM to run this adventure… then STOP READING NOW. If you read Parts I and II, then you already know more than you should, but I’ve made some changes here that can provide some surprises. That said, what remains for Parts III and IV are really for DM EYES ONLY.
Further Developments
Back in Part II, I closed out the post by including a few images of the rough draft of the temple. Observant readers will have noticed a few stray doors here and there, and the layout was okay… but not completely pleasant to the eye. I’m a big believer that your bird’s eye view of your dungeon should make sense… a randomly-generated room size or a super-long hallway will sometimes fit. And other times it won’t. Function of rooms should be considered or you end up with just a collection of square and rectangular rooms all connected by hallways — players move from room to room, fighting monsters and discovering treasures and traps. Yawn. I’m all for dungeon crawls, but let the crawl fit around a story. I’ll just conclude by saying that I took my rough draft layout and played with it here and there, and ultimately came up with the one below that will hopefully fit the story that goes along with its layout:

In the upper-left corner is the farmhouse. Notice that furniture and other dressing have not yet been applied I can turn to the DMG for that! In the upper-right corner is the secret temple chamber that can only be reached using a teleport spot in the main temple (dungeon) in the lower half of the page. I’ve numbered all the key locations so I’ll be able to reference them later with my final descriptions and encounters. In a nutshell, however, here are the room/area titles by number:
1. Porch
2. Living Room/Dining Area
3. Bedroom
4. Weapon/Trophy Room (with secret door)
5. Main Temple Foyer
6. Public Worship/Gathering Area
7. Kitchen
8. Stores
9. Library
10. Small Chapel (with collapsed areas plus cave access)
11. Primary Crypt Room
12. Preparation Room (accessed by concealed door)
13. Teleport Access to Primary Temple Room
14. Minor Crypt Room (six stone chambers)
15. Workshop
16. Barracks
17. Entry Room for Primary Temple
18. Primary Temple
As with many graph-paper designed dungeons, I’m not 100% happy with the fact that hallways and rooms all adhere to an almost perfect grid layout, but it does make it easier for dungeon creation. I could easily recreate the map so a room isn’t a perfect 30×40, for example, or all the hallways aren’t a perfect 5′ wide. (Feel free to give it a redraw if you like — and shoot me a copy!) Back in the day, I would tell the player drawing the map that a room was roughly 30×40 just to make it easy for them to place the room on the graph paper. With today’s large grid battle maps, the DM can play with the walls and hallways and give them a bit more of an imperfect shape and length/width.
Referring back to Part II, I had a list of the various things I wanted to address in Part III and to finish the adventure. That list is below plus a few new additions:
* The warlock AND the priest
* Magic item(s)
* Traps and Encounters
* Putting more tables to use
* Dungeon Creating App (??? I know… just hang on.)
* The full story (saving this for Part IV)
Let’s start with the Warlock and the Priest. As you’ll learn in Part IV, there’s a reason I need to flesh out both as opposed to just the Warlock — both NPCs are going to be important to the conclusion of the adventure, so they’ll need some details for the DM to use as reference. I may not know the number of players I will have or their mix of classes and levels, but that won’t matter here — what I’ll do is create the priest and warlock and have them fairly evenly matched in terms of power.
—–
The Priest — Oren Kindleharp, Level 3 Human Cleric, Lawful Good, no armor, white-gray robes with green trim, brown leather shoes. Light hammer, traveler’s backpack – ((water, rations, journal and a priest’s prayer book) Age 62, graying hair, not unhealthy, but no longer fast and strong as in his younger days. Oren has been assigned the duty to seal a hidden temple by performing a ritual to remove all blessings and deconsecrate the grounds. Oren will defend against any attempts to desecrate the temple. Once the ritual is completed, Oren will try and avoid combat unless cornered.
Oren KIndleharp
Human Cleric (Light Domain), Lawful Good (Level 3)
Armor Class: 12
Hit Points: 18
Speed: 25′
STR: 8(-1) DEX: 14(+2) CON: 10(0) INT: 12(+1) WIS: 17(+3) CHA: 14(+2)
Skills: Perception +3, History +1
Languages: Common, Elven, Dwarven
Challenge: 3
Actions
Light Hammer: Melee Weapon Attack: 1d4+4 (magical)
Cantrips: Light, Guidance, Spare the Dying, Resistance, Sacred Flame
Light Domain Spells: Burning Hands, Faerie Fire, Flaming Sphere, Scorching Ray
When the players first encounter Oren outside the farmhouse, he will be exhausted from his travels and an attack on his person by a pack of wolves. His spells are exhausted and he won’t be much help to the players. He will insist on joining them, however, if they manage to find the entrance to the temple. He will tolerate no disrespect or vandalism to the temple. If asked, he will admit to having possibly visited the temple 20 or 30 years earlier (“memory fails”) when it was being constructed and has no knowledge of its existing layout.
—–
The Warlock — Kynluu Silvershard, Level 4 Human Warlock, Neutral Evil, leather armor, charcoal gray overcoat, leather boots. Spell book, explorer’s pack, crossbow/15 bolts. Age 34, red hair, scar under right eye running down to chin. Kynluu is seeking to corrupt the temple with a special ritual that her patron has promised will significantly increase her powers. If she encounters Oren, she will fight him to the death as well as any characters that get in her way. She is unaware of the powerful artifact that hides in the temple and the effects it can have on her magic. She is extremely deceptive and untrustworthy, and much of her study and skills have been selected for deception and misleading others.
Kynluu Silvershard
Human Warlock (), Neutral Evil (Level 4)
Armor Class: 11
Hit Points: 31
Speed: 30′
STR: 10(0) DEX: 11(0) CON: 14(+2) INT: 12(+1) WIS: 12(+1) CHA: 17(+3)
Skills: Deception +3, Performance +3, Arcana +1
Languages: Common,
Challenge: 3
Actions
Crossbow: 1d8 piercing
Cantrips: Minor Illusion, Eldritch Blast, Friends
Spells: (5 known/2 slots) Disguise Self, Charm Person, Suggestion, Invisibility, Hold Person
Invocations: Mask of Many Faces (Disguise Self at will), Repelling Blast
DMs will discover a few secrets regarding Kynluu in Part IV. Players should not encounter Kynluu until they reach the Primary Temple (area 18). Once Kynluu sets eyes on Oren, however, she will immediately attack him. Kynluu knows if the priest manages to complete his own ritual, the temple will lose its power and her patron will punish her severely for her failure at the task.
—–
Shord’s Lantern of Blessing
Wondrous item, uncommon
When the lantern is held (but not necessarily lit), the bearer will receive a +2 bonus to initiative unless incapacitated. When lit, the lantern offers light in a 20′ sphere and dispels magic (spell or magic item) on any creature of evil alignment that falls within that light. Any evil creature beyond 20′ but less than 30′ must make a DC 15 saving throw — failure reduces any damage delivered by half.
Any dwarf that sees the lantern may roll a History check. A roll of 15 or higher will allow the player to identify the lantern and become aware of its legendary powers. If players are unable to discern its usefulness, area 17 will be completely dark when the players arrive — hopefully this will encourage them to light the lantern.
—–
And now we’re up to Traps and Encounters. I’ll split this up…
Traps
Area 4: This trap is a simple locking mechanism that protects the secret door in the Trophy Room (area 4) of the farmhouse. Players who investigate the trophy room carefully and roll a DC 14 or higher (Perception) will discover the secret catch behind three hanging (and rusted) swords. Pushing on the catch will release a small compartment beneath the swords that leads to a thin staircase going down to the Main Temple Foyer (area 5). Unless the player specifies they are using a dagger or other small object to press on the catch, assume they are using a hand and apply 1d4 poison damage. The player’s speed will also be cut in half due to dizziness.
Area 9: This trap is designed to inflict damage on any person approaching the bookcase furthest from the Main Temple Foyer (area 5). The trap’s location on the floor is shown on the map. Any player moving across this square will trigger the trap. Once triggered, three poisoned spears will shoot from the bookcase (one for each 5′ square) and in the direction of Area 5. Any players in the path of a spear must make a DC 14 Dexterity saving throw or take 1d8 poison damage. The poison is the same type as that found in the farmhouse catch — player speed will be reduced to half until a short rest is completed or the poison effect is removed.
Area 11: This is not a trap, but player action is required for the event to be triggered. In the NE corner of the room is a small bench (two seats maximum). Any player sitting on the bench will immediately trigger the room’s event — a loud voice will emanate from the large crypt in the middle of the room, asking a question. The answer to the question would be known to most priests in the temple. If a player successfully rolls 18 or higher on an Arcana check, they will know the answer immediately. The answer MUST be provided at Area 13 within five minutes or the trick will reset and another question must be asked. The amount of questions being asked is unlimited and will not duplicate. After three questions are asked, a player skilled in Arcana or History may make a DC 14 or higher roll (but less than 17) to recognize the question as being related to a specific time period or topic. At this point, players may realize they can examine the books on the trapped bookshelf for a book that will have the right answers. If a player does not make that connection, Oren will have a moment of insight and rush back to the library to find the book. (Oren’s assistance will reduce the amount of XP awarded to players at the end of the adventure.)
Area 18: There are two traps in this room. Approaching the altar on the opposite side of the room (from the double-entry doors) is meant to be done directly. Players approaching the altar and staying inside the columns will be able to successfully approach the altar where a figure is kneeling. Any character taking the few steps to the left or right and walking around the raised wooden bridges on the left or right will trigger a trap when they reach the points indicated on the map. The traps are:
Left trap — Lighting bolt shoots from wall – any players on the left bridge must roll a DC 14 Constitution saving throw. Failure gives 2d8 damage, success 1d4 damage. Any player not leaving the bridge on their next turn must roll again for additional damage. The lightning will alert the figure at the altar.
Right trap — A Thunderwave issues from the wall — any player on the right bridge must roll a DC 15 Dexterity saving throw. Failure throws the player to the center of the room (prone) and gives 1d8 damage, success allows player to stay on bridge but falls prone. Any player not leaving the bridge on their next turn must roll again. Thunderwave will alert figure at the altar.
Encounters
Area 3: Brown Bear — A medium-sized brown bear (HP 20, Speed 20ft) has made the bedroom its den. The bear has torn a small hole in the floor to enter and leave from the rear of the farmhouse and will not attack unless a player enters the room. Closing the door will be sufficient to stop the bear attack; it will leave via the hole and not return.
Area 6: Yellow Mold — Oren will want to examine the altar on the far wall of Area 6, but the area is covered with yellow mold. Oren will ask the players to try and burn or clear the mold with flame. Players may attempt to escort Oren through the room to the altar. For every 5′ moved with a flame applied to the mold, players must make a DC 10 Constitution saving throw — failure gives 1d10 poison damage and triggers any non-cleared mold within 5′ to explode and force players in range to also make saving throws. When players reach center of room (marked on map), another encounter is triggered.
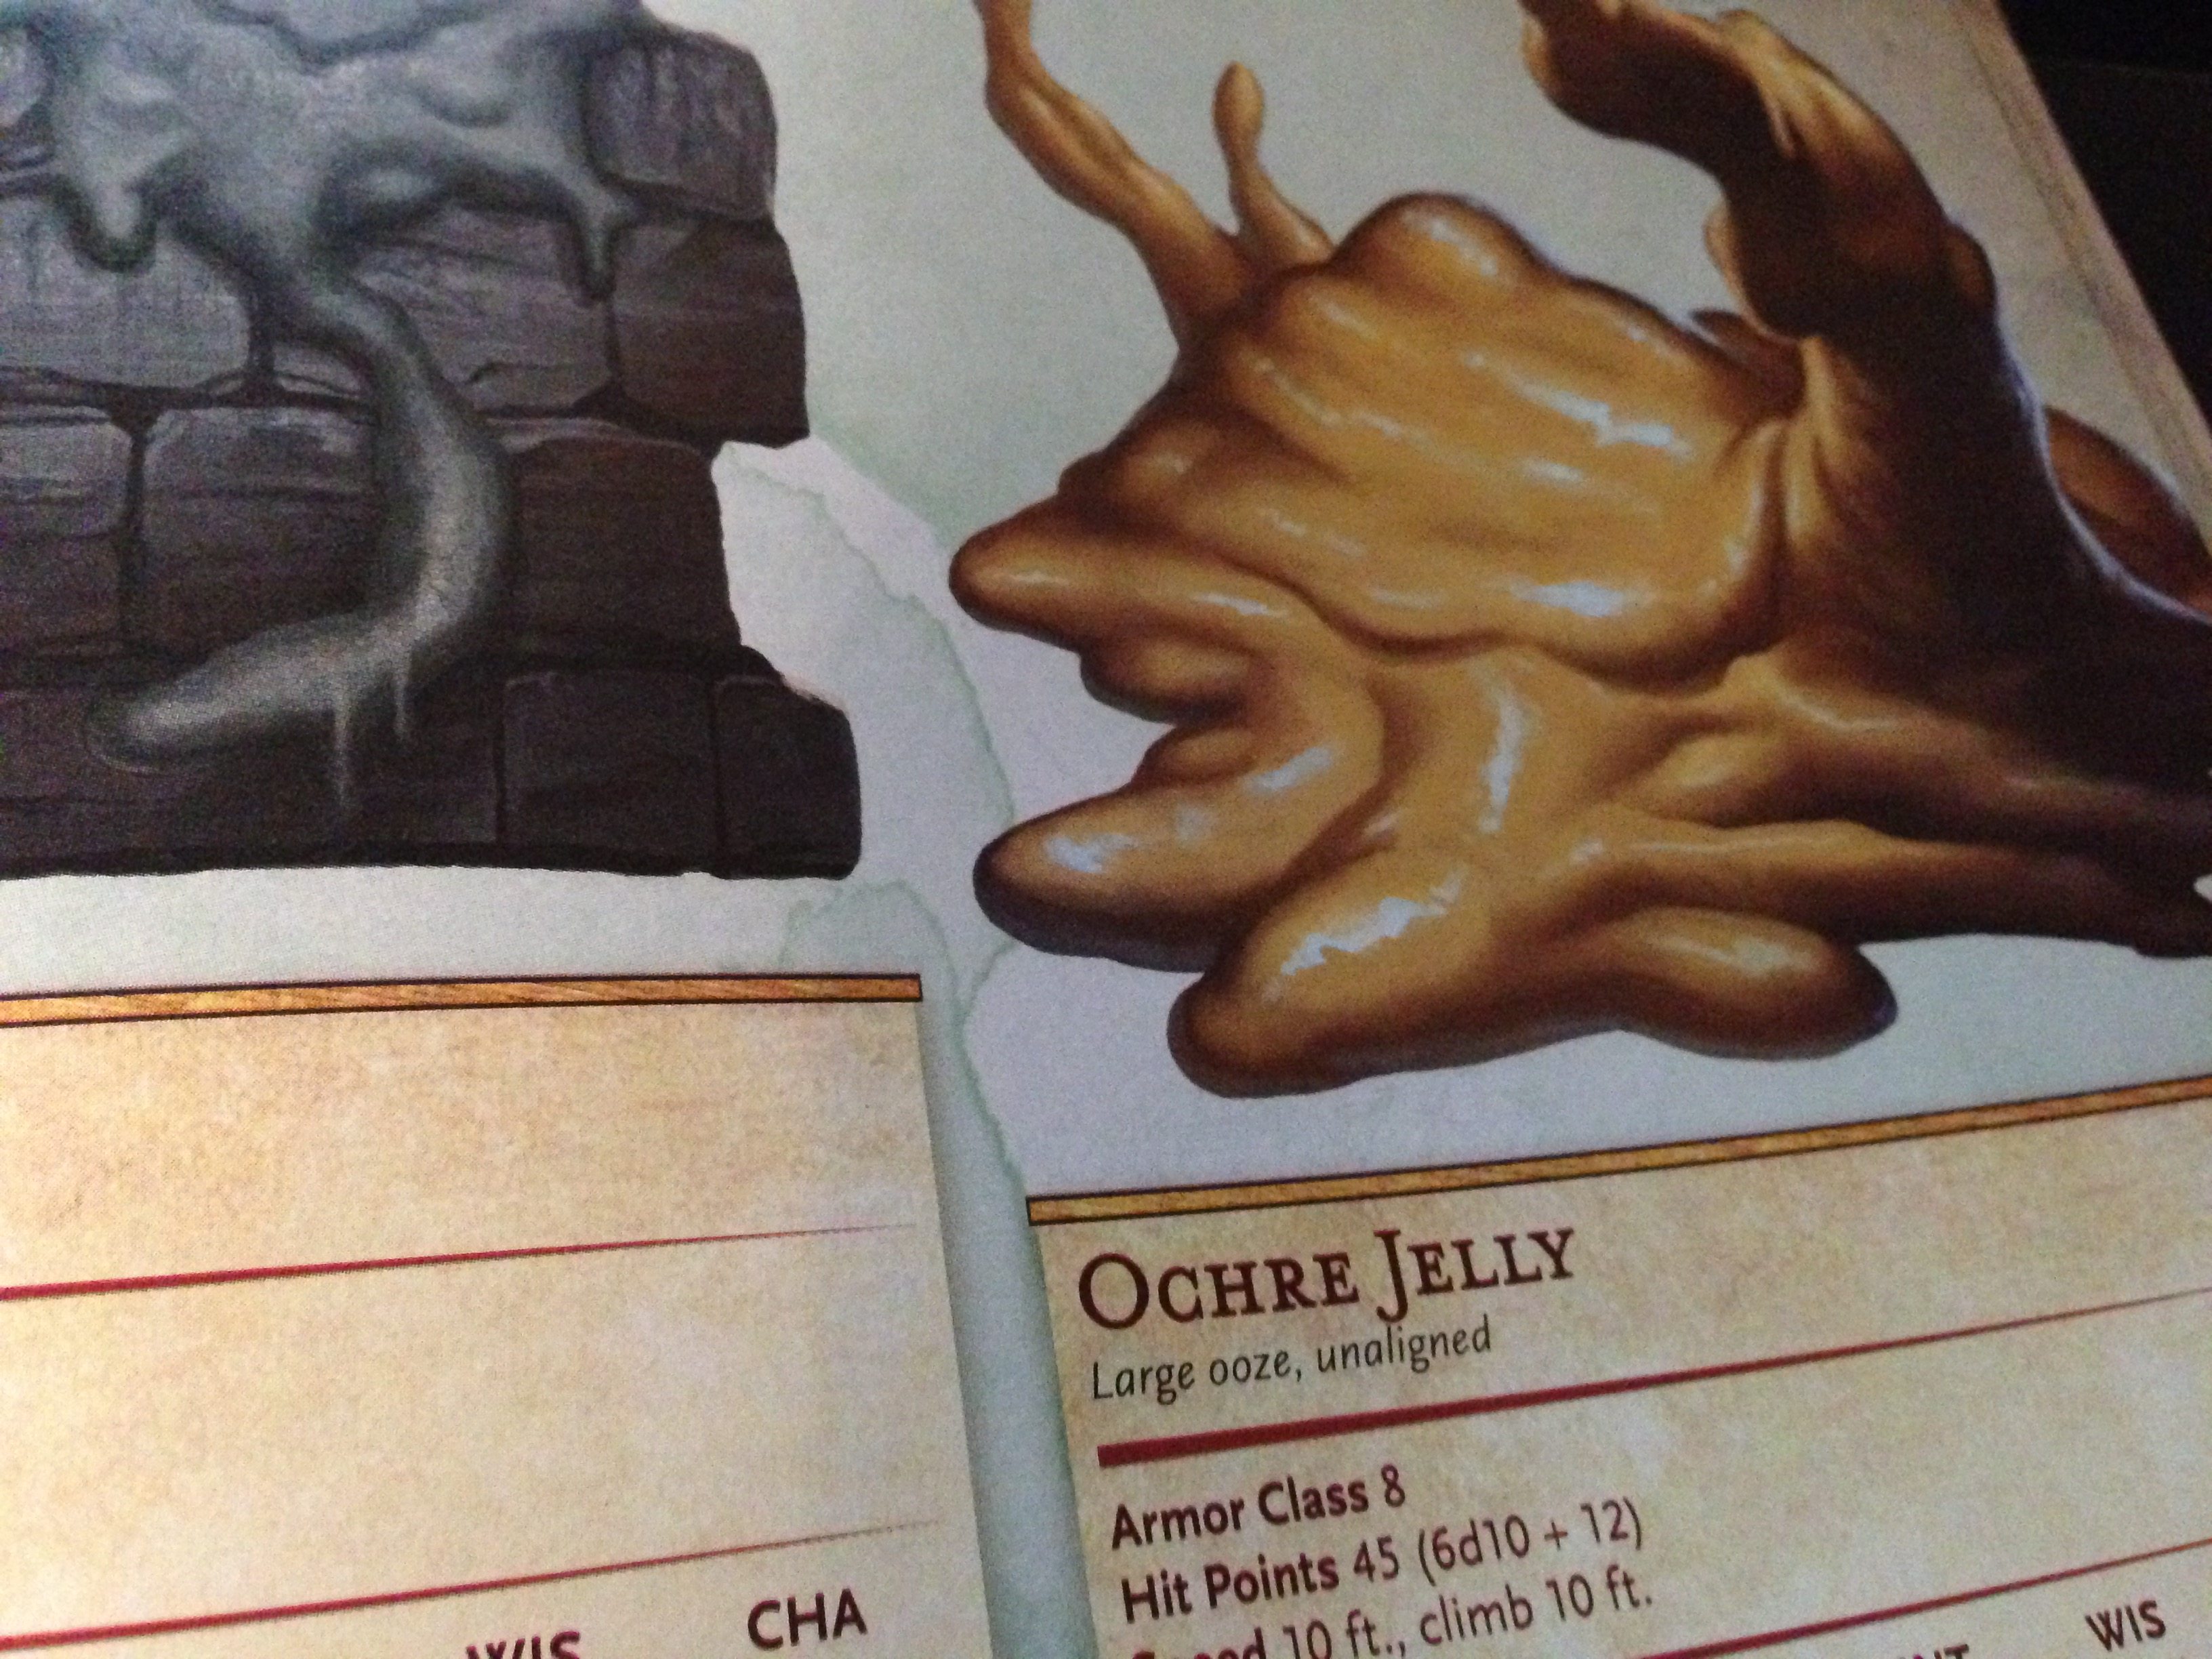
Area 6: Ochre Jelly — This ochre jelly is attached to the ceiling and will drop on any player immediately below. A DC 12 Dexterity saving throw must be made or 2d6 damage will be taken plus 1d6 acid damage. When ochre jelly reaches 10HP, it will automatically divide and split HP.

Area 11: Animated Armor (x2) — Inside each closet is an animated armor that will attack any players that touch the large crypt in the center of the room. Opening a closet will reveal the armor but no attack will occur. Examination by any player with spell casting abilities will reveal a slight hint of magic. Touching the armor will have no result. Once the crypt has been touched, the animated armors will not stop attacking until destroyed or all players have exited the room. When players exit the room, any surviving animated armor will return to the closet and the door(s) will automatically close. Returning to the room will provoke no response.
Area 14: Skeletons (x6) — These six skeletons were caused to be raised by Kenyuu’s patron, and they wait in front of their respective crypts for a phrase from Kynluu to follow her. When the door is open, if any player other than Oren enters, all will attack immediately with heavy hammers (1d8+2). All are AC 15 and 10 HP. If the players insist Oren go in first, he will do so. The skeletons will appear confused and not attack until another player enters.
Putting More Tables To Use
As you can see from the map, I haven’t done much to fill in the rooms. The library has bookcases and there’s a well and some columns and altars… but I need more. And on pages 298-301 there are a total of ten tables (all using d100) that can help me fill each room with sounds, smells, damage, furnishings, personal items, containers, scrolls… the list goes on.
I’m not going to go through each and every room, but let’s take the Barracks (Area 16) and see if we can convert its basic description into something that players will be able to really visualize. It’s only been a year since the fighter died, so the room won’t be in too much disarray. Plus, someone’s been sleeping in one of those beds!
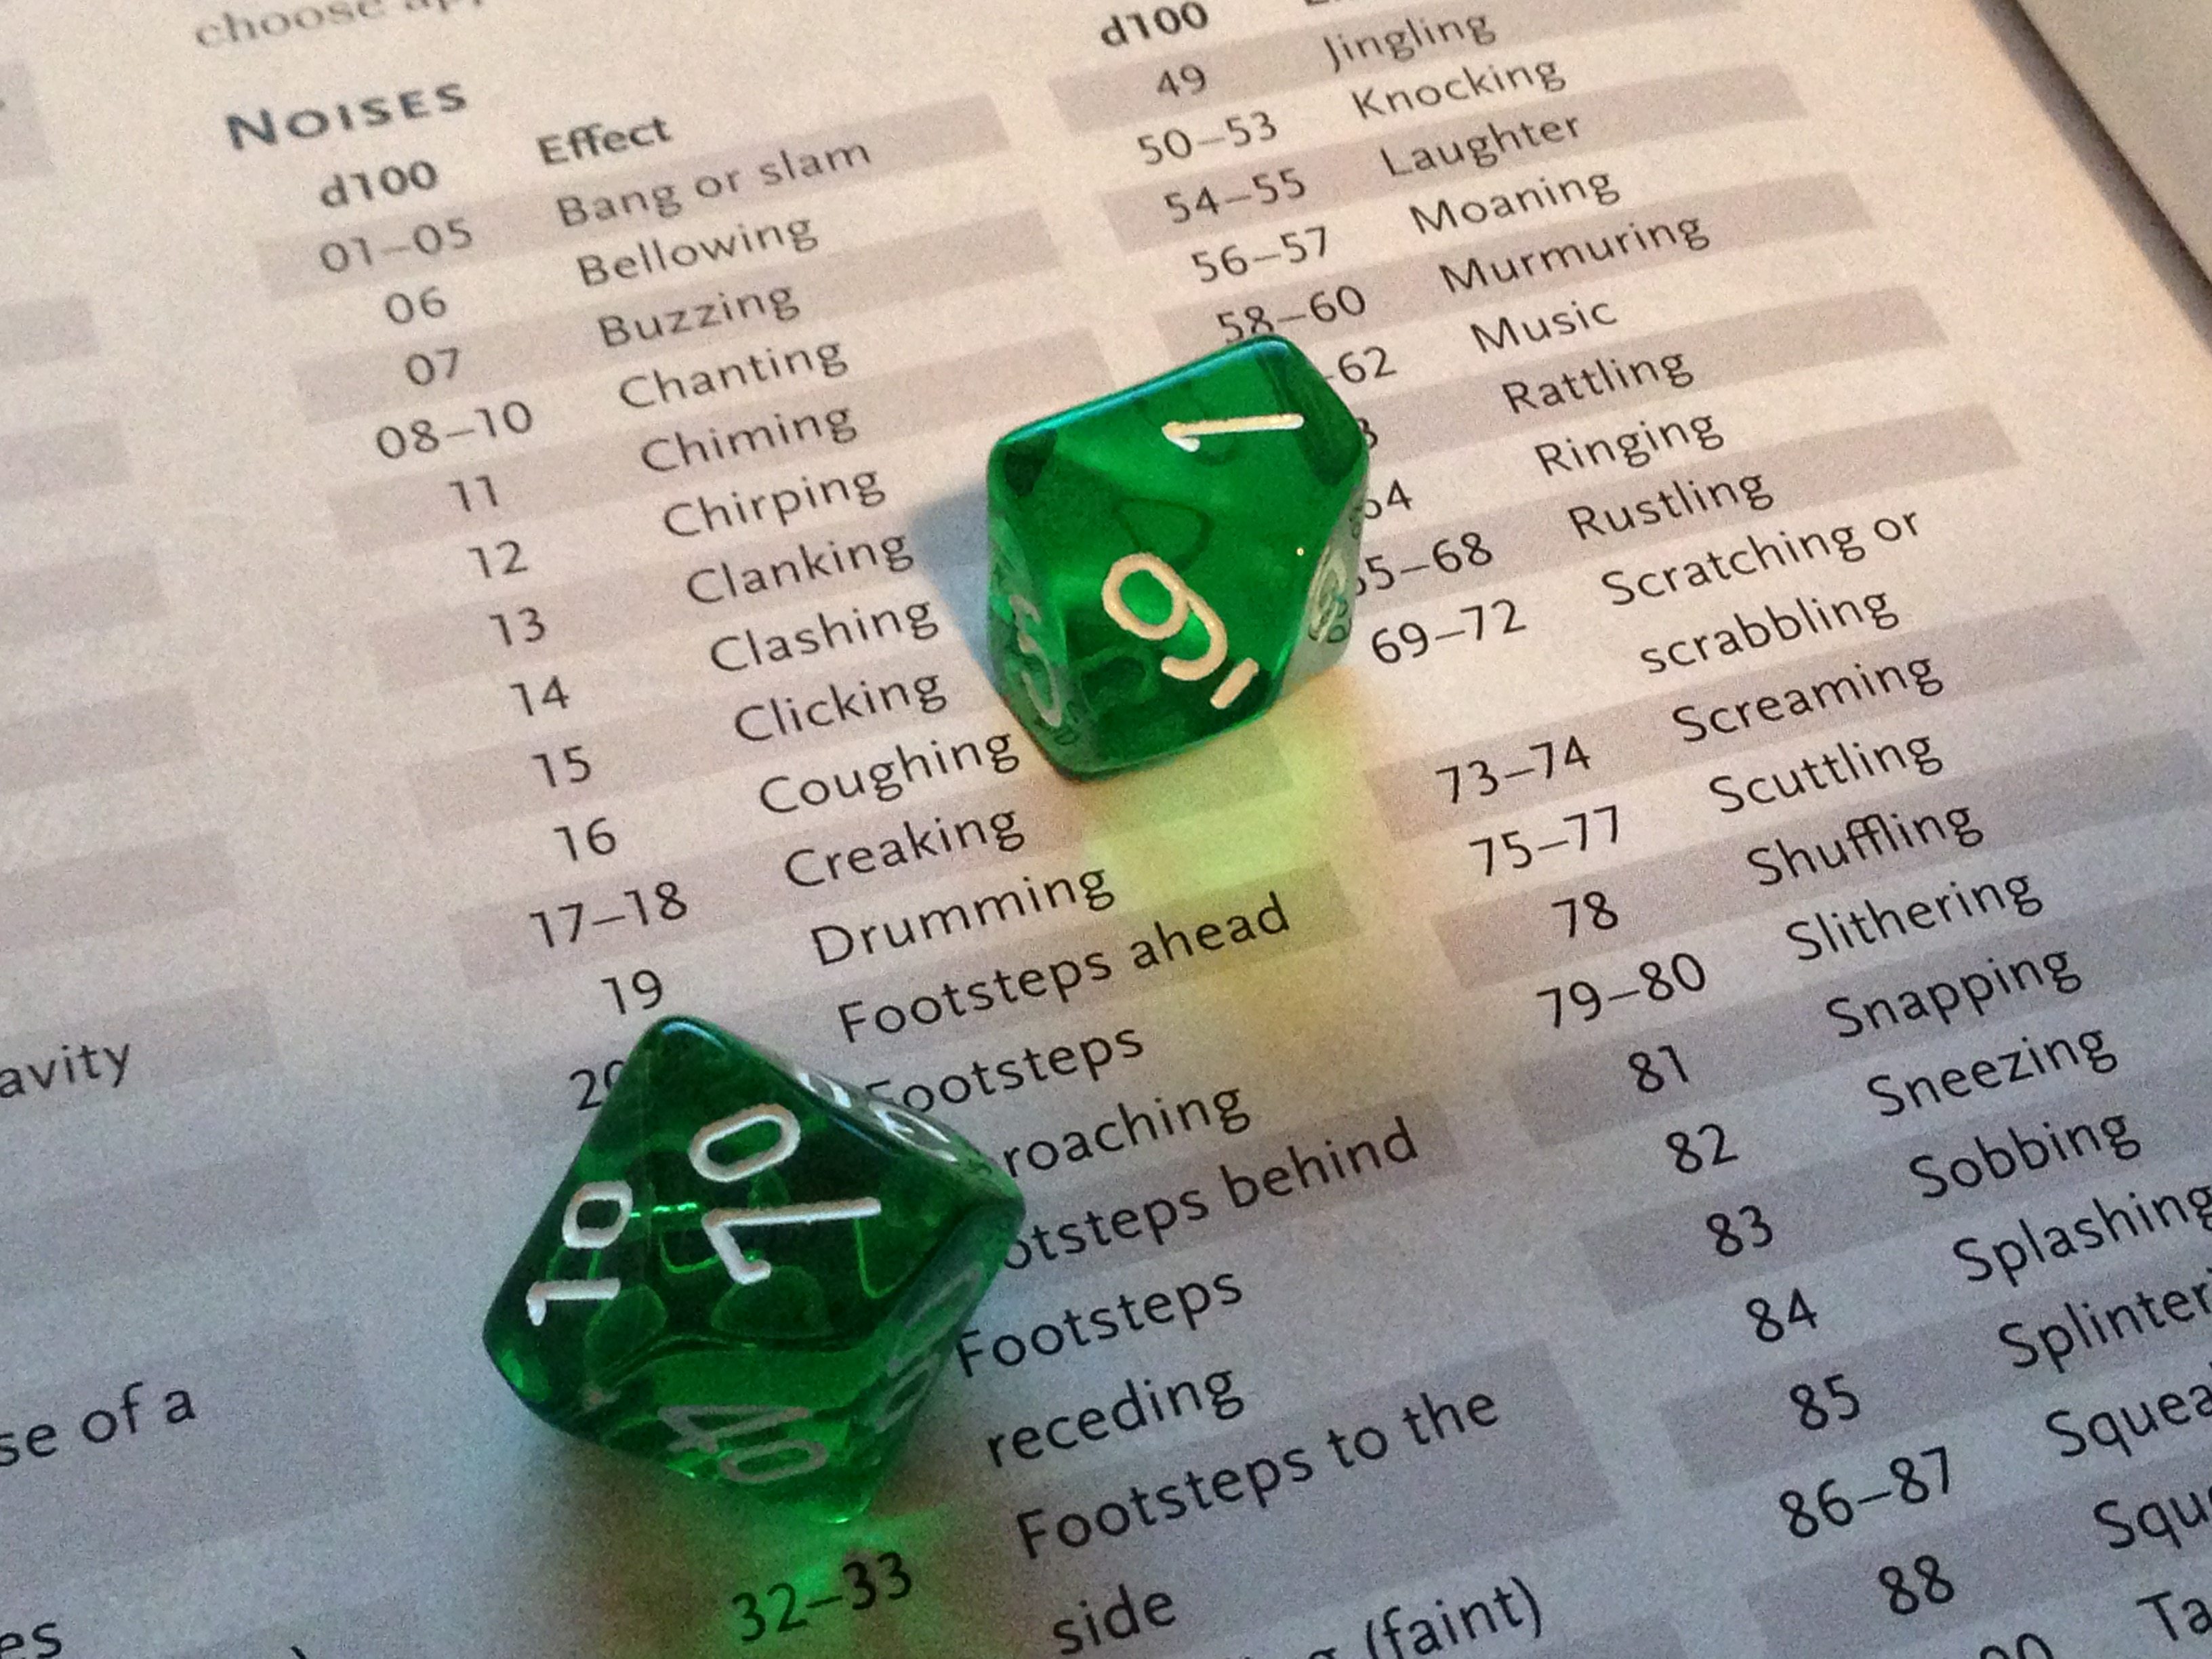
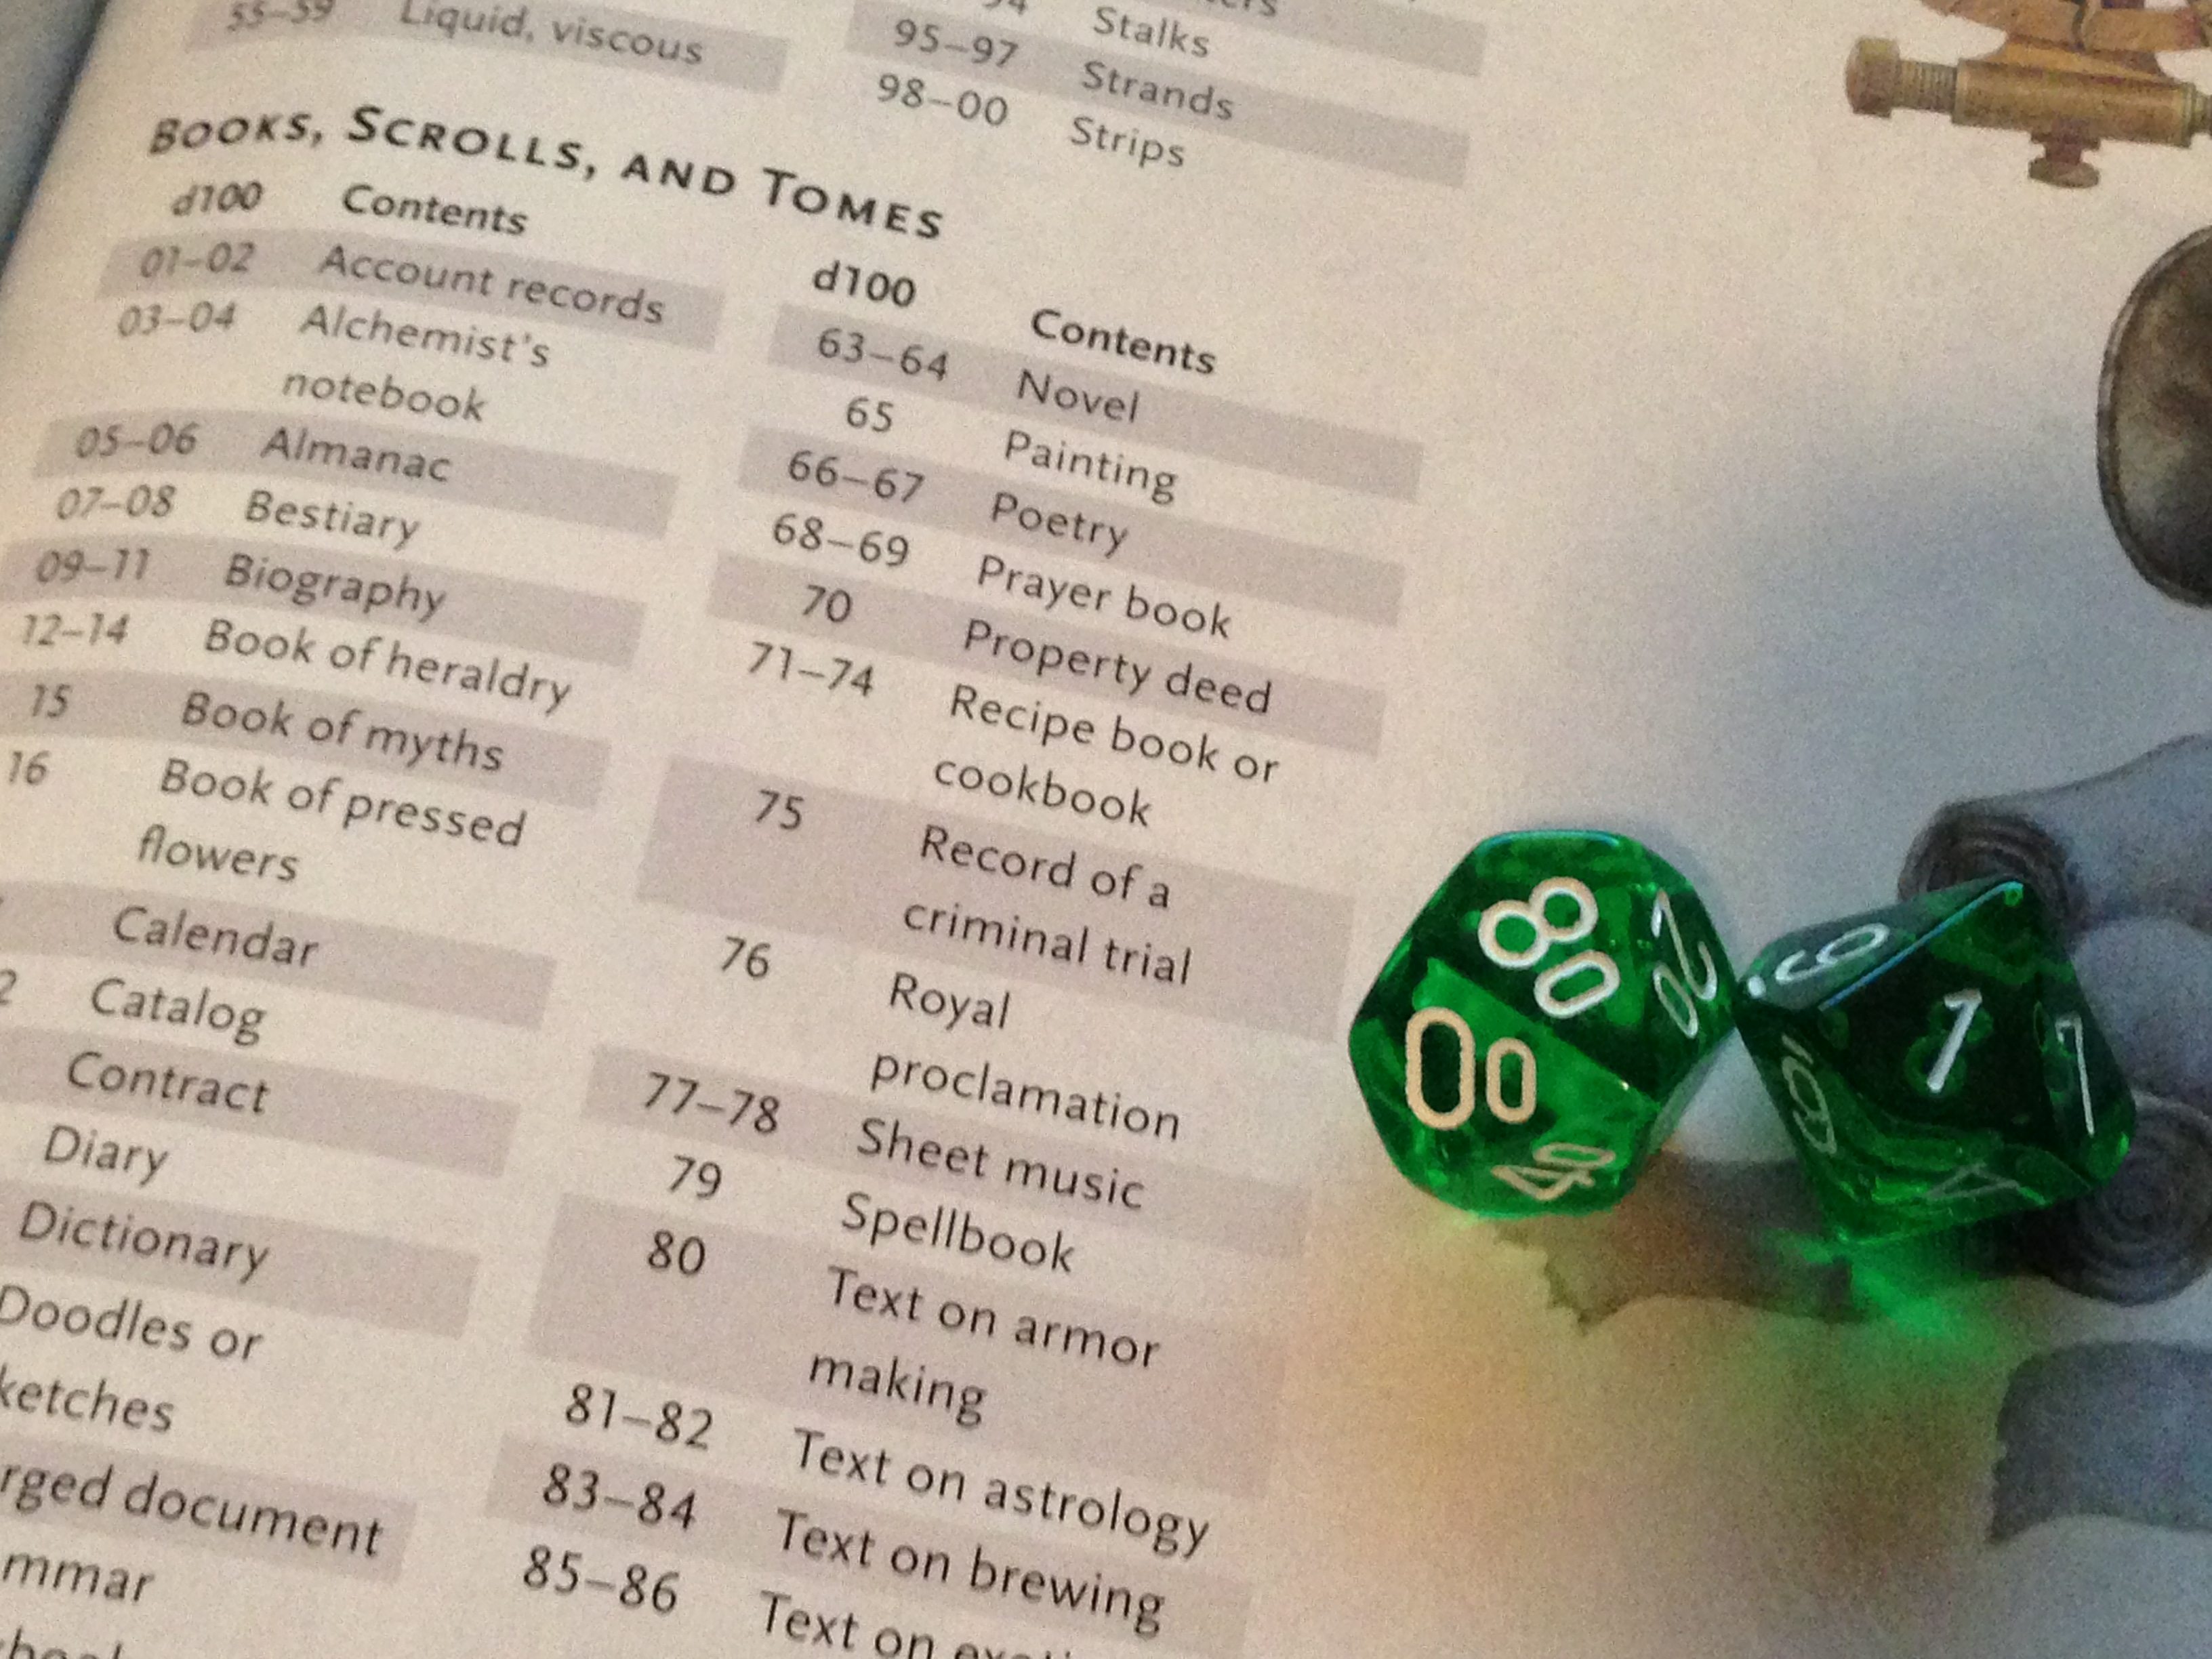
For the Noises table, I got 71 — Scratching or scrabbling. Probably rats. The Air table gives me 36 — Clear and damp. What’s it smell like in here? The Odors table provides 88 — Stale. Probably a lot of snacks moldering that the priests snuck into their rooms at night. For General Features, I rolled five times: 13, 22, 84, 64, 58 — Cobwebs, (Cracks, ceiling), (Stones, small), Leaves and twigs, and (Helmet, badly dented). Not sure about that helmet, but all the other stuff makes complete sense. For General Furnishings, I chose six rolls (and re-rolled two of them that just didn’t make sense given the room’s purpose): 9, 44, 85, 49, 12, 72: Bench, Firkin (small cask, 10 gallons), (Stool, normal), Hassock, Brazier and charcoal, and Sack. Again, all somewhat believable. Next is the Utensils and Personal Items table on page 300… I went with five rolls: 32, 18, 55, 42, 91: Flask or jar, Case, Parchment, Knife, and Vial. Lastly, I’ll toss in two rolls from the Books, Scrolls, and Tomes table — 58 and 81: (Map or atlas) and Text on astrology.
Honestly, my players probably won’t want this level of detail for every room they go into, but I thought it would be useful to see just how granular you can get when it comes to creating a room’s contents and overall mood/feel. Pretty cool, huh? Just knowing all these things IN the room will make it easier as a DM to set the mood when the players enter… I can gloss over some things (such as Vial) and focus on what I think will help accomplish my objective… namely, offering up some details to show players that the temple isn’t vacant… someone is living here. To do that, I can specify that the brazier is still hot and the parchment has fresh writing on it. As you can see, the randomly generated content can often help jog your creativity and even provide a solution you might be needing.
Before I finish up Part III, there was one other set of tables that I thought would be fun to try out. Beginning on page 275 and continuing to page 279 you’ll find a whopping 20 steps (!!) to create your own monster. I’m not talking about just coming up with a scary name and giving it some HP and AC. Follow all twenty steps and you’ll have something that would fit right into the Monster Manual! Let’s give it a try.
If players dig through the rubble in Area 10 and find the opening to the cave, I’d like to encourage them to turn around and return to the temple. This means creating a creature that’s a little more powerful than them, but not able to follow them back into the temple. This creature is going to be REALLY hungry because the cave entrance (outside) has been collapsed (intentionally) and has trapped it inside. Let’s call the creature a Thurrgal. Step 1: Name is done! I’m on a roll!
Step 2: Size — Large. Boom! Step 3: Type… you’ll have to consult the Monster Manual for this one (pages 6-7). I selected Beasts. Step 4: Alignment — unaligned. Step 5: Ability Scores and Modifiers. I’ll make it strong but dumb. Not so agile, but super healthy. Ugly and not so wise.
STR: 16(+3) DEX: 11(0) CON: 12(+1) INT: 7(-2) WIS: 6(-2) CHA: 5(-3)
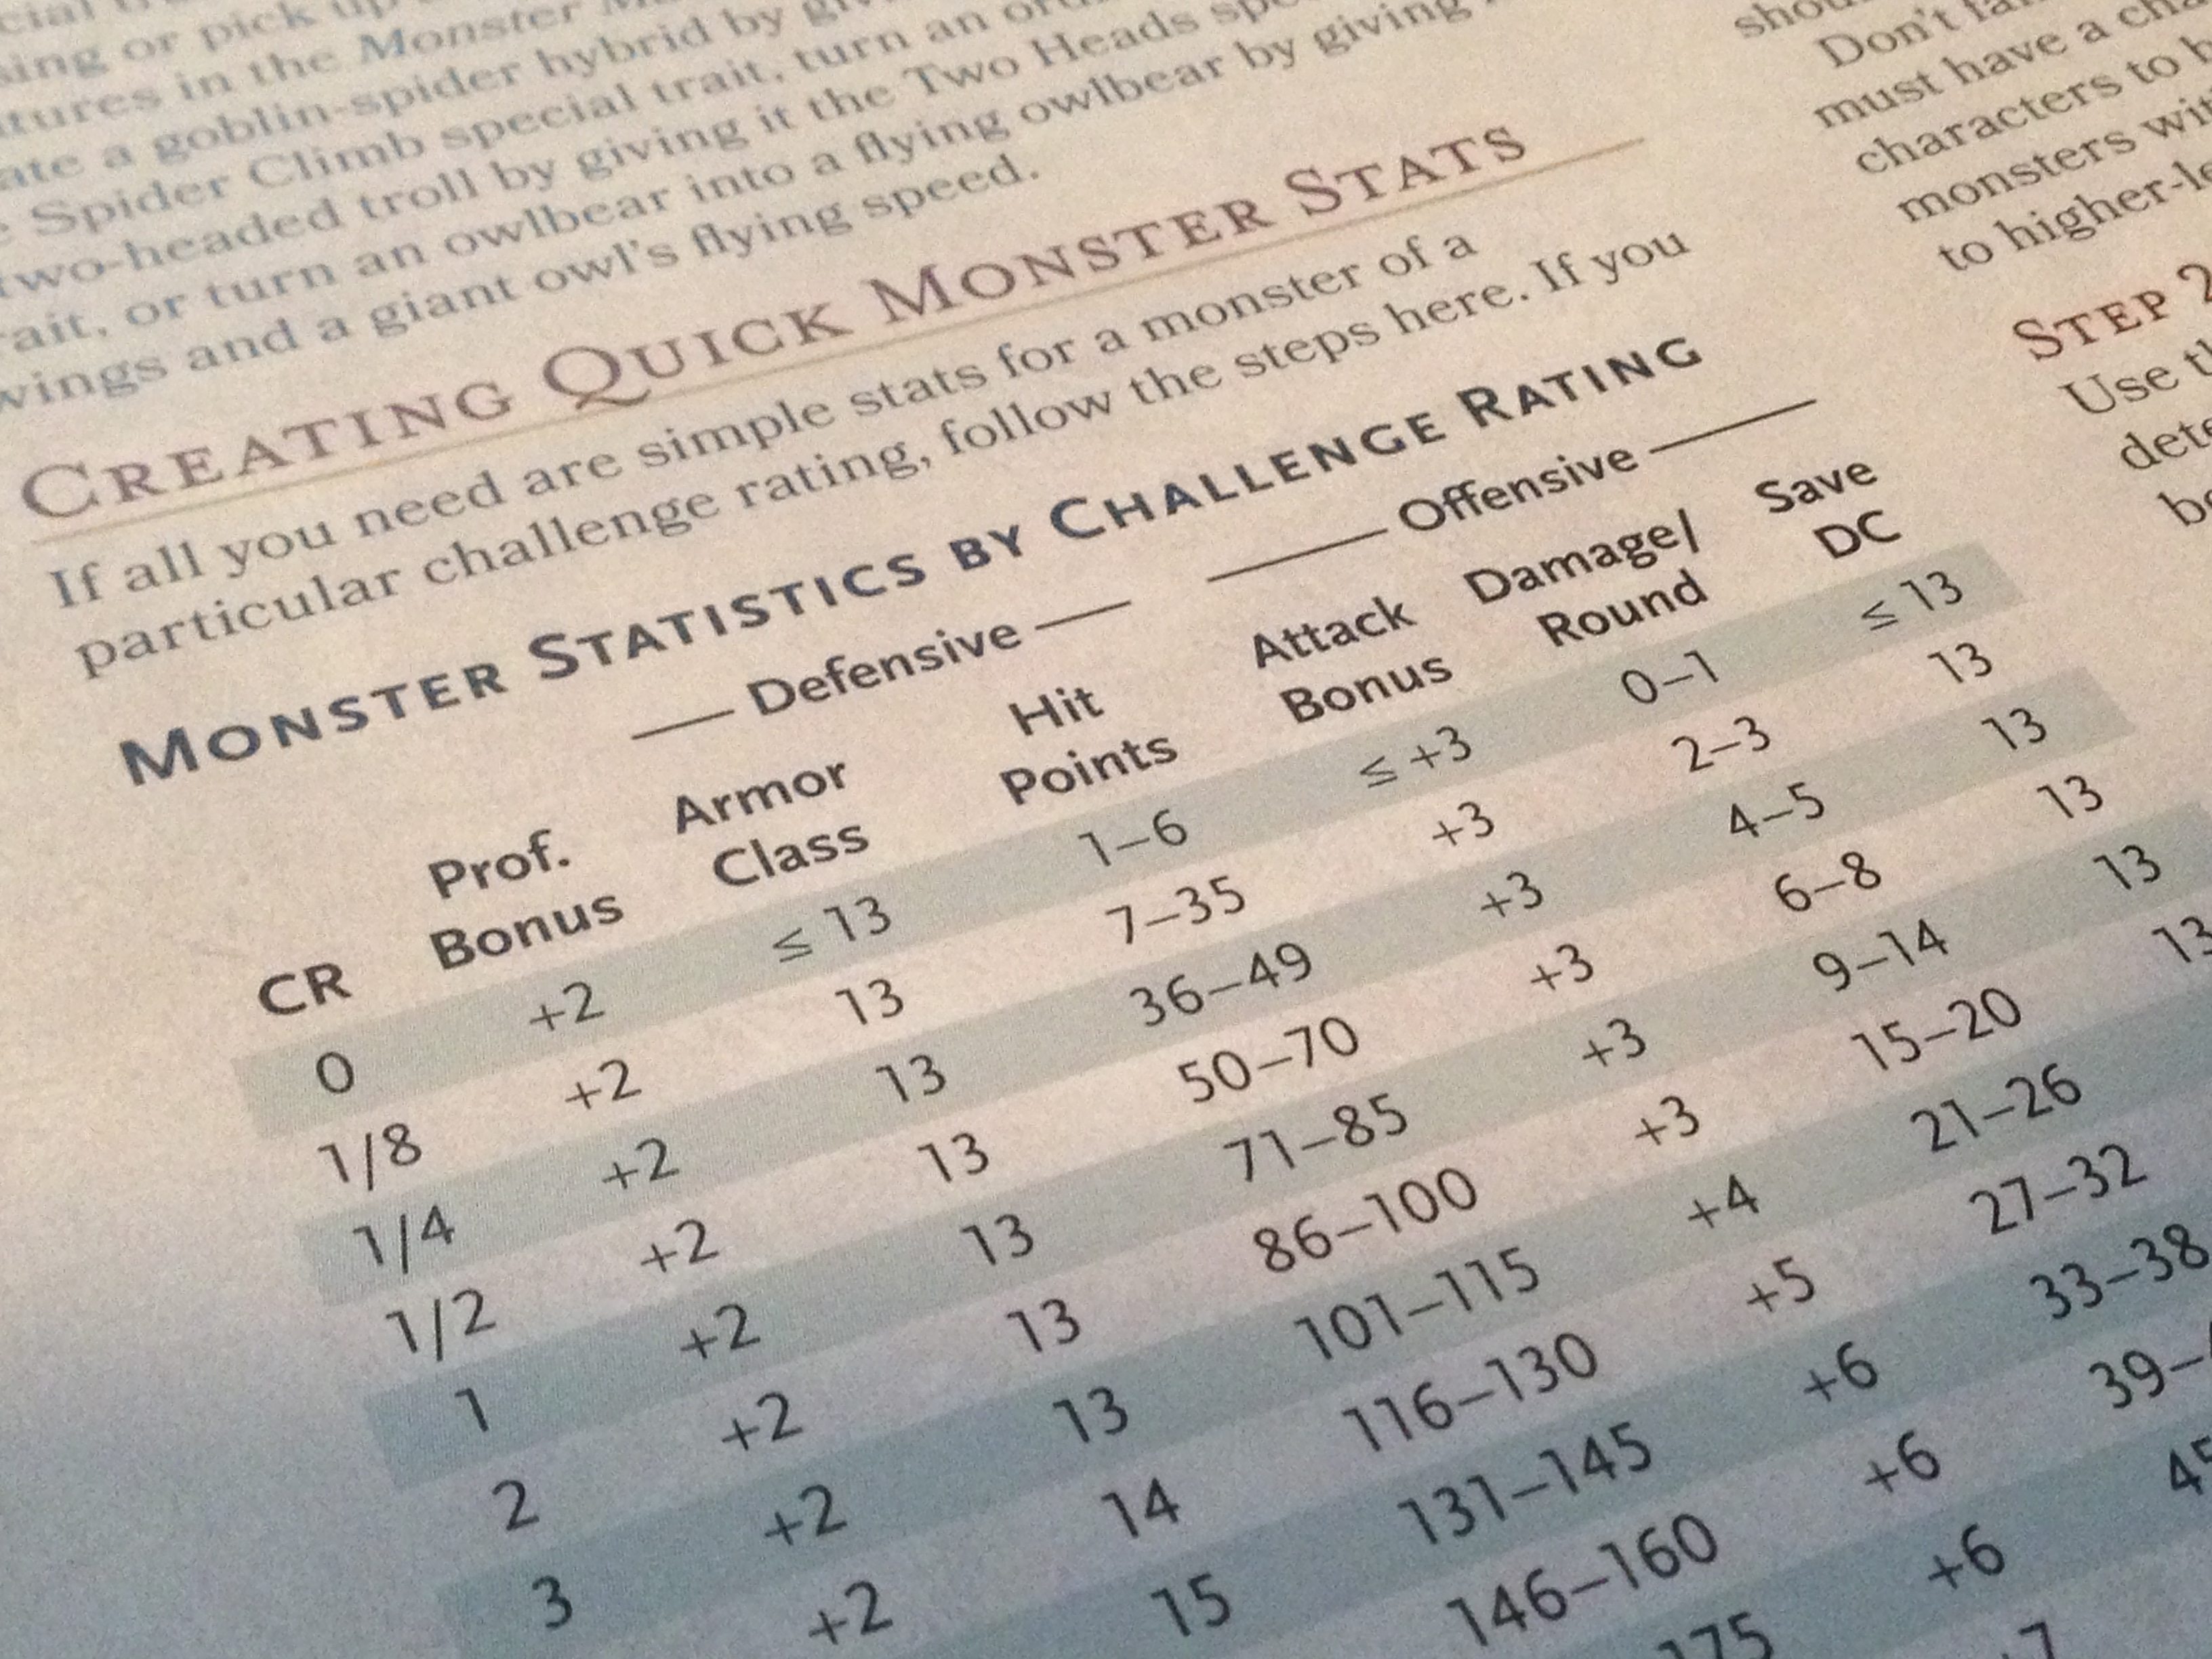
Step 6: Expected Challenge Rating — 3. I don’t want the players to fight this thing to the death. They might get in a few good shots, but I want them to quickly realize they don’t need to fight this thing and should just leave it alone. The CR 3 gives this creature a Proficiency Bonus of +2, AC 13, HP 101, Attack Bonus +4, Damage/Round 21-26, and a Save DC of 13. (These details can be found on page 274 in the Monster Statistics by Challenge Rating table.) My hope is that after one hit from this thing, the players will run. And run fast. And that the unlucky player doesn’t go down. (Accidents do happen, though. Adventuring is dangerous.)
Step 7 Armor Class – 17. Yeah, I bumped it. The original AC of 13 was just too low. Players can actually hit that thing. I want them to really worry when only one out of four attacks succeeds. (And consulting the previously mentioned chart on page 274, you’ll discover that an AC 17 matches up to a CR 10 creature!)
I’m not looking at using this creature in future adventures (but you never really know); this is a one-shot deal to just keep my players out of the cave and focused on the temple. But if I wished to keep developing this creature as something players would regularly encounter in a campaign, for example, I could continue with Step 8: Hit Points and keep going. I’ve set the HP to 101 which should be sufficiently high to keep it alive and have players scared. That said, I hope you see that the steps are logical and provide additional tables to reference. (For example, page 276 has a Hit Dice by Size table and page 277 has a table with probably the longest title I’ve seen yet — Effective Hit Points Based On Resistances and Immunities. Wow.)
Further steps will have you developing vulnerabilities and immunities, damage delivered, Save DCs, traits, speed, saving throws, and more. I fully expect to see these twenty steps used more and more by third parties to create completely new creatures that are balanced and match the format well of those found in the Monster Manual.
 FYI — further charts in the book offer advice and steps for creating new spells, new races, new magic items, and new classes. And in this series I didn’t even cover the various tables and charts in the book for creating small towns, fortresses, wilderness adventures and so much more. The new 5e DMG really does offer DMs a crazy amount of assistance with creating campaigns, adventures, and the smallest details they desire.
Dungeon Creating App
I decided to append this one to Part III because Part IV will be just the finished adventure. I got an email from a reader asking me what my thoughts were on taking the various random charts in the 5e DMG and creating an app to generate an adventure for you.
I thought this was a really cool idea… for about 30 seconds. Then I shook my head. I’m sure there will be those who disagree with me (and feel free to do so in the comments – let’s have a roundtable!), but here are my thoughts on using software to generate a random adventure:
* There are already random-dungeon generators out there online. Search for them. They always seem to create the same square/rectangle room dungeons connected by hallways. Very boring looking. While they can give you a basic dungeon layout to work with, they lack a personality.
* Many of the tables would translate well to software… others not so much. If you’ve read Part I and Part II, you know that sometimes you just have to ignore the dice and choose something that fits. Software will place three skulls, a vial of blood, and a Gelatinous Cube inside a kitchen and call it a day. Likewise, software won’t let you “guide the dice” and try to find logical and relevant items and monsters to fill your rooms. What you get is what you get. That’s not to say you can’t then go back and tweak the results, but if you’re having to redo the work the software does, doesn’t that sort of defeat the purpose of the app?
* For fleshing out rooms, you saw that the Furnishings table mentioned earlier in this post do work well. In that sense, an app that could give you random items and monsters for a room you’ve already created wouldn’t be unwelcome. But honestly… it wasn’t all that hard for me to sit down with some dice and roll up the results myself. I even thought it was fun, not tedious.
* Ultimately, I can’t see a piece of software creating an adventure like the one I’m attempting to create here. The software lacks the little creative bits (such as creating a realistic magic item on the fly), the twists and turns that a human DM will often come up with and toss into the game. What I see software doing is generating a series of Room A, fight the monster/avoid the trap/grab the treasure and Move to Room B and Repeat. If you’re wanting a story and some some intrigue and some puzzle solving… those come from DMs who spend the time crafting an adventure, not punching the big green GO button and printing out a map and matching text document.
Wrapping Up The Design Stage
The 5e DMG is outstanding. It’s got plenty of help to offer a DM, but ultimately the DM still has to do some work. I’ve probably put in about 4-5 hours on this adventure so far, and I’m still not done. But those 4-5 hours have provided me with an adventure I’d be proud to present to some players.
And let me change adventure to mini-adventure. This is honestly maybe four hours of adventuring… six hours max. I would expect to spend double or triple that amount of time to put together something that could span a month or two of weekly adventuring. For that kind of thing, the DMG offers additional tables that can help me identify my villains, the towns and villages my players will navigate, the NPCs they will fight with or along side, and a good mix of urban, underground, and wilderness locales.
So… what’s next? Give me a week or two (three max) to pull together all my notes, my modifications, a few twists I’ve held back, and my storytelling capabilities into one cohesive adventure. I’ll post it here with minimal commercial interruption. And then you can take it and do what you like — modify it, ridicule it, print and burn it.
Maybe some of you will even run it. I’d love that.