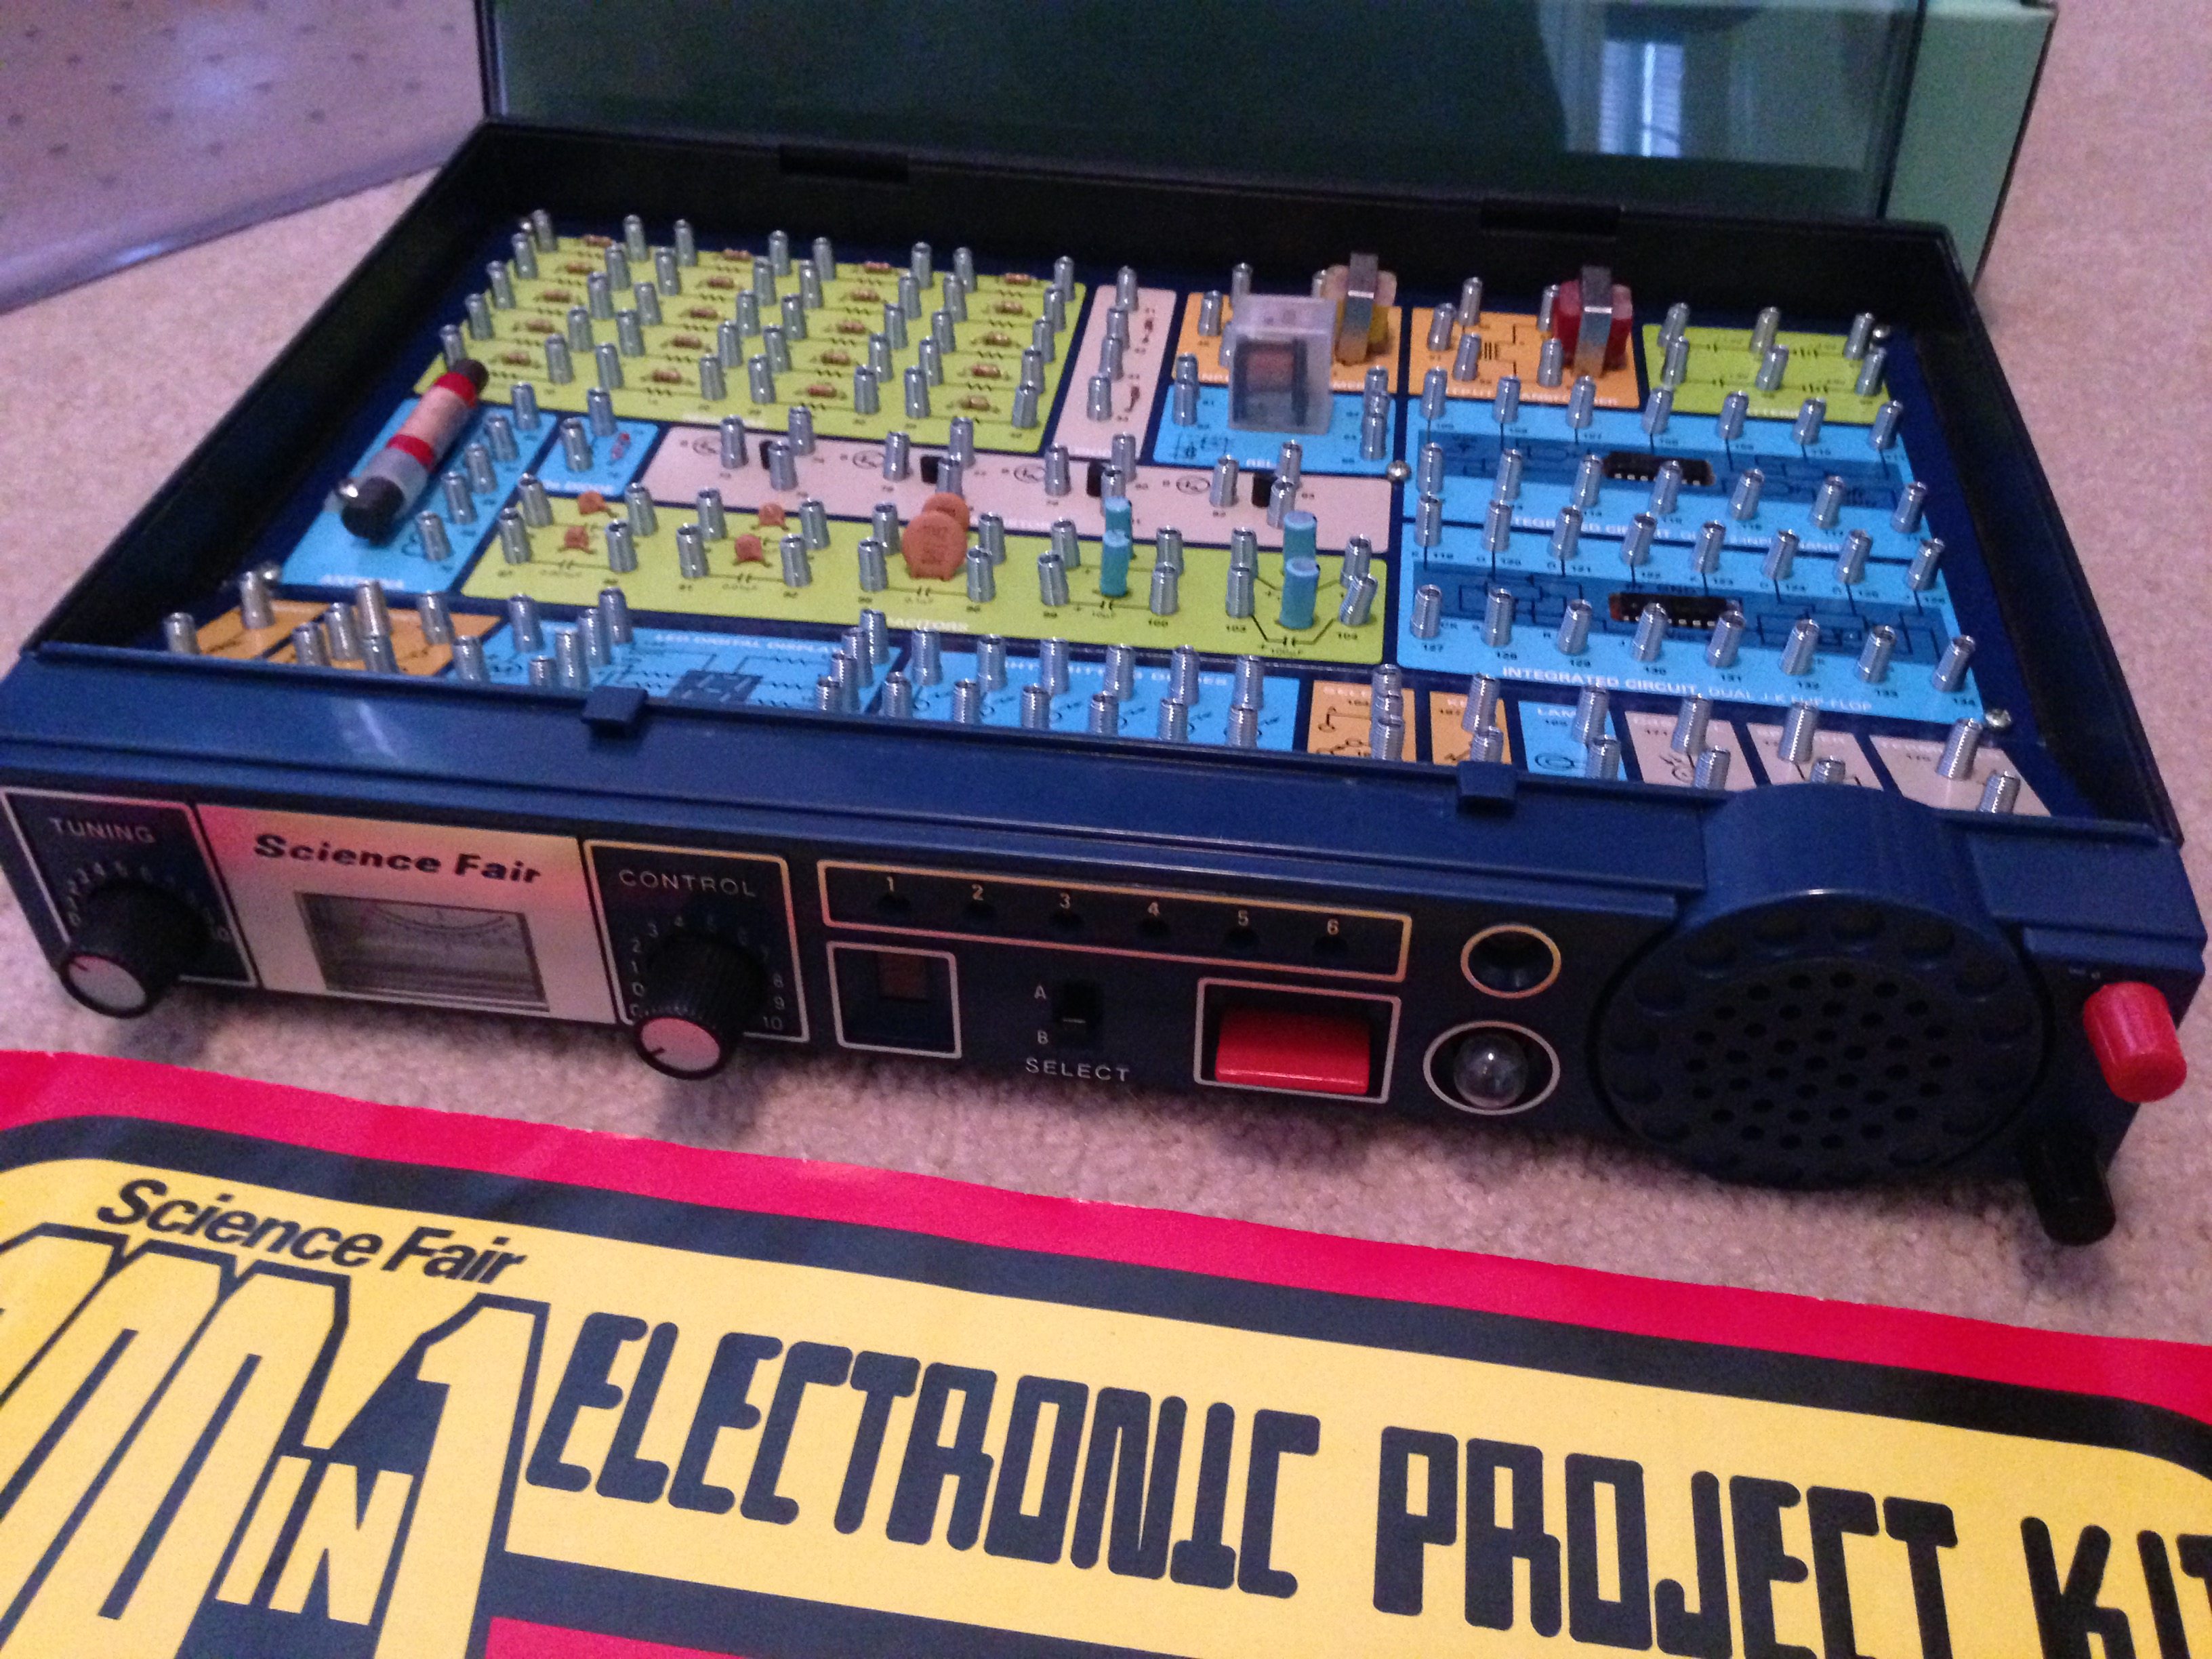
I must have been around twelve years of age when I began developing an interest in electronics. I started taking electronic gizmos like alarm clocks and kitchen appliances apart (often without permission) and examining them more closely. Rather than discourage me, my parents switched gears and birthday and Christmas presents moved from toys to more fun and advanced project-like gifts. One of the more memorable ones was a 200-in-1 electronics kit from Radio Shack. I still own it, and you can see a photo of both kit and book below.
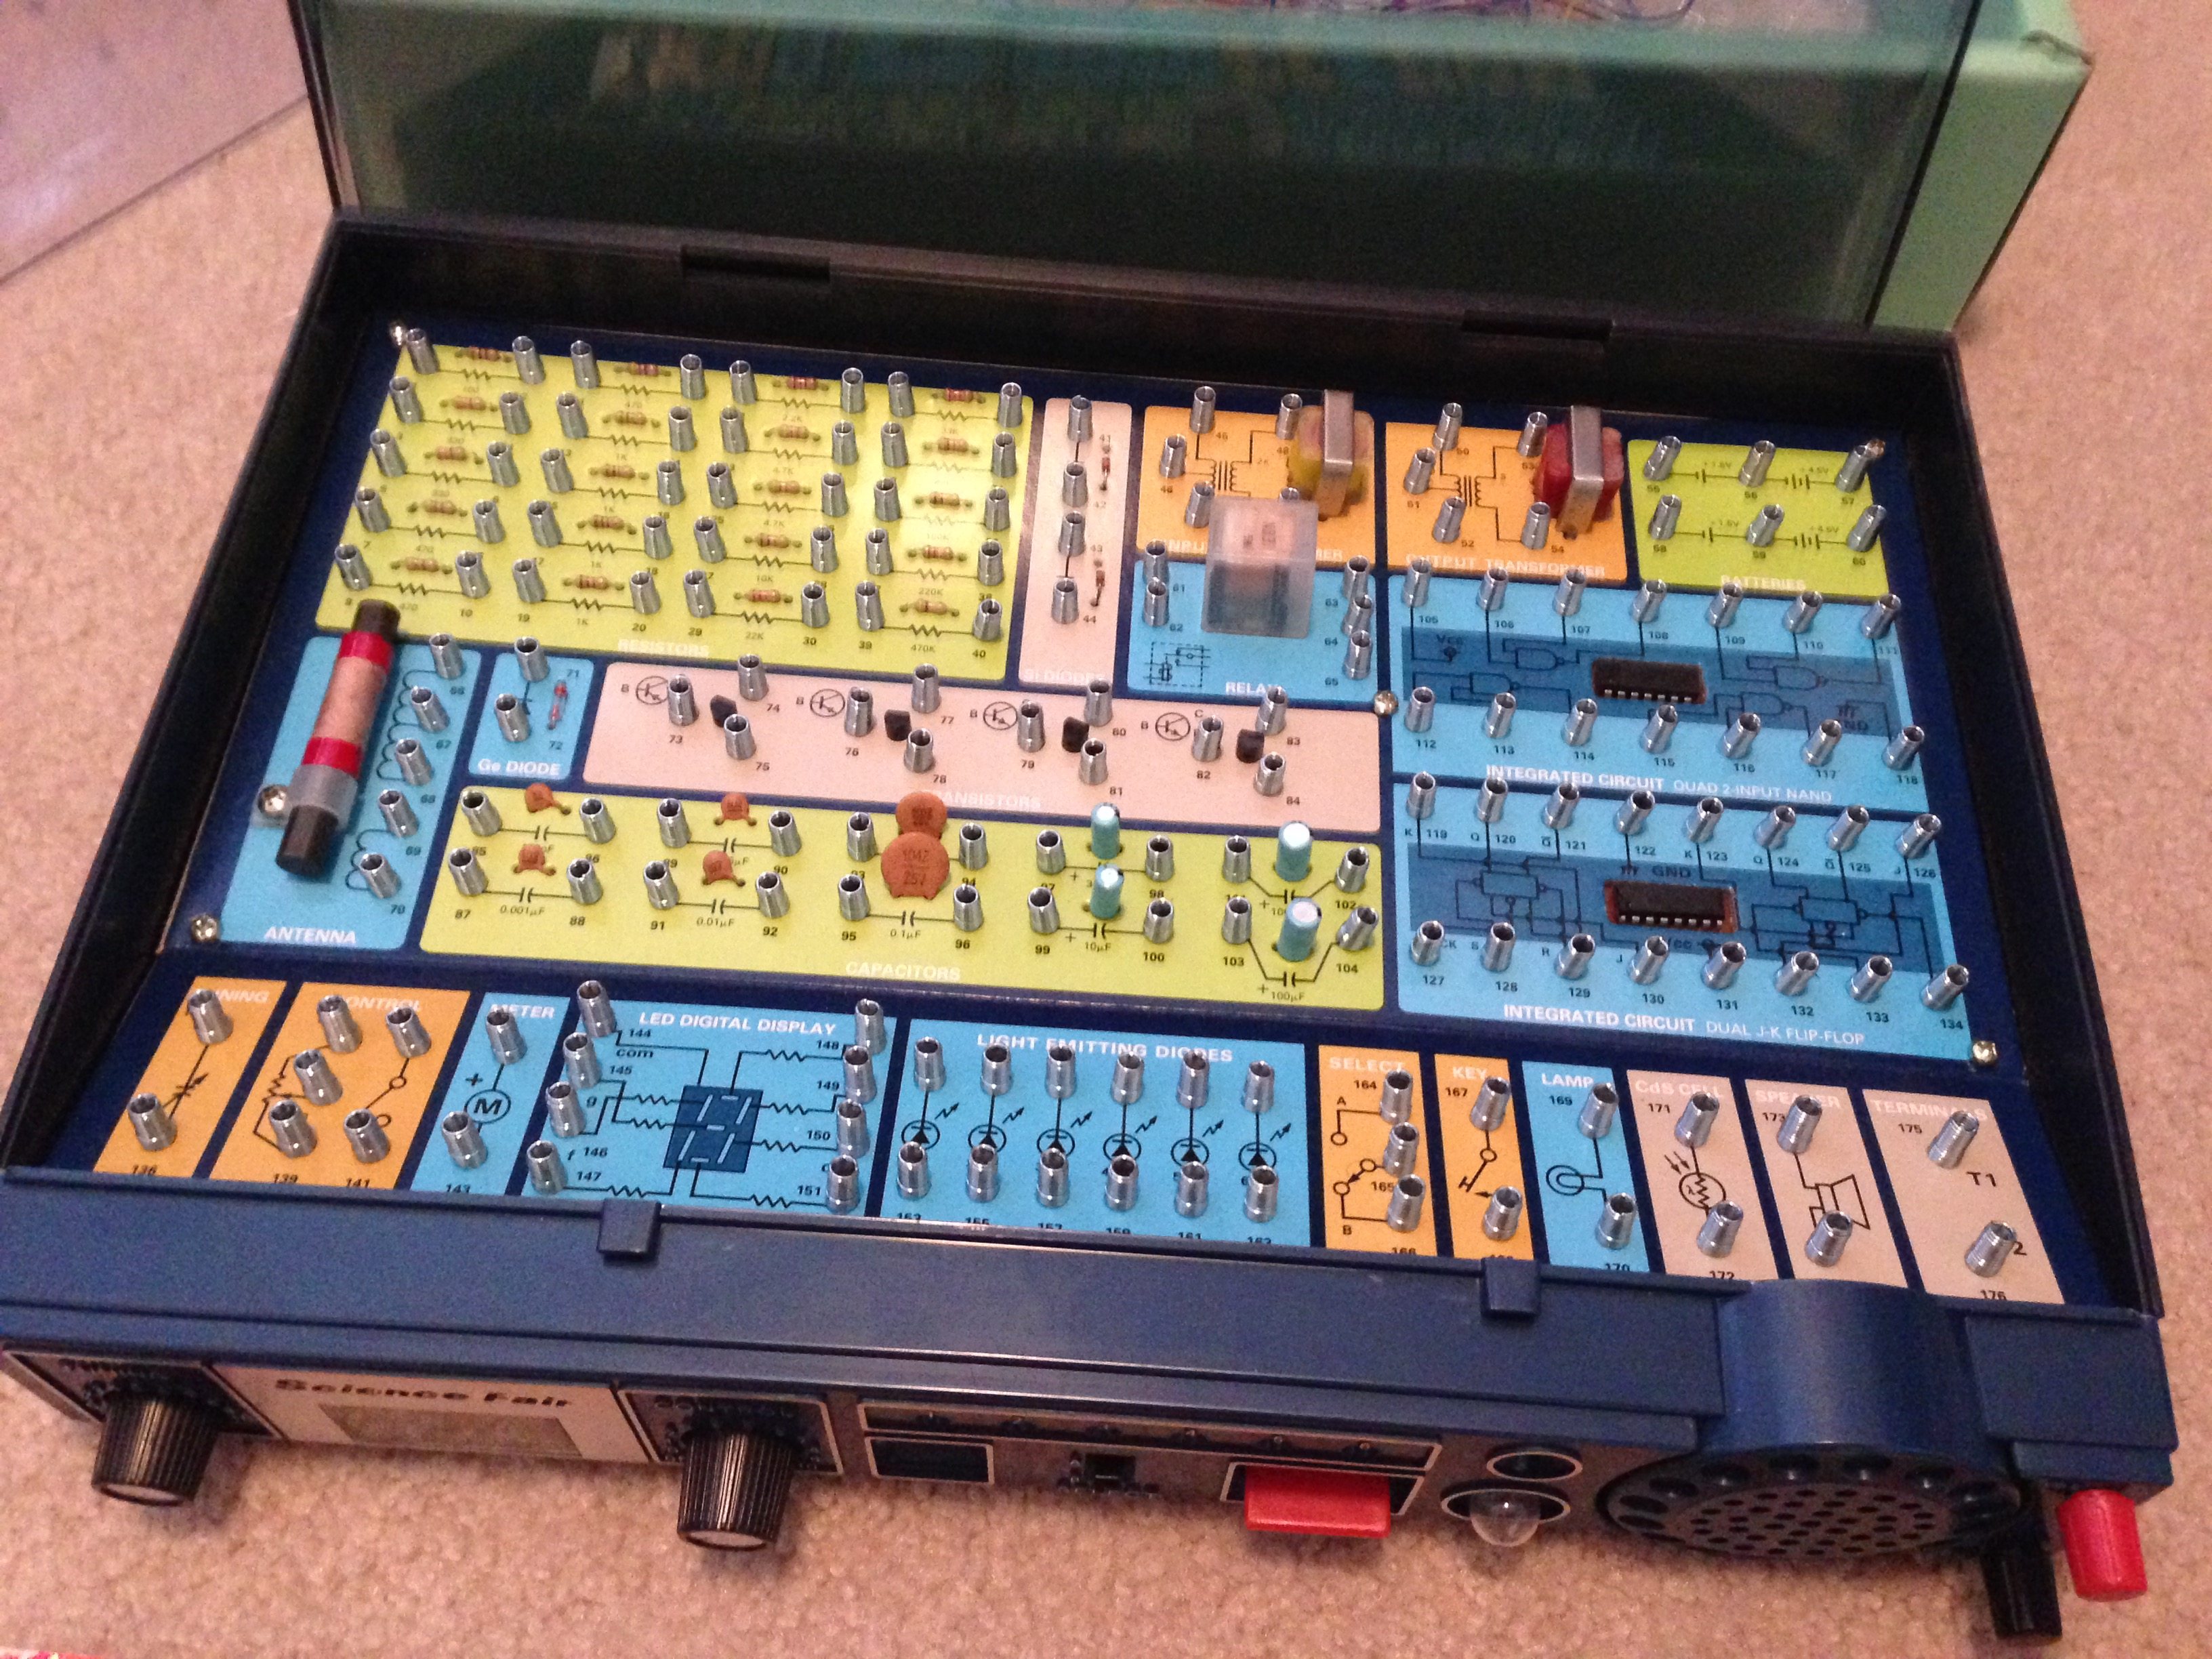
 The kit also came with a big bundle of flexible, solid-core wire in a variety of colors and lengths. To make a connection between a resistor and an LED, for example, you would slightly bend a small spring situated near a component and insert a wire. When you released the spring, it would compress and hold the wire nice and tight. Most components had two springs to allow current to flow through one end and out the other — the component was visible on top of the kit’s surface, while it’s various connections were hidden beneath the surface. Below is a closeup photo of some of the components and their respective springs.
The booklet was pretty slick, too. The extra-wide book would lay flat easily, and while the early projects started you out by showing you exactly where to place wires to make a connection, those hand-holding exercises didn’t continue and users were expected to start learning to read schematics that would be provided for the book’s 200 projects. Here’s a photo of the simple Rain Detector project, and you can see that the wiring was explained in detail to make the circuit work.

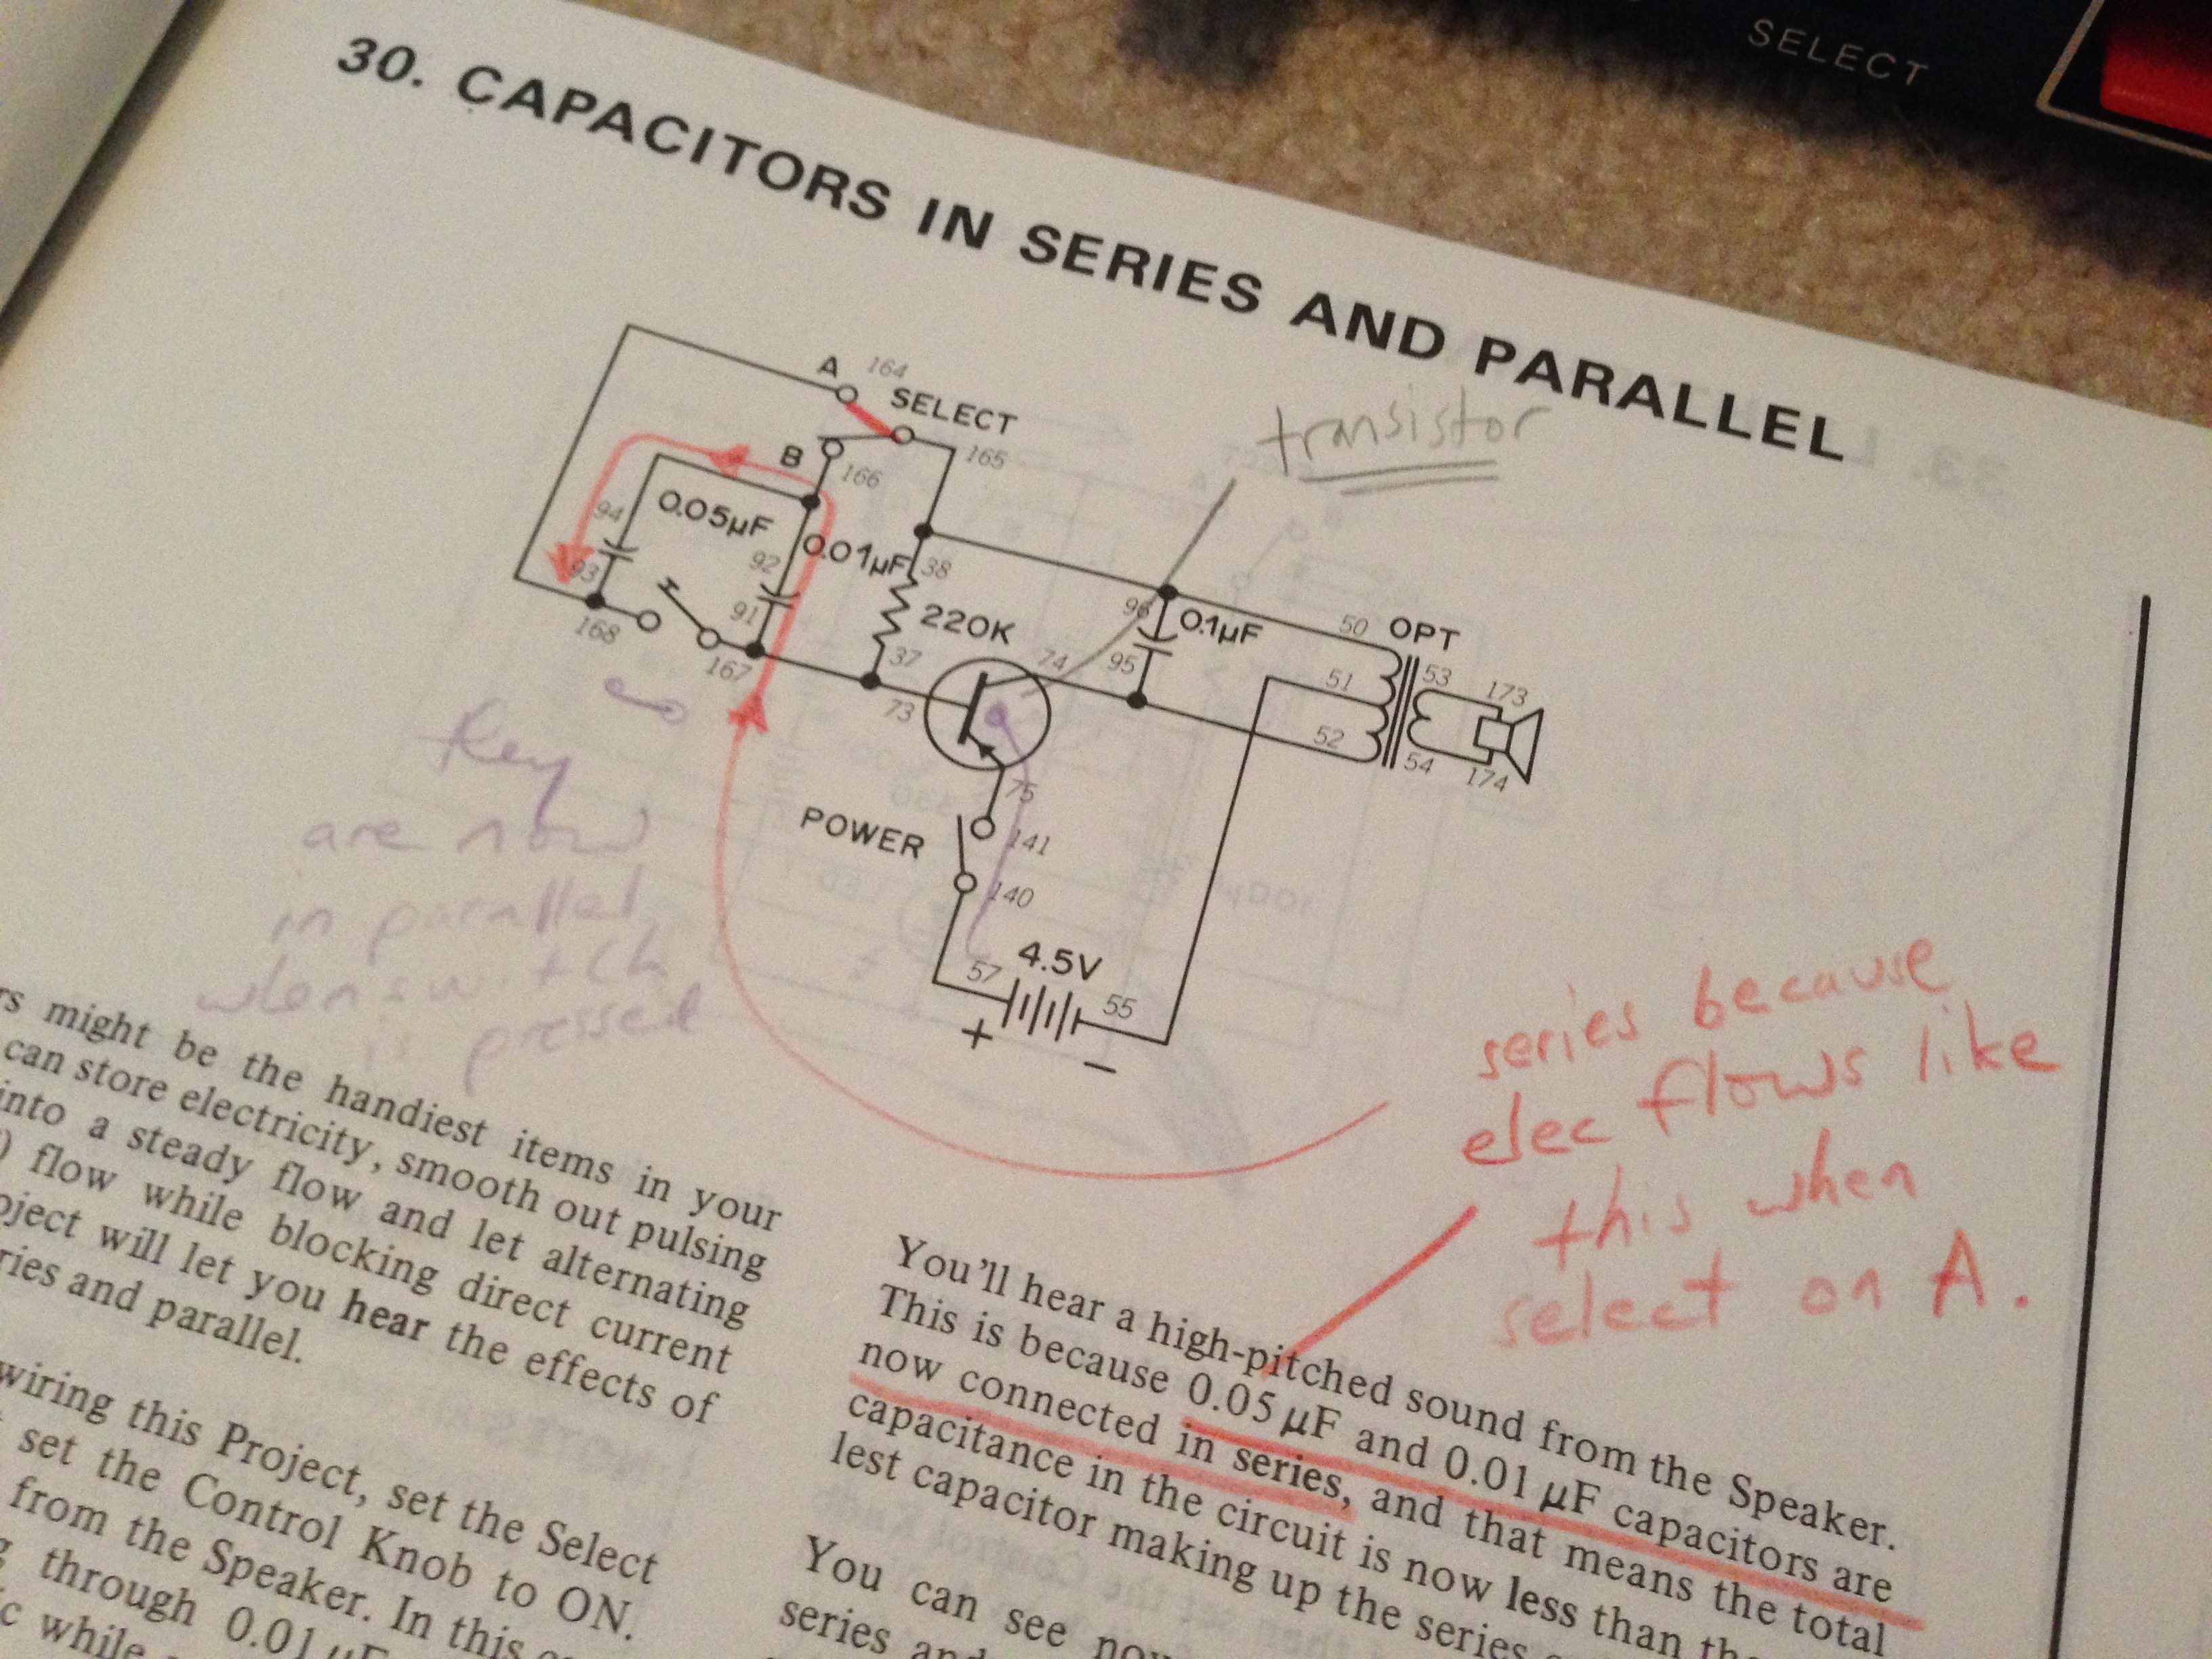
And here’s a photo of a later, more advanced project that came with a more typical schematic. I had some really decent handwriting at a young age… it’s since gone down hill. I actually remember wiring up this circuit all those years ago and making these notes so I would be able to remember a few things about it.
I learned a lot from this kit… but not nearly enough. My schematic reading skills would come and go as my interest in electronics did the same. Still, the kit gave me a solid understanding of what was going on behind the scenes in so many gadgets of the day — many of my friends would see a small FM radio, and an even smaller number of us would have any clue what was tucked inside and how it might work.
Amazingly, these kits are still available today. Radio Shack still sells some, and there are a number of other manufacturers who sell their own versions. If you’ve got a child in your house who is wanting to really learn electronics, these kinds of kits can do a lot to encourage that curiosity. (I’d even go so far as to recommend pairing the kit with Charles Platt’s Make: Electronics book — absolutely, positively the BEST teach yourself electronics book on the market. I worked my way through the book back in 2010 and documented my progress with photos and videos, and I recommend the book to everyone I encounter who is wanting to get into the hobby.)
This last October, the Atlanta Maker Faire (no longer Mini Maker Faire! We got upgraded!) was held over a Saturday and Sunday, and I was able to go on both days. There were a number of exhibits and vendors that I examined, but there were only a few that I visited more than once or twice. One of those that I must have returned to at least five or six times with the DuinoKit tent.
I got to visit with Dan, the owner and operator of DuinoKit, and discovered that he’d had two very successful Kickstarters with his kits and was opening up an online storefront to start selling them to the world.

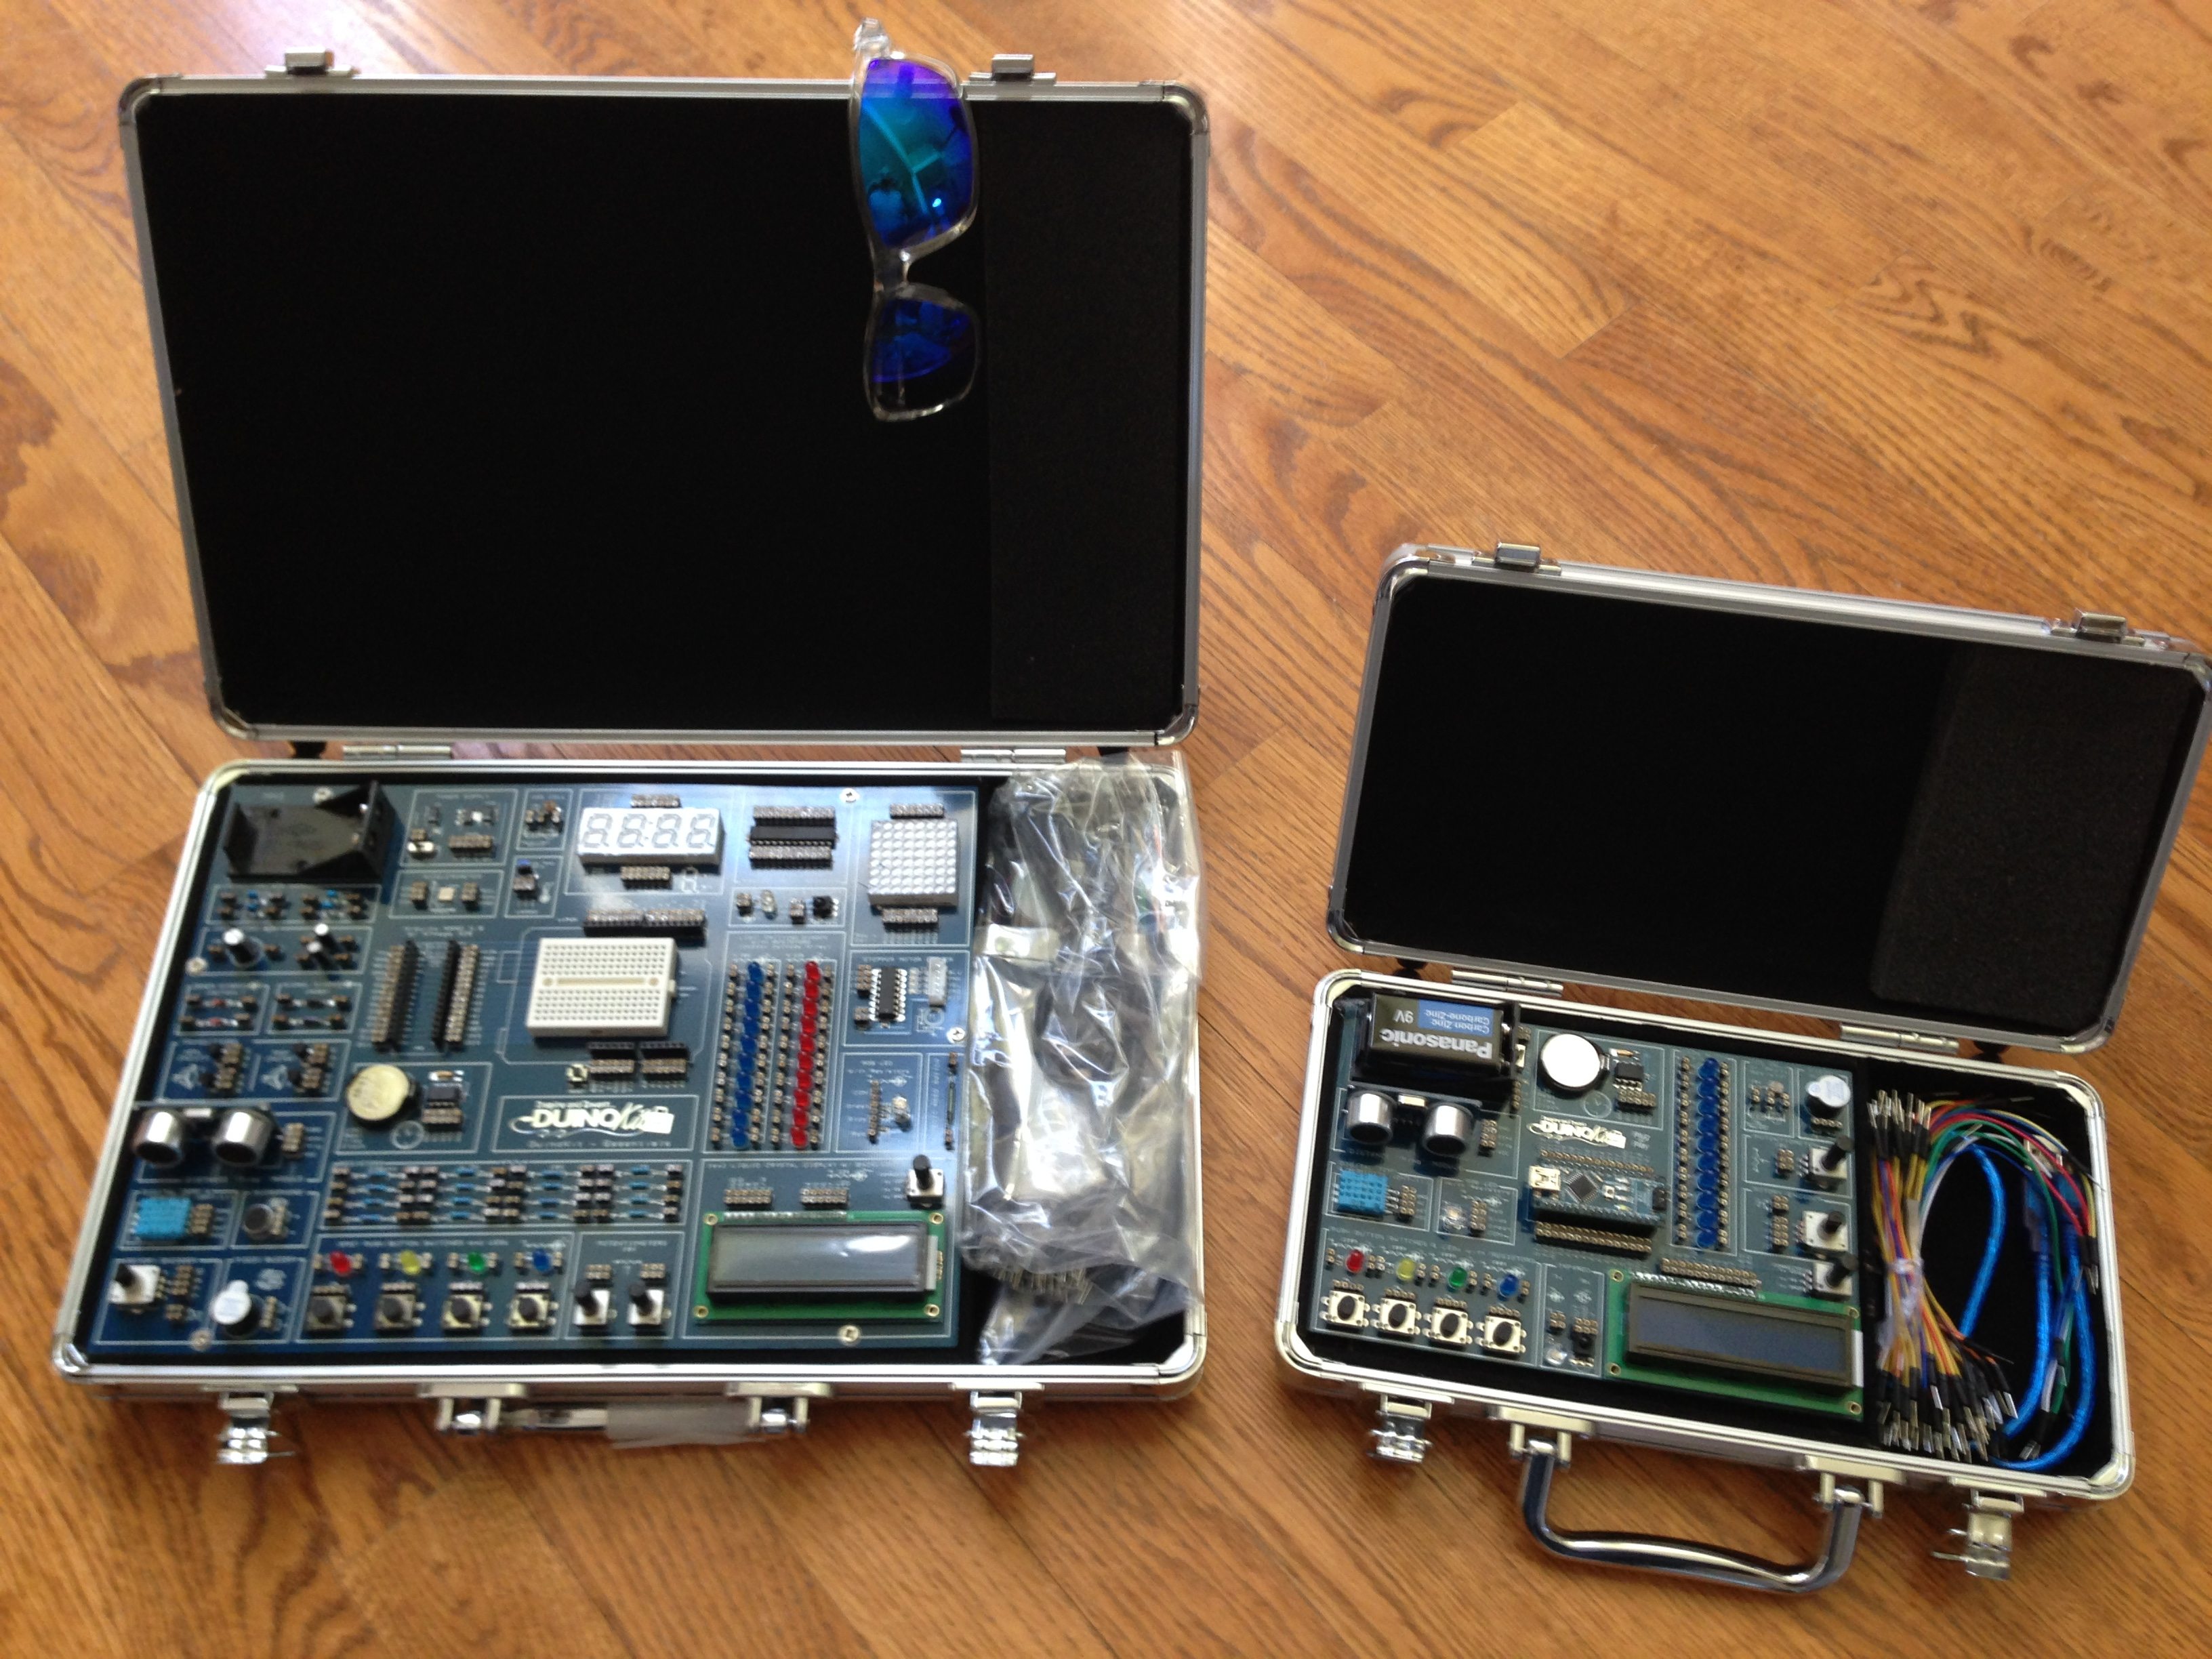
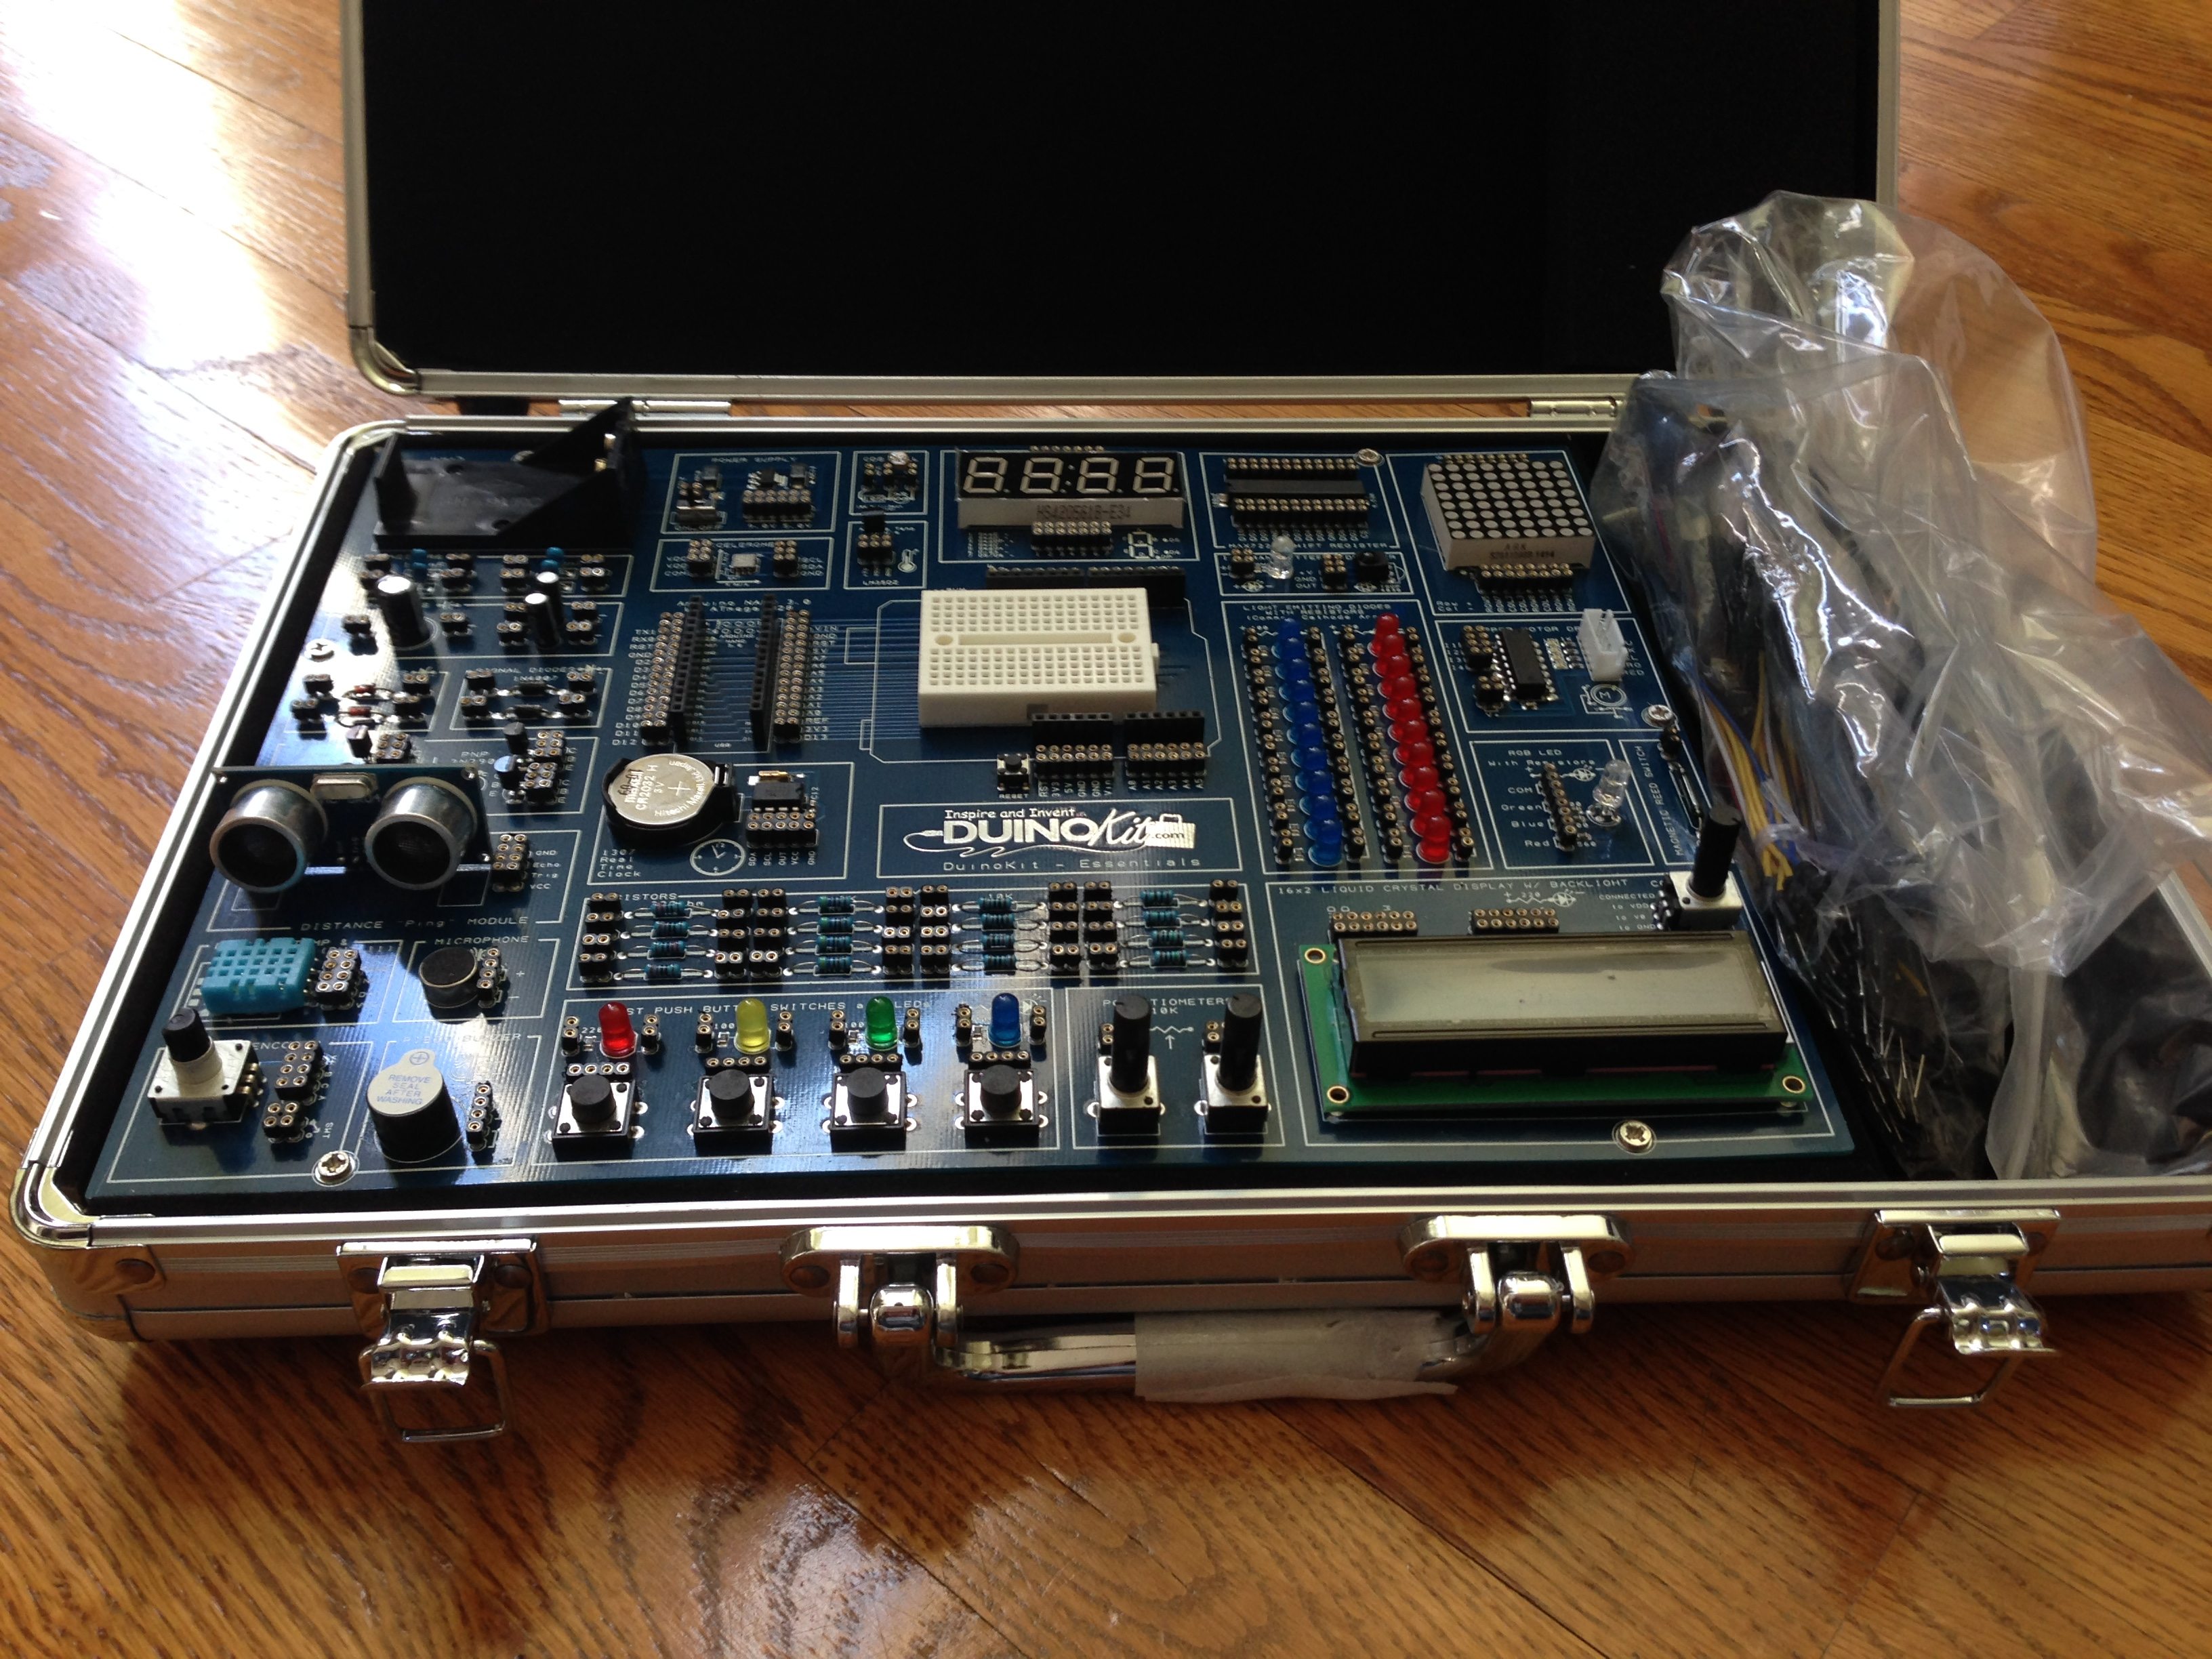
So, what exactly is the DuinoKit? Well, just like the electronics kits I described above, Dan has designed a custom circuit board that holds a mix of electronics components along with an Arduino Nano, the tiny version of the popular Arduino microcontroller. He’s placed everything inside a solid case for easy transport, and he throws in a great assortment of jumper wires and a few other components that aren’t designed to be mounted on the board. What he’s ended up with is a kit that looks like the one below.
Dan’s kits were EXTREMELY popular at Maker Faire. He always had a nice crowd around him who were wowed by the polished look of the kits and the sheer number of components he managed to cram into such a portable kit. I exchanged contact information with him because I’m going to be teaching a micro controller programming camp in Summer 2015 and the kits were just such an obvious fit. Dan got in touch, we traded some ideas, and he offered to loan me a DuinoKit for a few weeks to test it out. (And I’m shaking my head in sadness right now as I’ve just boxed it back up to send back.)
Seriously — this thing is AMAZING. Just like its predecessors, the DuinoKit seeks to put everything in view of the user while also making connecting components as simple as possible. Gone are the small springs — instead, the DuinoKit uses standard header-like plugs that hold the jumper wires securely (and it also helps keep projects decluttered much better than the spring-and-wire solutions). Anyone wanting to learn to program an Arduino and/or incorporate components such as motors, LEDs, and sensors is going to find the DuinoKit an idea solution. Everything stays in place. The lid is roomy enough to close and carry along a not-yet-finished project inside. And it just looks really cool. There’s a mini-breadboard, 8×8 LED display, LCD Display, Ultrasonic/Distance sensor, temperature sensor, microphone and piezo buzzer, accelerometer (!!!), humidity sensor, IR transmitter and decoder, stepper motor driver (and an included stepper motor), magnetic reed switch, and a bunch more.

But Dan also had a surprise for me. I knew he was working on a smaller version of the DuinoKit that will be making its appearance in a Kickstarter *VERY SOON*, but I didn’t realize he had a fully functional mini-kit for me to test out. Below you’ll see that he also provided me with the smaller DuinoKit Jr. for comparison.
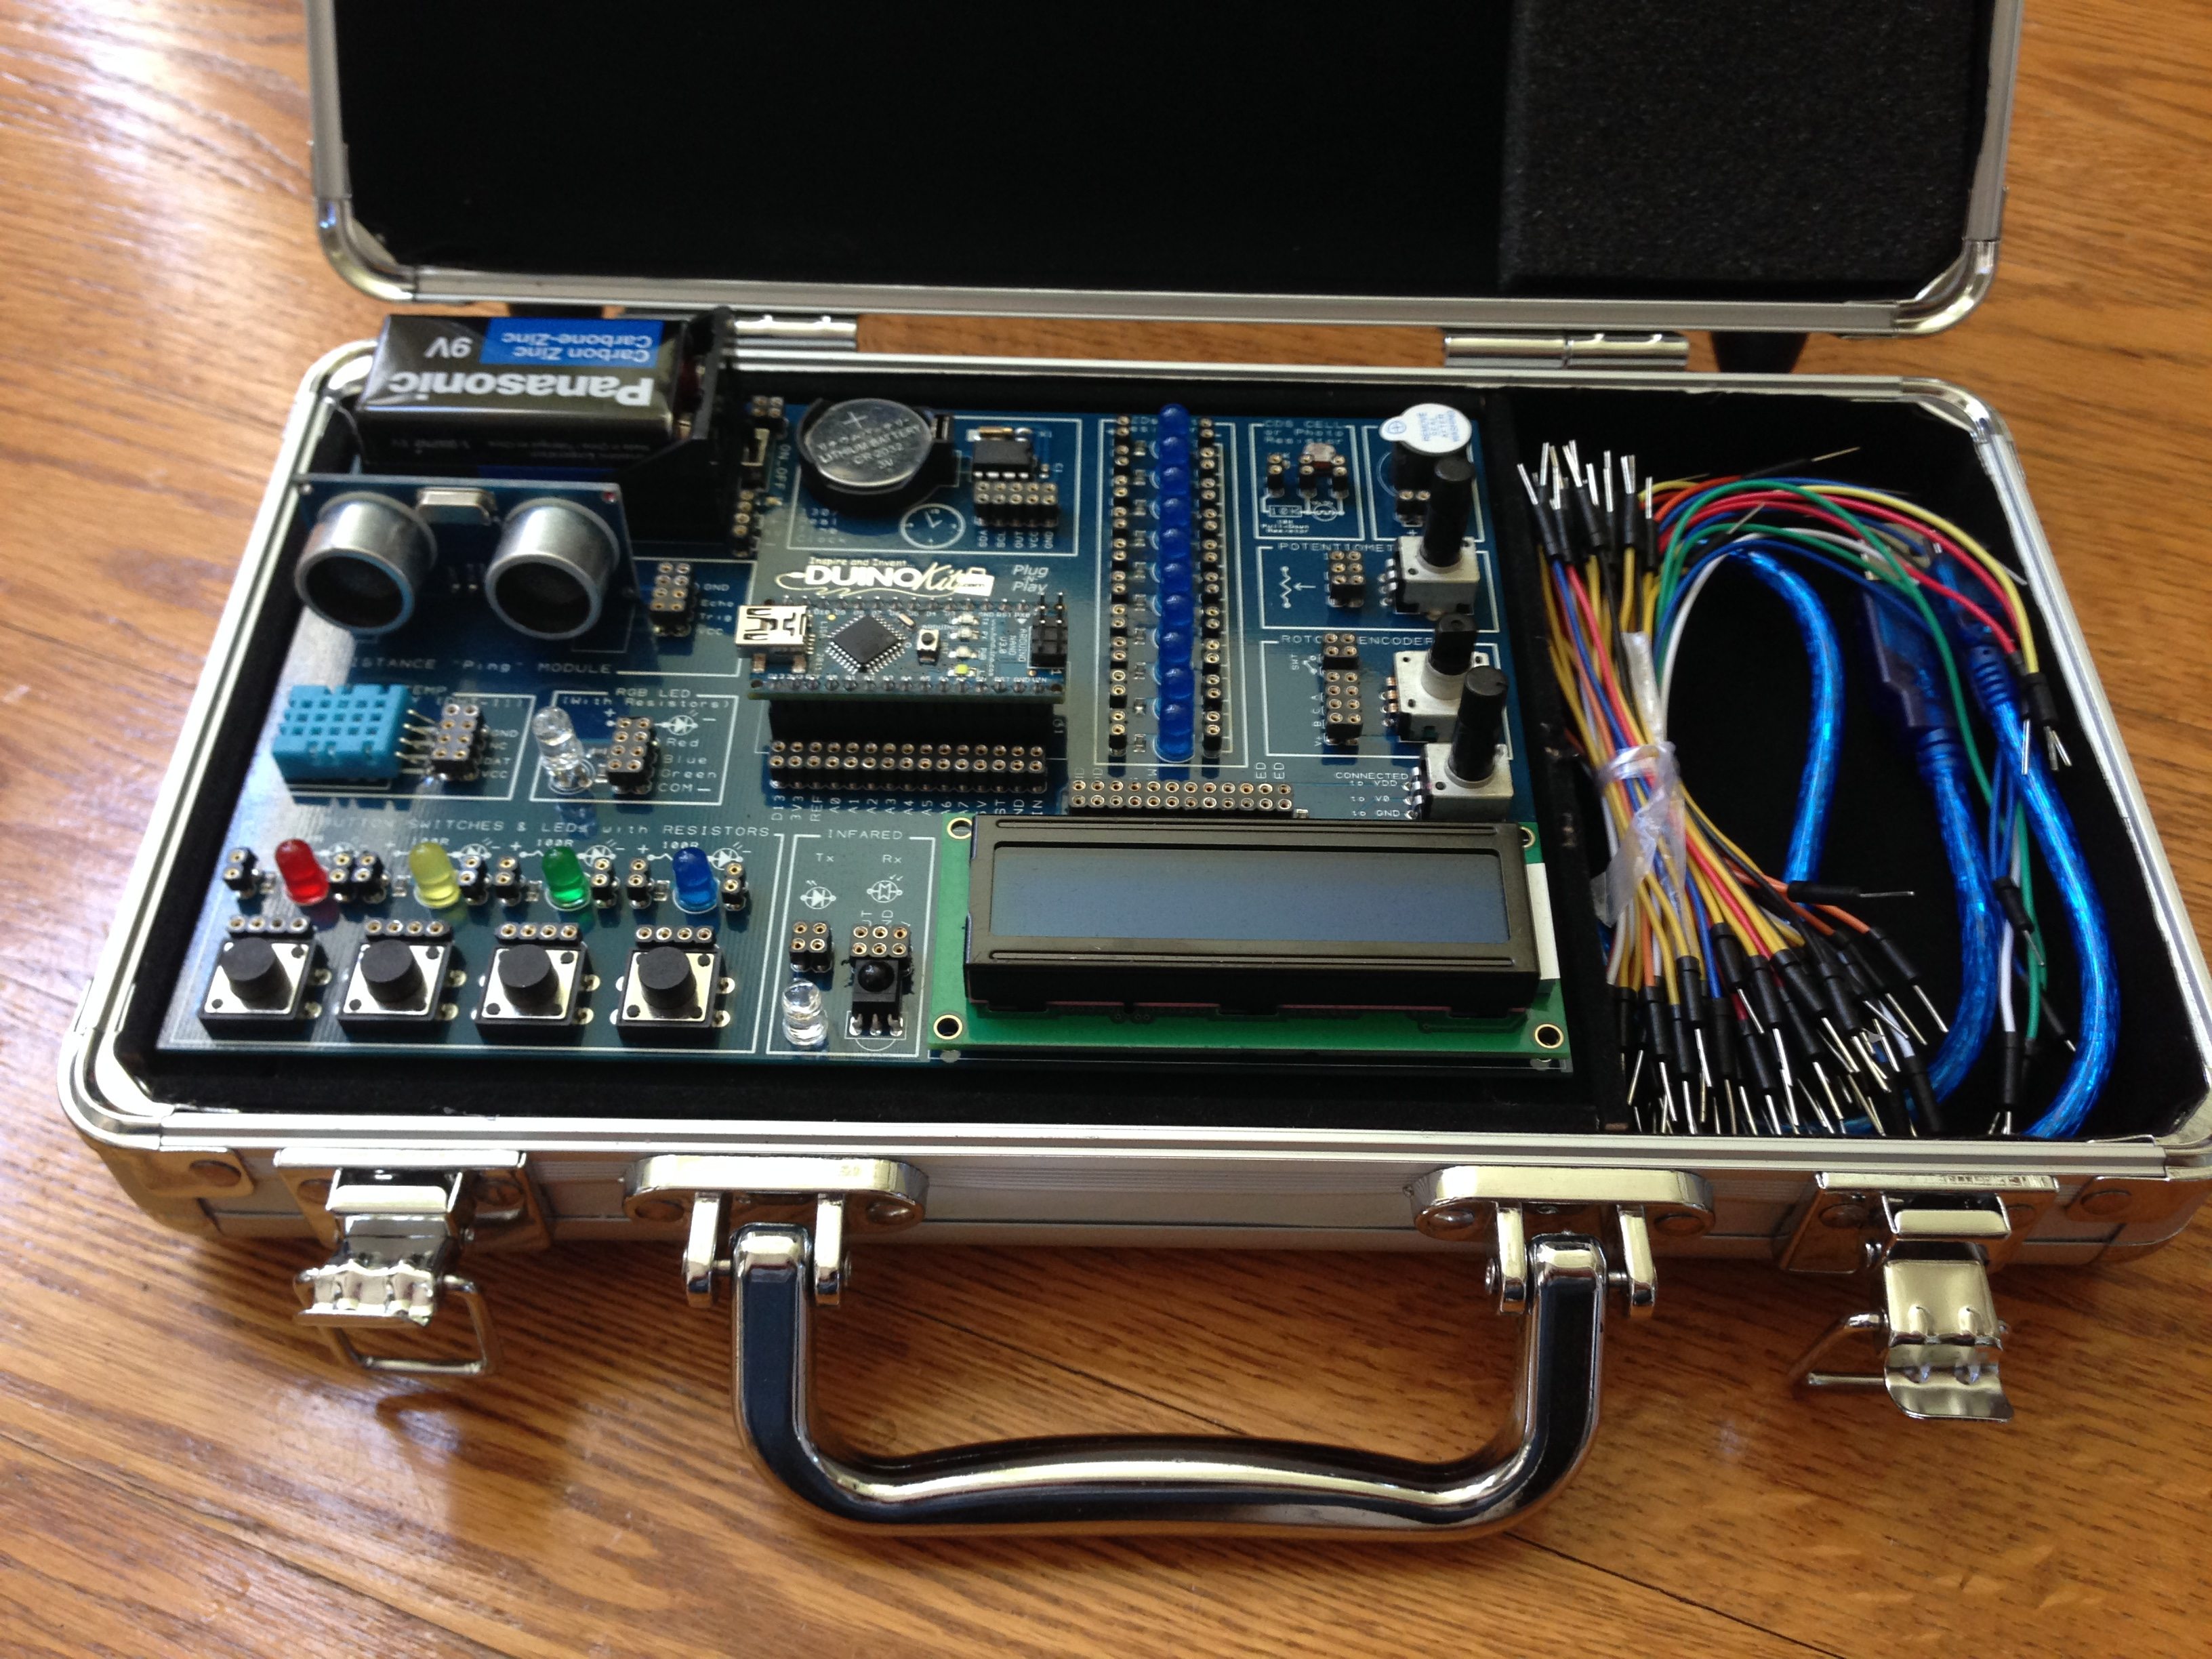
The Jr. still uses the Arduino Nano and a custom mounting board for the various components. There are fewer components, obviously, but his choices in sensors, LEDs, and a few other key components all contained in a smaller case are perfect. For the Jr., you’ll find an Ultrasonic/Distance sensor, humidity sensor, RGB LED, IR transmitter/decoder, piezo buzzer, Rotary Encoder, and an LCD display among others. (If you find the Jr. is missing a component you need, there’s nothing stopping you from buying it separately and using a mini-breadboard to wire it into a circuit on the Jr.)
Both kits come with the USB cable needed to connect the Arduino Nano to a computer to program it, and the kits also come with a coin battery to run the real-time clock circuit. I’m having a VERY difficult time deciding which kit to use with my camps. (And, of course, the final decision will be based on price of the kit, cost of the camp, and a few other factors — while I’d love to send each kid home with a DuinoKit, the finances may dictate sending them home with a Jr. — I can’t see any kids complaining, though.)
NOTE: I’ll update this post once I have information from Dan on the DuinoKit Jr. Kickstarter date, but the full-sized DuinoKit is available for purchase directly from the company’s website.
The DuinoKit and DuinoKit Jr. are impressive kits for any budding programmer/electronics fan. I’ve not found anything similar in appearance or quality that offers a portable, all-in-one collection of tools for learning both electronics and Arduino programming. My hope is that many more users will find Dan’s tool and website so that he can continue to add to or improve the kits… maybe even create a few different versions for hobbyists looking to focus on particular types of components and projects.
Note: I’d like to thank Dan for providing me with the DuinoKit and DuinoKit Jr. for testing purposes.


Hi
I’m looking for some help. I came across an old Radio Shack 200 in 1 electronics project kit at the place I work at. Unfortunately the old batteries were still in from previous and the leaked badly (producing a white and blue/green deposit). During the clean up I unscrewed the cardboard layer containing all the spring connections and components and found that the connections to the battery compartment (under the face on the top right side) were mostly detached (two black and two white) The two red connections were in tact.
The projects kit is called Science Fair 200 1 Electronic Project Lab
Cat. No, is 28-249 and made in Taiwan
The same as appears in : https://geekdad.com/2014/12/hobbyist-kits-yesterday-today/
I just need to know where to resolder the two black and two white wires as it is not obvious due to the corrosion/deposits.
Are you able to help?
J.Hart